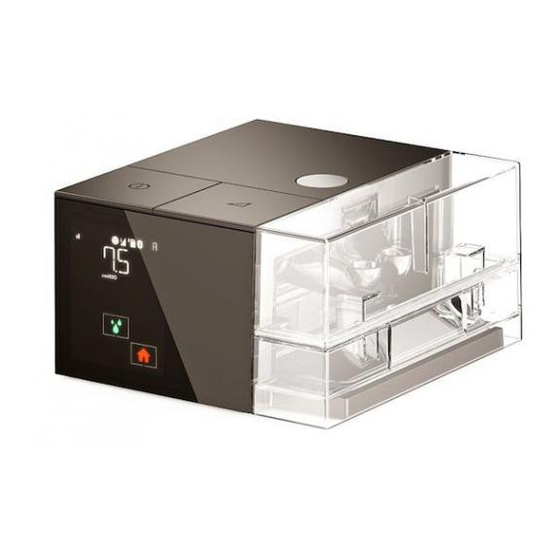
Starck Sefam S.Box Service Manual
Optional heated humidifier
Hide thumbs
Also See for Sefam S.Box:
- Patient manual (38 pages) ,
- User manual (56 pages) ,
- Patient manual (44 pages)
Table of Contents
Advertisement
Advertisement
Table of Contents

Related Manuals for Starck Sefam S.Box


Summary of Contents for Starck Sefam S.Box
- Page 2 144 AV CHARLES DE GAULLE 10 ALLEE PELLETIER DOISY 92200 NEUILLY SUR SEINE 54600 VILLERS-LES-NANCY FRANCE FRANCE TEL: +33 (0) 3 83 44 85 00 www.Sefam-medical.com Technical assistance: TEL.: +33 (0) 3 83 44 85 17 E:mail: technicalservice@sefam-medical.com Sefam S.Box...
-
Page 3: Table Of Contents
Special characteristics according to the standard NF EN ISO 17510-1:2009 ......... 35 Functional diagram of the internal pneumatic circuit................37 Maintenance ............................38 Disassembly instructions ........................... 39 Assembly instructions ..........................45 Pressure Verification ........................... 54 Spare parts..............................55 Features of the device Sefam S.Box... - Page 4 The S.Box heated humidifier is an accessory designed to warm and add moisture to the air flow delivered to the patient by the SEFAM S.Box device, for the treatment of Obstructive Sleep Apnea– Hypopnoea Syndrome (OSAHS). It is intended for use by adult patients in either the homecare or the hospital environment.
- Page 5 Essential performance of the device ® The essential performance of the SEFAM S.Box is to deliver a pressure equivalent to that of the adjusted pressure ± 0.5 cm H The device was designed to maintain basic safety and essential performance without maintenance regarding electromagnetic disturbance during the lifetime of the machine.
- Page 6 Use only the authorized accessories given in the list above or compliant with the standard EN ISO 17510-2:2007. ® Only connect the USB authorized cable to the USB connector. The SEFAM S.Box should not be used if connected via USB to an unauthorized device. ...
-
Page 7: Features Of The Device
Features of the device ® The SEFAM S.Box can operate either in constant mode (CPAP), it then delivers a constant pressure level, or automatic mode (Auto-CPAP) where the pressure changes between a minimum pressure and a maximum pressure depending on the detected respiratory events. When selected, the AUTO- CPAP mode will be activated 5 minutes after starting treatment. - Page 8 Auto-CPAP mode as soon as the device starts to detect respiratory events indicating that the patient has fallen asleep. The symbol is displayed in the status bar. The I Ramp stops automatically when the maximum ramp time bas been reached (45 minutes). Features of the device Sefam S.Box...
-
Page 9: Information And Settings
Ramp pressure in CPAP mode or to activate the Auto-CPAP feature when the time ramp is enabled. Maximum ramp time: parameter accessible only by the home care provider which restricts Sefam S.Box Information and settings ... - Page 10 The device is switched on by holding down the start / standby button . If the heated humidifier is installed, it switches on automatically if the humidification level is set between 01 to 10. Information and settings Sefam S.Box...
- Page 11 User interface description The two mechanical buttons on the top of the device are used to manage its operation: Start / standby button : to switch the device on or off. Sefam S.Box Information and settings ...
- Page 12 The backlight of the display is activated when you approach your hand (Wave & Go function) or by tapping a touch key or one of the two operating buttons located at the top of the device. The displays used in this manual are given as examples. Information and settings Sefam S.Box...
- Page 13 Touch key to adjust the S.Box Touch key to adjust the heated heated tube with ATC setting humidifier setting Touch key to access the settings Touch key to access information Multifunctional touch key Home touch key Sefam S.Box Information and settings ...
- Page 14 Minimum pressure if the APAP (Auto- Tap the touch key CPAP) mode was selected. You can decrease or increase the displayed value by tapping repeatedly the Possible settings: from 4 cm H O to the maximum Pressure. Information and settings Sefam S.Box...
- Page 15 Possible settings: from 4 cm H O to the maximum pressure adjusted in APAP mode (Auto- CPAP). from 4 cm H O to the prescribed pressure in CPAP mode. Sefam S.Box Information and settings ...
- Page 16 15 (tube 15 mm in diameter) 22 (tube 22 mm in diameter) CS (Circuit Select). If you select Circuit Select CS, the touch key is displayed on the screen. Tap it to run the specific calibration. Information and settings Sefam S.Box...
- Page 17 Choosing the format of time display ❿ Tap the touch key The time display is set to 24 hours by default. You can select another format by tapping the key Possible Settings: 24H and 12H. Sefam S.Box Information and settings ...
- Page 18 Tap the touch key displayed approximately two seconds later. Unchangeable value: from 1500 to 2500 (default value 2000). If a offset problem occurs on the pressure sensor, the value is no longer displayed : Information and settings Sefam S.Box...
- Page 19 configuration NO if you wish to keep all data and the pairing of accessories. Total machine hour counter ⓯ Tap the touch key This counter calculates the operating time of the device. Sefam S.Box Information and settings ...
- Page 20 Readjustment LK: OK, LK: NOK tightness of the mask of the mask in standby mode Display of the clock during Return to the delivered the treatment pressure in operating mode to exit the display. Information and settings Sefam S.Box...
- Page 21 When you are using Sefam ACCESS Pro application or SEFAM Analyze software on a Bluetooth enabled device (such as a Smartphone or a tablet) and you connect it to the SEFAM S.Box in standby mode via Bluetooth wireless communication, a message appears on the display of the machine at...
- Page 22 Do not touch the pneumatic circuit while the device is performing the calibration. The message "CS: OK" informs that the calibration was done properly. to exit the settings menu. Information and settings Sefam S.Box...
-
Page 23: Using The Sd Card
To configure a “service card”, refer to the user manual of the SEFAM Analyze software. To use the service card with the device, hold down the button while inserting the card. Sefam S.Box Information and settings ... -
Page 24: Cleaning And Maintenance
Place the humidifier chamber back on the heater plate, hinge side towards the inside of the machine, and push it against the device until you hear a "click". Cleaning and maintenance Sefam S.Box... -
Page 25: Monthly
Do not use spray detergent. Harmful residues could enter and remain in the air outlet, the air inlet filter or inside of the device, which could cause air way irritation. Never use concentrated bleach higher than 0.1%. For example: pour 200 ml of bleach to 2.6% in 5 liters of cold water. Sefam S.Box Cleaning and maintenance ... -
Page 26: Disinfecting The Materials
Keep the disinfected and dried humidifier chamber in a clean, single-use, hermetically sealed bag until its next use. Note: Dispose of the humidifier chamber when it is damaged and replace it with a new one. Disinfecting the materials Sefam S.Box... -
Page 27: Things Never To Use
Formaldehyde, Glutaraldehyde, etc. Do not use pre-disinfectant or non-active disinfectant on Mycobacterium tuberculosis (B.K). Never disinfect the internal circuit of the air flow with disinfectant or with an Airway Surface Disinfection System (ASDS). Sefam S.Box Disinfecting the materials ... -
Page 28: Troubleshooting Tips
Delete files on the SD card and give it back to more. the patient. SD card error. Give a new SD card to the patient. The unit detected an Refer to the section "Error Messages". operating error. The error code flashes. XX = 2 figures) Troubleshooting tips Sefam S.Box... -
Page 29: Error Messages
When an error is detected, the device goes in standby mode (except for special cases) making access to different menus impossible. Error codes can be processed using the SEFAM Analyze software or the tablets/Smartphones apps. Sefam S.Box Troubleshooting tips ... -
Page 30: Technical Characteristics
11 ml / kPa (humidifier chamber empty) 8 ml / kPa (humidifier chamber full) Maximum operating pressure: 20 cm H Maximum gas temperature coming from the respiratory circuit: 43°C Values determined under ATPD (Ambient Temperature and Pressure, Hygrometry) conditions. Sefam S.Box... -
Page 31: Conditions Of Use
75 W during a mask disconnection Current consumption at 20 cm H O with 0.42 A (minimum configuration: SEFAM S.Box only) a 4-mm leak: 1.99 A (maximum configuration: SEFAM S.Box with humidifier set to 10 and heated tube set to 05) RF emission type (SEFAM S.Box®):... -
Page 32: Physical Characteristics
12 mm and the latch to lock or unlock the against drops of water falling heater plate. vertically. On the packaging, this symbol On the packaging, this symbol means means "Atmospheric pressure "Relative humidity limit". limit". Technical characteristics Sefam S.Box... -
Page 33: Ce Marking
Refer to the user manual. means "Temperature limit". CE marking Date of CE marking of SEFAM S.Box®: 2017 Regulatory Requirements Risks concerning this medical device are evaluated according to the ISO 14971 standard, specifically with regard to global residual risk. -
Page 34: Electromagnetic Compatibility
80 MHz to from 80 MHz to from 80 MHz to 800 MHz 6 GHz 6 GHz from 800 MHz to 2,5 GHz Note: is the AC mains voltage prior to application of the test level. Technical characteristics Sefam S.Box... -
Page 35: Special Characteristics According To The Standard Nf En Iso 17510-1:2009
0.05 0.04 0.04 0.07 0.08 0.10 0.12 0.14 0.15 0.17 0.15 0.21 0.17 0.18 0.21 dynamic pressures (cm H Test Pressure (cm H HUMIDIFIER Respiratory freq. Respiratory freq. Respiratory freq. Respiratory freq. Respiratory freq. breaths/min breaths/min breaths/min breaths/min breaths/min Sefam S.Box Technical characteristics ... - Page 36 22 mm diameter tube >126 >145 Maximum flow (lpm) causing a 15 mm diameter tube >125 >145 pressure drop of 1 cm H O at the patient port 15 mm diameter tube >120 >147 and fine filter Technical characteristics Sefam S.Box...
-
Page 37: Functional Diagram Of The Internal Pneumatic Circuit
15 mm diameter tube 12.0 15.9 20.1 40 l/min at the patient interface 15 mm diameter tube 11.9 16.0 20.0 and fine filter Functional diagram of the internal pneumatic circuit Device with side cover Device with humidifier Sefam S.Box Technical characteristics ... -
Page 38: Maintenance
Intended for use by your doctor or Home Care Provider. Air inlet filter and grid: Prevents dust from entering the device and the air flow path. Power port: To power the device by the power supply or by a cigarette lighter. Maintenance Sefam S.Box... -
Page 39: Disassembly Instructions
Swivel connector for connecting the tube. Disassembly instructions WARNING: ELECTRICAL HAZARD ® The SEFAM S.Box Cpap System is electrically powered. To prevent serious injury or death, follow standard safety procedures. Ensure that power has been disconnected from the unit before servicing any component. - Page 40 (fig.1). Remove the heating element by sliding it outwards (fig.1). If you have a communicating accessory (SEFAM S.Box® modem, S.Box® SEFAM Wi-Fi module or PolyLink system), remove it from the accessory slot of the device (fig.2). Fig.1 Fig.2 ...
- Page 41 Unscrew the screw that holds the front panel display with a T6 tip equipped screwdriver (fig.1). Depress the bottom of the display from its notch and slide the display upwards to remove it (fig.2). Sefam S.Box Maintenance ...
- Page 42 Dislodge the connectors from the rear panel and remove the connector’s board. Disconnect the turbine layer (1) and the accessory connector (2) (slide the connector upwards and remove it). Unscrew the 3 screws on the main board with a T6 tip equipped screwdriver. Maintenance Sefam S.Box...
- Page 43 Unscrew with a screwdriver equipped with a T6 tip and remove the upper frame chassis by passing the turbine cable through the rectangular opening (be careful to the holding clip) (Fig.1). Remove the pressure/flow sensor (Fig.2). Sefam S.Box Maintenance ...
- Page 44 Remove the turbine chassis from the bottom cover by gently lifting the tank outlet seal (elbow tube). Remove the humidifier cable from the rib (Fig.1) Slide the humidifier connector to the right to unlock (1) and remove the humidifier cable from the cover opening (2) (Fig.2). Fig.1 Fig.2 Maintenance Sefam S.Box...
-
Page 45: Assembly Instructions
Insert the humidifier connector in the opening of the bottom cover (1), and then slide it to the left to lock (2) (Fig.1). Place the humidifier cable behind the rib (Fig.2). Fig.2 Fig.1 Insert the tank outlet seal on the bottom cover. Sefam S.Box Maintenance ... - Page 46 Place the tank inlet seal on the bottom cover, with the bevel facing down (1). Check that the two seals are correctly positioned (The holes of the bottom cover must be covered by the seals). Maintenance Sefam S.Box...
- Page 47 Check that the Humidifier cable is in the notch provided on the turbine chassis. Notch Assemble the cable on the pressure/flow sensor. Place the pressure / flow sensor against the air outlet seal (mark the direction of the sensor with the arrow on the sensor ( Sefam S.Box Maintenance ...
- Page 48 Screw with a T6 tip equipped screwdriver, until it locks (do not force). Check that the holding clip is in position. Screw Shell cutout Clip Place the elbow seal and the air inlet seal on the rear cover Maintenance Sefam S.Box...
- Page 49 2 capacitors. Sensor connection Humidifier connection Sensor cable passage Humidifier cable in front sensor cable Place the connector board in its back cover slot (insert the connectors in their slots). Sefam S.Box Maintenance ...
- Page 50 Connect the turbine cable to the connector on the main board (3). Check that the turbine cable and accessory cable pass behind their guides. Cable turbine guide Accessory cable guide Screw the 3 screws with a T6 tip equipped screwdriver until they are locked. Maintenance Sefam S.Box...
- Page 51 Place and slide down the front panel display on the bottom cover and engage the notch in its position. Notch Screw the front panel display with a T6 tip equipped screwdriver, until it locks. Sefam S.Box Maintenance ...
- Page 52 Fig.1 capacito Tabs Place the top cover (check that it is inserted into the rear panel rib). Close the top cover by tightening the 4 screws with T10 tip equipped screwdriver, until it locks. Maintenance Sefam S.Box...
- Page 53 Insert the communicating accessory (SEFAM S.Box® modem, SEFAM S.Box® Wi-Fi module or PolyLink system) for equipped devices (Fig.1). Insert the side cover (you have to hear a "click" of locking mechanism). For units equipped with a humidifier, insert the heating element by sliding it inward and lock it by pushing the latch to the left as indicated by (Fig.2).
-
Page 54: Pressure Verification
Check the pressure value measured by the controller. This value must be 12cmH2O +/- 0.5. If the pressure is not correct, it must be adjusted, in this case an automatic calibration of the pressure sensor is necessary (see § "How to set the device, 13- Pressure and flow offset"). Maintenance Sefam S.Box... -
Page 55: Spare Parts
M-315940-01 Inlet air filters (50 pcs) M-316400-02 Air inlet filter grid S.Box (Ext) M-316400-01 Rear cover S.Box (Ext) M-316430-01 Bottom cover S.Box (Ext) M-316440-01 Top cover S.Box (Ext) M-216430-09 S.Box USB cable M-216430-05 S.Box SD card Sefam S.Box Maintenance ... - Page 56 Manufacturer: Manufacturing plant: SEFAM SEFAM 144 AV CHARLES DE GAULLE 10 ALLÉE PELLETIER DOISY 92200 NEUILLY SUR SEINE 54600 VILLERS-LES-NANCY FRANCE FRANCE : M-164MAT00-10-Version 1 2018-01...
Need help?
Do you have a question about the Sefam S.Box and is the answer not in the manual?
Questions and answers