Table of Contents

Related Manuals for Siemens HS936GA 1 Series


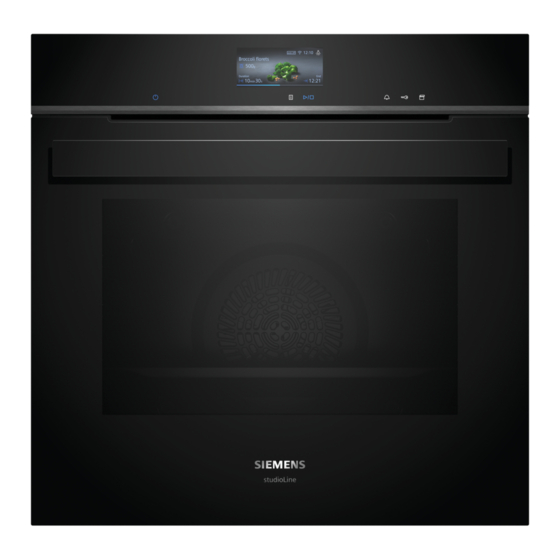
Summary of Contents for Siemens HS936GA 1 Series
- Page 1 Combi steam oven HS936GA.1 User manual and installation instructions Register your product on My Siemens and discover exclusive ser- vices and offers. siemens-home.bsh-group.com/welcome The future moving in. Siemens Home Appliances...
-
Page 2: Table Of Contents
en Safety Futher information and explanations are available on- line: Table of contents INSTALLATION INSTRUCTIONS ....... 49 29.1 General installation instructions....... 49 INFORMATION FOR USE 1 Safety Safety .............. 2 Preventing material damage ....... 5 Observe the following safety instructions. Environmental protection and saving en- 1.1 General information ergy ............... -
Page 3: Safety
Safety en The telescopic shelves become hot when the Keep children under the age of 8 years away appliance is in use. from the appliance and power cable. ▶ Allow hot telescopic shelves to cool down 1.4 Safe use before touching them. Always place accessories in the cooking com- ▶... - Page 4 en Safety Children may breathe in or swallow small WARNING ‒ Risk of electric shock! parts, causing them to suffocate. Incorrect repairs are dangerous. ▶ Keep small parts away from children. ▶ Repairs to the appliance should only be ▶ Do not let children play with small parts. carried out by trained specialist staff.
- Page 5 Preventing material damage en 2 Preventing material damage If the seal is very dirty, the appliance door will no 2.1 General longer close properly during operation. This may dam- ATTENTION! age the front of adjacent kitchen units. ▶ Alcoholic vapours may catch fire in the hot cooking Keep the seal clean at all times.
-
Page 6: Environmental Protection And Saving En- Ergy
en Environmental protection and saving energy 3 Environmental protection and saving energy 3.1 Disposing of packaging When baking multiple dishes, do so in succession or in parallel. The packaging materials are environmentally compat- ¡ The cooking compartment is heated after baking ible and can be recycled. the first dish. - Page 7 Familiarising yourself with your appliance en Symbol Meaning Button Function Timer is activated. Display additional information about a → "Setting the timer", Page 16 function or setting. → "Displaying information", Page 14 Childproof lock is activated. → "Childproof lock", Page 21 Start or pause the operation. → "Basic operation", Page 13 WiFi signal strength for Home Connect.
- Page 8 en Operating modes When you open the appliance door, the light in the The water tank is behind the control panel. cooking compartment switches on. If the appliance → "Filling the water tank", Page 16 door remains open for longer than around 18 minutes, the light switches off again.
-
Page 9: Operating Modes
Operating modes en Symbol Type of heating Temperature What it's used for and how it works range Possible additional functions Bottom heating 30 - 250 °C Final baking or cooking food in a bain marie. The heat is emitted from below. Top/bottom heating 30 - 250 °C Traditionally bake or roast on one level. -
Page 10: Accessories
en Accessories Symbol Steam heating type Temperature What it's used for and how it works range Possible additional functions Sous-vide 50 - 95 °C Cook meat, fish, vegetables and desserts under a vacuum, at low temperatures and with 100% steam. Proving dough 30 - 50 °C Leave the yeast dough to prove. - Page 11 You will find a comprehensive range of products for your appliance in our brochures and online: siemens-home.bsh-group.com Accessories vary from one appliance to another. When purchasing accessories, always quote the exact product number (E no.) of your appliance.
- Page 12 en Before using for the first time 7 Before using for the first time Implement the settings for the initial configuration. Calibrate the appliance. Clean the appliance and accessories. 7.1 Determining the water hardness before switching on the appliance for the first time Malfunctions may occur when using filtered or deminer- Before using the appliance for the first time, ask your alised water.
-
Page 13: Basic Operation
Basic operation en Start the operation. Temperature 100 °C Ventilate the kitchen while the appliance is heat- ‒ Duration 30 minutes ing. → "Basic operation", Page 13 a When the time has elapsed, a signal tone sounds. A Start the operation. message appears on the display confirming that the Ventilate the kitchen while the appliance is heat- operation has finished. - Page 14 en Rapid heating 8.6 Setting the type of heating and the If required, close the notification using . temperature 8.8 Sabbath-compliant use Press "Types of heating". If you want to operate your appliance so that it is Sab- Press the type of heating that you want to use. Set the temperature using ...
- Page 15 Time-setting options en Press "Rapid heating". Place the food in the cooking compartment. a "On" is in the tile. Cancelling rapid heating to start the operation. ▶ Press "Rapid heating". a Rapid heating starts. a For "Rapid heating" "Off" appears on the display. a Once rapid heating is complete, a signal tone sounds.
- Page 16 en Steaming 10.3 Setting the timer a When the appliance is switched on, the display shows the settings for the current operation. The The timer runs independently during the operation. You timer is displayed in the status bar. can set the timer when the appliance is switched on or a Once the timer has elapsed, a signal tone sounds.
-
Page 17: Dishes", Page
Steaming en Slide the full water tank back into the recess . WARNING ‒ Risk of scalding! When doing so, make sure that the water tank clicks Hot water collects on the vacuum-sealing bag during into place in the retainers . cooking. - Page 18 en Steaming Press "Cooking time". Press "Added Steam" . A cooking time must always be set for types of Press the required steam level. steam heating. Steam level Added steam To change the preset cooking time, press the relev- ant time value, e.g.
-
Page 19: Drying", Page
Dishes en 11.6 After using steam operation Insert the water tank and close the control panel. Drying the condensation tray Dry the appliance after each steam operation. Note: Traces of limescale may remain in the cooking WARNING ‒ Risk of burns! compartment after operation with steam. The functional- The appliance becomes hot during operation. - Page 20 en Dishes Programmes Category Food The ideal type of heating, temperature and cooking Cakes Cakes in tins time are preset for programmes. Cakes on a baking tray To achieve an optimal cooking result, you must also Small baked items set the weight, thickness or the cooking level. You can Biscuits set the weight only in the intended range.
- Page 21 Favourites en You can adjust only certain settings depending on Category Food the dish. Preserving, Preserving food → "Setting options for the dishes", Page 19 extracting Extracting juice For information about the accessory and shelf posi- juice, steril- Sterilising bottles tion, for example, press . ising ...
-
Page 22: Rapid Heating
en Basic settings 15 Basic settings You can configure the basic settings for your appliance Appliance set- Selection to meet your needs. tings Lighting ¡ On when cooking and opening 15.1 Overview of the basic settings the door ¡ Only when the door is opened Here you can find an overview of the basic settings ¡... -
Page 23: Home Connect
Home Connect en 16 Home Connect 16.1 Setting up Home Connect This appliance is network-capable. Connecting your ap- pliance to a mobile device lets you control its functions Requirements via the Home Connect app, adjust its basic settings ¡ The appliance is connected to the power supply and and monitor its operating status. -
Page 24: Home Connect ", Page
en Cleaning and servicing 16.3 Operating the appliance with the stalling it via the Home Connect app if you are in your WLAN home network (Wi-Fi). The Home Connect app Home Connect app will inform you once installation is successful. You can use the Home Connect app to set and start Notes the appliance remotely. -
Page 25: Cleaning And Servicing
Cleaning and servicing en Using oven cleaner in a hot cooking compartment If different cleaning agents are mixed together, there damages the enamel. may be a chemical reaction between these. ▶ ▶ Never use oven cleaner in the cooking compartment Do not mix cleaning agents. ▶... - Page 26 en Cleaning and servicing Area Suitable cleaning agents Information Shelf supports ¡ Hot soapy water Soak any heavily soiled areas and use a brush or steel wool. Note: To clean thoroughly, detach the shelf supports. → "Rails", Page 32 Pull-out system ¡ Hot soapy water Use a brush to remove heavy soiling.
-
Page 27: Descaling
Cleaning aid "humidClean" en 18 Cleaning aid "humidClean" The cleaning aid "humidClean" is a quick alternative Confirm the notification. for occasionally cleaning the cooking compartment. a The cleaning aid starts and the cooking time counts The cleaning aid softens dirt by vaporising the soapy down. -
Page 28: Drying
en Drying Press "Descaling". Open the control panel and remove the water ‒ The duration cannot be changed. tank. Press . Thoroughly rinse the water tank and fill it with ‒ fresh water. a A message stating that you should carry out the ne- Slide in the water tank and close the control cessary preparatory work for descaling appears on ‒... - Page 29 Appliance door en Press on the right-hand pressure surface until WARNING ‒ Risk of injury! the hook is released. When the hinges are not secured, they can snap shut with great force. ▶ Make sure that the locking levers are always either fully closed or (when detaching the oven door) fully open.
- Page 30 en Appliance door Push the condensate tray until the hooks on the Close the appliance door fully . right, left and bottom click into place. a The condensate tray is installed horizontally. 21.2 Attaching the appliance door WARNING ‒ Risk of injury! The hinges on the appliance door move when the door is opened and closed, which could trap your fingers.
- Page 31 Appliance door en Push the intermediate pane upwards until it is in the WARNING ‒ Risk of injury! left- and right-hand retainers . Scratched glass in the appliance door may develop into a crack. ▶ Do not use any harsh or abrasive cleaners or sharp metal scrapers to clean the glass on the oven door, as they may scratch the surface.
-
Page 32: Rails
en Rails Close the locking levers on the left- and right-hand Close the appliance door. hinges . Note: Do not use the cooking compartment again until the door panes have been correctly fitted. a The locking levers are closed. The appliance door is secured and cannot be detached. - Page 33 Rails en Push on the side of the tab marked PUSH behind Note: the rail, and push the rail to the rear. Further information: 22.4 Attaching the pull-out rail Note: The pull-out rails only fit on the right or left. Make sure when you fit them that you can pull them out to- wards the front.
-
Page 34: Troubleshooting
en Troubleshooting Release the PUSH tab. Pull the pull-out rail out as far as it will go and slide it back in. Note: Further information: a The retainer clicks into place. 23 Troubleshooting You can rectify minor faults on your appliance yourself. WARNING ‒ Risk of electric shock! Read the troubleshooting information before contacting Incorrect repairs are dangerous. - Page 35 Troubleshooting en Fault Cause and troubleshooting The time is not dis- Basic setting has been changed. played when the ap- ▶ Change the basic setting for the time display. pliance is switched → "Basic settings", Page 22 off. Home Connect is not Different causes are possible. working properly.
-
Page 36: Disposal
▶ Next time, set lower or higher values. Tip: A lot of other information about the food preparation and corresponding adjustment values can be found in the Home Connect app or on our website siemens-home.bsh- group.com . 24 Disposal 24.1 Disposing of old appliance... -
Page 37: Information Regarding Free And Open
A detailed Declaration of Conformity can be found on- A detailed RED Declaration of Conformity can be found line at siemens-home.bsh-group.com/uk/ among the online at siemens-home.bsh-group.com among the ad- additional documents on the product page for your ditional documents on the product page for your appli- appliance. - Page 38 2 levels tion and corresponding adjustment values can be ¡ Baking tins/dishes on 2 wire found in the Home Connect app or on our website racks siemens-home.bsh-group.com . 3 levels ¡ Baking tray 28.1 General cooking tips ¡ Universal pan Take note of the following information when cooking all ¡...
-
Page 39: How It Works
How it works en Roasting in uncovered cookware ¡ The perforated steaming tray, size XL, is the best option here. To catch any liquid that drips down, ¡ Use a deep roasting dish. slide the universal pan into the cooking compart- ¡... - Page 40 en How it works 28.6 List of foods Recommended settings for a variety of foods, sorted into food categories. Recommended settings for various types of food Food Accessory/cook- Height Type of Temperature in Steam in- Cooking time ware heating °C/grill setting tensity in mins → Page 8 Sponge cake, delicate...
- Page 41 How it works en Food Accessory/cook- Height Type of Temperature in Steam in- Cooking time ware heating °C/grill setting tensity in mins → Page 8 Tarte flambée Universal pan 240-250 10-18 Bake, savoury, cooked Ovenproof dish 150-170 40-50 ingredients Potato gratin, raw in- Ovenproof dish ...
- Page 42 en How it works Food Accessory/cook- Height Type of Temperature in Steam in- Cooking time ware heating °C/grill setting tensity in mins → Page 8 Long-grain rice, 1:1.5 Shallow cookware 12-17 Eggs, hard-boiled Perforated steam- 9-12 ing tray Preheat the appliance. Turn the dish 2/3 of the way through the cooking time.
- Page 43 How it works en Recommended settings for cooking whole menus Food Accessory/cook- Height Type of Temperature in Steam in- Cooking time ware heating °C tensity in mins → Page 8 Peeled boiled potatoes, Perforated steam- 5+5+3 1. 30 quartered ing tray, size M 2.
- Page 44 en How it works The protective envelope of the vacuum-sealing bag re- – There are no holes in the vacuum-sealing bag. tains the nutrients and flavours. The low temperatures – Pieces of meat or fish that have been vacuum- and the direct transfer of heat allow precisely controlled sealed together are not pressed directly against cooking in order to achieve the desired cooking res- one another.
- Page 45 How it works en ATTENTION! Use scissors to open the vacuum-sealing bag. Place Risk of damage to kitchen units all of the food and liquid into the container. ▶ Do not fill the water tank a second time for the You can use the stock or marinade to make a sous-vide cooking.
- Page 46 en How it works Food Accessory/ Type of Temperat- Steam intens- Cooking time Tips for sous-vide cookware heating ure in °C in mins cooking Potatoes, peeled, Wire rack 35-45 Recipe tip: Vacuum- quartered, 800 g seal along with Universal pan some butter and salt.
- Page 47 How it works en Recommended settings for proving dough Food Accessory/cook- Height Type of Temperature in Steam in- Cooking time ware heating °C tensity in mins → Page 8 Rich dough, e.g. pan- Bowl on wire rack 40-45 40-90 ettone White bread Bowl on wire rack ...
- Page 48 en How it works ¡ Shelf positions when baking on 3 levels: ¡ Hot water sponge cake – Baking tray: Shelf position 5 – When baking on 2 levels, place the springform – Universal pan: Shelf position 3 tins at diagonally opposite corners of the wire –...
-
Page 49: Installation Instructions
Installation instructions en Recommended settings for steaming Food Accessory/cook- Height Type of Temperature in Steam in- Cooking time ware heating °C tensity in mins → Page 8 Peas, frozen, two con- 5+3+1 tainers Steam containers, XL size Universal pan Broccoli, fresh, 300 g Steam containers, ... - Page 50 en Installation instructions 29.2 Appliance dimensions You will find the dimensions of the appliance here ¡ For appliances that have a hinged switch panel, make sure that the switch panel does not hit adjacent kitchen units when you open it. 29.3 Installation below a worktop ¡...
- Page 51 Installation instructions en 29.4 Installation underneath a hob If the appliance is installed under a hob, the following The minimum worktop thickness a is based on the minimum dimensions must be adhered to (including required minimum clearance . substructure, if applicable).
- Page 52 en Installation instructions ¡ Ensure that air exchange is guaranteed in accord- ¡ Contact protection must be guaranteed by the in- ance with the diagram. stallation. ¡ If the display on the appliance remains dark, it has not been connected correctly. Disconnect the appli- ance from the mains and check the connection.
- Page 53 Installation instructions en Screw the appliance into place. For handleless kitchens with vertical bar handle strips: Attach a suitable filling piece in order to cover ‒ any sharp edges and to guarantee a safe install- ation. Pre-drill aluminium profiles to establish a screw ‒...
- Page 56 Valid within Great Britain: Imported to Great Britain by BSH Home Appliances Ltd. Grand Union House Old Wolverton Road Wolverton, Milton Keynes MK12 5PT United Kingdom Manufactured by BSH Hausgeräte GmbH under the trademark licence of Siemens AG *9001673569* 9001673569 (020914)
Need help?
Do you have a question about the HS936GA 1 Series and is the answer not in the manual?
Questions and answers