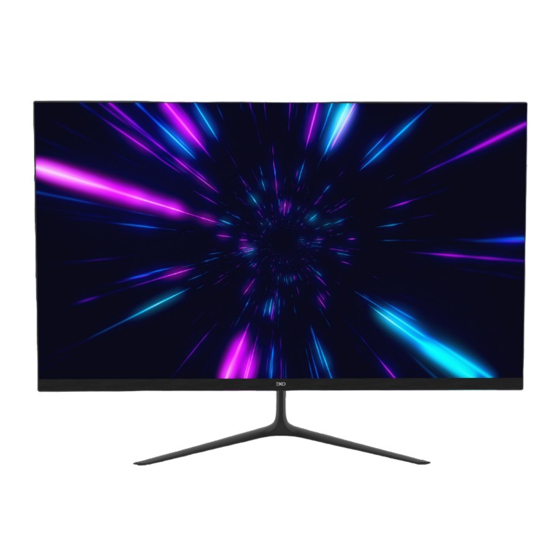
Summary of Contents for EKO K27FM
- Page 1 INSTRUCTION MANUAL 27” FULL HD MONITOR K27FM Please read this manual carefully before using, and keep it for future reference.
-
Page 3: Table Of Contents
CONTENTS General Safety Installation Attaching the Stand Wall or Arm Mounting Instructions Controls and Connections Operation Brightness Image Color Temp. Language Reset MISC. Specifications Customer Helpline Last Page... -
Page 4: General Safety
GENERAL SAFETY Read this manual thoroughly before you start using the Monitor. Store this manual, the completed warranty card, your receipt and the product packaging. The safety precautions instructions reduces the risk of fire, electric shock and injury when correctly complied to. Please follow all instructions and take notice of all warnings. - Page 5 GENERAL SAFETY (CONT.) IMPORTANT INFORMATION • Do not expose this appliance to rain or moisture as it may result in fire or an electric shock hazard • Do not tamper or change or modify the product in any way. • Only use Accessories outlined and recommended by the manufacturer. •...
- Page 6 GENERAL SAFETY (CONT.) • Please beware that Dust could accumulate over time on the unit and cause it to generate heat and or deteriorate insulation, which in turn may result in an electrical fire. • The product is not intended for use by persons (including children) with reduced physical, sensory or mental capabilities, or young children of any age, They must be supervised product by a person responsible for their safety.
- Page 7 GENERAL SAFETY (CONT.) Please make sure upon positioning this product, the place is: • Not wet or damp and Well ventilated • Away from direct sunlight or heaters. • Away from splashes or food. • Protected from excessive dust or grease. •...
-
Page 8: Installation
INSTALLATION Install the stand as described below, or if you want to mount it to a wall, please contact a professional installer. Please ensure the monitor is not plugged into the wall socket and furthermore we recommend to get another person to assist in the following task. Attaching the stand Step 1 Place a soft cushioned material on top of a flat surface to prevent damaging the screen panel. -
Page 9: Wall Or Arm Mounting Instructions
INSTALLATION (CONT.) Wall OR Monitor Arm Mounting Instructions Please ensure the Monitor is not plugged into the wall socket and furthermore we recommend to get another person to assist in the following task. • We recommend you use a professional installer as we assume no liability for any eventual damage to the product or injury to yourself if you mount the Monitor on your own. -
Page 10: Controls And Connections
CONTROLS AND CONNECTIONS M - MENU / SELECT E - EXIT / INPUT MENU UP / VOLUME + DOWN / BRIGHTNESS STANDBY POWER OFF/ON... - Page 11 CONTROLS AND CONNECTIONS DC IN HDM I VG A EARPHONE HDMI 1 EARPHONE PORT DC IN (POWER)
-
Page 12: Operation
OPERATION BRIGHTNESS Press MENU button, and the main menu page will appear as follows: (BRIGHTNESS MENU), and then press MENU button to enter. Brightness Press button to select Brightness, then press MENU button to confirm your selection and press button to adjust. This item can adjust the optical fiber output of the entire picture, and it will affect the dark region of the picture. -
Page 13: Image
OPERATION (CONT.) IMAGE button to select IMAGE, and then press MENU button to confirm your Press selection. This item can adjust the configuration automatically (VGA Mode). H. Position button to select H. Position, and then press MENU button to confirm your Press selection. -
Page 14: Color Temp
OPERATION (CONT.) COLOR TEMP. Press button to select Color in the main menu, and then press MENU button to enter. button to select COLOR TEMP, and then press MENU button to confirm your Press selection and press button to adjust. This item can change the value of RGB to adjust the image tune. - Page 15 OPERATION (CONT.) BLUE(B) Press button to select Blue, and then press MENU button to confirm your selection and press button to adjust the value of the three primary colors of blue. Press button to increase the number, and the picture color will become bluer as the increasing number.
-
Page 16: Language
OPERATION (CONT.) LANGUAGE Press MENU button to LANGUAGE , Press select LANGUAGE (Options: English / French / Deutsch / Chinese / ltalian / Spanish / Portugueserrurkish / Polish / Nederlands / Russian / Korean...) OSD H.POS Press button to select OSD H.Position, and then press MENU button to confirm your selection and press button OSD menu will move toward the left side. -
Page 17: Reset
OPERATION (CONT.) RESET Press button to selec reset in the main menu, and then press MENU button to enter. IMAGE AUTO ADJUST VGA mode press button to select image auto adjust, and then press MENU button to confirm your selection and press button to choose image press MENU button auto adjust. -
Page 18: Misc
OPERATION (CONT.) MISC. Press button to select misc. in the main menu signal source, and then press MENU button to HDMI/VGA. MUTE button to select mute, and then press MENU button to confirm your selection Press and press button to on/off adjust. VOLUME Mute is off, Press button to select volume, and then press MENU button to confirm... -
Page 19: Specifications
SPECIFICATIONS Resolution 1920 x 1080 Display Colours 16.7 Million Contrast ratio: 3000 : 1 Brightness 250 cd/m2 Refresh Rate 60Hz Power Source DC 12V 4A Power Consumption With stand: 613.9 (w) × 188 (d) × 440.5 (h) mm Dimensions Without stand: 613.9 (w) × 40.8 (d) × 358.9 (h) mm 1 x Instruction Manual Monitor Stand with screws Accessories... - Page 20 CUSTOMER SUPPORT: help@eko-entertainment.com.au DISTRIBUTED BY: Ayonz Pty Ltd...


Need help?
Do you have a question about the K27FM and is the answer not in the manual?
Questions and answers