Table of Contents
Advertisement
Quick Links
In the United States: BOBRICK WASHROOM EQUIPMENT, INC.
New York: 200 Commerce Drive, Clifton Park, NY 12065-1350 • Tel: (518) 877-7444 • Fax: (518)-877-5029
Los Angeles: 6901 Tujunga Ave, North Hollywood, CA 91605-6213 • Tel: (818) 982-9600 • Fax: (818)-503-9287
or email customerservice@bobrick.com
In Canada: BOBRICK WASHROOM EQUIPMENT COMPANY
45 Rolark Drive, Scarborough, Ontario M1R 3B1 • Eastern Canada: Tel: (877) 423-6555 • Fax: (877) 423-8555
© 2022 by Bobrick Washroom Equipment, Inc.
• Western Canada: Tel: (877) 423-6444 • Fax: (877) 423-8444 or email customerservice@bobrick.com
Form No. 820-69ii 9-26-22
8
Automatic Multi-Feed Soap Dispensing System
INSTRUCTIONS FOR INSTALLATION, OPERATION, MAINTENANCE & TROUBLESHOOTING
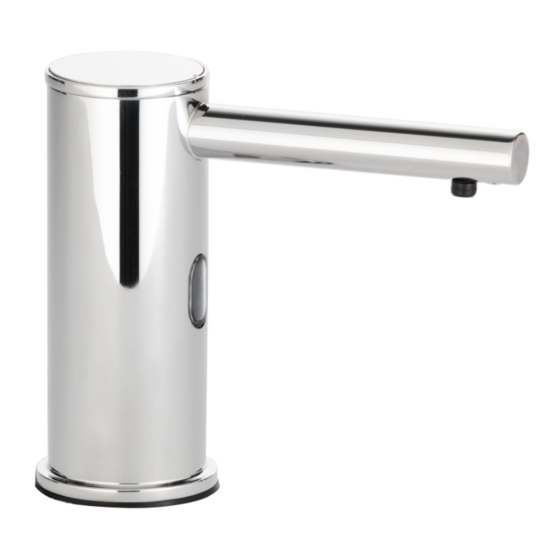
Bobrick B-820-258 (Liquid Soap Dispenser) / B-820-248 (Foam Soap Dispenser)
B-820 (Multi-Feed Soap Reservoir)
Clearances and Mounting Requirements:
B-820-258 (Liquid Soap Dispenser) / B-820-248 (Foam Soap Dispenser)
•
Designed for installation into countertops up to 1.5" (38.1 mm) thick.
•
Requires 1" (25 mm) diameter mounting hole.
•
Compatible with sink rims up to 0.39" (10 mm) wide and 0.8" (20 mm) tall.
•
Recommended spout location is minimum of 1.6" (40 mm) and maximum of 2.7" (70 mm) from inside edge of the
sink rim to the center of the mounting hole, and minimum clearance of 1.18" (30 mm) from the edge of the sink and
rear wall to the center of the mounting hole.
•
Requires a minimum of 4" (100 mm) and maximum of 18" (450 mm) vertical clearance from the bottom of the
countertop to the mounting screw for the soap pump at the rear wall.
B-820 (Multi-Feed Soap Reservoir)
•
Designed for installation into countertops up to 1.5" (38.1 mm) thick.
•
Requires 2.38" (60.3 mm) diameter mounting hole.
•
Recommended install location for the fill port is at least 5.91" (150 mm) from the center of the mounting hole to the
side and back wall.
•
The horizontal clearance required between the soap reservoir and side wall is 1" (25mm)
Unit Diagram
B-820-258 (Liquid Soap Dispenser) / B-820-248 (Foam Soap Dispenser) – Spout with Stem Assembly
1.
Plate
2.
Top Cover
3.
Dispenser Spout
4.
Elbow Connector
5.
O Ring
6.
Nozzle with Mesh
7.
Nozzle without Mesh
8.
Screw
9.
Screw Nut
10. CSD Sensor
3
11.
CSD Mounting shaft
12. Rubber Washer (Above Countertop)
13. Rubber Washer (Below Countertop)
4
14. Nylon Washer
5
15. Mounting Nut
16. Soap Tube
6
10
B-820-258 (Liquid Soap Dispenser) / B-820-248 (Foam Soap Dispenser) – Pump with Electronic Control Box
1.
Control Box
11
2.
Base Plate
3.
AC Adapter
4.
Soap Pump (Liquid)
5.
Soap Pump (Foam)
6.
Soap Tube Holder (Two included)
7.
Soap Tube Valve Switch
12
8.
Soap Tube T Connector
9.
Soap Tube (1,200 mm)
13
B-820 (Multi-Feed Soap Reservoir)
16
14
1.
Control Box
2.
Soap Reservoir Tank
15
3.
Bottom Bracket
4.
Fill Port Cap
5.
Refilling Assembly
6.
Rubber Washer
7.
Mounting Nut
8.
Bracket
9.
Thumb Screws (Four included)
10. Funnel
11.
AC Adapter
1
3
4
1
5
6
10
2
3
4
5
1
7
6
10
16
2
11
8
12
9
13
7
16
14
15
1
2
1
2
8
9
3
7
4
11
5
6
10
8
11
9
12
13
14
12
15
13
16
14
15
Advertisement
Table of Contents

Summary of Contents for Bobrick B-820-258
- Page 1 12. Rubber Washer (Above Countertop) 13. Rubber Washer (Below Countertop) 14. Nylon Washer 15. Mounting Nut 16. Soap Tube B-820-258 (Liquid Soap Dispenser) / B-820-248 (Foam Soap Dispenser) – Pump with Electronic Control Box Control Box Base Plate AC Adapter Soap Pump (Liquid)
- Page 2 Recommendation on Tubing Configuration Installation for B-820-258 (Liquid Soap Dispenser) / Thread the screws into the wall anchors and leave a Installation for B-820 (Multi-Feed Soap Reservoir) B-820-248 (Foam Soap Dispenser) space of 0.24" (6 mm) from the bottom of the screw •...
- Page 3 Installation for Tube Connections For each soap dispenser in the system, plug in the AC Fill Instructions: adapter into the control box. Using the soap tubes, Use the provided Suction Cup to remove the fill port cap. connect the bottom end of all control boxes Insert the provided funnel into the fill port, then pour the liquid soap through the funnel.
- Page 4 • Check if or soap tube is damaged or not connected properly. TROUBLESHOOTING GUIDE B-820-258 (Liquid Soap Dispenser) / B-820-248 (Foam Soap Dispenser) Observed Issue Recommended Solution Unit does not respond at all or has delayed response. • Check all wire connections from the spout into the control box.


Need help?
Do you have a question about the B-820-258 and is the answer not in the manual?
Questions and answers