SALICE F70 Installation Instructions Manual
Hide thumbs
Also See for F70:
- Quick start manual (9 pages) ,
- Manual (40 pages) ,
- Installation instructions (3 pages)
Table of Contents
Advertisement
Advertisement
Table of Contents

Related Manuals for SALICE F70


Summary of Contents for SALICE F70
- Page 1 CANADA...
-
Page 3: Table Of Contents
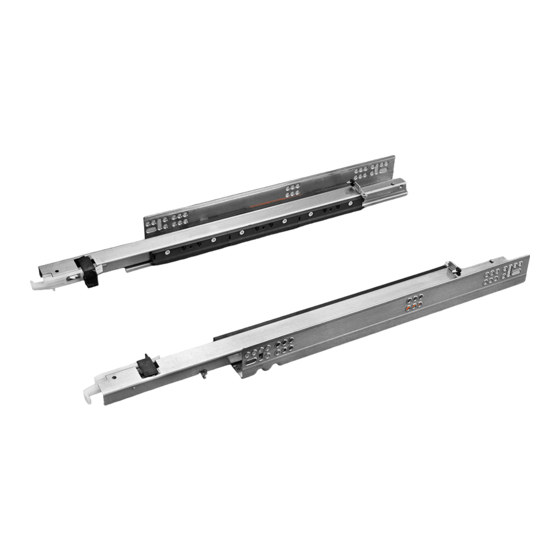
Slide installation page 7 Technical information page 8 Part number composition and packing page 11 F70 CLIPS/LOCKING DEVICES page 13 F70 ADJUSTMENTS page 17 F70 SMOVE page 23 Runner for drawers with decelerated closing for side thicknesses up to 16 mm... - Page 4 Both versions are available in the full range of lengths from 350 mm to 750 mm in 50 mm increments. All versions and lengths of F70 have an integrated rack and pinion system, which synchronizes the three sliding elements of the runner and guarantees excellent lateral stability and a perfectly silent sliding movement without the need for further components.
- Page 5 The F70 runner is also available with integrated Push opening system, for all handle-less drawers. A slight pressure of the drawer front is sufficient for the Push mechanism to release and consequently for the drawer to self-open with minimum effort.
- Page 6 The adjusters for height and tilt (optional) of the drawer front are located on the runner. Rack and pinion system All versions and lengths of F70 have an integrated rack and pinion system, which synchronizes the three sliding elements of the runner and guarantees excellent lateral stability and a perfectly silent sliding movement without the need for further components.
-
Page 7: Slide Installation
Fixing Mounting full-extension runner on the cabinet side Setback 2 ø 4 ø7 -0.2 EUROSCREW ø 6.3 Pre-drilling ø 5 mm +/- 4.5 +0.5 ø7 -0.2 Screws, see page 37 If runners are mounted before the assembly of the cabinet, we recommend that the inset position of the runner be increased from 38 to 39 mm to accommodate the manufacturing tolerances in the cabinet and the runner. -
Page 8: Technical Information
Drilling positions for runner on cabinet side MIN 360 The use of at least 4 fixing screws for each runner to the cabinet side is highly recommended. Load capacity may vary on longer lengths. MIN 410 MIN 460 MIN 510 MIN 560 MIN 610 MIN 660... - Page 9 Drawer setting Abbreviations SP = Drawer side thickness LC = Drawer depth PM = Cabinet depth = Cabinet internal width LN = Nominal runner length The internal width of the drawer is 42 mm to 43.5 mm The external drawer depth is 10 mm less than the internal width of the cabinet less than the runner length Nominal runner length...
- Page 10 Push runners Synchronizer and tilt adjustment lever 40 mm MIN rear notch 75 mm MIN rear notch Use SGD704UGXA drilling template for rear hook, F70 Push Synchronizer, see page 32. AGLRXX3F Tilt adjustment lever, see page 35. see page 37.
-
Page 11: Part Number Composition And Packing
Part number composition Example: G7E6 _ _ _ _ XXB BASIC PART NUMBER ARTICLE VERSIONS RUNNER LENGTH S = SMOVE (350 - 400 - 450 - 500 - 550 - 600 - 650 - 700 - 750 mm) P = PUSH Industrial packaging PALLET PALLET... -
Page 13: F70 Clips/Locking Devices
F70 Clips Locking devices... - Page 14 F70 - Clips - Locking devices - For all F70 runner versions - Material: plastic and steel - Integrated tool-free side and depth adjustments - Recommended pre-drilling ø 2.5 mm - Mounts to the bottom or to the drawer front Clip dimension and drilling position 95 min.
- Page 15 Drawer assembly Place the drawer on the runners and push forward until completely closed Drawer removal Position hands under the front of the drawer and press on the orange levers, as indicated in the drawing, sliding the drawer out of the cabinet.
-
Page 17: F70 Adjustments
Adjustments... - Page 18 Side adjustment +/- 1.5 mm Rotate the white wheel towards the drawer front to adjust left. This operation is tool free. 1.5 mm Rotate the white wheel towards the back of the drawer to adjust right. This operation is tool free. 1.5 mm For side adjustment, it is recommended that the wheels on the clips are operated in the same direction, in order to maintain the correct alignment and movement of the runners.
- Page 19 Depth adjustment +/- 3 mm Rotate the white wheel towards the outside of the drawer to increase the gap between the front and the side. This operation is tool free. + 3 mm Rotate the white wheel towards the inside of the drawer to reduce the gap between the front and the side. This operation is tool free.
- Page 20 Height adjustment + 2.5 mm Push the lever towards the inside of the drawer to achieve height adjustment. This operation is tool free. 2.5 mm...
- Page 21 Tilt adjustment + 3 mm Open the drawer and press the lever to achieve the adjustment. This operation is tool free. + 3 mm Drawer back preparation, see page 10. AGLRXX3F Tilt adjustment lever, see page 37. Assembly of tilt adjustment lever (optional) Pull out the drawer and remove the plastic insert Insert the tilt adjustment levers, both right and left Rotate the lever to achieve the required adjustment...
-
Page 23: F70 Smove
Smove... - Page 24 Note: Drawer side material thickness may vary. Make sure you take precise measurements when calculating outside drawer width using the table below. Inside drawer width must equal opening width minus 42 mm (1 21/32”) for F70 runners to align and function optimally.
- Page 25 Part number BASIC RUNNER LENGTH (LN) MIN. DEPTH OF THE CABINET (PM) PART NUMBER G7E6S350XXB G7E6S400XXB G7E6S450XXB G7E6S500XXB G7E6S550XXB G7E6S600XXB G7E6S650XXB G7E6S700XXB G7E6S750XXB AFCGXX3B Right and left clip with integrated adjustments PACKAGING 2 BOXES = 100 right pcs. and 100 left pcs.
-
Page 27: F70 Push
Push... - Page 28 Note: Drawer side material thickness may vary. Make sure you take precise measurements when calculating outside drawer width using the table below. Inside drawer width must equal opening width minus 42 mm (1 21/32”) for F70 runners to align and function optimally.
- Page 29 Part number BASIC RUNNER LENGTH (LN) MIN. DEPTH OF THE CABINET (PM) PART NUMBER G7E6P350XXB G7E6P400XXB G7E6P450XXB G7E6P500XXB G7E6P550XXB G7E6P600XXB G7E6P650XXB G7E6P700XXB G7E6P750XXB AFCGXX3B Right and left clip with integrated adjustments PACKAGING 2 BOXES = 100 right pcs. and 100 left pcs.
-
Page 31: Accessories
Accessories... -
Page 32: F70 Push Synchronizer
F70 Push synchronizer The synchronization system for Push-open F70 runners has been developed to ensure that drawers of any width can be opened with minimum effort. The system links the two runners, which then become a single element; applying pressure on any part of the drawer front (even at the extremities), is sufficient for the Push devices to release and consequently for the drawer to open. - Page 33 Assembly instructions Insert and slide the carrier plates into position on the runners in the direction indicated by the arrows 75 mm MIN 75 mm MIN Fitting the driver pins to the runners (X - 155 mm) ±1 X (1305 mm MAX) Cut the synchronizer bar to length (X - 155 mm) ±1...
- Page 34 F70 Push synchronizer - Assembly instructions Fix the bar to the plates and insert the drawer Applying pressure on any part of the drawer front is sufficient for the drawer to open Use of bumpers not recommended for the correct...
-
Page 35: Drawer Drilling Templates
Drilling templates for drawers Pre-drilling for the clips reduces the possibility of splitting the wood, thus assuring the correct and level installation of the clips. The correct and level mounting assures a smooth assembly and operation of the drawer slide. SGD704UGXA PACKAGING 1 box = 20 pcs. - Page 36 Drilling templates for drawers Pre-drilling ø 2,5 mm, to assemble the clips to the front of the drawer Use a ø 2,5 mm drill bit Pre-drilling ø 2,5 mm, to assemble the clips to the drawer bottom Use a ø 2,5 mm drill bit...
-
Page 37: Tilt Adjustment Lever
Tilt adjustment lever AGLRXX3F PACKAGING 1 large box = 10 boxes (120 pairs) 1 box = 12 right pcs. and 12 left pcs. Technical information, see page 21 Wood screw V234X164I ø 4 x 16 mm PACKAGING 1 box = 20.000 pcs Euroscrews V136X114I drilling ø... - Page 38 Notes Notes...
- Page 39 Notes Notes...
- Page 40 SALICE CANADA INC. 3500 RIDGEWAY DRIVE, UNIT#1 MISSISSAUGA, ONTARIO, L5L 0B4 TEL. 905 820 8787 FAX. 905 820 7226 info.salice@salicecanada.com www.salicecanada.com Digital contents We reserve the right to change technical specifications. Nous nous réservons le droit de modifier les spécificités techniques.
Need help?
Do you have a question about the F70 and is the answer not in the manual?
Questions and answers