
Related Manuals for Better Packages 555e


Summary of Contents for Better Packages 555e
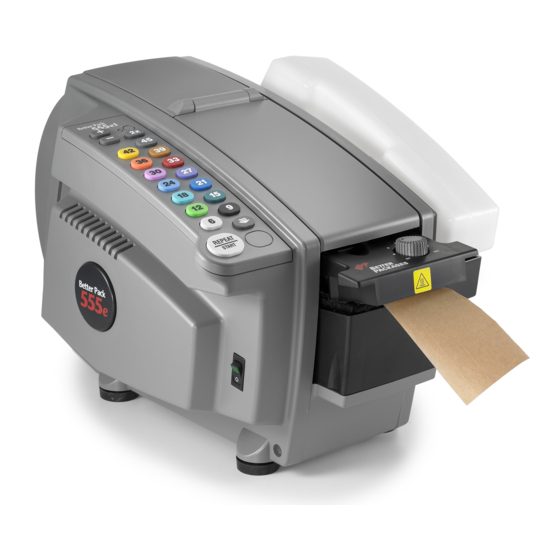
- Page 1 SERVICE MANUAL 555e Model BP555e Tape Dispenser 55e SERVICE MANUAL ® ACKAGES Drive Ansonia, CT 06401 www.betterpackages.com File Name: BP555e Service Manual Rev7.doc...
- Page 3 Information contained in this manual does not constitute a warranty of performance. Furthermore Better Packages reserves the right to revise this publication. Better Packages assumes no liability for any losses or damages incurred as a result of information contained in this manual.
-
Page 4: Table Of Contents
Table of Contents Technical Data Troubleshooting Tape Jams Tape Strips Too Short Tape Strips Too Long Tape Feeds Slowly Not Feeding Tape Maintenance & Repair Preventative Maintenance Removal of Covers Fuses Control Board Replacement Feed Wheel/Blade Height Adjustment Keypad/Keypad Membrane Replacement Feed Wheel Replacement Front and Rear Cover Assembly... - Page 5 • This machine is designed for sealing cartons with water activated tape. Any other use will void all warranties and any responsibility or liability of Better Packages, Inc. • Read all Safety Precautions and Operating Instructions before powering on and using the machine.
-
Page 6: Technical Data
Technical Data Size: 20”Lx12.5”Wx12”H (51 x 32 x 30 cm) Dispensing Speed: Up to 45” (114 cm) per second Water Bottle Capacity: 2 pints 2 oz. (1 liter) Shipping Weight: 32 lbs. (15 kg) Power Requirements: 555es, eSA, eL, eLA – 115 volts, 60 Hz, 4 Amps 555eMA, eFA –... -
Page 7: Troubleshooting
Troubleshooting Tape Jams • Interference when Tape in Motion ◊ Operator grabs the tape before it stops dispensing ◊ Tape hits box or other object while dispensing. • Tape Path Dirty ◊ Tape path must be free of dirt, glue and tape. Keep in mind that the feed wheel is pushing tape forward after leaving it. -
Page 8: Tape Strips Too Short
Troubleshooting Tape Strips Too Short The machines measures the tape length by counting the number of pulses from the length encoder. Each time one of the small cutouts in the encoder wheel passes in front of the optical switch a pulse is produced. When the programmed number of pulses is reached the machine turns off the motor and cuts the tape. -
Page 9: Tape Strips Too Long
Troubleshooting Tape Strips Too Long If the controller board does not see all the encoder pulses the tape produced will be long. • Encoder Problem ◊ Verify the length encoder is plugged into the controller board and none of the wires are broken. ▪... -
Page 10: Not Feeding Tape
Troubleshooting Not Feeding Tape If the power indicator lamp is illuminated but the motor does not start check the following: • Interlock Circuit ◊ Top cover open ▪ Verify the top cover is fully closed and seated properly ◊ Magnet missing ▪... -
Page 11: Maintenance & Repair
Maintenance & Repair Always unplug your machine when performing service. CAUTION: ALWAYS DISCONNECT YOUR MACHINE FROM ALL ENERGY SOURCES AND WEAR ALL PROPER PERSONAL PROTECTIVE EQUIPMENT (PPE) PRIOR TO CONDUCTING ANY MAINTENANCE. Rev 9 2022... -
Page 12: Preventative Maintenance
Maintenance & Repair Preventative Maintenance Suggested preventative maintenance schedule: Weekly • Wash water brushed with mild soap; rinse well. • Clean any accumulated tape dust with a dry brush or blower. • Wash water tank with mild soap; rinse well. Monthly •... -
Page 13: Removal Of Covers
Maintenance & Repair Removal of Covers This will act as the basic platform of how to remove the left and right covers from the machine safely they are the first steps in almost all of the procedures. Removing the covers is the first step in many maintenance procedures. Removal of the left cover Removal of the right cover Unplug the machine... -
Page 14: Fuses
Fuses There are two fuses located in the 555e series machine. One fuse is accessible and located on the connector plate, outside of the machine above the power connector. Another fuse is located on the controller board just after the power connector and below the transformer. -
Page 15: Control Board Replacement
Maintenance & Repair Control Board Replacement Part Numbers • ES Model ◊ E55500201 • ESA Model ◊ E55500101 Tools Needed • Philips head screwdriver Procedure Unplug Machine Remove the water bottle, and tank assembly Remove left side cover (5 Philips screws) be careful as the ribbons connecting the keypad can be ripped easily. Lay machine on its right side Disconnect all connectors (Figure 17-1) a. -
Page 16: Feed Wheel/Blade Height Adjustment
Maintenance & Repair Feed Wheel/ Blade Height Adjustment When a dispense key is pressed the tape cutter blade and the lower feed wheel lift up. The machine has an adjustment set screw that sets the height of the blade and lower feed wheel. The adjustment sets the amount of pinch force between the upper and lower feed wheels. -
Page 17: Keypad/Keypad Membrane Replacement
Maintenance & Repair Keypad/Keypad Membrane Replacement Part Numbers • ES Model ◊ E55500301 – Membrane and Keypad ◊ E55500301PAD – Keypad Only ◊ E55500301SW – Membrane Only • ESA/EFA Model ◊ E55500302 – Membrane and Keypad ◊ E55500302PAD – Keypad Only ◊... -
Page 18: Feed Wheel Replacement
Maintenance & Repair Feed Wheel Replacement This is considered part of standard maintenance and typically is replaced along with the blade oiler (page XX) and/or heater assembly (page xx). Part Numbers • E55506500 – Feed Wheel Tools needed • Philips head screwdriver •... - Page 19 Maintenance & Repair Feed Wheel Replacement Continued 13. Slide new feed wheel on, seat into retaining pin 14. Replace the washer 19. Tighten set screw on sprocket 15. Using an E-clip applicator or needle-nose pliers 20. Push motor back until drive chain is tight replace the E-clip to hold washer and feed wheel in place.
-
Page 20: Front And Rear
Maintenance & Repair Front and Rear Cover Assembly Part Numbers • E55509801 – Lift Roller Bracket Assembly • E55503501 – Top Cover Assembly • E55503401 – Rear Cover Assembly • E55506000 – Rear Pivot Pin • E55509000 – Extension Spring Tools needed •... -
Page 21: Blade Oiler
Maintenance & Repair Blade Oiler Replacing the blade oiler is considered part of standard maintenance. Typically this is done at the same time as replacing the feed wheel and/or the heater assembly. Part Numbers • SA10XXK – Felt and Bracket Kit Tools Needed •... -
Page 22: Solenoid Repair
This is a relatively simple procedure that can be accomplished within an hour for someone with no experience and the right tools. If this process is followed and the noise persists please contact Better Packages Machinery Support at (813) 345-3070 Part Numbers •... - Page 23 Maintenance & Repair Solenoid Repair Continued 11. Pull the plunger from the solenoid 22. On left cover plug keypad ribbons back into controller board a. Be sure not to miss any pins as this will effect the length selected 23. Reinstall left cover be sure not to pinch or drive a screw through the keypad ribbons.
-
Page 24: Solenoid Replacement
If this process is followed and the noise persists please contact Better Packages Machinery Support at (813) 345-3070 for confirmation before replacing the solenoid. We recommend when replacing that whole Solenoid Shelf Assembly be purchased as the solenoid floats in the rubber feet. - Page 25 Maintenance & Repair Solenoid Replacement Continued 11. Pull the connector and wire through the frame of the machine 20. Reinstall the spring 12. Pull the plunger from the solenoid 21. Replace the access plate 22. Reinstall the baffle safety 23. Snap the tank shelf back into place 24.
-
Page 26: Thermostat Replacement
Maintenance & Repair Thermostat Replacement It is recommended that the heater parts be replace with a Better Packages supplied heater parts to maintain safety compliance. If the heater is no longer functioning and the heater plates are clean and well maintained replacing the thermostat will most likely fix any heating issues. - Page 27 Maintenance & Repair Thermostat Replacement Continued 12. Remove the knob (5/16” nut driver) 17. Remove the slip on electrical connectors from the thermostat 18. Remove the nut holding the thermostat on 19. Discard the old thermostat 20. Place new thermostat 13.
-
Page 28: Heater Replacement
Heater Replacement It is recommended that the heater be replace with a Better Packages supplied heater to maintain safety compliance. When replacing the heater it is customary to also replace the blade oiler and feed wheel as they are wear items and the machine will be disassembled enough to conduct those replacements at the same time. -
Page 29: Motor Replacement
Maintenance & Repair Motor Replacement Part Numbers • E55504401 – Motor Bracket Assembly Tools Needed • 3/8” Wrench • Phillips head screwdriver Procedure Unplug Machine Remove the water bottle, and tank assembly Remove right side cover (5 Philips screws) Remove left side cover (5 Philips screws) be careful as the ribbons connecting the keypad can Feed the new motor wire through and plug into be ripped easily. -
Page 30: Motor Chain Adjustment
Maintenance & Repair Motor Chain Adjustment Tools Needed • 3/8” Wrench • Philips head screwdriver Procedure Unplug Machine Remove the water bottle, and tank assembly Remove right side cover (5 Philips screws) Loosen the 2 3/8” nuts holding the motor to the bracket (do not remove the nuts completely) (Figure 1) Slide the motor toward the back of the machine... -
Page 31: Connector Plate Assembly
Maintenance & Repair Connector Plate Assembly Part Numbers • E55502301 Tools Needed • Philips head screwdriver Procedure Unplug Machine Remove the water bottle, and tank assembly Remove left side cover (5 Philips screws) be careful as the ribbons connecting the keypad can be ripped easily. -
Page 32: Shear Blade Replacement
Maintenance & Repair Shear Blade Replacement Part Numbers • FM20BXK – Blade Kit Tools Needed • Philips head screwdriver • Flat head screwdriver • Vice grip pliers Procedure Unplug Machine Remove the water bottle, and tank assembly Remove right side cover (5 Philips screws) Remove left side cover (5 Philips screws) be 10. - Page 33 Maintenance & Repair Shear Blade Replacement 12. Remove the spring that is fastened to the cutter yoke 14. Lift the upper blade out from the two holders to reduce tension on the springs 13. Loosen the pin that holds the blade in place 15.
-
Page 34: Length Sensor Replacement
Maintenance & Repair Length Sensor Replacement Part Numbers • E55506801 – Length Sensor Assembly Tools Needed • Philips head screwdriver • Zip cable tie Procedure Unplug Machine Remove the water bottle, and tank assembly Remove left side cover (5 Philips screws) be careful as the ribbons connecting the keypad can be ripped easily. Unplug keypad ribbons from controller board Remove 2 Philip screws holding sensor to frame (Figure 1) Cut tie holding sensor wire in place... -
Page 35: Tape Sensor (Esa Only)
Maintenance & Repair Tape Sensor (ESA Only) Part Numbers • E55506901 Tools Needed • Philips head screwdriver • Zip cable tie Procedure Unplug Machine Remove the water bottle, and tank assembly Remove left side cover (5 Philips screws) be careful as the ribbons connecting the keypad can be ripped easily. Unplug keypad ribbons from controller board Remove sensor from heater assemble it should twist and pull out Remove connector from controller board... -
Page 36: Parts Listing
Parts Listing Rev 9 2022... - Page 37 BP555e ITEM Better Packa Shelton, CT 0648 REVISED 11/04/2011 Rev 9 2022...
- Page 38 REPLACE METAL ENCODER DISK WITH PLASTIC ENCODER DISK. CONVERTING TO PLASTIC DISK REQUIRES A COMPATIABLE REAR COVER ASSY FEED WHEEL ASSY (ITEM 47 - P/N E555-024-01 ) WHICH MUST BE ORDERED SEPARATELY BP555e ITEM LIST Better Packages,Inc. Shelton, CT 06484 Rev 9 2022 REVISED 11/04/2011...
- Page 39 E555-044-03 ITEM 15 ITEM 16 E555-060-00 E555-090-00 REAR PIVOT PIN SPRING, EXTENSION-SWIVEL ENDS ITEM 17 E555-030-00 - LEFT COVER ITEM 18 ITEM 19 E555-037-00 E555-036-00 - WATER BOTTLE BOTTLE RETAINER Better Packages,Inc. Shelton, CT 06484 Rev 9 2022 REVISED 11/04/2011...
- Page 40 SENSOR ASSY E555-007-01 - TOP HEATER ASSY LOWER HEATER PLATE ITEM 26 ITEM 27 E555-084-01 E555-051-01 ITEM 28 LINK, CUTTER LIFT CAM ROLLER ASSEMBLY E555-032-00 - TANK SHEL BP555e ITEM LIST Better Packages,Inc. Shelton, CT 06484 Rev 9 2022 REVISED 11/04/2011...
- Page 41 ITEM 35 E555-235-0 - ACCESS PLATE ITEM 36 - SOLENOID SHELF ASSY MODEL PART NUMBER ESA / ELA E555-048-01 EL / ES EFA / EMA E555-048-02 E555-048-03 BP555e ITEM LIST Better Packages,Inc. Shelton, CT 06484 Rev 9 2022 REVISED 11/04/2011...
- Page 42 ITEM 46 CAM, CUTTER LIFT E555-019-01 VERTICAL TIE PLATE ASSY ITEM 49 ITEM 48 ITEM 47 E555-078-00 E555-024-01 E555-065-00 LINK, CUTTER LIFT CAM FEED WHEEL ASSY FEED WHEEL BP555e ITEM LIST Better Packages,Inc. Shelton, CT 06484 Rev 9 2022 REVISED 11/04/2011...
- Page 43 EFA / EMA ST-2490 MODEL PART NUMBER ESA / EJA / EFA ST-484 ELA / EL / ES ST-2004 Thermostat ST 2313 BP555e ITEM LIST ITEM 58 Better Packages,Inc. E555-011-01 Shelton, CT 06484 Rev 9 2022 RIGHT FRAME ASSY REVISED 11/04/2011...
- Page 44 ITEM 51 ST-2929-KIT -HEATER KNOB Better Pack ITEM 50 555e ITEM 52 E555-010-01 E555-064-00 - SIDE GUIDE LEFT FRAME ASSY ITEM 60 E555-055-01 BADGE ITEM 59 E555-131-01 KIT-WATER BOTTLE ITEM 54 ITEM 53 ITEM 55 E555-085-01 E555-079-01 SA10X CUTTER LIFT LEVER...
- Page 45 ASSORTED HARDWARE (QTY PER MACHINE) RETAINING RING RETAINING RING FM 101(3/8) FM 94 (5/16) E 623 ST 2337 (3/16) 0233760 (5/32) BURR WASHER BW1/4 THIN MACHINE SCREW ST 1949 Rev 9 2022...
- Page 46 Model BP555e Tape Dispenser...
Need help?
Do you have a question about the 555e and is the answer not in the manual?
Questions and answers