Advertisement
Advertisement

Related Manuals for Jennov P31


Summary of Contents for Jennov P31
- Page 1 Quick Start Guide Be sure to read this book before installing or using the surveillance camera. Keep the book in a safe place so that you can read it whenever necessary. Please read carefully before use it C.2022.006.E www.jennov.com support@jennov.com...
-
Page 2: Table Of Contents
TABLE OF CONTENTS What's Included and APP Setup Product Overview Camera Installation APP Sign Up Set up Wifi for the Camera Functions Introduction and Settings FCC Statement... - Page 3 What's Included Camera Camera Screw Pack Power Adapter Sticker Warning Sticker User Manual Cloud Edge App installation and Setup Search "Cloudedge" on apple store or google play to download the app. ·from Google play ·from Apple store ·or Scan the following QR code Download App ( IOS/ Android ) - 01-...
-
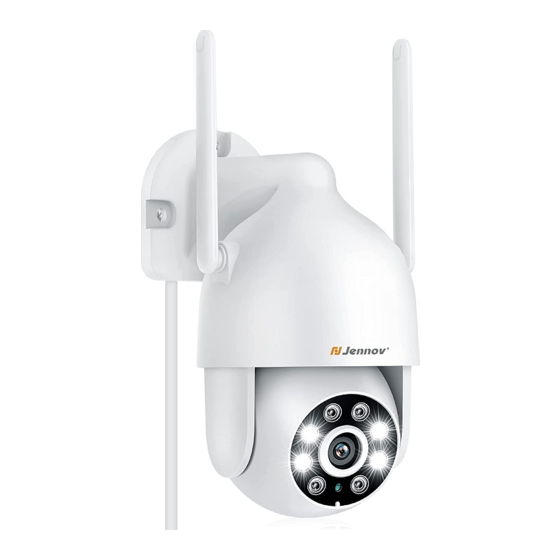
Page 4: Product Overview
Product overview Antenna Spotlights Lens Microphone Ambient Light Sensor Infrared LEDS Micro SD Card Slot Reset button CAUTION: Please insert the Micro SD Card according to the direction shown in the diagram. Micro SD Card might JAM if inserted incorrectly and device could be damaged. SD Card Port: Support micro SD card for local storage (Max 128GB). - Page 5 Installing Camera Select height and location Install the camera 7-10 ft (2-3m) above the ground.This height maximizes the detection range of motion sensor of the camera. Avoid placing camera direct to sunlight. Camera fieldof view Motion Detection Zone Up to 30ft ( 10m ) Tips: 1.
- Page 6 Installation 1 . Drilling according to position sticker, drill bit:15/64 (6mm) 2 . Insert the plugs 3 . Tighten the screw Wall Positioning stickersx Expansion bolts Camera Screw Power Drill ( not provided ) Drill Bit Test the Wifi signal at installation position Use cell phone to test Wifi signal quality at the installation position before installing camera, make sure the Wifi router can provide good Wifi signal.
-
Page 7: App Sign Up
APP Sign Up The Cloudedge app that is necessary to operate the camera. Signing up for storage in the cloud is totally optional and is really not necessary when using an onboard Micro SD card . 1. Open the APP to sign up an account. Go to the login interface, and click "Sign UP". 2 . -
Page 8: Set Up Wifi For The Camera
√ The router automatically selects a faster Wi Fi band for you. Turn off this switch to set it separately 2.4G Wi-Fi Wi-Fi name Model Security Wi-Fi Password Jennov-2.4 Jennov-5G 5G Wi-Fi Wi-Fi name Model Security Wi-Fi Password Save WI-FI powermode... - Page 9 2. Log in to "Cloudedge", then tap the "+" icon in the center. Tap "Camera" to add device. - 07-...
- Page 10 3.Reset device and wait for a flashing RED indicator light, then tap “Next” 4.Select the Wi-Fi needs to be connected (Wi-Fi in your house), enter the password, and click "Next". jennov-2.4 jennov0123 jennov-2.4 jennov0123 jennov0123 Input wifi password Note: Please don’t set too many special symbols for your WiFi password, which may cause the device to be unrecognized and fail to add.
- Page 11 5. Use the camera to scan the QR code on your mobile phone as noted below. When the scan is complete you will hear a prompt tone then push Next. - 09-...
- Page 12 - 10-...
-
Page 13: Functions Introduction And Settings
Functions Introduction and Settings 1. Functions Introduction Functions Introduction and Settings Screenshot: Save the screenshot of the current picture in the mobile phone. Intercom: Press and hold intercom to realize two-way audio. Video Recording: This video needs to be recorded into the mobile phone memory. Motion Detection: When this function is enabled, the video or mobile phone will get message alarm push when any moving object is detected. - Page 14 2. Motion Detection Video and All Day Video 1. All Day Video Recording: 24-hours video recording. When there are moving objects, the video format will become dark blue. When there is no one else,the video format is light blue. 2. Motion Detection Video Recording: When there is a moving object, the recording format will change to dark blue, and other times it is in standby mode.
- Page 15 3. Alarm Management Alarm On: Enter system settings - alarm management - motion detection - enable motion detection, select the appropriate sensitivity, and it is recommended to default. Alarm working mode: The saving time of alarm video is 1 minute by default. (three modes of 1, 2, 3 and minute can be set) Alarm Area: Alarm Area: You can select the area need to be alarm.
- Page 16 4. Recording Time Selection Alarm Working Mode: The saving time of alarm video is 1 minute by default. (three modes of 1, 2, 3 and minute can be set) The recording time of motion detection can be set. The default is 1 minute. (three modes of 1, 2, 3 and minute can be set).
- Page 17 5. Image Settings Image Setting: You can also set the flip of the screen according to the installation environment. Night Vision Mode: 1.Automatic: Default daytime is color and nighttime is infrared mode. 2.Daytime: (full-color mode), color during daytime, the infrared light will not turn on at night, nor will the white light turn on.
- Page 18 6. Share Device: Share Device: Enter Settings - Select device sharing - after entering, there is a short video tutorial, or you can click add directly. Share by scanning QR code or entering account. Note: 1. The accounts to be shared also need to download the app "cloudedge" to register.
- Page 19 7. Delete Device: 1.In the viewing interface, long press the device interface, and a prompt will pop up. Click delete. 2.Enter the settings - pull down to the bottom, and click delete. - 17-...
-
Page 20: Faq
Q:How many device can be shared to others ? A:Max up to 4 device online viewing at the same time. Q:The device cannot be previewed properly ? A:Check whether the network is normal, you can place the camera close to the router, and if not, it is recommended to reset the device and add it again. -
Page 21: Fcc Statement
Safety Statement FCC Statement This device complies with Part 15 of the FCC Rules. Operation is subject to the following two conditions: (1) this device may not cause harmful interference, and ( 2 ) this device must accept any interference received, including interference that may cause undesired operation. - Page 22 12-month warranty from the order date on. After finish filling or scanning, please take a picture and send it to the email(support@jennov.com). Then your free warranty will take effect ! During the warranty period, if any parts of product are damaged, please contact us immediately and we will provide satisfactory resolution.
Need help?
Do you have a question about the P31 and is the answer not in the manual?
Questions and answers
Where is the UID located for the Instalation.
Where is the UIF located