Table of Contents
Advertisement
Quick Links
Advertisement
Table of Contents

Related Manuals for La Crosse Technology WS-7138U


Summary of Contents for La Crosse Technology WS-7138U
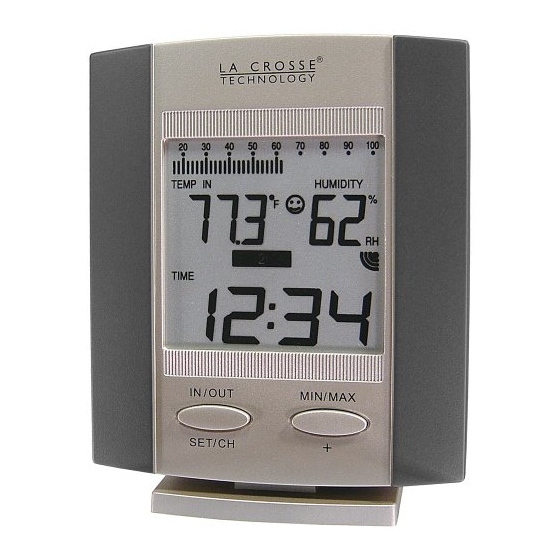
- Page 1 WS-7138U Wireless 433 MHz Wireless Weather Station Instruction Manual...
-
Page 2: Table Of Contents
TABLE OF CONTENTS Topic Inventory of Contents/Additional Equipment Quick Set-Up Guide Detailed Set-Up Guide Battery installation Program Mode Program Sequence and Default Settings Function Keys Setting the Temperature Format Setting 12/ 24-hr Time Mode Setting the Time Setting the Year, Date and Month Features Indoor Temperature, Humidity, &... -
Page 3: Inventory Of Contents/Additional Equipment
One strip double-sided adhesive tape. Instruction manual and warranty card. Figure 1 ADDITIONAL EQUIPMENT (not included) Two fresh AAA 1.5V batteries (for indoor weather station) Two fresh AAA 1.5V batteries (for temperature/humidity sensor) One Philips screwdriver One Standard screwdriver Figure 2... -
Page 4: Quick Set-Up Guide
To complete the set up of your wireless weather station after the 15 minutes have passed please follow the steps that follow in the Detailed Set-Up Guide. -
Page 5: Detailed Set-Up Guide
AAA batteries. 5. Replace the battery cover and re-insert the screw into the back of the remote temperature/humidity sensor. B. INDOOR WEATHER STATION 1. Remove the battery cover. To do this, insert a solid object in the space provided at the... -
Page 6: Program Mode
seconds, and reinstall making sure to install batteries into the remote temperature/humidity sensor first. PROGRAM MODE Programming Note: If 30 seconds is allowed to pass, or the IN/OUT, SET/CH button is pressed during the programming mode, the unit will confirm/set the last information entered—the display will stop flashing and return to normal time-date readings. -
Page 7: Function Keys
FUNCTION KEYS The function buttons are located directly below the LCD display. The function of each button is as described below: • IN/OUT, SET/CH Press for approximately three seconds to enter the setting mode. Use to enter the setting mode for the following settings: Temperature Unit 12hr/24hr time display... -
Page 8: Setting The Temperature Format
III. SELECTING °F OR °C 1. Press and hold the IN/OUT, SET/CH button for 3 seconds. 2. Either ”°F” or “°C” will flash in the time/date LCD. 3. Press and release the MIN/MAX, + button to select the temperature format. 4. -
Page 9: Setting The Time
5. Press and release the MIN/MAX, + button to select 12 or 24-hour time format. Note: When in the 12-hour format “P.M.” will appear to the left of the hour in the time LCD between the hours of noon and midnight. -
Page 10: Setting The Year, Date And Month
VI. SETTING THE YEAR, DATE AND MONTH 1. Press and hold the IN/OUT, SET/CH button for 3 seconds. 2. Either ”°F” or “°C” will flash in the time/date LCD. 3. Press and release the IN/OUT, SET/CH button four times. 4. The year will flash in the time/date LCD. 5. -
Page 11: Indoor Temperature, Humidity, & Comfort
11. Press and release the IN/OUT, SET/CH button to confirm the settings and exit the setting mode. FEATURES OF THE WS-7138U Indoor Readings Indicator Comfort Remote Temp/Humidity Sensor Channel Indicator INDOOR TEMPERATURE, HUMIDITY, AND COMFORT LEVEL INDICATOR • The current indoor temperature (viewed on the left) and relative humidity (viewed on the right) is displayed in the TEMPERATURE/HUMIDITY portion of the LCD. -
Page 12: Outdoor Temperature And Humidity
IV—Adding Remote Temperature/Humidity Sensors). III. MINIMUM AND MAXIMUM TEMPERATURE RECORDS The WS-7138U keeps a record of the MINIMUM and MAXIMUM temperature and humidity as well as the time and date of their occurrence— for both the indoor and outdoor modes. - Page 13 1. Press the MIN/MAX/ + button once. 2. The display will now show the Date and Month at the bottom of the LCD. 3. Press and release the MIN/MAX/ + button. 4. “MAX” appears above the temperature and the temperature flashes.
- Page 14 18. “MIN” remains above the temperature and the humidity and bar graph remain flashing The date of the minimum humidity reading is displayed in the time/ date portion of the LCD 19. Press and release the MIN/MAX/ + button to exit the indoor MIN/MAX mode.
- Page 15 8. “MIN” appears above the temperature and the temperature flashes. The time of the minimum temperature reading is displayed in the time/ date portion of the LCD. 9. Press and release the MIN/MAX/ + button. 10. “MIN” remains above the temperature and the temperature remains flashing.
-
Page 16: Adding Remote Temperature/Humidity Sensor
IV. ADDING REMOTE TEMPERATURE/HUMIDITY SENSORS (OPTIONAL) The WS-7138U is able to receive signals from 2 different remote temperature/humidity sensors. The remote temperature/humidity sensor model(s) that you choose will come with their own set of instructions— follow these instructions for a complete guide to setting up. Following are some brief instructions for the basic set-up of remote temperature/humidity sensor units with the WS-7138U. -
Page 17: Mounting
Also, extreme and sudden changes in temperature will decrease the accuracy of the indoor weather station. To achieve a true temperature reading, avoid mounting where direct sunlight can reach the remote temperature/ humidity sensor or indoor weather station. - Page 18 humidity reading in the temperature/ humidity portion of the LCD within 4 minutes of setting up. I. THE REMOTE TEMPERATURE/HUMIDITY SENSOR The remote temperature/humidity sensor can be mounted in three ways: • Mounting with screws • Mounting with adhesive tape •...
- Page 19 A. USING THE TABLE STAND The indoor weather station comes with the table stand already mounted. If you wish to use the table-stand all that is required is to place the indoor weather station in an appropriate location. B. WALL MOUNTING 1.
-
Page 20: Troubleshooting
2) Place remote temperature/humidity sensor closer to indoor weather station. 3) Be sure all batteries are fresh. 4) Place remote temperature/humidity sensor and indoor weather station in position so the straight-line signal is not passing through more than two or three walls. -
Page 21: Specifications
Indoor weather station: Remote temperature/humidity sensor: Battery life cycle: Recommended battery type: Dimensions (H x W x D) Indoor weather station (without stand): Remote temperature/humidity sensor: (excluding wall bracket) 14.2°F to 122.0°F with 0.2°F resolution (-9.9°C to 50.0°C with 0.1°C resolution) “OFL”... -
Page 22: Warranty Information
WARRANTY INFORMATION La Crosse Technology, Ltd provides a 1-year limited warranty on this product against manufacturing defects in materials and workmanship. This limited warranty begins on the original date of purchase, is valid only on products purchased and used in North America and only to the original purchaser of this product. To receive warranty service, the purchaser must contact La Crosse Technology, Ltd for problem determination and service procedures. - Page 23 interference.. This warranty covers only actual defects within the product itself, and does not cover the cost of installation or removal from a fixed installation, normal set-up or adjustments, claims based on misrepresentation by the seller or performance variations resulting from installation-related circumstances. LA CROSSE TECHNOLOGY, LTD WILL NOT ASSUME LIABILITY FOR INCIDENTAL, CONSEQUENTIAL, PUNITIVE, OR OTHER SIMILAR DAMAGES ASSOCIATED WITH THE OPERATION OR MALFUNCTION OF THIS PRODUCT.
- Page 24 This handbook may contain mistakes and printing errors. The information in this handbook is regularly checked and corrections made in the next issue. We accept no liability for technical mistakes or printing errors, or their consequences. All trademarks and patents are acknowledged. Freq. 433.92 MHz Made in China WS-7138U...
Need help?
Do you have a question about the WS-7138U and is the answer not in the manual?
Questions and answers