Table of Contents
Advertisement
Available languages
Available languages
Quick Links
Gebrauchshinweis
SARSTEDT Sediplus
DE
Gebrauchshinweis – SARSTEDT Sediplus
EN
Instructions for Use – SARSTEDT Sediplus
CS
Návod k obsluze – SARSTEDT Sediplus
ES
Instrucciones de uso – SARSTEDT Sediplus
FR
Mode d'emploi – SARSTEDT Sediplus
IT
Istruzioni d'uso - SARSTEDT Sediplus
NL
Gebruiksaanwijzing – SARSTEDT Sediplus
PL
PT
Instruções de utilização – Sediplus
®
SK
®
S 2000 NX
®
S 2000 NX
®
S 2000 NX
®
S 2000 NX
®
S 2000 NX
®
S 2000 NX
®
S 2000 NX
®
S 2000 NX
®
S 2000 NX
S 2000 NX SARSTEDT
®
S 2000 NX
2 - 55
56 - 109
110 - 163
164 - 217
218 - 271
272 - 325
326 - 379
380 - 433
434 - 487
488 - 541
1
Advertisement
Chapters
Table of Contents

Related Manuals for Sarstedt Sediplus S 2000 NX


Summary of Contents for Sarstedt Sediplus S 2000 NX
- Page 1 S 2000 NX ® Gebrauchshinweis – SARSTEDT Sediplus S 2000 NX 2 - 55 ® Instructions for Use – SARSTEDT Sediplus S 2000 NX 56 - 109 Návod k obsluze – SARSTEDT Sediplus ® S 2000 NX 110 - 163 Instrucciones de uso –...
-
Page 2: Grundlegende Hinweise
Das Urheberrecht der vorliegenden Gebrauchsanweisung hat die SARSTEDT AG & Co. KG. Die Gebrauchsanweisung ist nur für das bedienende Personal und für den Käufer des Gerätes bestimmt. Diese Gebrauchsanweisung darf ohne das schriftliche Einverständnis der SARSTEDT AG & Co. KG weder vollständig, noch in Teilen vervielfältigt oder verbreitet werden. Zuwiderhandlungen können strafrechtliche Folgen haben. -
Page 3: Table Of Contents
Inhaltsverzeichnis Grundlegende Hinweise! ..........................2 Allgemeine Informationen ........................5 Sicherheitshinweise ..........................5 Verwendungszweck ..........................9 EG-Konformitätserklärung ........................9 Einleitung ............................10 Beschreibung ............................10 Die Messgröße „Blutsenkung“ ......................10 Aufstellen des Gerätes / Installation .....................12 2.3.1 Technische Daten ..........................13 2.3.2 Auspacken, Transport und Lagerung ....................15 2.3.3 Lieferumfang ............................15 2.3.4 Anschließen einer PC-AT-Tastatur und / oder eines Barcode-Scanners ..........16 2.3.5... - Page 4 Störungen und Bedienungsfehler ......................39 Störung des Auf- und Abfahrens der Messplatte ..................39 Unterfüllte S-Sedivette ® ........................40 Falschmessung ............................41 ® Vorzeitiges Entnehmen einer S-Sedivette ...................42 Netzausfall............................44 Service und Wartung .........................44 Reinigen des Gerätes ...........................44 Qualitätskontrollen mit Test-Sedivetten ....................45 Messoptik ............................47 Wartung beim Hersteller ........................47 Außerbetriebnahme / Entsorgung .....................48 Allgemeine Vorsichtsmaßnahmen .....................48 Einschränkungen ..........................48...
-
Page 5: Allgemeine Informationen
• Für die bestimmungsgemäße Verwendung. • In sicherheitstechnisch einwandfreiem Zustand. In der Garantiezeit darf das Gerät nur von der Firma SARSTEDT AG & Co. KG oder von durch die Firma SARSTEDT AG & Co. KG autorisierte Personen repariert werden. Bei unsachgemäßer Handhabung oder Reparatur erlischt jeglicher Anspruch auf Gewährleistung. - Page 6 beim Aufstellen des Gerätes unbedingt auf Folgendes geachtet werden: • Erschütterungen des gefüllten Senkungssystems führen zu erhöhten Senkungswerten. Das Gerät muss daher auf einen festen Tisch oder auf eine vibrationsfreie Unterlage gestellt werden. Das Gerät darf zum Beispiel nicht gemeinsam mit einer Zentrifuge auf einem Labortisch stehen. •...
- Page 7 Füllstand und äußere Schäden (Schmutz, Kratzer etc.). Wiederholen Sie die Messung. Sollte der Fehler bestehen bleiben, wenden Sie sich bitte an die Service Abteilung der DESAGA GmbH in Wiesloch oder Ihre SARSTEDT Niederlassung vor Ort. ® Wenn Sie in die Position eine neue S-Sedivette einsetzen, wird das Messprotokoll der zuvor ®...
- Page 8 Beachten Sie unbedingt die Vorschriften zum Reinigen des Gerätes. Unachtsames Reinigen oder Nichtbeachten der Vorschriften können zu Funktionsstörungen führen! • Trennen Sie das Gerät zum Reinigen von der Spannungsversorgung • Ausnahme: Sie haben die Möglichkeit den Messtisch in die höchste Position zufahren, um die Gehäuseteile unter der Messplatte zu reinigen und das Touch-Display für 30 Sekunden zu deaktivieren, um dieses zu reinigen.
-
Page 9: Verwendungszweck
Software des Gerätes eindeutig erkannt. Probenmaterial: 1:4 (1 Teil Citrat + 4 Teile Blut) in S-Sedivetten (Art. Nr. 06.1690.xxx). *BSG = Blutkörperchensenkungsgeschwindigkeit auch Blutsenkungsgeschwindigkeit EG-Konformitätserklärung Die EG-Konformitätserklärung ist auf der Hompage der Sarstedt AG & Co. KG einzusehen www.sarstedt.com; https://www.sarstedt.com/en/download/declarations-of-conformity/... -
Page 10: Einleitung
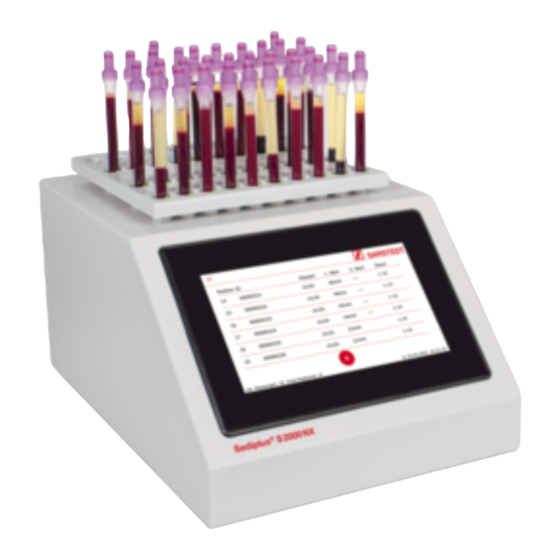
Einleitung Beschreibung Basierend auf der langjährigen Erfahrung von SARSTEDT auf dem Gebiet der Blutsenkung steht durch den Einsatz eines ® IR-Transmissions-Messverfahrens mit dem Sediplus S 2000 NX ein automatisches 40-Kanal-Blutsenkungsmessgerät zur Verfügung. ® Das Sediplus S 2000 NX wurde speziell für Labore mit zentraler Abarbeitung der Blutsenkung entwickelt. Nach den Messungen können die Ergebnisse einer EDV zugeführt werden. - Page 11 Das Sediplus ® Zeitpunkten gemessen, in Westergren mm umgewandelt und gemäß der normierten Westergren Methode nach 1 Stunde in ® x mm/h ausgegeben. Darüber hinaus bietet das Sediplus S 2000 NX auch die Möglichkeit, die Senkungswerte nach ½ und 2 Stunden in x mm/h auszugeben. Referenzwerte sollten auf lokaler Ebene in Übereinstimmung mit den Empfehlungen für Referenzwerte festgelegt werden.
-
Page 12: Aufstellen Des Gerätes / Installation
Aufstellen des Gerätes / Installation Folgendes geachtet werden: • Erschütterungen des gefüllten Senkungssystems führen zu fälschlich erhöhten Senkungswerten. Das Gerät muss daher auf einen festen Tisch oder auf eine vibrationsfreie Unterlage gestellt werden. Das Gerät darf zum Beispiel nicht gemeinsam mit einer Zentrifuge auf einem Labortisch stehen. •... -
Page 13: Technische Daten
Technische Daten Hersteller- und Gerätedaten ® Gerät: Sediplus S 2000 NX Bestellnummer: SARSTEDT Nr. 90.1092 Hersteller: SARSTEDT AG & Co. KG Anschrift: Sarstedtstraße 1 D-51582 Nümbrecht Gerätedaten Messprinzip: IR-Transmissions-Messverfahren mit Fremdlichtkompensation Blutsenkungsmessung in der SARSTEDT S-Sedivette ® Umrechnung in Westergren-Werte Messgenauigkeit: ±... - Page 14 Messplätze: 40 Positionen Datenspeicherung: Eine eingebaute Batterie sorgt für den Datenerhalt (Messdaten, Datum, Uhrzeit) bei Stromausfall Datenausgabe auf: - Display - Drucker - EDV / HL7 Spannungsversorgung: 110-230 V~, (-10/+10 %), 50-60 Hz Leistungsaufnahme: 16 W Sicherungen: 0,8 AT (2 Stück Schmelzsicherungen, 5 x 20 mm) Störaussendung und Das Gerät ist entsprechend den Anforderungen an die Störaussendung und Störfestigkeit Störfestigkeit...
-
Page 15: Auspacken, Transport Und Lagerung
® Das Sediplus S 2000 NX (SARSTEDT Nr. 90.1092) ist mit dem kompletten Zubehör in einem Karton verpackt. • Prüfen Sie die Unversehrtheit des Verpackungskartons und des Gerätes. • Bei Transportschäden wenden Sie sich sofort an den Spediteur! Beachten Sie die Meldefrist der einzelnen Transportunternehmen (Bahn, Post, Paketdienste oder Spedition). -
Page 16: Anschließen Einer Pc-At-Tastatur Und / Oder Eines Barcode-Scanners
2.3.4 Anschließen einer PC-AT-Tastatur und / oder eines Barcode-Scanners Beim Anschließen und beim Entfernen der Verbindung eines oder mehrerer Peripheriegeräte (Barcode-Scanner, PC-AT-Tastatur, EDV und / oder Drucker) muss das Sediplus ® S 2000 NX unbedingt vom Versorgungsnetz getrennt werden! ® Auf der Rückseite des Sediplus Netzwerk auch zwei USB-Anschlüsse für den Anschluss von Peripheriegeräten: Sie haben die Möglichkeit an den beiden USB-Anschlüssen einen Barcode-Scanner, eine PC-AT-Tastatur... -
Page 17: Anschließen Eines Optionalen Druckers
2.3.5 Anschließen eines optionalen Druckers Sie haben die Möglichkeit an den beiden USB-Anschlüssen einen Barcode-Scanner, eine PC-AT-Tastatur oder einen Drucker anzuschließen. Stecken Sie den USB-Anschluss des Druckers in die USB-Anschlussbuchse an der Rückseite des Gerätes, siehe Abbildung 1. Unter dem Menüpunkt Druckeinstellungen (siehe Kapitel 5.1.7) haben Sie die Möglichkeit die Funktion des Druckers zu testen. -
Page 18: Beschreibung Der Hl7-Schnittstelle
Basis des HL7 Standards programmiert wurde. Diese von dem Gerät übermittelte Nachricht ist folgendermaßen aufgebaut: MSH Segment Position Daten Beschreibung Segmentname Feldtrennzeichen ^~\& weitere Trennzeichen S2000 Sendende Anwendung Sarstedt Sendender Prozess Receiving Application Receiving Facility YYYYMMDDHHMMSS Zeitpunkt Nachrichtenerstellung Leer OML^O21 Nachrichtentyp und Ereignis Nachrichtenkontrollnummer Verarbeitungsmodus HL7 Versionsnummer... - Page 19 OBR Segment Position Daten Beschreibung Segmentname 1 für OBR 1 OBR Segmentnummer 2 für OBR 2 Auftragsnummer, hier: Barcode Leer Leer Leer YYYYMMDDHHMMSS Zeitpunkt der Messung Leer Leer Leer Leer Leer Leer Leer Leer Leer Leer Leer Leer Messwert Eventuell zusätzliche Angaben zum Messwert (?) Beispiel: Eine vollständige HL7 Nachricht für den Barcode 1234567 mit den zwei Messwerten 1.11 um 14:35:00 und 2.22 um 15:05:00, gemessen am 30.10.2020 würde dann wie folgt aussehen:...
-
Page 20: Die Funktionselemente Des Sediplus S 2000 Nx
In der Messplatte ist die Sensorik zur Senkungsmessung untergebracht. Daher darf die Messplatte in ihrer Bewegung (Auf- und Abfahren bei der Messung) nicht behindert werden. Verwenden Sie als Patientenblut-Träger für Sediplus ® S 2000 NX ausschließlich die S-Sedivette ® von SARSTEDT. Mit anderen Röhrchen, z.B. Westergren Röhren, erhalten Sie falsche Blutsenkungs-Werte. -
Page 21: Die Leuchtdioden Der Messplatte
Die Leuchtdioden der Messplatte Die Leuchtdioden zeigen die verschiedenen Zustände der dazugehörigen Position bzw. des gesamten Gerätes an. Alle 40 Leuchtdioden blinken gleichzeitig. Optische Signalisierung: Die Messplatte wird in den nächsten 5 Sekunden zur Messung nach oben und wieder nach unten gefahren. -
Page 22: Das Display
Das Display ® Das Sediplus S 2000 NX verfügt zur Bedienung und zur Anzeige der Messwerte über ein modernes Touch-Display. Über das Display können Sie mit Hilfe des Bedienerpanels alle Messdaten von beendeten und laufenden Messungen abfragen. Der Gerätestatus - Datum, Wochentag, Uhrzeit, Anzahl der freien und bestückten Positionen und die Anzahl der beendeten Messungen - wird über das Display ausgegeben. -
Page 23: Bedienung Des Sediplus S 2000 Nx
® Bedienung des Sediplus S 2000 NX Einschalten des Gerätes Schalten Sie das Sediplus ® S 2000 NX am Netzschalter an der Rückseite des Gerätes ein. Sie sehen die folgende Displayansicht. In der unteren rechte Ecke der Ansicht erkennen Sie die aktuell auf dem Gerät aufgespielte Softwareversion. Diese können Sie unter dem Menüpunkt Service (Kapitel 5.2) später wieder einsehen. -
Page 24: Vorbereiten Der Proben
Die einzelnen Menüpunkte werden in Kapitel 5 erläutert. Vorbereiten der Proben Bitte beachten Sie auch in der Fachliteratur beschriebene Störfaktoren (z.B. Paraproteinämie, ungewöhnlichen Blutproben ggf. die Plausibilität des Messergebnisses. • Verwenden Sie ausschließlich die S-Sedivetten für das SARSTEDT Blutsenkungssystem Sediplus ® S 2000 NX. -
Page 25: Einsetzen Der S-Sedivette Und Starten Einer Messung
® enthaltene Mischkugel 5x mal durch die gesamte Blutprobe wandert, oder schonend und komfortabel mit einem speziell für diese ® Aufgabe entwickelten Gerät der SARSTEDT AG & Co. KG, dem Sarmix M 2000 (Siehe Kapitel 9 Bestellinformationen). ® Verwenden Sie den SARSTEDT Sarmix , um sorgfältig und schonend zu mischen. - Page 26 Möglichkeit 2: ® Der Barcode oder die Patienten ID-Nummer liegt separat vor (also nicht nur auf der S-Sedivette - Wenn die Patienten ID-Nummer nicht auf der S-Sedivette ® steht, können Sie eine S-Sedivette ® in eine freie Messpositionen setzen ohne zuvor eine Taste zu drücken. - Mit dem Einsetzen ist die Messung automatisch gestartet.
- Page 27 - Es erscheint folgendes Display: Abbildung 13: Eingabe der ID - Geben Sie die ID-Nummer ein. Sie können die ID-Nummer über das Touch-Display oder über eine optionale PC-AT-Tastatur eingeben und mit der Taste [OK] bestätigen. Eine weitere Möglichkeit ist, die im Display vorgeschlagene ID-Nummer (fortlaufend nicht patientenzugeordnet) durch Drücken der Taste [OK] zu übernehmen.
-
Page 28: Auswahl Der Messzeitpunkte
Auswahl der Messzeitpunkte Durch das Gerät wird die Blutsenkung einer Probe nach ½ h und nach 1 h automatisch bestimmt. Sie haben die Möglichkeit die Messzeitpunkte nach 1 h und 2 h auszuwählen. Dies können Sie optional beim Starten jeder Messung im Eingabefenster auswählen (siehe Abbildung 15) oder global für alle Messungen in den Einstellungen festlegen, siehe 5.1.3 Messeinstellungen. -
Page 29: Eingabe Der Id-Nummer Mittels Eines Barcode-Scanners (Optional)
4.5.1 Eingabe der ID-Nummer mittels eines Barcode-Scanners (optional) Eine weitere Möglichkeit die ID-Nummer einzugeben, ist das Scannen der Nummer mit einem optionalen Barcode-Scanner. (Oft ist die Patienten ID-Nummer als Barcode auf der S-Sedivette ® angebracht oder auf einem Patientenbogen vorrätig.) ®... -
Page 30: Betrachten Bereits Ermittelter Werte Während Einer Messung
Betrachten bereits ermittelter Werte während einer Messung In der Hauptansicht werden alle Messergebnisse zu jeder Zeit dargestellt. Es werden generell nur in Westergren-Werte umgerechnete Messwerte angezeigt. Je nach eingestellter Option (siehe Kapitel 5.1.3 Messeinstellungen) ist die Messwertermittlung für eine Position nach einer Stunde (½h/1h Option) oder nach zwei Stunden (1h/2h Option) beendet. -
Page 31: Akustische Unterstützung
Achtung! Wenn Sie in die Position eine neue S-Sedivette ® einsetzen, wird das Messprotokoll der zuvor entnommenen S-Sedivette ® dieser Position sofort gelöscht. Die Daten stehen nicht mehr zur Verfügung! Es wird empfohlen die Optionen zur Datenübermittlung an ein EDV-System oder einen Drucker zu nutzen, siehe Kapitel 2.3.5 oder 2.3.6. -
Page 32: Erneuter Ausdruck / Wiederholen Des Druckvorgangs
Erneuter Ausdruck / Wiederholen des Druckvorgangs Wurde vor Beginn der Messungen der Drucker aktiviert, siehe 5.1.7 Druckeinstellungen, wird das Messprotokoll nach Ablauf der voreingestellten Messzeit automatisch gedruckt. ® Solange die S-Sedivette nicht aus dem Gerät entnommen wurde haben Sie die Möglichkeit die Zeile mit den Messergebnissen auf der Hauptansichtsseite auszuwählen. -
Page 33: Menü
Menü Durch Antippen der Menütaste (siehe Abbildung 21) gelangen Sie in das Menü. Hier haben Sie die Möglichkeit verschiedenen Optionen einzustellen und Service, sowie Reinigungsfunktionen aufzurufen. Darüber hinaus können Fehlermeldungen angezeigt und gelöscht werden. Abbildung 21: Aufrufen des Menüs Einstellungen Durch Auswahl des Menüpunktes „Einstellungen“... -
Page 34: Sprache
5.1.1 Sprache Sie haben die Möglichkeit zwischen der Sprache Deutsch und Englisch zu wählen Abbildung 23: Spracheinstellungen 5.1.2 Start-ID Im Menüpunkt Start-ID haben sie die Möglichkeit die fortlaufende ID-Nummer auf einen Beliebigen Wert zu setzen. Dazu tippen Sie in das Feld mit der angezeigten ID-Nummer und geben die gewünschte Nr., z.B. 00000001 über die Display- Tastatur oder die optional angeschlossenen PC-AT-Tastatur ein. -
Page 35: Unterfüllungsgrenze 5
- Die S-Sedivetten sind dann korrekt gefüllt, wenn der Kolben voll ausgezogen wird, bis in die Klick Position (siehe ® Gebrauchshinweis der S-Sedivette www.sarstedt.com/en/download/instructions-for-use). ® - Beim Abbrechen des Kolbens ist darauf zu achten, dass er nicht wieder ein Stück in die S-Sedivette geschoben wird. -
Page 36: Datum
5.1.5 Datum ® Das Sediplus S 2000 NX verfügt über eine eingebaute elektronische Uhr. In dem Menü der Einstellungen haben Sie die Möglichkeit, Datum und Uhrzeit, sowie das angezeigte Format einzustellen. Abbildung 27: Datum einstellen Abbildung 28: Datumsformat einstellen 5.1.6 Uhrzeit Das Sediplus ®... -
Page 37: Druckeinstellungen
5.1.7 Druckeinstellungen Sollen Messprotokolle über einen an die USB- Schnittstelle angeschlossen Drucker ausgedruckt werden, so ist die Druckschnittstelle in den Einstellungen zu aktivieren. Die Funktion des Druckers kann in diesem Menüpunkt (Testdruck) überprüft werden. Abbildung 30: Druckeinstellungen Ist der Drucker aktiviert wird nach dem Beenden einer Messung das Messprotokoll automatisch ausgedruckt. Abbildung 31: Gedrucktes Messprotokoll Ist ein Druck nicht möglich werden die Messergebnisse auch nach dem Entnehmen der S-Sedivette ®... -
Page 38: Netzwerkeinstellungen / Hl7
Auf der Displayanzeige erscheint unter den Messwerten ein Warnhinweis Abbildung 33: Ergebnisanzeige mit Druckfehler 5.1.8 Netzwerkeinstellungen / HL7 In diesem Menüpunkt werden die notwendigen Daten eingegeben, um das Gerät mit einem LIS (Laborinfomationssystem) zu koppeln. Folgende Daten werden benötigt: • Server-IP •... -
Page 39: Service
Service Im Service-Menü sind Menüpunkte enthalten, welche für die Wartung des Gerätes relevant sind. Diese Menüpunkte werden durch die Servicetechniker des Herstellers aufgerufen. Fehler In diesem Menüpunkt werden mögliche Fehlermeldungen angezeigt. Diese können, wie dargestellt gelöscht werden. Abbildung 36: Fehlermeldung löschen Störungen und Bedienungsfehler Bitte beachten Sie auch in der Fachliteratur beschriebene Störfaktoren (z.B. -
Page 40: Unterfüllte S-Sedivette
® Unterfüllte S-Sedivette Die S-Sedivetten müssen für die Blutsenkung korrekt gefüllt sein. Dazu ist schon bei der Blutabnahme darauf zu achten, dass die SARSTEDT S-Sedivetten richtig gehandhabt werden (siehe Gebrauchshinweis ® der S-Sedivetten). Online Gebrauchshinweis: Sedivette GB 512 unter: www.sarstedt.com/en/download/instructions-for-use •... -
Page 41: Falschmessung
® Überprüfen Sie die S-Sedivette auf Füllstand und äußere Schäden (Schmutz, Kratzer etc.). Wiederholen Sie die Messung. Sollte der Fehler bestehen bleiben, wenden Sie sich bitte an die Serviceabteilung der DESAGA GmbH in Wiesloch oder Ihre SARSTEDT Niederlassung vor Ort. -
Page 42: Vorzeitiges Entnehmen Einer S-Sedivette
® Vorzeitiges Entnehmen einer S-Sedivette Das vorzeitige Entnehmen einer S-Sedivette ® wird von dem Gerät als Fehler erkannt. Dies liegt dann vor, wenn eine S-Sedivette ® aus ihrer Position entnommen wurde, die Messung jedoch noch nicht beendet ist ® (beachten Sie auch Kapitel 4.3 Einsetzen der S-Sedivette und Starten einer Messung). - Page 43 Abbildung 41: Ergebnisanzeige mit Hinweis Messung verspätet Achtung! Dieses Protokoll ist nur 15 Sekunden zu sehen. Sie können die Messwerte der entnommenen S-Sedivetten zu einem späteren Zeitpunkt betrachten. Dies ist für die Werte einer Position nur so lange möglich, wie keine neue S-Sedivette ®...
-
Page 44: Netzausfall
Netzausfall Wird im Verlauf einer Messung das Gerät vom Versorgungsnetz getrennt, tritt kein Fehler auf, solange in den Zeitraum des Versorgungsnetz-Ausfalls keine Messwerterfassung fällt. Die eingebaute Batterie sorgt dafür, dass die bereits ermittelten Daten erhalten (gespeichert) bleiben. Dies gilt auch dann, wenn Sie das Gerät nach Beendigung aller Messungen ausschalten und erst am nächsten Tag auf die Werte zugreifen möchten. -
Page 45: Qualitätskontrollen Mit Test-Sedivetten
Empfehlung: Lassen Sie Ihr Gerät einmal im Jahr vom Hersteller warten. Überprüfen Sie die korrekte Arbeitsweise Ihres Gerätes zu Beginn jeder Messreihe mit den SARSTEDT GmbH Service Zentrale überprüfen lassen. Menüpunkt kann nur ausgewählt werden, wenn keine laufende Messungen vorhanden sind. - Page 46 • Betätigen Sie die Taste Messung Starten • Setzen Sie die erste vollgefüllte Test-Sedivette in das Gerät ein • • Entnehmen Sie die Test-Sedivette, und setzen die zweite Test-Sedivette mit der mittleren Füllung in dieselbe Position wie die Erste. • Das Gerät scannt die Test-Sedivette erneut und berechnet den ersten Messwert, dieser wird sowohl in Millimetern als auch in mm-Westergren angezeigt.
-
Page 47: Messoptik
Defekte oder fehlerhafte Geräte werden im Rahmen eines Post-Reparatur-Servicesystems schnellstmöglich durch unsere Servicezentrale überprüft und repariert. Hierzu sollten Sie das defekte Gerät mit einer Fehlerbeschreibung, dem ausgefüllten Kontaminationsfragebogen und einer Kopie des Lieferscheines in der Originalverpackung an die nachfolgende Adresse oder Ihre lokale SARSTEDT Verkaufsagentur schicken. DESAGA GmbH / SARSTEDT-GRUPPE... -
Page 48: Außerbetriebnahme / Entsorgung
Rechtsvorschriften unbedingt fach- und sachgerecht zu handhaben und zu entsorgen. Bei Außerbetriebnahme des Gerätes wenden Sie sich bitte an den Hersteller Sarstedt AG & Co. KG, welcher das Gerät zurücknimmt und fachgerecht für Sie entsorgt. -
Page 49: Bestellinformationen
18.1325.100 ® BSG-Ständer für die Microvette CB 200 BSG, mit skalierter Rückwand 90.1091 Sollten Sie Fragen zu weiteren SARSTEDT Produkten oder zu dem SARSTEDT Lieferprogramm haben, setzen Sie sich bitte mit: SARSTEDT AG & Co. KG Sarstedtstraße 1 D-51582 Nümbrecht... -
Page 50: Gewährleistung Und Haftung
40 Probeaufnahmen für S-Sedivette Raumtemperatur Temperaturbereich, 18-25° C nach CLSI H02 – A5(1), oder gemäß landes- HL7-Schnittstelle Schnittstelle zur Übermittlung von Messdaten an ein Laborinformationssystem (LIS) Senkungsgeschwindigkeit Absinken der Erythrozyten in x mm/h ® S-Sedivette Sicherheitsblutentnahmesystem von SARSTEDT Westergren Senkungswert in mm/h... -
Page 51: Abbildungsverzeichnis
Abbildungsverzeichnis ® Abbildung 1: Rückwand des Sediplus S 2000 NX ...................13 Abbildung 2: Barcode-Scanner testen ......................16 Abbildung 3: Testdruck .............................17 Abbildung 4: Vorderansicht auf das Sediplus ® S 2000 NX .................20 ® Abbildung 5: S-Sedivette entfernt ........................21 Abbildung 6: Hauptansicht ..........................22 Abbildung 07: Start-Bildschirm .........................23 Abbildung 08: Startbildschirm mit der Statusanzeige ..................23 Abbildung 09: Aufrufen des Menüs ........................24... -
Page 52: Literatur
Literatur 1) CLSI* H2-A5 2011: Procedures for Erythrocyte Sedimentation Rate Test. 2) Thomas, L.: Labor und Diagnose. Digitale Ausgabe Labor & Diagnose 2020; Kapitel 19.3.2 Blutkörperchensenkungs- Reaktion (BSR) (www.labor-und-diagnose-2020.de/k19.html#_idTextAnchor8638) 3) ICSH recommendations for measurement of erythrocyte sedimentation rate. J. Clin. Pathol. 1993 46:198-203 *CLSI (Clinical and Laboratory Standards Institute) 4) Bruhn et al;... -
Page 53: Symbol Und Kennzeichenschlüssel
Symbol und Kennzeichenschlüssel Diese Gebrauchsanweisung enthält folgende wichtige Symbole, um auf Gefahren und Bedienungsfehler hinzuweisen. Im ® S 2000 NX. Dieses „Achtung“ Zeichen bedeutet, dass in dem Abschnitt: • Wichtige Hinweise gegeben werden. • Eine unmittelbare oder möglicherweise drohende Gefahr für das Leben und die Gesundheit von Personen beschrieben ist. - Page 54 Chargenbezeichnung CE-Zeichen In-vitro-Diagnostikum Hersteller Land der Herstellung Herstellungsdatum Seriennummer Getrennte Sammlung von Elektro- und Elektronikgeräten Alle in Zusammenhang mit dem Produkt aufgetretenen schwerwiegenden Vorfälle sind dem Hersteller und der zuständigen nationalen Behörde zu melden.
-
Page 55: Kontaminationsfragebogen
Schicken Sie das Gerät zusammen mit dem ausgefüllten Kontaminations-Fragebogen, einer kurzen Beschreibung des aufgetretenen Problems und einer Kopie des Lieferscheins an die Service Abteilung der DESAGA GmbH / SARSTEDT-GRUPPE Wiesloch oder an Ihre lokale SARSTEDT Verkaufsagentur. Tabelle 3: Konatminationsfragebogen Kontaminations-Fragebogen bei Reparatur-Aufträgen... -
Page 56: Basic Notes
Copyright: SARSTEDT AG & Co. KG is the copyright holder of these Instructions for Use. The Instructions for Use are intended only for the operating personnel and for the purchaser of the device. These Instructions for Use may not be reproduced or distributed in whole or in part without the written consent of SARSTEDT AG &... - Page 57 Table of Contents Basic notes! ..............................56 General information ..........................59 Safety information ..........................59 Intended use ............................63 EC Declaration of Conformity .......................63 Introduction ............................64 Description ............................64 The "blood sedimentation" measurement .....................64 Setting up the device / Installation ......................66 2.3.1 Technical data: .............................67 2.3.2 Unpacking, transport and storage ......................69 2.3.3...
- Page 58 Faults and operating errors........................93 Fault in the opening and closing of the measuring plate ................93 ® ........................94 Incorrect measurement ........................95 ® Premature removal of an S-Sedivette ....................96 Mains failure ............................98 Service and maintenance ........................98 Cleaning the device ..........................98 Quality controls with test Sedivettes .....................99 Measurement optics ...........................101 Maintenance at the manufacturer's premises ..................101 Decommissioning / Disposal ......................102...
-
Page 59: General Information
• For the intended purpose. • In faultless condition in terms of safety. During the device’s warranty period, only the company SARSTEDT AG & Co. KG or persons authorised by the company SARSTEDT AG & Co. KG may repair the device. - Page 60 that the information below be noted when setting up the device: • For example, the device must not stand on a laboratory table together with a centrifuge. • The S-Sedivettes may not be scratched, dusty or contaminated under any circumstances. •...
- Page 61 ® • Only use the S-Sedivettes for the SARSTEDT blood sedimentation system Sediplus S 2000 NX. • The surface of the S-Sedivettes must be clean. There must be no residues from labels or powder traces from gloves on it.
- Page 62 Be sure to observe the instructions for cleaning the device. Careless cleaning or failure to observe the regulations can lead to malfunctions! • Disconnect the appliance from the power supply to clean it • Exception: You have the option to move the measuring plate to the highest position to clean the housing parts under the measuring plate and to deactivate the touch display for 30 seconds to clean it.
-
Page 63: Intended Use
(1 part citrate + 4 parts blood) in S-Sedivettes (Art. No. 06.1690.xxx). *ESR = Erythrocyte sedimentation rate EC Declaration of Conformity The EC Declaration of Conformity can be viewed in various languages on the website of SARSTEDT AG & Co KG www.sarstedt.com; https://www.sarstedt.com/en/download/declarations-of-conformity/... -
Page 64: Introduction
ESR values (5). In contrast, the increase in concentration of negatively charged plasma proteins leads to slower sedimentation of the erythrocytes and thus to lower ESR measured values. To perform the blood sedimentation, 2.8 ml of venous blood are taken up in the SARSTEDT S-Sedivette ®... - Page 65 The Sediplus ® points in time, converted into Westergren mm and output after 1 hour in x mm/h according to the standardised Westergren ® method. In addition, the Sediplus and 2 hours. Reference values should be set at the local level in accordance with the recommendations for reference values. In view of the progressive increase in ESR with age, separate values should be set for each decade of adult life for men and medications, menstrual cycle, pregnancy and smoking.
-
Page 66: Setting Up The Device / Installation
Setting up the device / Installation the device: • For example, the device must not stand on a laboratory table together with a centrifuge. • The S-Sedivettes may not be scratched, dusty or contaminated under any circumstances. • The device must therefore be set up in such a way that the S-Sedivettes stand upright and the S-Sedivettes can be loaded from above. -
Page 67: Technical Data
Address: Sarstedtstraße 1 D-51582 Nümbrecht Device data Measuring principle: IR transmission measurement method with extraneous light compensation Blood sedimentation measurement in the SARSTEDT S-Sedivette ® Conversion to Westergren values Measurement accuracy: +/- 1 mm of the measurement path Measuring range: 0-65 mm, this corresponds to a sedimentation value range of 0-116 mm according ®... - Page 68 Data storage: A built-in battery ensures data retention (measured data, date, time) in the event of a power failure Data output to: - Display - Printer - EDP / HL7 Power supply: 110-230 V~, (-10 /+10 %), 50-60 Hz Power consumption: 16 W Fuses: 0.8 AT (2 fuses, 5 x 20 mm)
-
Page 69: Unpacking, Transport And Storage
® The Sediplus S 2000 NX (SARSTEDT No. 90.1092) is packed with all accessories in a box. • Check the integrity of the packaging box and the device. • In case of transport damage, contact the carrier immediately! Observe the reporting deadline of the individual transport companies (rail, mail, parcel services or freight forwarder). -
Page 70: Connecting A Pc-At Keyboard And / Or A Barcode Scanner
2.3.4 Connecting a PC-AT keyboard and / or a barcode scanner When connecting and removing the connection of one or more peripheral devices (barcode scanner, PC-AT keyboard, EDP and / or printer), the Sediplus ® S 2000 NX must be disconnected from the power supply! ®... -
Page 71: Connecting An Optional Printer
2.3.5 Connecting an optional printer You can connect a barcode scanner, a PC-AT keyboard or a printer to the two USB ports. Insert the USB connecion of the printer into the USB port on the back of the device, see Figure 1. Under the menu item Print settings (see chapter 5.1.7), you have the option of testing the functioning of the printer. -
Page 72: Description Of The Hl7 Interface
HL7 standard. This message transmitted by the device is structured as follows: MSH Segment Position Data Description Segment name Field separator ^~\& additional separators S2000 Sending application Sarstedt Sending process Receiving Application Receiving Facility YYYYMMDDHHMMSS Time of message creation Blank OML^O21 Message type and event Message control number Processing mode... - Page 73 OBR segment Position Data Description Segment name 1 for OBR 1 OBR segment number 2 for OBR 2 Order number, here: Barcode Blank Blank Blank YYYYMMDDHHMMSS Time of measurement Blank Blank Blank Blank Blank Blank Blank Blank Blank Blank Blank Blank Measured value If applicable, additional information on the measured value (?)
-
Page 74: The Functional Elements Of The Sediplus ® S 2000 Nx
(moving up and down during the measurement). ® ® Use only the S-Sedivette from SARSTEDT as a patient blood carrier for Sediplus S 2000 NX. With other tubes, such as Westergren tubes, you will get incorrect blood sedimentation values. -
Page 75: The Light Emitting Diodes Of The Measuring Plate
The light emitting diodes of the measuring plate The light-emitting diodes indicate the various states of the associated position or of the entire device. Optical signalling: The measuring plate is moved up and down in the next 5 seconds for measurement. During this time, no S-Sedivettes may be used. -
Page 76: The Display
The Display ® The Sediplus S 2000 NX has a modern touch display for operating and displaying the measured values. With the help of the operator panel, you can query all measurement data from completed and ongoing measurements via the display. The device by touching the touch display, in the lower right corner you can sort the measurement results according to your needs. -
Page 77: Operation Of The Sediplus S 2000 Nx
® Operation of the Sediplus S 2000 NX Switching the device on Switch on the Sediplus ® S 2000 NX at the power switch on the back of the device. You will see the following display view. In the lower right corner of the view, you can see the software version currently installed on the device. You can view these again later under the menu item Service (Chapter 5.2). -
Page 78: Preparation Of Samples
® • Only use the S-Sedivettes for the SARSTEDT blood sedimentation system Sediplus S 2000 NX. • The surface of the S-Sedivettes must be clean. There must be no residues from labels or powder traces from gloves on it. -
Page 79: Inserting The S-Sedivette And Starting A Measurement
5 times through the entire blood sample, or gently and comfortably with a device specially developed for this task by ® SARSTEDT AG & Co. KG, the Sarmix M 2000 (see Chapter 9 Ordering Information). ® Use the SARSTEDT Sarmix to mix carefully and gently. - Page 80 Option 2: ® The barcode or the patient ID number is available separately (i.e. not only on the S-Sedivette - If the patient ID number is not on the S-Sedivette ® , you can insert an S-Sedivette ® in a vacant measuring position - Once inserted, the measurement starts automatically.
- Page 81 - The following display appears: Figure 13: Entering the ID - Enter the ID number. Another possibility is to accept the ID number proposed in the display (not consistently assigned to the patient) by pressing the [OK] key. - The following display appears: Figure 14: Insert S-Sedivette ®...
-
Page 82: Selecting The Measurement Times
Selecting the measurement times The device automatically determines the blood sedimentation of a sample after ½ h and after 1 h. You have the option to select the measurement times after 1 h and 2 h. You can choose between selecting this when starting each measurement in the input window (see Figure 15) or setting it globally for all measurements in the settings, see 5.1.3 Measurement settings. -
Page 83: Entering The Id Number Using A Barcode Scanner (Optional)
4.5.1 Entering the ID number using a barcode scanner (optional) Another way to enter the ID number is to scan the number with an optional barcode scanner. (Often the patient ID number is ® or is available on a patient sheet.) ®... -
Page 84: Viewing Already Determined Values During A Measurement
Viewing already determined values during a measurement In the main view, all measurement results are displayed at any time. In general, only measured values converted into Westergren values are displayed. Depending on the selected option (see chapter 5.1.3 Measurement settings), the measurement value determination for one position is completed after one hour (½h/1h option) or after two hours (1h/2h option). -
Page 85: Acoustic Support
Important! If you insert a new S-Sedivette ® into the position, the measurement log of the previously removed S-Sedivette ® from this position will be immediately deleted. The data will no longer be available! It is recommended to use the options for data transmission to a computer system or a printer, see chapter 2.3.5 or 2.3.6. -
Page 86: Reprinting / Repeating The Printing Process
Reprinting / repeating the printing process If the printer was activated before the start of the measurements, see 5.1.7 Print settings, the measurement log is automatically printed after the preset measurement time has elapsed. ® As long as the S-Sedivette has not been removed from the device, you have the option of selecting the line with the measurement results on the main view page. -
Page 87: Menu
Menu service and cleaning functions. In addition, error messages can be displayed and deleted. Figure 21: Accessing the menu Settings Selecting the menu item "Settings" takes you to the following display view. You can use the touch display to scroll up and down the list of settings. -
Page 88: Start Id
5.1.2 Start ID displayed ID number and enter the desired number, e.g. 00000001, via the display keyboard or the PC-AT keyboard which you may have chosen to connect. The ID number is then incremented by one counter for each newly inserted S-Sedivette ®... -
Page 89: Deleting Measurement Results
- If the S-Sedivette , the measurement ® (see Instructions for Use of the S-Sedivette www.sarstedt.com/en/download/instructions-for-use). ® Changing the limit is at the discretion of the operating personnel, the laboratory management or S-Sedivettes. When evaluating measured values, note that the maximum evaluation distance extends from the shortens the usable measuring range for S-Sedivettes which contain a lower initial volume (see Chapter ®... -
Page 90: Date
5.1.5 Date The Sediplus ® S 2000 NX has a built-in electronic clock. In the Settings menu, you can set the date, time and the displayed format. Figure 27: Set date Figure 28: Set date format 5.1.6 Time ® The Sediplus S 2000 NX has a built-in electronic clock. -
Page 91: Printer Settings
5.1.7 Printer settings If measurement logs are to be printed via a printer connected to the USB interface, the print interface must be activated in the Settings. The functionality of the printer can be checked in this menu item (test print). Figure 30: Printer settings If the printer is activated, the measurement log is automatically printed after a measurement is completed. -
Page 92: Network Settings / Hl7
A warning message appears on the display under the measured values Figure 33: Results display with printing error 5.1.8 Network settings / HL7 In this menu item, the necessary data is entered to connect the device with an LIS (laboratory information system). The following data is required: •... -
Page 93: Service
Service The service menu contains menu items that are relevant for the maintenance of the device. These menu items are called up by the manufacturer's service technicians. Errors Possible error messages are displayed in this menu item. These can be deleted as shown. Figure 36: Delete error message Faults and operating errors Please also note the interfering factors described in the specialist literature (e.g. - Page 94 ® to ensure that the SARSTEDT S-Sedivettes are handled correctly during the blood collection ® (see Instructions for Use of the S-Sedivettes). Online instructions for use: S-Sedivette ; GB 512 at: www.sarstedt.com/en/download/instructions-for-use • ® the plunger rod, nothing is pushed back into the S-Sedivette •...
-
Page 95: Incorrect Measurement
The measured value will be marked with a minus sign. A negative value can only occur due to an incorrect measurement. ® Check the S-Sedivette measurement. If the error persists, please contact the service department of DESAGA GmbH in Wiesloch or your local SARSTEDT branch. -
Page 96: Premature Removal Of An S-Sedivette
® Premature removal of an S-Sedivette The premature removal of an S-Sedivette ® is recognised by the device as an error. This is the case if an S-Sedivette ® has been removed from its position, but the measurement has not yet been completed ®... - Page 97 Figure 41: Result display with Measurement delayed note Important! This log can only be seen for 15 seconds. You can view the measured values of the extracted S-Sedivettes at a later point in time. This is only possible for the values of a position as long as no new S-Sedivette ®...
-
Page 98: Mains Failure
Mains failure If the device is disconnected from the mains supply during a measurement, no error occurs as long as no measured value is recorded during the period of the mains supply failure. device after completing all measurements and only want to access the values the next day. However, if a measured value is detected during the period of the mains failure, the power of the built-in battery is not After the mains supply is restored, the device recovers the overdue measurement(s). -
Page 99: Quality Controls With Test Sedivettes
Be sure to observe the instructions for cleaning the device. Careless cleaning or failure to observe the regulations can lead to malfunctions! • Disconnect the appliance from the power supply to clean it • Exception: • You have the option to move the measuring table to the highest position to clean the housing parts under the measuring plate and to deactivate the touch display for 30 seconds to clean it. - Page 100 • Press the Start measurement button • • • • and in mm-Westergren. • • The device will scan the test Sedivette again and calculate the second measured value, which in turn is displayed both in millimetres and in mm-Westergren. Figure 44: Test measurement To interpret the results, please compare the values displayed in your device with the following table: Table 2...
-
Page 101: Measurement Optics
To have this carried out, you should send the defective device with a fault description, the completed contamination questionnaire and a copy of the delivery note in the original packaging to the following address or your local SARSTEDT sales agency. -
Page 102: Decommissioning / Disposal
When decommissioning the device, please contact the manufacturer SARSTEDT AG & Co. KG, who will take back the device and dispose of it for you in accordance with professional requirements. -
Page 103: Order Information
® ESR rack for the Microvette CB 200 ESR with graduated real wall 90.1091 If you have any questions about other SARSTEDT products or the SARSTEDT product range, please contact: SARSTEDT AG & Co. KG Sarstedtstraße 1 D-51582 Nümbrecht Phone: +49 2293 305 0... -
Page 104: Warranty And Liability
Temperature range, 18-25° C according to CLSI H02 – A5(1), or according HL7 interface Interface for transmitting measurement data to a laboratory information system (LIS) Sedimentation speed Sedimentation of erythrocytes in x mm/h S-Sedivette ® SARSTEDT secure blood collection system Westergren Sedimentation value in mm/h... -
Page 105: List Of Illustrations
List of illustrations ® Figure 1: Rear wall of the Sediplus S 2000 NX ....................67 Figure 2: Test barcode scanner .........................70 Figure 3: Test print ............................71 Figure 4: Front view of the Sediplus ® S 2000 NX ....................74 ® Figure 5: S-Sedivette removed ........................75 Figure 6: Main view ............................76 Figure 07: Start screen .............................77... -
Page 106: Literature
Literature 1) CLSI* H2-A5 2011: Procedures for Erythrocyte Sedimentation Rate Test. 2) Thomas, L.: Labor und Diagnose. Digitale Ausgabe Labor & Diagnose 2020; Kapitel 19.3.2 Blutkörperchensenkungs- Reaktion (BSR) (www.labor-und-diagnose-2020.de/k19.html#_idTextAnchor8638) 3) ICSH recommendations for measurement of erythrocyte sedimentation rate. J. Clin. Pathol. 1993 46:198-203 *CLSI (Clinical and Laboratory Standards Institute) 4) Bruhn et al.;... -
Page 107: Key For Symbols And Labels
Key for symbols and labels: These Instructions for Use contain the following important symbols to indicate hazards and operating errors. The chapter "Safety information" contains detailed information on safety when handling the Sediplus ® S 2000 NX. This "Important" sign means that in the section: •... - Page 108 Batch number CE mark In vitro diagnostic device Manufacturer Country of manufacture Date of manufacture Serial number Separate collection of electrical and electronic equipment All serious incidents relating to the product must be reported to the manufacturer and the competent national authority.
-
Page 109: Contamination Questionnaire
Send the device together with the completed contamination questionnaire, a brief description of the problem encountered and a copy of the delivery note to the service department of DESAGA GmbH / SARSTEDT GROUP Wiesloch or to your local SARSTEDT sales agency. -
Page 110: Základní Pokyny
® Návod k obsluze – SARSTEDT Sediplus S 2000 NX Základní pokyny! ® ® S 2000 NX; GB 557 na adrese: www.sarstedt.com/en/download/instructions-for-use Autorské právo: ® ® ® ® Sediplus , Sedivette , Sarmix a Monovette jsou registrované ochranné známky SARSTEDT AG & Co. KG Adresa výrobce a... - Page 111 Obsah Základní pokyny! ............................110 Obecné informace ..........................113 ......................113 ............................117 ........................117 Úvod..............................118 Popis ..............................118 ....................118 .......................120 ..........................121 ......................123 ............................123 ..............124 ........................125 ..........................126 ® S 2000 NX .................128 ............................128 .......................129 Displej ..............................130 ® S 2000 NX ...................131 ..........................131 ...........................132 ® ................133 ......................136 .........................136 ...........137 ................137...
- Page 112 Poruchy a chyby obsluhy .........................147 ...................147 ® ................148 ...........................149 ® ..................150 ............................152 ..........................152 ...........................152 Kontroly kvality se zkumavkami Test-Sedivette ...................153 ............................155 ..........................155 ......................156 ................156 Omezení ............................156 Informace pro objednání ........................157 ........................158 ...............................158 ..........................159 Literatura ............................160 ......................161 Dotazník k dekontaminaci .......................163...
-
Page 113: Obecné Informace
Obecné informace ® • • • • • • • • • POVINNOSTI PROVOZOVATELE POVINNOSTI PERSONÁLU • •... - Page 114 • • • zkumavky S-Sedivette stály svisle. • • ® • • • stopy krve nebo plazmy. • • ® in-vitro (IVD). ®...
- Page 115 ® ® ® ® , GB 512 na adrese: www.sarstedt.com/en/download/instructions-for-use ® • S-Sedivette. • • zkumavce S-Sedivette ® • • ® • ® ® zkumavky S-Sedivette viz kapitola 2.3.5 nebo 2.3.6.
- Page 116 • • • • • • • • • • • „Dodací a platební podmínky“ • • • • • • • •...
- Page 117 ® Princip fungování: ® https://www.sarstedt.com/en/download/declarations-of-conformity/...
-
Page 118: Úvod
Úvod Popis ® Sediplus ® ® ® ® ® ® zkumavkou S-Sedivette ® ® ® ® zkumavce S-Sedivette S 2000 NX. ® ® S 2000 NX... - Page 119 ESR mm Westergren / 1 hod 18-30 < 7,1 < 10,7 31-40 < 7,8 < 11,0 41-50 < 10,6 < 13,2 51-60 < 12,2 < 12,2 60-70 < 12,7 < 20,2 > 70 10,1 < 30 < 35 • •...
- Page 120 • • • sedimentace. • • • ® • • nebo plazmy. • • • • • ® • • vitro (IVD). • •...
- Page 121 Konektor RJ-45 (Ethernet) tiskárny a/nebo klávesnice PC-AT. ® S 2000 NX ® Sediplus S 2000 NX SARSTEDT AG & Co. KG Adresa: Sarstedtstraße 1 ® ® Westergrena a zobrazena na Sediplus ® S 2000 NX. Zkumavka na vzorky: SARSTEDT S-Sedivette...
- Page 122 40 pozic - displej - tiskárna - EDV / HL7 110-230 V~, (-10/+10 %), 50-60 Hz 16 W Pojistky: podle normy DIN EN 61326-2-6:2013-09 pro elektromagnetickou kompatibilitu (EMC) in-vitro (IVD). Hloubka: 355 mm Hmotnost: 6,7 kg +40 °C +10 °C...
- Page 123 ® • • • • • • • • +40 °C • +10 °C ® Popis Sediplus ® S 2000 NX Kryt proti prachu...
- Page 124 ® S 2000 NX ® ®...
- Page 125 Vyobrazení 3: Testovací tisk...
- Page 126 ® Segment MSH Pozice Data Popis Název segmentu ^~\& S2000 Sarstedt YYYYMMDDHHMMSS OML^O21 Typ zprávy a události Segment PID Pozice Data Popis Název segmentu Segment ORC Pozice Data Popis Název segmentu Stav zakázky...
- Page 127 Segment OBR Pozice Data Popis Název segmentu 1 pro OBR 1 2 pro OBR 2 YYYYMMDDHHMMSS...
- Page 128 ® S 2000 NX ® S-Sedivette zkumavky S-Sedivette ® Displej ® S 2000 NX ® ®...
- Page 129 ® ® ® ® Zkumavka S-Sedivette ® Vyobrazení 5: S-Sedivette ® vyjmuta...
-
Page 130: Displej
Displej ® Vyobrazení 6: Hlavní menu Tabulka 1 Pozice ® 1. Hodnota 2. Hodnota ® je zkumavka S-Sedivette ®... - Page 131 ® S 2000 NX ® Vyobrazení 07: Úvodní obrazovka Vyobrazení 08: Úvodní obrazovka se zobrazením stavu ®...
- Page 132 Vyobrazení 09: Vyvolání menu ® • S-Sedivette. • • ® S-Sedivette ® S-Sedivette ® ®...
- Page 133 S-Sedivette ® ® ® Sarmix M 2000 ® Uchování vzorku krve: ® ® ® ® ® ® ® ® ® nebo ® S-Sedivette ® ® ®...
- Page 134 ® ® ® ® ® ® S-Sedivette ® musí zadat.
- Page 135 Vyobrazení 13: Zadání ID Vyobrazení 14: Nasazení zkumavky S-Sedivette ® ® ®...
- Page 136 ® ®...
- Page 137 ® ® S-Sedivette ® Zkumavku S-Sedivette ® Vyobrazení 17: Klávesnice na obrazovce...
- Page 138 sedimentace na pozici. Vyobrazení 18: Hlavní pohled ® S-Sedivette naleznete v kapitole 6 Poruchy a chyby obsluhy. Vyobrazení 19: Zobrazení výsledku...
-
Page 139: Akustická Podpora
POZOR! ® S-Sedivette ® nebo 2.3.6. Akustická podpora ® S 2000 NX je vybaven akustickou podporu obsluhy. • ® • • • ® • pokud zkumavku S-Sedivette •... - Page 140 ® Dokud nebude zkumavka S-Sedivette Vyobrazení 20: Dotisk / opakování tisku • ® ® • ® • ® • Dokud je zkumavka S-Sedivette...
-
Page 141: Menu
Menu Vyobrazení 21: Vyvolání menu Vyobrazení 22: Nastavení 5.1.1 Jazyk Vyobrazení 23: Nastavení jazyka... - Page 142 ® ®...
- Page 143 ® S-Sedivette ® ® - Pokud je zkumavka S-Sedivette ® - Pokud je zkumavka S-Sedivette ® zkumavek S-Sedivette www.sarstedt.com/en/download/instructions-for-use). ® ® POZOR! ® Dokud zkumavka S-Sedivette...
-
Page 144: Datum
5.1.5 Datum ® Vyobrazení 27: Nastavení data Vyobrazení 28: Nastavení formátu data ®... - Page 145 Vyobrazení 30: Nastavení tisku ® ®...
- Page 146 Vyobrazení 33: Zobrazení výsledku s chybou tisku • IP serveru • Port serveru • • ® ®...
-
Page 147: Servis
Servis Chyby Vyobrazení 36: Smazání chybového hlášení Poruchy a chyby obsluhy... - Page 148 ® ® , GB 512 na: www.sarstedt.com/en/download/instructions-for-use • ® • • ® ® zdokumentováno a zobrazeno na displeji. P 0: P 1: 5 mm pod P 0 ® P 2: 10 mm pod P 0 ® ® S 2000 ®...
- Page 149 ® ® ® ® ® ® ®...
- Page 150 ® ® zkumavka S-Sedivette ® ® ® Pokud zkumavku S-Sedivette ® Vyobrazení 40: S-Sedivette vyjmuta • • ® • Pokud zkumavku S-Sedivette • ® byla zkumavka S-Sedivette vyjmuta. ® ® ® ® ® ® ® Pokud zkumavku S-Sedivette ® hodnoty sedimentace pro tuto zkumavku S-Sedivette ®...
- Page 151 POZOR! ® Zkumavku S-Sedivette ® ® ® ® ® ®...
- Page 152 ® ® Ukázka pro výpadek napájení: • •...
-
Page 153: Kontroly Kvality Se Zkumavkami Test-Sedivette
• • Výjimka: • • • • • • • • • • Kontroly kvality se zkumavkami Test-Sedivette... - Page 154 • • • • • v milimetrech, tak i v mm Westergrena. • • zobrazena jak v milimetrech, tak i v mm Westergrena. Tabulka 2 Posun: 72-68 mm 40 mm - 44 mm 56 mm Westergren - 61 mm Westergren 63 mm - >...
- Page 155 Vyobrazení 45: Systém DESAGA GmbH / SARSTEDT-GRUPPE Serviceabteilung In den Ziegelwiesen 1-7 Tel.: +49 (0) 62 22 / 92 88 65 service.des@desaga-gmbh.de...
-
Page 156: Omezení
Zkumavka SARSTEDT S-Sedivette ® ® Omezení ®... -
Page 157: Informace Pro Objednání
ESR stojan pro zkumavky S-Monovette 90.1060 ® ESR stojan pro zkumavky S-Monovette 90.1060.062 ® Microvette 18.1325 ® Microvette 18.1325.100 ® 90.1091 SARSTEDT AG & Co. KG Sarstedtstraße 1 Tel: +420 281 021 491 Fax: +49 2293 305 3450 info.cz@sarstedt.com www.sarstedt.com... - Page 158 • • • • • • • • Antikoagulant nadávkováno 0,7 ml. ® (ESR) Dokumentace ® Pokojová teplota Rychlost sedimentace ® S-Sedivette Westergren Hodnota sedimentace v mm/h...
- Page 159 ® S 2000 NX ................121 ....................124 ..........................125 ® S 2000 NX ................128 ® vyjmuta ........................129 ..........................130 ........................131 ..................131 ........................132 ..............133 ® ..............134 ..................134 ..........................135 ® ...................135 ............136 ......................137 ....................137 ..........................138 .........................138 ......................140 ........................141 ..........................141 ........................141 .......................142 ........................142 ........................143 ........................144 ......................144 ........................144 ........................145 .....................145...
-
Page 160: Literatura
Literatura 1) CLSI* H2-A5 2011: Procedures for Erythrocyte Sedimentation Rate Test. 2) Thomas, L.: Labor und Diagnose. Digitale Ausgabe Labor & Diagnose 2020; Kapitel 19.3.2 Blutkörperchensenkungs- Reaktion (BSR) (www.labor-und-diagnose-2020.de/k19.html#_idTextAnchor8638) 3) ICSH recommendations for measurement of erythrocyte sedimentation rate. J. Clin. Pathol. 1993 46:198-203 *CLSI (Clinical and Laboratory Standards Institute) 4) Bruhn et al;... - Page 161 Sediplus ® S 2000 NX. • • •...
- Page 162 in-vitro...
-
Page 163: Dotazník K Dekontaminaci
Dotazník k dekontaminaci ® dekontaminaci. DESAGA GmbH / SARSTEDT-GRUPPE In den Ziegelwiesen 1-7 Tel.: +49 (0) 62 22 / 92 88 65 service.des@desaga-gmbh.de Tabulka 3: Dotazník ke kontaminaci Dotazník k dekontaminaci pro objednávky oprav Firma: Ulice: Telefon: ❑ ❑ ❑... -
Page 164: Indicaciones Básicas
Derechos de autor: SARSTEDT AG & Co. KG es propietario de los derechos de autor de las presentes instrucciones de uso. Estas instrucciones de uso solo se ofrecen para el personal operario y para el comprador del dispositivo. Estas instrucciones de uso no pueden reproducirse ni difundirse, en parte o en su totalidad, sin el permiso previo por escrito de SARSTEDT AG &... - Page 165 Índice Indicaciones básicas ............................164 .........................167 Advertencias de seguridad .........................167 Uso previsto ............................171 ....................171 .............................172 ............................172 ................172 .....................174 ...........................175 2.3.2 Desembalaje, transporte y almacenamiento ..................177 2.3.3 Contenido ............................177 ..........178 ....................179 ......................180 Elementos funcionales del Sediplus ® S 2000 NX ................182 .........................182 ...................183 La pantalla............................184 Manejo del Sediplus...
- Page 166 Averías y errores de manejo ......................201 Avería del movimiento vertical de la placa de medición ...............201 S-Sedivette ® .....................202 Medición incorrecta ..........................203 ® Retirada prematura de la S-Sedivette ....................204 Fallo de la red eléctrica ........................206 Servicio y mantenimiento ........................206 Limpieza del aparato ..........................206 ®...
-
Page 167: Advertencias De Seguridad
• Para su uso previsto. • En un estado impecable en aspectos de seguridad. o por personas autorizadas por SARSTEDT AG & Co. KG • • Se deben observar y cumplir las normativas generales y las disposiciones legales para la •... - Page 168 se debe tener en cuenta lo siguiente al instalar el aparato: • Por ejemplo, no debe colocarse junto a una centrifugadora sobre una mesa de laboratorio. ® • Las S-Sedivette • Por esto, el aparato debe instalarse de forma que se pueda cargar desde arriba con las ®...
- Page 169 ® ® Para Sediplus S 2000 NX utilice solo recipientes de sangre de paciente S-Sedivette de SARSTEDT. Con otros tubos, como por ejemplo tubos Westergren, se producen resultados incorrectos. ® Tenga siempre en cuenta las instrucciones de manejo de S-Sedivette de SARSTEDT.
- Page 170 Siga estrictamente las instrucciones de limpieza del aparato. Una limpieza incorrecta o no seguir las directivas pueden causar fallos de funcionamiento. • • Excepción: • • • En principio, limpie solo el aparato por fuera. • No utilice detergentes, limpiadores agresivos ni disolventes. •...
-
Page 171: Uso Previsto
Altura de la columna de eritrocitos mediante el escaneo de S-Sedivette (n.º art. 06.1690.xxx) con diodos de infrarrojos mediante los diodos y el software del aparato. Material de la muestra: de mezcla 1:4 (1 parte citrato + 4 partes de sangre) en S-Sedivette (n.º art. 06.1690.xxx). https://www.sarstedt.com/en/download/declarations-of-conformity/... - Page 172 ® S 2000 NX ® Sediplus manualmente a los datos en la pantalla en todo momento. ® ® ® ® y la ® ® Detrás de la S-Sedivette en la intensidad de la luz. puede consultar el estado de cada uno de los 40 canales del aparato en la pantalla. hora) con fecha, hora, ID y mensajes de error, si los hay, en la pantalla, en el PED mediante una interfaz integrada, o se puede imprimir.
- Page 173 Sediplus ® ® Asimismo, Sediplus horas en x mm/h. Los valores de referencia se deben establecer localmente conforme a las recomendaciones para los valores de referencia. Debido al aumento progresivo de la VSG con la edad, se deben establecer valores separados para cada década de la de referencia son, por ejemplo, el nivel de hemoglobina, la medicación, el ciclo menstrual, el embarazo y el tabaquismo.
- Page 174 • falseado más elevado. Por ejemplo, no debe colocarse junto a una centrifugadora sobre una mesa de laboratorio. • Las S-Sedivette ® • falseado más elevado. Por esto, el aparato debe instalarse de forma que las S-Sedivette ® se puedan insertar desde arriba •...
- Page 175 Datos del fabricante y del aparato ® Aparato: Sediplus S 2000 NX Referencia: N.º SARSTEDT 90.1092 Fabricante: SARSTEDT AG & Co. KG Sarstedtstraße 1 D-51582 Nümbrecht, Alemania Datos del aparato ® de SARSTEDT. ® Como S-Sedivette se visualiza con Sediplus ®...
- Page 176 40 posiciones Almacenamiento de datos: Salida de datos: - Pantalla - Impresora - PED/HL7 110-230 V~, (-10/+10 %), 50-60 Hz Consumo de potencia: 16 W Fusibles: 0,8 AT (2 fusibles, 5 x 20 mm) inmunidad a las interferencias in-vitro (IVD). Dimensiones: Anchura: 270 mm...
-
Page 177: Desembalaje, Transporte Y Almacenamiento
2.3.2 Desembalaje, transporte y almacenamiento ® Sediplus S 2000 NX (n.º SARSTEDT 90.1092) viene embalada en una caja con todos los accesorios. • • • Si detecta fallas o daños, contacte de inmediato con SARSTEDT AG & Co. KG. •... - Page 178 PED o impresora), el Sediplus ® S 2000 NX debe estar desconectado de la red eléctrica. En el dorso de Sediplus ® o una impresora. Sediplus ® S 2000 NX. utilizada. de barras.
- Page 179 o una impresora.
- Page 180 S 2000 NX se puede conectar a una red mediante la toma Ethernet (RJ-45) en el dorso del aparato. Si el aparato asigna automáticamente las direcciones IP. Segmento MSH Datos Nombre del segmento Separadores de campo ^~\& otros separadores S2000 Sarstedt YYYYMMDDHHMMSS OML^O21 Tipo de mensaje y suceso Modo de procesamiento Ejemplo: Segmento PID Datos Nombre del segmento...
- Page 181 Segmento OBR Datos Nombre del segmento 1 para OBR 1 2 para OBR 2 YYYYMMDDHHMMSS Ejemplo:...
-
Page 182: Elementos Funcionales Del Sediplus ® S 2000 Nx
, cada una con un diodo verde de control. Cada uno ® Las S-Sedivette Para Sediplus ® S 2000 NX utilice solo recipientes de sangre de paciente S-Sedivette ® SARSTEDT. Con otros tubos, como por ejemplo tubos Westergren, se producen resultados incorrectos. - Page 183 Los diodos luminosos muestran los distintos estados de las posiciones correspondientes o de todo el aparato. Los 40 diodos luminosos parpadean a la vez. hacia abajo. En ese periodo, no se pueden insertar S-Sedivette ® S-Sedivette ® ® para medir. ®...
-
Page 184: La Pantalla
La pantalla ® Sediplus la lista de mediciones deslizando en la pantalla hacia arriba y hacia abajo, en la esquina inferior derecha puede ordenar los Imagen 6: Vista principal Tabla 1 ® 1. Valor 2. Valor ® en el aparato y termina ®... -
Page 185: Manejo Del Sediplus S 2000 Nx
® Manejo del Sediplus S 2000 NX Encendido del aparato Encienda Sediplus ® S 2000 NX con el interruptor de red en la parte trasera del aparato. Aparece lo siguiente en la pantalla. Imagen 07: Pantalla de inicio Al cabo de unos segundos, el dispositivo termina de encenderse automáticamente. Aparece la vista principal en la pantalla. 1. - Page 186 Las impurezas causan señales adicionales que se registran y pueden alterar los • ® S-Sedivette ® S-Sedivette La sangre se extrae con la S-Sedivette ® anticoagulante. ® Tenga siempre en cuenta las instrucciones de uso de S-Sedivette de SARSTEDT.
- Page 187 Se puede hacer directamente a mano de forma que la bola de mezcla contenida en la S-Sedivette ® recorra 5 veces la muestra de sangre completa, o de forma suave y confortable con el aparato ® desarrollado especialmente para esta tarea por SARSTEDT AG & Co. KG, el Sarmix M 2000 ® Use el SARSTEDT Sarmix , para mezclar minuciosamente y con suavidad.
- Page 188 Posibilidad 2: ® ® , puede poner la S-Sedivette ® libre sin pulsar antes una tecla. ® posibilidad es transmitir el ID del paciente sugerido en la pantalla (sucesivo, no asignado a paciente) pulsando la tecla [OK]. ® o extrayendo la S-Sedivette Posibilidad 3: ®...
- Page 189 - Aparece lo siguiente en la pantalla: Otra posibilidad es transmitir el ID del paciente sugerido en la pantalla (sucesivo, no asignado a paciente) pulsando la tecla [OK]. - Aparece lo siguiente en la pantalla: Imagen 14: Insertar S-Sedivette ® ®...
- Page 190 (opcional). ® Sediplus - Pulse la tecla o inserte una S-Sedivette ® para que el aparato sugiera un ID sucesivo.
- Page 191 ® o en un formulario de paciente). ® ® Mantenga siempre la S-Sedivette ® en vertical Imagen 16: Escaneo del número de ID permite ocultar de nuevo el teclado de la pantalla. Imagen 17: Teclado de la pantalla...
- Page 192 Imagen 18: Vista principal mediciones han concluido. ® que la S-Sedivette se puede sacar del aparato (ver imagen 19). Las mediciones terminadas aparecen en verde en la vista...
- Page 193 Si inserta una nueva S-Sedivette ® S-Sedivette ® se borra de inmediato. Los datos dejan de estar disponibles. ® Sediplus Se distingue entre: - Un tono individual. - Dos tonos cortos rápidamente sucesivos. Esencialmente, el tono individual se emplea como señal de aviso. Se aplica, por ejemplo, en los siguientes casos: •...
- Page 194 ® Si la S-Sedivette • Puede eliminar las mediciones en curso sacando la S-Sedivette ® prematura de una S-Sedivette ® • Si la S-Sedivette ® • ® • Si la S-Sedivette...
-
Page 195: Menú
Menú las funciones de limpieza. Además, puede visualizar y borrar mensajes de error. Imagen 21: Acceso al menú Ajustes deslizando por la pantalla táctil. Imagen 22: Ajustes 5.1.1 Idioma Imagen 23: Ajustes de idioma... -
Page 196: Id De Inicio
5.1.2 ID de inicio opcional. Cada vez que inserte una nueva S-Sedivette ® Imagen 24: Ajustar el ID de inicio o de una y dos horas. Sediplus ® no altera el funcionamiento del aparato. -
Page 197: Borrar Mediciones
9 mm (o más) por debajo del ensanchamiento del cuello de la S-Sedivette ® ® de diferente grado de llenado debido al cambio en ® - Las S-Sedivette ® www.sarstedt.com/en/download/instructions-for-use). ® resultados de las mediciones de las S-Sedivette ® ® que contengan un ®... -
Page 198: Fecha
5.1.5 Fecha Sediplus ® Imagen 27: Ajustar fecha Imagen 28: Ajustar formato de fecha 5.1.6 Hora ® Sediplus Imagen 29: Ajustar hora... - Page 199 ® del aparato. de una S-Sedivette ® Imagen 32: Mensaje de aviso: no se puede imprimir...
-
Page 200: Ajustes De Red/Hl7
5.1.8 Ajustes de red/HL7 Se necesitan los siguientes datos: • IP del servidor • Puerto del servidor • • ® ® borrarán tras retirar la S-Sedivette Imagen 34: Ajustes de red/HL7... -
Page 201: Servicio
Servicio Error Imagen 36: Borrar mensajes de error Averías y errores de manejo de sangre llamativas. No se deben dejar objetos sobre la placa ni al lado de esta. -
Page 202: S-Sedivette
® S-Sedivette Las S-Sedivette ® ® de SARSTEDT ® ). Instrucciones de uso online: ® S-Sedivette ; GB 512 en: www.sarstedt.com/en/download/instructions-for-use ® • Si las S-Sedivette S-Sedivette ® • valores de VSG/ESR. ® • El volumen de sangre en la columna de la S-Sedivette ®... -
Page 203: Medición Incorrecta
® . En este momento, el aparato ya ® ® Imagen 38: S-Sedivette ® ® El aviso de que una S-Sedivette ® Tenga en cuenta lo siguiente: se indicará un valor negativo. Este se indicará con un signo menos. Los valores negativos solo se producen en mediciones incorrectas. ®... -
Page 204: Retirada Prematura De La S-Sedivette
® Retirada prematura de la S-Sedivette La retirada prematura de una S-Sedivette ® se detecta como error por parte del aparato. Este es el caso cuando S-Sedivette ® ® ® Si retira una S-Sedivette ® Imagen 40: S-Sedivette retirada. • No se pueden iniciar nuevas mediciones hasta que se haya resuelto el error. •... - Page 205 ® nueva S-Sedivette ® Tenga en cuenta lo siguiente: La S-Sedivette ® Esto quiere decir que, si la S-Sedivette ® ® correspondiente se recupera. En caso de que la ® Recuerde que, al retirar la muestra entre las mediciones, las pequeñas sacudidas de la ®...
-
Page 206: Fallo De La Red Eléctrica
como retrasada. ® ® puede realizar, porque la S-Sedivette • • Al cabo de un rato, por ejemplo 2 horas y 10 minutos, se da cuenta del corte de corriente y vuelve a encender el aparato. En este caso, tras el encendido aparecen todas las mediciones en curso en la pantalla. Servicio y mantenimiento Limpieza del aparato Además, la pantalla táctil puede desactivarse durante 30 segundos. -
Page 207: Controles De Calidad Con S-Sedivette De Test
Siga estrictamente las instrucciones de limpieza del aparato. Una limpieza incorrecta o no seguir las directivas pueden causar fallos de funcionamiento. • • • • • • En principio, limpie solo el aparato por fuera. • No utilice detergentes, limpiadores agresivos ni disolventes. •... - Page 208 • ® • Ponga la primera S-Sedivette de test completamente llena ® • El aparato escanea la S-Sedivette de test automáticamente de inmediato y calcula el valor de desplazamiento • Retire la S-Sedivette ® de test e inserte la segunda S-Sedivette ®...
-
Page 209: Partes Ópticas De Medición
Mantenimiento por el fabricante DESAGA en Wiesloch o con su agencia de ventas local de SARSTEDT. Nunca intente abrir o reparar el aparato por su cuenta. con software. Imagen 45: Sistema rápido posible. DESAGA GmbH / SARSTEDT-GRUPPE... -
Page 210: Puesta Fuera De Servicio/Eliminación
Si desea poner el aparato fuera de servicio, contacte con el fabricante SARSTEDT AG & Co. KG, que retirará el aparato y lo eliminará adecuadamente por usted. Las S-Sedivette ® ® el aparato Sediplus Las instrucciones de uso están impresas en papel mate (80gm/m ) encuadernadas y se pueden eliminar en su sistema de reciclaje. -
Page 211: Información Para Pedidos
Gradilla VSG para Microvette CB 200 VSG con pared trasera graduada 90.1091 Si tiene alguna pregunta sobre productos SARSTEDT o sobre el programa de entrega de SARSTEDT, contacte con nosotros: SARSTEDT AG & Co. KG Sarstedtstraße 1 D-51582 Nümbrecht, Alemania... -
Page 212: Garantía Y Responsabilidad
Garantía y responsabilidad causas: • Uso no previsto del aparato. • Montaje, puesta en servicio, manejo o mantenimiento inapropiados. • Manejo del aparato con dispositivos de seguridad defectuosos o dispositivos de seguridad montados incorrectamente o no operativos. • Incumplimiento de las advertencias de las instrucciones de uso respecto al transporte, •... -
Page 213: Índice De Imágenes
Índice de imágenes ® Imagen 1: Pared trasera del Sediplus S 2000 NX ..................175 ....................178 ........................179 Imagen 4: Vista frontal del Sediplus ® S 2000 NX .....................182 ® Imagen 5: S-Sedivette retirada........................183 Imagen 6: Vista principal ..........................184 Imagen 07: Pantalla de inicio ..........................185 ..................185 ...........................186 ..................187... -
Page 214: Literatura
Literatura 1) CLSI* H2-A5 2011: Procedures for Erythrocyte Sedimentation Rate Test. 2) Thomas, L.: Labor und Diagnose. Digitale Ausgabe Labor & Diagnose 2020; Kapitel 19.3.2 Blutkörperchensenkungs- Reaktion (BSR) (www.labor-und-diagnose-2020.de/k19.html#_idTextAnchor8638) 3) CSH recommendations for measurement of erythrocyte sedimentation rate. J. Clin. Pathol. 1993 46:198-203 *CLSI (Clinical and Laboratory Standards Institute) 4) Bruhn et al;... -
Page 215: Leyenda De Símbolos Y Marcas
Leyenda de símbolos y marcas ® S 2000 NX. • Se indican advertencias importantes. • Describe un peligro inmediato o posible para la vida y la seguridad de las personas. • Contiene una advertencia sobre situaciones peligrosas. o daños materiales. funcionar incorrectamente o incluso quedar dañado. - Page 216 Marcado CE in vitro Fabricante...
-
Page 217: Formulario De Contaminación
Tel.: +49 (0) 62 22 / 92 88 65 service.des@desaga-gmbh.de entrega al departamento de asistencia de DESAGA GmbH/GRUPO SARSTEDT, Wiesloch, o a su agencia de ventas local de SARSTEDT. Estimado cliente: por motivos de seguridad, le pedimos que responda a todas estas preguntas antes de enviar el aparato para su... - Page 218 Sediplus , Sedivette , Sarmix et Monovette sont des marques commerciales de la société SARSTEDT AG & Co. KG SARSTEDT AG & Co. KG Adresse du fabricant et du service (à compléter par le client) SARSTEDT AG & Co. KG ®...
- Page 219 Table des matières ..........................218 Informations générales ........................221 ........................221 ............................225 ......................225 Introduction ............................226 Description ............................226 ................226 Mise en place de l’appareil/installation ....................228 ...........................229 ......................231 2.3.3 Contenu de la livraison ........................231 2.3.4 Connexion d’un clavier PC-AT et/ou d’un lecteur de code-barres ............232 2.3.5 Connexion d’une imprimante optionnelle ....................233 2.3.6...
- Page 220 Défaillances et erreurs d’utilisation ....................255 ............255 S-Sedivette ® sous-remplie ........................256 ..........................257 ® ....................258 Panne de courant ..........................260 Service et entretien ..........................260 Nettoyage de l’appareil ........................260 ..................261 Optique de mesure ..........................263 Entretien chez le fabricant ........................263 Mise hors service/élimination ......................264 Précautions générales ........................264 Restrictions ............................264 Informations relatives à...
-
Page 221: Informations Générales
Informations générales ® S 2000 NX est construit dans le respect Toutefois, pendant le fonctionnement, des dangers peuvent survenir au niveau de l’utilisateur, de tiers • • • • d’autres liquides dans l’appareil. • • • • • ENGAGEMENT DE L’UTILISATEUR ENGAGEMENT DU PERSONNEL •... - Page 222 • avec une centrifugeuse. • • • • sources de chaleur. ® • S 2000 NX du laboratoire). • • • • Ne mettez sous tension le Sediplus ® de diagnostic in vitro (IVD). appareil. ® S 2000 NX...
- Page 223 Utilisez exclusivement la S-Sedivette ® de SARSTEDT comme tube porteur de sang de patient pour le Sediplus ® S 2000 NX. ® SARSTEDT. ® www.sarstedt.com/en/download/instructions-for-use sont inhabituels. ® • S 2000 NX SARSTEDT. • mesure. • ® par la chute de gouttes de sang.
- Page 224 Veuillez impérativement respecter les consignes de nettoyage de l’appareil. Tout nettoyage • • Ne vaporisez pas de produit de nettoyage sous la plaque de mesure. • • • • N’utilisez en aucun cas de produits abrasifs, de nettoyants agressifs ou de solvants. •...
- Page 225 ® ® infrarouges. par les diodes ou le logiciel de l’appareil. https://www.sarstedt.com/en/download/declarations-of-conformity/...
-
Page 226: Introduction
Introduction Description ® mesure par transmission IR. ® Le Sediplus ® ® remplie dans une position de mesure libre. ® ® dans un emplacement de mesure quelconque, l’appareil reconnaît la nouvelle S-Sedivette ® La table de mesure monte et descend pour le processus de mesure. Chaque S-Sedivette ®... - Page 227 Le Sediplus ® ® Le Sediplus Les valeurs de référence doivent être déterminées au niveau local, en accord avec les recommandations en matière de peuvent ainsi avoir une incidence sur les valeurs de référence, notamment le taux d’hémoglobine, la prise de médicaments, le cycle menstruel, la grossesse ou le tabagisme.
-
Page 228: Mise En Place De L'appareil/Installation
Mise en place de l’appareil/installation • avec une centrifugeuse. • • • • de chaleur. • ® S 2000 laboratoire). • • • • • • • • Ne mettez sous tension le Sediplus ® • de diagnostic in vitro (IVD). •... - Page 229 Prise de courant ® S 2000 NX Données du fabricant et caractéristiques de l’appareil ® Sediplus S 2000 NX SARSTEDT AG & Co. KG Sarstedtstraße 1 51582 Nümbrecht, Allemagne Caractéristiques de l’appareil ® SARSTEDT Conversion en valeurs de Westergren ®...
- Page 230 ® S-Sedivette SARSTEDT - Écran - Imprimante pour les appareils de diagnostic in vitro (IVD). Conditions ambiantes admissibles pour le stockage condensation.
-
Page 231: Contenu De La Livraison
® Le Sediplus • • • • • Ne jetez pas l’emballage de transport. • Entretien chez le fabricant), utilisez exclusivement l’emballage fourni. • • • 2.3.3 Contenu de la livraison Le Sediplus ® Nombre Désignation Sediplus ® S 2000 NX Mode d’emploi Test-Sedivette (ensemble de 3) -
Page 232: Connexion D'un Clavier Pc-At Et/Ou D'un Lecteur De Code-Barres
2.3.4 Connexion d’un clavier PC-AT et/ou d’un lecteur de code-barres Lors du branchement et du débranchement d’un ou plusieurs périphériques (lecteur de code- barres, clavier PC-AT, informatique et/ou imprimante), il est impératif de débrancher le Sediplus ® ® aux deux ports USB. marche du Sediplus ®... -
Page 233: Connexion D'une Imprimante Optionnelle
2.3.5 Connexion d’une imprimante optionnelle aux deux ports USB. -
Page 234: Description De L'interface Hl7
Description de l’interface HL7 ® Il est possible de connecter le Sediplus de service, voir chapitre 5.2. Segment MSH Position Données Description Nom de segment ^~\& S2000 Sarstedt AAAAMMJJHHMMSS Vide OML^O21 Mode de traitement Vide Vide Segment PID Position Données Description... - Page 235 Segment OBR Position Données Description Nom de segment Vide Vide Vide AAAAMMJJHHMMSS Moment de mesure Vide Vide Vide Vide Vide Vide Vide Vide Vide Vide Vide Vide Valeur de mesure...
-
Page 236: Les Éléments Fonctionnels Du Sediplus ® S 2000 Nx
S 2000 NX La plaque de mesure ® Utilisez exclusivement la S-Sedivette de SARSTEDT comme tube porteur de sang de patient ® pour le Sediplus S 2000 NX. Avec d’autres tubes, par exemple les tubes Westergren, vous obtenez des valeurs de... -
Page 237: Les Diodes Lumineuses De La Plaque De Mesure
Les diodes lumineuses de la plaque de mesure tout l’appareil. La diode lumineuse d’une position donnée ne s’allume pas et la position correspondante est libre. ® La diode lumineuse d’une position s’allume. La position est occupée avec une S-Sedivette ® La mesure avec la S-Sedivette ®... - Page 238 ® Sediplus mesure en fonction de vos besoins. Position Indique la position courante d’une S-Sedivette ® le couvercle de la table de mesure Type de mesure 1. Valeur 2. Valeur ® ®...
-
Page 239: Utilisation Du Sediplus S 2000 Nx
® Utilisation du Sediplus S 2000 NX Mise en marche de l’appareil Mettez en marche le Sediplus ® ® 2. Mettez en place la S-Sedivette dans un logement libre... - Page 240 • ® S 2000 NX SARSTEDT. • mesure. • ® par la chute de gouttes de sang. ® S-Sedivette pour le prélèvement sanguin ® comme anticoagulant. ® Veuillez impérativement respecter le mode d’emploi de la S-Sedivette SARSTEDT.
-
Page 241: Insertion De La S-Sedivette ® Et Lancement D'une Mesure
La S-Sedivette ® ® ® le Sarmix M 2000 ® Utilisez le Sarmix ® Insertion de la S-Sedivette et lancement d’une mesure ® et lancer une mesure. ® ® ® la première S-Sedivette ® Vous travaillez avec un lecteur de code-barres optionnel pour saisir les numéros ID des patients. ®... - Page 242 la S-Sedivette ® ® ® dans ® en appuyant sur la touche [OK]. retirant la S-Sedivette ® ® . Elle doit donc être saisie avant l’insertion ® de la S-Sedivette - Appuyez sur le bouton rouge avec le signe plus...
- Page 243 en appuyant sur la touche [OK]. ® ® dans un emplacement libre, puis ® dans l’appareil.
- Page 244 Avec Sediplus ® - Lorsque vous appuyez sur le bouton rouge ®...
- Page 245 ® ® Lorsque vous lisez le code-barres de la S-Sedivette S-Sedivette ® le long du lecteur de code-barres. Vous trouverez des informations sur l’installation du lecteur de code-barres Tenez la S-Sedivette ®...
- Page 246 ® retirer la S-Sedivette...
-
Page 247: Support Acoustique
® dans la position, le protocole de mesure de la S-Sedivette ® Support acoustique ® Le Sediplus unique • si vous utilisez une S-Sedivette ® • si vous appuyez sur la touche [OK • • La double tonalité ® • si vous retirez une S-Sedivette •... - Page 248 ® Tant que la S-Sedivette souhaitez en appuyant sur le champ d’impression. • ® et en appuyant sur la ® • Si la S-Sedivette ® • Suppression des mesures. • Tant que la S-Sedivette ®...
-
Page 249: Menu
Menu 5.1.1 Langue... -
Page 250: 5.1.3.1 Type De Mesure
® chaque nouvelle S-Sedivette 5.1.3.1 Type de mesure ®... -
Page 251: Suppression Des Mesures
- Si la S-Sedivette ® - Si la S-Sedivette ® d’emploi de la S-Sedivette www.sarstedt.com/en/download/instructions-for-use). ® sous-remplies. de sous-remplissage, la plage de mesure utilisable pour les S-Sedivette avec un volume initial plus faible en est raccourcie (voir chapitre 6.2 Sous-remplissage de la S-Sedivette ®... -
Page 252: Date
5.1.5 Date ® Le Sediplus 5.1.6 Heure Le Sediplus ®... - Page 253 menu (test d’impression). ® ® d’une S-Sedivette...
- Page 254 de laboratoire). • IP serveur • Port serveur • Application reçue • Dispositif/processus reçu ® S-Sedivette ®...
-
Page 255: Service
Service Le menu de service contient des options de menu pertinentes pour l’entretien de l’appareil. Ces options de menu sont Erreurs Défaillances et erreurs d’utilisation sanguins inhabituels. -
Page 256: S-Sedivette Sous-Remplie
® S-Sedivette sous-remplie ® www.sarstedt.com/en/download/instructions-for-use • ® lors de la rupture de la tige du piston. • remises en question. • ® ® Valeurs de sédimentation selon le niveau de remplissage Au-dessus de ce point, une S-Sedivette ® comme sous-remplie ®... - Page 257 ® un sous-remplissage de la S-Sedivette ® ® Si un sous-remplissage d’une S-Sedivette ® sous-remplie ® L’indication qu’une S-Sedivette ® sous-remplie ®...
- Page 258 ® ® est reconnu comme une erreur par l’appareil. C’est le cas lorsqu’une S-Sedivette ® ® et lancement d’une mesure). ® Si vous retirez une S-Sedivette ® retirée • • Interrompez au besoin la mesure. ® • • ® la S-Sedivette ®...
- Page 259 aucune nouvelle S-Sedivette ® Il est possible de retirer la S-Sedivette ® ® ® retard. ® N’oubliez pas que si l’échantillon est prélevé entre les mesures, de faibles secousses de la S-Sedivette ® peuvent entraîner des résultats de mesure erronés. ®...
-
Page 260: Panne De Courant
Panne de courant impression ou sur un rapport de mesure transmis. ® . La mesure ne peut pas y être ® • • remettez l’appareil en marche. Service et entretien Nettoyage de l’appareil... - Page 261 Veuillez impérativement respecter les consignes de nettoyage de l’appareil. Tout nettoyage • • • • Ne vaporisez pas de produit de nettoyage sous la plaque de mesure. • • • N’utilisez en aucun cas de produits abrasifs, de nettoyants agressifs ou de solvants. •...
- Page 262 • Appuyez sur la touche Lancer la mesure • • • • • • voir le chapitre 7.4 Entretien chez le fabricant. • •...
-
Page 263: Optique De Mesure
Optique de mesure Entretien chez le fabricant agence de vente SARSTEDT locale. DESAGA GmbH/GROUPE SARSTEDT Service après-vente In den Ziegelwiesen 1-7 69168 Wiesloch, Allemagne service.des@desaga-gmbh.de Faites entretenir votre appareil par le fabricant une fois par an. de faire contrôler votre appareil par le centre de service DESAGA GmbH. -
Page 264: Mise Hors Service/Élimination
Mise hors service/élimination En cas de mise hors service de l’appareil, veuillez vous adresser au fabricant SARSTEDT AG & Co. KG, La S-Sedivette ® ® relation avec l’appareil Sediplus S 2000 NX sont des sources potentielles d’infection. Précautions générales Consignes de sécurité et avertissements Restrictions ®... -
Page 265: Informations Relatives À La Commande
CB 200 VS, code couleur ISO 18.1325.100 ® Portoir de VS pour la Microvette 90.1091 Si vous avez des questions sur d’autres produits SARSTEDT ou sur le programme de livraison SARSTEDT, SARSTEDT AG & Co. KG 51582 Nümbrecht, Allemagne info@sarstedt.com www.sarstedt.com... -
Page 266: Garantie Et Responsabilité
Garantie et responsabilité au dos de la facture. • Utilisation non conforme de l’appareil. • Installation, mise en service, utilisation et entretien non conformes de l’appareil. • • Non-respect des consignes du mode d’emploi concernant le transport, le stockage, le montage, •... - Page 267 ® S 2000 NX ....................229 ......................232 ..........................233 ® S 2000 NX ....................236 ® .........................237 ..........................238 ........................239 ...................239 ..........................240 ..................241 ® .................242 ..............242 ..........................243 ® .........................243 ...........244 ..........................245 ......................245 ..........................246 ........................246 ................248 ..........................249 ...........................249 ........................249 ........................250 ........................250 ......................251 ..........................252 ........................252 ..........................252 .......................253 ......................253 ................253...
-
Page 268: Références Bibliographiques
Références bibliographiques 1) CLSI* H2-A5 2011: Procedures for Erythrocyte Sedimentation Rate Test. 2) Thomas, L.: Labor und Diagnose. Digitale Ausgabe Labor & Diagnose 2020; Kapitel 19.3.2 Blutkörperchensenkungs- Reaktion (BSR) (www.labor-und-diagnose-2020.de/k19.html#_idTextAnchor8638) 3) ICSH recommendations for measurement of erythrocyte sedimentation rate. J. Clin. Pathol. 1993 46:198-203 *CLSI (Clinical and Laboratory Standards Institute) 4) Bruhn et al;... - Page 269 ® S 2000 NX. • • • peut entraîner une utilisation incorrecte de l’appareil, voire l’endommager. Respecter le mode d'emploi Stocker dans un endroit sec Risque biologique...
- Page 270 Marque CE Diagnostic in vitro Fabricant Pays de fabrication Date de fabrication...
-
Page 271: Questionnaire De Contamination
Questionnaire de contamination Avant d’envoyer l’appareil Sediplus ® remplir le questionnaire de contamination. DESAGA GmbH/GROUPE SARSTEDT Service après-vente In den Ziegelwiesen 1-7 69168 Wiesloch, Allemagne service.des@desaga-gmbh.de Questionnaire de contamination pour les commandes de réparation Cher cliente/Cher client, ❑ L’appareil ne contient pas de substances nocives ❑... -
Page 272: Avvertenze Fondamentali
Copyright: Il copyright delle presenti istruzioni d’uso appartiene a SARSTEDT AG & Co. KG. Le istruzioni d’uso sono destinate esclusivamente al personale operativo e agli acquirenti del dispositivo. È proibito riprodurre o divulgare le presenti istruzioni d’uso, in toto o in parte, senza il previo consenso scritto di SARSTEDT AG &... - Page 273 Indice Avvertenze fondamentali! ..........................272 Informazioni generali ........................275 Avvertenze di sicurezza ........................275 Destinazione d’uso ..........................279 ......................279 Introduzione ............................280 Descrizione ............................280 .......................280 Montaggio del dispositivo / installazione .....................282 ..........................283 2.3.2 Disimballaggio, trasporto e conservazione ..................285 2.3.3 Dotazione ............................285 2.3.4 Collegamento di una tastiera di un computer e/o di uno scanner per codici a barre ......286 2.3.5 Collegamento di una stampante opzionale ..................287 2.3.6...
- Page 274 Anomalie ed errori di utilizzo ......................309 Anomalia nel movimento avanti e indietro del pannello di misurazione ..........309 ® ..................310 Misurazione sbagliata .........................311 ® Rimozione prematura di una S-Sedivette ..................312 Guasto della rete ..........................314 Assistenza e manutenzione ......................314 Pulizia del dispositivo ..........................314 ..................315 ........................317 Manutenzione presso il produttore ......................317...
-
Page 275: Informazioni Generali
Informazioni generali Avvertenze di sicurezza ® Il dispositivo di misurazione dell’eritrosedimentazione Sediplus tecnologia più recente e le regole riconosciute relative alla sicurezza tecnica. Per l’utilizzo in laboratorio rispettare le avvertenza di sicurezza applicabili e le linee guida così come le disposizioni sulla protezione del lavoro e la prevenzione degli infortuni. - Page 276 al momento del montaggio del dispositivo, si deve prestare attenzione a quanto segue: • Le vibrazioni del sistema di sedimentazione riempito determinano valori di sedimentazione maggiori. vibrazioni. Il dispositivo, ad esempio, non deve essere collocato su un tavolo da laboratorio insieme a una centrifuga.
- Page 277 ® S-Sedivette di SARSTEDT. Con altre provette, ad es. provette Westergren, si ottengono valori di eritrosedimentazione errati. ® Attenersi scrupolosamente alle avvertenze sulla manipolazione della SARSTEDT S-Sedivette Istruzioni d'uso online: S-Sedivette ® ; GB 512 alla pagina: www.sarstedt.com/en/download/instructions-for-use Prestare attenzione anche ai fattori di disturbo descritti nella letteratura specializzata (ad es.
- Page 278 Rispettare assolutamente le disposizioni sulla pulizia del dispositivo. Una pulizia negligente o il mancato rispetto di tali disposizioni può determinare l’insorgere di anomalie! • Prima di pulire, staccare il dispositivo dall’alimentazione elettrica. • È possibile sollevare il piano di misurazione nella posizione più alta per pulire le parti dell’involucro sotto il pannello di misurazione e disattivare per 30 secondi il touch-screen per pulirlo.
-
Page 279: Destinazione D'uso
L’altezza della colonna di sangue viene determinata tramite scansione di una S-Sedivette ® (art. n. 06.1690.xxx) utilizzando diodi a infrarossi. riconosciuta dai LED o dal software del dispositivo in modo univoco. Campione: di miscelazione di 1:4 (1 parte di citrato + 4 parti di sangue) in S-Sedivette (n. art. 06.1690.xxx). https://www.sarstedt.com/en/download/declarations-of-conformity/... -
Page 280: Introduzione
Introduzione Descrizione Basato sulla pluriennale esperienza di SARSTEDT nel campo dell'eritrosedimentazione, il Sediplus ® dispositivo di misurazione dell’eritrosedimentazione automatico a 40 canali che utilizza un metodo di misurazione a trasmissione IR. ® Il sistema Sediplus dell'eritrosedimentazione. Dopo la misurazione, i risultati possono essere inseriti in un sistema informatico. Naturalmente, il display può... - Page 281 mm secondo il metodo Westergren e forniti secondo il medesimo metodo standardizzato dopo 1 ora in mm/h. Il Sediplus ® I valori di riferimento devono essere determinati a livello locale in accordo con le raccomandazioni per i valori di riferimento. In considerazione dell’aumento progressivo della VES con l’età, per ogni decennio di vita dovrebbero essere determinati sottostante sono riportati i valori di riferimento della VES che possono essere utilizzati come linee guida per la determinazione dei valori di riferimento locali.
-
Page 282: Montaggio Del Dispositivo / Installazione
Montaggio del dispositivo / installazione attenzione a quanto segue: • Le vibrazioni del sistema di sedimentazione riempito determinano valori di sedimentazione supporto esente da vibrazioni. Il dispositivo, ad esempio, non deve essere collocato su un tavolo da laboratorio insieme a una centrifuga. •... - Page 283 ® Dispositivo: Sediplus S 2000 NX Codice articolo: SARSTEDT N. 90.1092 Produttore: SARSTEDT AG & Co. KG Indirizzo: Sarstedtstraße 1 D-51582 Nümbrecht Dati del dispositivo Principio di misurazione: Procedimento di misurazione delle trasmissioni IR con compensazione di luce estranea misurazione dell'eritrosedimentazione nella SARSTEDT S-Sedivette ®...
- Page 284 ® Supporti per campioni: SARSTEDT S-Sedivette Postazioni di misurazione: 40 posizioni Memorizzazione dei dati: Una batteria montata consente la registrazione dei dati (dati di misurazione, data, ora) in caso di blackout Emissione dei dati su: - Display - Stampante - Sistema informatico / HL7...
-
Page 285: Disimballaggio, Trasporto E Conservazione
(ferrovie, posta, servizi postali o spedizionieri). Questi sono, in particolari circostanze, di sole 24 ore. • Vizi o danni devono essere immediatamente comunicati a SARSTEDT AG & Co. KG! • • L’imballaggio utilizzato per il trasporto non dovrebbe essere smaltito. -
Page 286: Collegamento Di Una Tastiera Di Un Computer E/O Di Uno Scanner Per Codici A Barre
2.3.4 Collegamento di una tastiera di un computer e/o di uno scanner per codici a barre Quando si collegano e scollegano una o più unità periferiche (scanner per codici a barre, tastiera di un computer, sistema informatico e/o stampante) il Sediplus ®... -
Page 287: Collegamento Di Una Stampante Opzionale
2.3.5 Collegamento di una stampante opzionale È possibile collegare a entrambi i cavi USB uno scanner per codici a barre, una tastiera di un computer e una stampante. Inserire il cavo USB della stampante nella porta USB sul retro del dispositivo, vedi Figura 1. Alla voce del menu Impostazioni stampa: Figura 3: Stampa di prova... -
Page 288: Descrizione Dell'interfaccia Hl7
Posizione Dati Descrizione Nome del segmento Separatore di campo ^~\& Altri simboli di separazione S2000 Applicazione inviante Sarstedt Processo inviante Applicazione ricevente Struttura ricevente AAAAMMGGHHMMSS Momento della creazione del messaggio Vuoto OML^O21 Tipo di messaggio e risultato Numero di controllo del messaggio... - Page 289 Segmento OBR Posizione Dati Descrizione Nome del segmento 1 per OBR 1 Numero segmento OBR 2 per OBR 2 Numero dell’incarico, qui Codice a barre Vuoto Vuoto Vuoto AAAAMMGGHHMMSS Momento della misurazione Vuoto Vuoto Vuoto Vuoto Vuoto Vuoto Vuoto Vuoto Vuoto Vuoto Vuoto...
-
Page 290: Elementi Funzionali Del Sediplus ® S 2000 Nx
(avanti e indietro durante la misurazione). Utilizzare come supporto del sangue del paziente per Sediplus ® S 2000 NX esclusivamente la S-Sedivette ® di SARSTEDT. Con altre provette, ad es. provette Westergren, si ottengono valori di eritrosedimentazione errati. -
Page 291: Led Del Pannello Di Misurazione
LED del pannello di misurazione Tutti i 40 LED lampeggiano contemporaneamente. misurazione, inserire quindi le S-Sedivette. Il LED di una determinata posizione non è illuminato e la relativa posizione non è occupata. ® per la misurazione. ® Il LED di una posizione è illuminato. La posizione è occupata con una S-Sedivette La misurazione con la S-Sedivette inserita ®... -
Page 292: Display
Display ® Per l’utilizzo e la visualizzazione dei valori misurati, il Sediplus S 2000 NX dispone di un moderno touch-screen. Tramite display viene visualizzato lo stato del dispositivo: data, giorno della settimana, ora, numero delle posizioni libere e occupate Figura 6: Vista principale Nella vista principale sono visualizzate le seguenti informazioni: Tabella 1 Posizione... -
Page 293: Utilizzo Del Sediplus S 2000 Nx
® Utilizzo del Sediplus S 2000 NX Accensione del dispositivo Accendere il Sediplus ® riportata anche alla voce del menu di assistenza (Capitolo 5.2). Figura 7: Schermata di avvio visualizzazione principale. Figura 8: Schermata di avvio con visualizzazione dello stato Capitolo 4.3: 1. -
Page 294: Preparazione Dei Campioni
® S-Sedivette per prelievi ematici Il prelievo ematico avviene con la SARSTEDT S-Sedivette ® trisodico / soluzione tampone con acido citrico) in rapporto di miscelazione di 1:4 (1 parte di citrato + 4 parti di sangue) come anticoagulante. -
Page 295: Utilizzo Della S-Sedivette E Avvio Di Una Misurazione
La S-Sedivette ® Importante: Ogni campione ematico deve essere miscelato a fondo, ma senza formare schiuma, direttamente dopo il prelievo ematico e subito prima dell’inserimento nel dispositivo. Questa operazione può essere eseguita a mano in modo tale che la sfera di miscelazione contenuta ®... - Page 296 Possibilità 2: ® Il codice a barre o il numero ID del paziente sono disponibili separatamente (non sulla S-Sedivette ® ® in una posizione di misurazione libera senza dover premere in precedenza il pulsante. - La misurazione inizia automaticamente con l’inserimento. Sul display viene visualizzato quanto segue: ®...
- Page 297 - Sul display viene visualizzato quanto segue: Figura 13: Inserimento dell’ID - Inserire il numero ID. È possibile inserire il numero ID tramite touch-screen o tramite tastiera del computer opzionale e confermare con il tasto premendo il tasto [OK]. - Sul display viene visualizzato quanto segue: Figura 14: Inserimento della S-Sedivette ®...
-
Page 298: Selezione Dei Momenti Della Misurazione
Selezione dei momenti della misurazione impostazioni, vedi Capitolo 5.1.3 Impostazioni per le misurazioni. Figura 15: Selezione dei momenti della misurazione prima dell’avvio di una misurazione Inserimento del numero ID o una tastiera di un computer AT (opzionale). ® Con il Sediplus - Se si preme il tasto rosso o si inserisce una S-Sedivette ®... -
Page 299: Inserimento Del Numero Id Con Scanner Per Codici A Barre (Opzionale)
4.5.1 Inserimento del numero ID con scanner per codici a barre (opzionale) ® ® ® Quando si legge il codice a barre dalla S-Sedivette , tenerla in verticale. Muovere il codice a barre della S-Sedivette lungo lo scanner per codici a barre. Informazioni sull’installazione dello scanner opzionale per codici a barre sono presenti nel Capitolo 2.3.4 o nelle Istruzioni d'uso dello scanner per codici a barre utilizzato. - Page 300 Nella vista principale sono visualizzati tutti i risultati della misurazione in ogni momento. In generale, sono visualizzati solo i valori misurati convertiti in valori secondo il metodo Westergren. A seconda dell’opzione impostata (vedi Capitolo 5.1.3 Impostazioni per le misurazioni) la determinazione del valore misurato valori di sedimentazione della posizione sono a disposizione.
-
Page 301: Supporto Acustico
Attenzione! Se si inserisce nella posizione una nuova S-Sedivette ® , il protocollo di misurazione della S-Sedivette ® I dati non saranno più disponibili! Si consiglia di utilizzare le opzioni sulla trasmissione dei dati a un sistema informatico o a una stampante, vedi Capitoli 2.3.5 o 2.3.6. -
Page 302: Nuova Stampa / Ripetizione Della Procedura Di Stampa
Nuova stampa / ripetizione della procedura di stampa ® Fino a quando la S-Sedivette toccando il campo di stampa. Figura 20: Nuova stampa / ripetizione della procedura di stampa Cancellazione dei risultati della misurazione È possibile cancellare manualmente i risultati della misurazione relativi sia a misurazioni in corso sia a misurazioni concluse. •... -
Page 303: Menu
Menu richiamare l’assistenza così come le funzioni di pulizia. Possono essere inoltre visualizzati e cancellati i messaggi di errore. Figura 21: Richiamo del menu Impostazioni di far scorrere l’elenco delle impostazioni verso l’alto e il basso. Figura 22: Impostazioni 5.1.1 Lingua Si può... -
Page 304: Id Di Avvio
5.1.2 ID di avvio con il numero ID visualizzato e inserire il numero desiderato, ad es. 00000001 con la tastiera del display o la tastiera di un ® inserita. Figura 24: Impostazione ID di avvio 5.1.3 Impostazioni per le misurazioni 5.1.3.1 Tipo di misurazione ®... -
Page 305: Cancellazione Delle Misurazioni
S-Sedivette riempite in modo diverso dovuto allo spostamento del rapporto di miscelazione anticoagulante/sangue. ® di scatto (vedi Istruzioni d’uso della S-Sedivette www.sarstedt.com/en/download/instructions-for-use). ® medico curante. Questo vale anche per la valutazione dei risultati di misurazione di S-Sedivette riempite in Nella valutazione dei valori misurati, tenere presente che il tratto massimo misurabile si estenda dal menisco della colonna di sangue al bordo superiore dell’etichetta. -
Page 306: Data
5.1.5 Data Il Sediplus ® S 2000 NX dispone di un orologio elettronico montato. Figura 27: Impostazione della data Figura 28: Impostazione del formato della data 5.1.6 ® Il Sediplus S 2000 NX dispone di un orologio elettronico montato. Figura 29: Impostazione dell'ora... -
Page 307: Impostazioni Di Stampa
5.1.7 Impostazioni di stampa di prova). Figura 30: Impostazioni di stampa Figura 31: Protocollo di misurazione stampato ® dal dispositivo. Una volta trascorso il tempo di misurazione appare un messaggio di avvertimento, vedi Capitolo 6.4 ® Rimozione prematura di una S-Sedivette Figura 32: Messaggio di avvertimento: stampa non possibile... -
Page 308: Impostazioni Di Rete / Hl7
Sul display, sotto ai valori misurati, viene visualizzata un’avvertenza Figura 33: Visualizzazione risultato con errore di stampa 5.1.8 Impostazioni di rete / HL7 In questa voce del menu sono inseriti i dati necessari per accoppiare il dispositivo con un LIS (sistema informativo di laboratorio). -
Page 309: Assistenza
Assistenza Il menu di assistenza comprende voci riguardanti la manutenzione del dispositivo. Queste voci del menu sono richiamate dal tecnico dell’assistenza del fabbricante. Errori In questa voce del menu sono visualizzati possibili messaggi di errore. Questi, come indicato, possono essere cancellati. Figura 36: Cancellazione dei messaggi di errore Anomalie ed errori di utilizzo Prestare attenzione anche i fattori di disturbo descritti nella letteratura specializzata (ad es. - Page 310 ® ® modo corretto (vedi Istruzioni d’uso della S-Sedivetten). Istruzioni d'uso online: S-Sedivette ; GB 512 alla pagina: www.sarstedt.com/en/download/instructions-for-use • ® in caso di rottura dello stesso, non ne sia nuovamente spinto un pezzo nella S-Sedivette • dubbio. • dello spostamento dei rapporti di miscelazione anticoagulante/sangue.
-
Page 311: Misurazione Sbagliata
Pochi secondi dopo l’inserimento della S-Sedivette ® riconosce il sottoriempimento della S-Sedivette ® ® , la misurazione viene segnalata in rosso; tale avviso Figura 38: S-Sedivette ® ® L’avvertenza relativa al sottoriempimento di una S-Sedivette visualizzata direttamente al termine di una misurazione di 15 secondi. ®... -
Page 312: Rimozione Prematura Di Una S-Sedivette
® Rimozione prematura di una S-Sedivette La rimozione prematura di una S-Sedivette ® viene riconosciuta dal dispositivo come un errore. Questo avviene quando una S-Sedivette ® viene rimossa dalla sua posizione senza che la misurazione sia ancora ® terminata (fare attenzione anche al capitolo 4.3 Utilizzo della S-Sedivette e Avvio di una misurazione). - Page 313 Figura 41: Visualizzazione del risultato con avvertenza di misurazione ritardata Attenzione! ® Attenzione: La S-Sedivette ® ® , ad es., viene rimossa dopo la misurazione la misurazione mancante. Lo stesso vale per il prelievo dopo la misurazione a 1 ora e il puntuale riposizionamento prima della misurazione a 2 ore.
-
Page 314: Guasto Della Rete
Guasto della rete periodo del guasto non vengano registrati valori. quando il dispositivo, al termine di tutte le misurazioni, viene spento e si desidera accedere ai valori solamente il giorno successivo. su una stampa o su un report di misurazione trasmesso. ®... - Page 315 Rispettare assolutamente le disposizioni sulla pulizia del dispositivo. Una pulizia negligente o il mancato rispetto di tali disposizioni può determinare l’insorgere di anomalie! • Prima di pulire, staccare il dispositivo dall’alimentazione elettrica. • Eccezione: • È possibile sollevare il piano di misurazione nella posizione più alta per pulire le parti dell’involucro sotto il pannello di misurazione e disattivare per 30 secondi il touch-screen per pulirlo.
- Page 316 • Premere il tasto di avvio misurazione. • Inserire nel dispositivo la prima S-Sedivette di prova completamente riempita. • • • Il dispositivo scansiona nuovamente la S-Sedivette di prova e calcola il primo valore, che viene mostrato sia in millimetri sia in mm secondo il metodo Westergren.
-
Page 317: Manutenzione Presso Il Produttore
Figura 45: Sistema rapidamente possibile dalla nostra centrale di assistenza. una copia della bolla di consegna, nell’imballaggio originale, all’indirizzo seguente o all’agente di vendita locale di SARSTEDT. DESAGA GmbH / SARSTEDT-GRUPPE Servizio di assistenza In den Ziegelwiesen 1-7 D-69168 Wiesloch Tel.:... -
Page 318: Messa Fuori Servizio / Smaltimento
Il dispositivo, così come le sostanze che sono utilizzate o impiegate con questo dispositivo, devono essere obbligatoriamente maneggiati e smaltiti secondo le disposizioni di legge vigenti in modo corretto e professionale. Al momento della dismissione del dispositivo rivolgersi al produttore SARSTEDT AG & Co. KG che lo La SARSTEDT S-Sedivette ®... -
Page 319: Informazioni Relative All'ordinazione
® S-Sedivette , codice a colori UE 06.1690.001 ® S-Sedivette , codice a colori ISO 06.1690.100 Da SARSTEDT AG & Co. KG sono disponibili altre soluzioni sistematiche per la determinazione della VES. Articolo: N. d'ordine: ® S-Monovette 05.1079 ® S-Monovette 05.1079.001... -
Page 320: Garanzia E Responsabilità
Temperatura ambiente Interfaccia HL7 Interfaccia per la trasmissione dei dati di misurazione a un sistema informativo di laboratorio (LIS) Sedimentazione degli eritrociti in mm/h ® S-Sedivette Sistema di prelievo ematico di sicurezza di SARSTEDT Westergren Valore di sedimentazione in mm/h... -
Page 321: Indice Delle Immagini
Indice delle immagini ® Figura 1: Retro del Sediplus S 2000 NX ......................283 ...................286 Figura 3: Stampa di prova ..........................287 Figura 4: Vista anteriore del Sediplus ® S 2000 NX ...................290 ® Figura 5: S-Sedivette rimossa ........................291 Figura 6: Vista principale ..........................292 Figura 7: Schermata di avvio ...........................293 Figura 8: Schermata di avvio con visualizzazione dello stato ................293 Figura 9: Richiamo del menu ..........................294... - Page 322 1) CLSI* H2-A5 2011: Procedures for Erythrocyte Sedimentation Rate Test. 2) Thomas, L.: Labor und Diagnose. Digitale Ausgabe Labor & Diagnose 2020; Kapitel 19.3.2 Blutkörperchensenkungs- Reaktion (BSR) (www.labor-und-diagnose-2020.de/k19.html#_idTextAnchor8638) 3) ICSH recommendations for measurement of erythrocyte sedimentation rate. J. Clin. Pathol. 1993 46:198-203 *CLSI (Clinical and Laboratory Standards Institute) 4) Bruhn et al;...
-
Page 323: Legenda Dei Simboli E Dei Contrassegni
Legenda dei simboli e dei contrassegni Le presenti istruzioni d'uso contengono i seguenti simboli importanti che rimandano a pericoli ed errori di utilizzo, Nel capitolo ® S 2000 NX. • Sono forniti avvisi importanti. • Viene descritto un pericolo diretto o possibile per la vita e la salute delle persone. •... - Page 324 Designazione della partita Marchio CE Diagnostica in vitro Produttore Paese di fabbricazione Data di fabbricazione: Numero di serie Raccolta separata di dispositivi elettrici ed elettronici...
-
Page 325: Modulo Di Decontaminazione
Inviare il dispositivo insieme al questionario sulle contaminazioni riempito, a una breve descrizione del problema insorto e a una copia della bolla di consegna al servizio di assistenza della ditta DESAGA GmbH / SARSTEDT-GRUPPE, Wiesloch, oppure al proprio agente locale di vendita SARSTEDT. -
Page 326: Basisinstructies
® ® ® Sediplus , Sedivette , Sarmix en Monovette SARSTEDT AG & Co. KG Nümbrecht, mei 2022 SARSTEDT AG & Co. KG Toestelgegevens: Adres van de fabrikant en de klantendienst: (in te vullen door de klant) SARSTEDT AG & Co. KG ®... - Page 327 Inhoudsopgave Basisinstructies! ............................326 Algemene informatie ........................329 Veiligheidsinstructies ...........................329 Gebruiksdoel ............................333 EG-conformiteitsverklaring ........................333 Introductie ............................334 ............................334 De eenheid 'bezinking' ........................334 Opstellen van het toestel / de installatie ....................336 2.3.1 Technische gegevens .........................337 2.3.2 Uitpakken, transport en opslag ......................339 2.3.3 Leveringsomvang ..........................339 2.3.4 Aansluiten van een PC-AT-toetsenbord en/of een barcodescanner .............340 2.3.5...
- Page 328 Storingen en bedieningsfouten .......................363 ............363 Ondervulde S-Sedivette ® ........................364 Foutieve meting ..........................365 ® ..................366 Netwerkuitval............................368 Service en onderhoud ........................368 Reinigen van het toestel ........................368 Kwaliteitscontroles met test-Sedivetten ....................369 Meetoptiek ............................371 .........................371 ....................372 Algemene voorzorgsmaatregelen ....................372 Beperkingen .............................372 Bestelinformatie ..........................373 ......................374 .........................374 Afbeeldingsopgave ..........................375 Literatuur ............................376...
-
Page 329: Algemene Informatie
Dit toestel mag enkel worden gebruikt: • voor reglementair gebruik. • in veiligheidstechnische correcte toestand. SARSTEDT AG & Co. KG of door personen die door SARSTEDT AG & Co. KG werden aangesteld. • personeel, de laboratoriumdirectie of de behandelende arts. - Page 330 • Trillingen van het gevulde bezinkingssysteem leiden tot hogere bezinkingswaarden. geplaatst. • • Als het gevulde bezinkingssysteem schuin staat, leidt dit tot hogere bezinkingswaarden. Het toestel moet daarom zo worden opgesteld dat het van bovenaf met de S-Sedivetten kan worden geladen en dat de S-Sedivetten verticaal staan. •...
- Page 331 ; GB 512 op: www.sarstedt.com/en/download/instructions-for-use Let erop dat de beoordeling van de meetresultaten van ondervulde S-Sedivetten wordt overgelaten aan het bedieningspersoneel, de laboratoriumdirectie of de behandelende arts. • Gebruik alleen de S-Sedivetten voor het SARSTEDT bloedbezinkingssysteem Sediplus ® S 2000 NX •...
- Page 332 Volg absoluut de voorschriften voor het reinigen van het toestel. Onzorgvuldig reinigen of het niet in acht nemen van de voorschriften kan tot storingen leiden! • Koppel het toestel los van de spanningstoevoer om het te reinigen. • In het menu vindt u het menupunt Reiniging, zie hoofdstuk 8.1: de meetplaat te reinigen en het touch-display gedurende 30 seconden uit te schakelen om het te reinigen.
-
Page 333: Gebruiksdoel
De bloedcelbezinkingssnelheid wordt gemeten in een bereik van 0-65 mm, wat overeenkomt met 0-116 mm volgens Westergren. Monstermateriaal: mengverhouding van 1:4 (1 deel citraat + 4 delen bloed) in S-Sedivetten (art. nr. 06.1690.xxx). *BSE = erytrocytbezinkingssnelheid of bloedbezinkingssnelheid EG-conformiteitsverklaring https://www.sarstedt.com/en/download/declarations-of-conformity... -
Page 334: Introductie
BBS-waarden. Onder invloed van de zwaartekracht wordt na 1 uur de sedimentatiesnelheid bepaald en uitgedrukt in mm-Westergren. Om de bloedbezinking uit te voeren, wordt 2,8 ml veneus bloed opgenomen in de SARSTEDT S-Sedivette ®... - Page 335 De Sediplus ® S 2000 NX meet het hoogteverschil tussen de onderste meniscus van het plasmavloeistofoppervlak en het gemeten, omgerekend in Westergren-mm en na 1 uur uitgevoerd in x mm/u volgens de genormaliseerde Westergren- ® methode. Bovendien biedt de Sediplus uit te voeren.
-
Page 336: Opstellen Van Het Toestel / De Installatie
Opstellen van het toestel / de installatie toestel op het volgende te letten: • Trillingen van het gevulde bezinkingssysteem leiden tot vals hogere bezinkingswaarden. geplaatst. • • Als het gevulde bezinkingssysteem schuin staat, leidt dit tot vals hogere bezinkingswaarden. Het toestel moet daarom zo worden opgesteld dat de S-Sedivetten verticaal staan en dat het van bovenaf met de S-Sedivetten kan worden geladen. -
Page 337: Technische Gegevens
Technische gegevens Fabrikant- en toestelgegevens ® Toestel: Sediplus S 2000 NX Bestelnummer: SARSTEDT Nr. 90.1092 Fabrikant: SARSTEDT AG & Co. KG Adres: Sarstedtstraße 1 D-51582 Nümbrecht Toestelgegevens Meetprincipe: IR-transmissie-meetmethode met omgevingslichtcompensatie Bloedbezinkingsmeting in de SARSTEDT S-Sedivette ® Omzetting naar Westergren-... - Page 338 Meetstations: 40 posities Gegevensopslag: Gegevensuitvoer op: - Display - Printer - EDV / HL7 Spanningstoevoer: 110-230 V~, (-10/+10 %), 50-60 Hz Opgenomen vermogen: 16 W Zekeringen: 0,8 AT (2 stuks smeltzekeringen, 5 x 20 mm) Storingsemissie en Het toestel is getest in overeenstemming met de vereisten voor uitgestraalde -bestendigheid interferentie en immuniteit voor interferentie volgens DIN EN 61326-2-6:2013-09 voor elektromagnetische compatibiliteit (EMC) voor in-vitro-diagnostische (IVD) apparaten.
-
Page 339: Uitpakken, Transport En Opslag
2.3.2 Uitpakken, transport en opslag ® De Sediplus S 2000 NX (SARSTEDT Nr. 90.1092) is met het volledig toebehoren in een karton verpakt. • • omstandigheden slechts 24 uur. • • • De transportverpakking mag niet worden weggegooid. • •... -
Page 340: Aansluiten Van Een Pc-At-Toetsenbord En/Of Een Barcodescanner
2.3.4 Aansluiten van een PC-AT-toetsenbord en/of een barcodescanner toetsenbord, EDV en/of printer) moet de Sediplus ® S 2000 NX beslist van denetvoeding worden losgekoppeld! ® Aan de achterkant van de Sediplus S 2000 NX vindt u naast de RJ-45-poort voor de Ethernet-aansluiting op een netwerk ook twee USB-poorten voor de aansluiting van randapparatuur: Op de twee USB-poorten kunt u een barcodescanner, een PC-AT-toetsenbord of een printer aansluiten. -
Page 341: Aansluiten Van Een Optionele Printer
2.3.5 Aansluiten van een optionele printer Op de twee USB-poorten kunt u een barcodescanner, een PC-AT-toetsenbord of een printer aansluiten. volgende print: Afbeelding 3: Testprint... - Page 342 (LIS) dat is geprogrammeerd op basis van de HL7-norm. Dit door het toestel verzonden bericht is als volgt gestructureerd: MSH-segment Positie Gegevens Segmentnaam Veldscheider ^~\& andere scheidingstekens S2000 Toepassing verzenden Sarstedt Verzendingsproces Receiving application Receiving facility YYYYMMDDHHMMSS Leeg OML^O21 Berichttype en gebeurtenis Berichtcontrolenummer Verwerkingsmodus HL7 versienummer...
- Page 343 OBR-segment Positie Gegevens Segmentnaam 1 voor OBR 1 OBR-segmentnummer 2 voor OBR 2 Ordernummer, hier: Barcode Leeg Leeg Leeg YYYYMMDDHHMMSS Leeg Leeg Leeg Leeg Leeg Leeg Leeg Leeg Leeg Leeg Leeg Leeg Meetwaarde Voorbeeld: Een volledig HL7-bericht voor barcode 1234567 met de twee meetwaarden 1.11 om 14:35:00 en 2.22 om 15:05:00 gemeten op 30.10.2020 zou er dan als volgt uitzien: Netwerkinstellingen / HL7...
-
Page 344: De Functionele Elementen Van De Sediplus S 2000 Nx
De S-Sedivetten worden verticaal door de geleidegaten in de bodems van de basismodule gestoken. Het sensorsysteem voor de bezinkingsmeting is ondergebracht in de meetplaat. Daarom mag de beweging van de Gebruik uitsluitend de S-Sedivette ® van SARSTEDT als drager van patiëntenbloed voor Sediplus ® S 2000 NX. -
Page 345: De Leds Van De Meetplaat
De LEDS van de meetplaat De leds geven de verschillende toestanden van de overeenkomstige positie of van het gehele toestel aan. Optische signalering: De meetplaat wordt weer omhoog en naar beneden bewogen voor de meting in de volgende de S-Sedivetten in. De LED van een bepaalde positie brandt niet en de overeenkomstige positie is onbezet. -
Page 346: Het Display
Het display ® De Sediplus S 2000 NX beschikt over een modern touch-screen voor de bediening en voor de weergave van de meetwaarden. Via het display kunt u alle meetgegevens van voltooide en lopende metingen opvragen met behulp van aantal voltooide metingen - wordt op het display weergegeven. In de volgende afbeelding ziet u de weergave van het in de rechterbenedenhoek kunt u de meetresultaten sorteren volgens uw behoeften. -
Page 347: Bediening Van De Sediplus S 2000 Nx
® Bediening van de Sediplus S 2000 NX Inschakelen van het toestel Schakel de Sediplus ® S 2000 NX aan de achterkant van het toestel met de netschakelaar in. U ziet de volgende displayweergave. In de rechterbenedenhoek van het scherm ziet u de softwareversie die momenteel op het toestel Afbeelding 07: Startscherm Na een paar seconden schakelt het toestel automatisch in. -
Page 348: Voorbereiden Van De Monsters
Afbeelding 09: Oproepen van het menu Voorbereiden van de monsters ® • Gebruik alleen de S-Sedivetten voor het SARSTEDT bloedbezinkingssysteem Sediplus S 2000 NX • poedersporen van handschoenen op zitten. Verontreiniging veroorzaakt extra signalen die worden etiket of zelfklevende etiketten op dezelfde hoogte interfereren niet met de meting. -
Page 349: Plaatsen Van De S-Sedivette En Starten Van Een Meting
5 keer door het hele bloedmonster gaat, of voorzichtig en comfortabel met een toestel dat speciaal voor deze taak is ® ontwikkeld door SARSTEDT AG & Co. KG, de Sarmix M 2000 (zie hoofdstuk 9 Bestelinformatie). ® Gebruik de SARSTEDT Sarmix om zorgvuldig en voorzichtig te mengen. - Page 350 ® ® staat, kunt u een S-Sedivette ® zonder eerst een knop in te drukken. ® Afbeelding 11: Start een meting door een S-Sedivette te plaatsen - Voer het ID-nummer in: U kunt het ID-nummer invoeren via het touch-display of via een optioneel PC-AT-toetsenbord en bevestigen met de [OK] toets.
- Page 351 Afbeelding 13: Invoer van de ID - Voer het ID-nummer in: U kunt het ID-nummer invoeren via het touch-display of via een optioneel PC-AT-toetsenbord en bevestigen met de [OK]- toets. Een andere optie is het accepteren van het ID-nummer dat op het display wordt voorgesteld (opeenvolgend niet Afbeelding 14: S-Sedivette ®...
-
Page 352: Invoeren Van Het Id-Nummer
(zie Afbeelding 15) of het globaal instellen voor alle metingen in de instellingen, zie 5.1.3 Meetinstellingen. Invoeren van het ID-nummer Met de Sediplus ® - Wanneer u op de rode toets drukt of een S-Sedivette ® insteekt, suggereert het toestel een opeenvolgend ID-nummer. - Druk op de toets [OK] om dit voorgestelde opeenvolgende nummer als ID-nummer te accepteren (opeenvolgend, - U kunt ook uw eigen ID-nummer invoeren via het touch-display of een PC-AT-toetsenbord. -
Page 353: Invoeren Van Het Id-Nummer Door Middel Van Een Barcodescanner (Optioneel)
4.5.1 Invoeren van het ID-nummer door middel van een barcodescanner (optioneel) Een andere manier om het ID-nummer in te voeren is door het te scannen met een optionele barcodescanner. ® ® Wanneer u de barcode uit de S-Sedivette leest, moet u deze absoluut verticaal houden. Beweeg de barcode van de S-Sedivette ®... - Page 354 In de hoofdweergave worden steeds alle meetresultaten weergegeven. In het algemeen worden alleen meetwaarden positie beschikbaar. Afbeelding 18: Hoofdaanzicht ® dat de S-Sedivette overeenkomstige meting rood gemarkeerd, voor details over foutdetectie zie hoofdstuk 6 Fouten en bedieningsfouten. Afbeelding 19: Resultaatweergave...
-
Page 355: Akoestische Ondersteuning
Let op! Als u een nieuwe S-Sedivette ® S-Sedivette ® De gegevens staan niet meer ter beschikking! Het wordt aanbevolen om de opties voor gegevensoverdracht naar een EDV-systeem of een printer te gebruiken, zie hoofdstuk 2.3.5 of 2.3.6. Akoestische ondersteuning ®... -
Page 356: Nieuwe Print / Herhalen Van Het Printproces
Nieuwe print / Herhalen van het printproces Als de printer was geactiveerd voordat de metingen werden gestart, zie 5.1.7 Printinstellingen, wordt het meetprotocol ® Zolang de S-Sedivette hoofdweergavepagina. In de detailweergave kunt u het protocol zo vaak als u wilt opnieuw afdrukken door op het afdrukveld te tikken. -
Page 357: Menu
Menu Door op de menuknop te tikken (zie afbeelding 21) komt u in het menu. Hier kunt u verschillende opties instellen en service- en reinigingsfuncties oproepen. Bovendien kunnen foutmeldingen worden weergegeven en gewist. Afbeelding 21: Oproepen van het menu Instellingen Als u het menupunt "Instellingen"... -
Page 358: Start-Id
5.1.2 Start-ID Tik daartoe in het veld met het weergegeven ID-nummer en voer via het displaytoetsenbord of het optioneel aangesloten ® nieuwe S-Sedivette die wordt ingebracht. Afbeelding 24: Start-ID instellen 5.1.3 Meetinstellingen 5.1.3.1 Meettype ® S 2000 voeren. De bediening van het toestel verandert daardoor niet. Afbeelding 25: Meetinstellingen... -
Page 359: Ondervullingsgrens 5
- De beoordeling van de meetresultaten van ondervulde S-Sedivetten wordt overgelaten aan het bedieningspersoneel, de gevulde S-Sedivetten als gevolg van de verschoven mengverhouding anticoagulans/bloed. ® van de S-Sedivette www.sarstedt.com/en/download/instructions-for-use). ® wordt geduwd. behandelende arts. Eveneens de beoordeling van de meetresultaten van ondervulde S-Sedivetten. -
Page 360: Datum
5.1.5 Datum ® De Sediplus S 2000 NX beschikt over een ingebouwde elektronische timer. evenals het weergaveformaat. Afbeelding 27: Datum instellen Afbeelding 28: Datumformaat instellen De Sediplus ® S 2000 NX beschikt over een ingebouwde elektronische timer. evenals het weergaveformaat. -
Page 361: Printinstellingen
5.1.7 Printinstellingen Als meetprotocollen moeten worden afgedrukt via een printer die is aangesloten op de USB-aansluiting, moet de afdrukinterface worden geactiveerd in de instellingen. De werking van de printer kan in dit menupunt worden gecontroleerd (testprint). Afbeelding 30: Afdrukinstellingen Als de printer is geactiveerd, wordt het meetprotocol automatisch afgedrukt nadat een meting is voltooid. Afbeelding 31: Geprint meetprotocol ®... -
Page 362: Netwerkinstellingen / Hl7
Afbeelding 33: Resultaatweergave met printfouten 5.1.8 Netwerkinstellingen / HL7 In dit menupunt worden de nodige gegevens ingevoerd om het toestel aan een LIS (Laboratoriuminformatiesysteem) te koppelen. • Server-IP • Server-poort • Toepassing ontvangen • Inrichting/proces ontvangen Voor het instellen van de interface kunt u contact opnemen met uw systeembeheerder en de serviceafdeling van DESAGA, zie hoofdstuk 7 Service en onderhoud. -
Page 363: Service
Service opgeroepen door de servicetechnici van de fabrikant. Fouten Afbeelding 36: Foutmelding wissen Storingen en bedieningsfouten Er mogen geen voorwerpen op of naast de meetplaat liggen. Indien om een of andere reden de meetplaat geblokkeerd wordt, wordt de beweging automatisch gestopt Afbeelding 37: Foutmelding meettafel geblokkeerd... -
Page 364: Ondervulde S-Sedivette
® Ondervulde S-Sedivette ® ; GB 512 op: www.sarstedt.com/en/download/instructions-for-use • ® eindje wordt teruggeduwd in de S-Sedivette wanneer de zuigerstang wordt afgebroken. • In geval van ondervulling is het aan de exploitant om te bepalen of de BBS/ESR-waarden moeten worden betwist. -
Page 365: Foutieve Meting
Enkele seconden na het inbrengen van de S-Sedivette ® wordt de eerste meting verricht. Zelfs op dit punt detecteert het toestel ondervulling van de S-Sedivette ® ® Indien ondervulling van een S-Sedivette gedurende de volledige periode van de meting. Afbeelding 38: Ondervulde S-Sedivette ®... - Page 366 ® ® wordt door het toestel als een fout herkend. Dit is het geval wanneer een S-Sedivette ® ® (zie ook hoofdstuk 4.3 S-Sedivette inbrengen en een meting starten). ® Als u een S-Sedivette ® Afbeelding 40: S-Sedivette • U kunt zolang geen nieuwe meting starten totdat de fout verholpen werd. •...
- Page 367 Afbeelding 41: Resultaatweergave met aanduiding van vertraagde meting Let op! S-Sedivette ® op deze positie wordt ingevoegd. Opgelet: De S-Sedivette ® de meting stopzet. Dit betekent dat als de S-Sedivette ® ® toestel haalt een meting in zodra de betrokken S-Sedivette (n) gereset is.
-
Page 368: Netwerkuitval
Netwerkuitval het toestel uitschakelt nadat u alle metingen hebt voltooid en de waarden pas de volgende dag wilt raadplegen. niet voldoende om een meting uit te voeren. Nadat de netvoeding is hersteld, voert het toestel de achterstallige meting(en) uit. op een afdruk of op een verzonden meetrapport. ®... -
Page 369: Kwaliteitscontroles Met Test-Sedivetten
Aanbeveling: Laat uw toestel eenmaal per jaar door de fabrikant onderhouden. Controleer de goede werking van uw toestel aan het begin van elke serie metingen met de SARSTEDT servicecentrum van DESAGA GmbH te laten controleren. Het menupunt "Testmeting" (Menu - Service-testmeting) betreft metingen ten behoeve van een functionele test. - Page 370 • Druk op de toets Meting starten • Plaats de eerste volledig gevulde test-Sedivette in het toestel • • • Het toestel scant de test-Sedivette opnieuw en berekent de eerste meting, die zowel in millimeters als in mm-westergren wordt weergegeven. •...
-
Page 371: Meetoptiek
+49 (0) 62 22 / 92 88 65 service.des@desaga-gmbh.de Aanbeveling: Laat uw toestel eenmaal per jaar door de fabrikant onderhouden. Controleer de goede werking van uw toestel aan het begin van elke serie metingen met de SARSTEDT servicecentrum van DESAGA GmbH te laten controleren. -
Page 372: Algemene Voorzorgsmaatregelen
De SARSTEDT S-Sedivette ® en bloedmonsters die u gebruikt of aanbrengt in verband met het toestel ® Sediplus Desinfecteer indien nodig en voer het correct en professioneel af! De gebruikershandleiding is gedrukt op mat papier (80gm/m ), geniet in de bundel en kan in uw recyclagesysteem worden ingevoerd. -
Page 373: Bestelinformatie
® BBS-staander voor de Microvette CB 200 BBS, met achterwand met schaalverdeling 90.1091 Als u vragen heeft over andere SARSTEDT-producten of het SARSTEDT-assortiment, neem dan contact met ons op: SARSTEDT AG & Co. KG Sarstedtstraße 1 D-51582 Nümbrecht Telefoon: +49 2293 305 0... - Page 374 Temperatuurbereik, 18-25° conform CLSI H02 - A5 (1), of conform land- of HL7-interface Interface voor de overdracht van meetgegevens aan een laboratoriuminformatiesysteem (LIS) Bezinkingssnelheid Bezinken van de erytrocyten in x mm/u ® S-Sedivette Veilig bloedafnamesysteem van SARSTEDT Westergren Bezinkingswaarde in mm/u...
-
Page 375: Afbeeldingsopgave
Afbeeldingsopgave ® Afbeelding 1: Achterwand van de Sediplus S 2000 NX .................337 Afbeelding 2: Barcodescanner testen ......................340 Afbeelding 3: Testprint ............................341 Afbeelding 4: Vooraanzicht op de Sediplus ® S 2000 NX..................344 ® Afbeelding 5: S-Sedivette ......................345 Afbeelding 6: Hoofdaanzicht ...........................346 Afbeelding 07: Startscherm ..........................347 Afbeelding 08: Startscherm met de statusweergave ..................347 Afbeelding 09: Oproepen van het menu ......................348... -
Page 376: Literatuur
Literatuur 1) CLSI* H2-A5 2011: Procedures for Erythrocyte Sedimentation Rate Test. 2) Thomas, L.: Labor und Diagnose. Digitale Ausgabe Labor & Diagnose 2020; Kapitel 19.3.2 Blutkörperchensenkungs- Reaktion (BSR) (www.labor-und-diagnose-2020.de/k19.html#_idTextAnchor8638) 3) ICSH recommendations for measurement of erythrocyte sedimentation rate. J. Clin. Pathol. 1993 46:198-203 *CLSI (Clinical and Laboratory Standards Institute) 4) Bruhn et al;... -
Page 377: Symbool En Markeringssleutel
Symbool en markeringssleutel ® S 2000 NX. • • van personen beschreven. • Het niet in acht nemen van dit symbool kan leiden tot lichte tot ernstige of levensbedreigende Dit "info-symbool" geeft informatie over het juiste gebruik van het toestel of algemene informatie voor een beter begrip. - Page 378 Lotnummer CE-markering Voor in-vitro diagnostiek Fabrikant Land van productie Productiedatum Serienummer Gescheiden inzameling van elektrische en elektronische apparatuur Alle ernstige incidenten met betrekking tot het product worden gemeld aan de fabrikant en de bevoegde nationale instantie.
- Page 379 DESAGA GmbH / SARSTEDT-GRUPPE Serviceabteilung In den Ziegelwiesen 1-7 D-69168 Wiesloch Tel.: +49 (0) 62 22 / 92 88 65 service.des@desaga-gmbh.de verkoopkantoor. Geacte klant, reparatie of terugzending naar DESAGA GmbH / SARSTEDT-GRUPPE Wiesloch stuurt. Firma: Afdeling: Plaats: Straat: Naam: Telefoonnr.: Toestel/Artikel: Hiermee bevestigen we: Het toestel is niet gecontamineerd.
- Page 380 ® ® ® ® Sediplus , Sedivette , Sarmix i Monovette SARSTEDT AG & Co. KG Nümbrecht, maj 2022 SARSTEDT AG & Co. KG Adres producenta i serwisu: SARSTEDT AG & Co. KG Typ: Sediplus ® S 2000 NX Postfach 1220 D-51502 Nümbrecht...
- Page 381 ..........................380 ..........................383 ....................383 Przeznaczenie ............................387 ........................387 Wprowadzenie ..........................388 Opis ..............................388 ................388 .......................390 2.3.1 Dane techniczne ..........................391 2.3.2 Rozpakowywanie, transport i przechowywanie ...................393 2.3.3 Zakres dostawy ..........................393 ............394 ......................395 2.3.6 Opis interfejsu HL7 ..........................396 ® S 2000 NX ..............398 ..........................398 .......................399 ............................400 ®...
- Page 382 ........................417 ..............417 ® ................418 ............................419 ® ...................420 Awaria zasilania ..........................422 Serwis i konserwacja ........................422 ........................422 ............423 .........................425 Konserwacja u producenta .........................425 Wycofanie z eksploatacji / utylizacja ....................426 .......................426 Ograniczenia .............................426 ........................427 ......................428 ..........................428 Spis ilustracji ............................429 ..........................430 ......................431 ..................433...
- Page 383 ® • zgodne z przeznaczeniem, • • • • • • • • • •...
- Page 384 • • • sedymentacji. • • • ® • • • • Zasilanie elektryczne Sediplus ® drukarka). in vitro (IVD). ®...
- Page 385 ® S-Sedivette ® ® ® ; GB 512 na stronie: www.sarstedt.com/en/download/instructions-for-use • ® • • ® • • ® • ® ® z tej pozycji pomiarowej zostanie natychmiast skasowany.
- Page 386 • • • • • • • • • • • • • • • • • • •...
-
Page 387: Przeznaczenie
Przeznaczenie ® . Otrzymane wyniki ® (nr art. 06.1690.xxx) za (nr art. 06.1690.xxx). www.sarstedt.com; https://www.sarstedt.com/en/download/declarations-of-conformity/... -
Page 388: Wprowadzenie
Wprowadzenie Opis ® S 2000 NX – ® ® ® w wolnej pozycji pomiarowej. ® ® ® jest ® Westergrena. ® ® ® S 2000 NX. - Page 389 Sediplus ® ® Sediplus Wiek (w latach) Kobieta Kobieta 18–30 31–40 41–50 51–60 60–70 10,1 • •...
- Page 390 • • • • • ® • • • • • • • • • Zasilanie elektryczne Sediplus ® lub drukarka). • in vitro (IVD). • •...
-
Page 391: Dane Techniczne
Ilustracja 1: Tylna obudowa Sediplus S 2000 NX 2.3.1 Dane techniczne ® Sediplus S 2000 NX SARSTEDT nr 90.1092 Producent: SARSTEDT AG & Co. KG Adres: Sarstedtstraße 1 D-51582 Nümbrecht Metoda pomiaru: ® ± 1 mm drogi pomiaru Zakres pomiaru: ®... - Page 392 ® Gniazda pomiarowe: 40 pozycji pomiarowych Zapis danych: Wbudowany akumulator zapewnia zachowanie danych (dane pomiarowe, data, godzina) w przypadku awarii zasilania - Drukarka Zasilanie elektryczne: 110–230 V~, (-10/+10 %), 50–60 Hz 16 W Bezpieczniki: 0,8 AT (2 bezpieczniki topikowe, 5 x 20 mm) (IVD).
-
Page 393: Rozpakowywanie, Transport I Przechowywanie
2.3.2 Rozpakowywanie, transport i przechowywanie ® • • • • • • opakowanie. • • +40°C • +10°C 2.3.3 Zakres dostawy ® Liczba Oznaczenie ® Sediplus S 2000 NX Pokrowiec ochronny... - Page 394 ® ® ® S 2000 NX.
- Page 395 Ilustracja 3: Wydruk testowy...
-
Page 396: Opis Interfejsu Hl7
2.3.6 Opis interfejsu HL7 ® Segment MSH Pozycja Dane Opis Nazwa segmentu ^~\& S2000 Aplikacja nadawcza Sarstedt Proces nadawczy Aplikacja odbiorcza YYYYMMDDHHMMSS Czas utworzenia komunikatu Puste OML^O21 Typ komunikatu i zdarzenie Nr kontrolny komunikatu Tryb przetwarzania Nr wersji HL7 Puste... - Page 397 Segment OBR Pozycja Dane Opis Nazwa segmentu 1 dla OBR 1 Numer segmentu OBR 2 dla OBR 2 Numer zlecenia, tutaj: kod kreskowy Puste Puste Puste YYYYMMDDHHMMSS Czas pomiaru Puste Puste Puste Puste Puste Puste Puste Puste Puste Puste Puste Puste patrz 5.1.8 Ustawienia sieciowe / HL7.
- Page 398 ® S 2000 NX ® S-Sedivette pomiarowa ® Diody kontrolne ® S 2000 NX przeprowadzenia pomiaru. ® S-Sedivette ®...
- Page 399 ® w celu pomiaru. ® ® ® ® ® kolejnej pozycji pomiarowej.
- Page 400 ® Tabela 1 Pozycja ® Tryb pomiaru Ustalone czasy pomiaru Czas trwania ® ®...
- Page 401 ® S 2000 NX ® Ilustracja 07: Ekran startowy Ilustracja 08: Ekran startowy ze wskazaniem stanu ®...
- Page 402 Ilustracja 09: Otwieranie menu • ® • • ® ® do pobierania krwi ® ®...
- Page 403 S-Sedivette ® konieczne przelewanie krwi lub pobieranie jej do osobnej pipety. ® ® Sarmix M 2000 ® ® ® ® ® ® ® Opcja 1: ® ® S-Sedivette ® w wolnej pozycji pomiarowej. ® ® ®...
- Page 404 Opcja 2: ® ® ® do wolnej pozycji ® ® S-Sedivette Opcja 3: ® ® ze znakiem plusa.
- Page 405 Ilustracja 13: Wprowadzanie ID Ilustracja 14: Umieszczanie S-Sedivette ® ® ®...
-
Page 406: Wprowadzanie Numeru Id
Wprowadzanie numeru ID (opcja). ® W przypadku Sediplus ®... - Page 407 ® w postaci kodu kreskowego lub widnieje na karcie pacjenta). ® ® ® pionowo! Ilustracja 16: Skanowanie numeru ID Ilustracja 17: Klawiatura ekranowa...
- Page 408 ® Ilustracja 19: Widok wyniku...
-
Page 409: Akustyczne Wspomaganie
Uwaga! ® ® z tej pozycji pomiarowej zostanie natychmiast skasowany. Akustyczne wspomaganie ® • ® • OK] po wprowadzeniu numeru ID; • po zatwierdzeniu przyciskiem [OK] kolejnego numeru ID; • • ® •... - Page 410 ® • ® ® • ® • • ®...
-
Page 411: Menu
Menu Ilustracja 21: Otwieranie menu Ustawienia Ilustracja 22: Ustawienia... -
Page 412: 5.1.3.1 Tryb Pomiaru
® 5.1.3.1 Tryb pomiaru ®... - Page 413 ® ® ® ® ® www.sarstedt.com/en/download/instructions-for-use). ® S-Sedivette. ® Uwaga! ®...
-
Page 414: Data
5.1.5 Data ® Ilustracja 27: Ustawianie daty Ilustracja 28: Ustawianie formatu daty 5.1.6 Godzina ® Ilustracja 29: Ustawianie godziny... -
Page 415: Ustawienia Drukowania
5.1.7 Ustawienia drukowania Ilustracja 30: Ustawienia drukowania ® ®... -
Page 416: Ustawienia Sieciowe / Hl7
5.1.8 Ustawienia sieciowe / HL7 informatycznym). • IP serwera • Port serwera • Aplikacja odbiorcza • ® S-Sedivette ® Ilustracja 34: Ustawienia sieciowe HL7... -
Page 417: Serwis
Serwis technicy serwisu producenta. - Page 418 ® ® ; GB 512 na stronie: www.sarstedt.com/en/download/instructions-for-use • ® • • ® ® S-Sedivette P 0: P 1: ® nie jest oznaczana P 2: ® jest zawsze Zakres od P 1 do P 2: ® S 2000 NX w celu oznaczenia ®...
- Page 419 ® ® ® pomiar zostaje zaznaczony na czerwono. ® ® ® Uwaga: ®...
- Page 420 ® ® ® ® pomiaru). ® ® • • • ® • ® ® ® ® ® ® ® ® ® ®...
- Page 421 Uwaga! ® Uwaga: ® ® S-Sedivette ® ® ® ®...
-
Page 422: Awaria Zasilania
Awaria zasilania nie wystarczy do wykonania pomiaru. ® ® • • Serwis i konserwacja Ilustracja 43: Czyszczenie... - Page 423 • • • • • • • • • • • • Zalecenie:...
- Page 424 • • • • • • • Ilustracja 44: Pomiar testowy Tabela 2 72–68 mm 40 mm – 44 mm 56 mm wg metody Westergrena – 61 mm wg metody Westergrena 63 mm –> 65 mm 109 mm wg metody Westergrena –> 116 mm wg metody Westergrena •...
-
Page 425: Konserwacja U Producenta
Konserwacja u producenta Ilustracja 45: System DESAGA GmbH / SARSTEDT-GRUPPE Serviceabteilung In den Ziegelwiesen 1-7 D-69168 Wiesloch Tel.: +49 (0) 62 22 / 92 88 65 service.des@desaga-gmbh.de Zalecenie:... -
Page 426: Wycofanie Z Eksploatacji / Utylizacja
Wycofanie z eksploatacji / utylizacja ® ® Ograniczenia wymieszanie. 4. Metoda pomiaru odpowiada CLSI H2-A5. ®... - Page 427 CB 200 ESR, kod kolorystyczny UE 18.1325 ® Microvette CB 200 ESR, kod kolorystyczny ISO 18.1325.100 ® 90.1091 kontakt z: SARSTEDT AG & Co. KG Sarstedtstraße 1 D-51582 Nümbrecht Tel.: +48 22 722 05 43 Faks: +48 22 722 07 95 info.pl@sarstedt.com www.sarstedt.com...
- Page 428 • • • • • • • • organowi krajowemu. Antykoagulant / kwasu cytrynowego 0,105 mol/l pH 5,5, odpowiada 3,2-procentowemu roztworowi buforowemu cytrynianu trisodowego / kwasu cytrynowego w Kod kreskowy ® lub w karcie pacjenta Dokumentacja Gniazda pomiarowe numer lub kod kreskowy pacjenta Punkty pomiarowe ®...
-
Page 429: Spis Ilustracji
Spis ilustracji ® Ilustracja 1: Tylna obudowa Sediplus S 2000 NX ...................391 ..................394 Ilustracja 3: Wydruk testowy ...........................395 ® S 2000 NX ................398 ® ....................399 ..........................400 Ilustracja 07: Ekran startowy ...........................401 Ilustracja 08: Ekran startowy ze wskazaniem stanu ..................401 Ilustracja 09: Otwieranie menu ........................402 ................403 ®... - Page 430 1) CLSI* H2-A5 2011: Procedures for Erythrocyte Sedimentation Rate Test. sedymentacji krwinek (ESR) (www.labor-und-diagnose-2020.de/k19.html#_idTextAnchor8638) 3) ICSH recommendations for measurement of erythrocyte sedimentation rate. J. Clin. Pathol. 1993 46:198-203 *CLSI (Clinical and Laboratory Standards Institute) 4) Bruhn et al; Lehrbuch der Labormedizin; Schattauer, 1999; ISBN 3-7945-1856-X 5) Gressner et al;...
- Page 431 ® S 2000 NX. • • • Dopuszczalny zakres temperatury...
- Page 432 Oznaczenie partii Znak CE in vitro Producent Kraj produkcji Data produkcji Numer seryjny...
- Page 433 ® DESAGA GmbH / SARSTEDT-GRUPPE Serviceabteilung In den Ziegelwiesen 1-7 D-69168 Wiesloch Tel.: +49 (0) 62 22 / 92 88 65 service.des@desaga-gmbh.de Szanowny Kliencie, Firma: Ulica: Nazwisko: Nr tel.: Nr ser.: ❑ ❑ Klasa substancji Nazwa substancji ❑ ❑ ❑...
-
Page 434: Indicações Básicas
Direitos de autor: instruções destina-se apenas a pessoal responsável pela operação e aos compradores do dispositivo. Este manual de instruções não pode ser usado sem o consentimento por escrito da SARSTEDT AG & legais. informativa para o seu dispositivo. - Page 435 Índice Indicações básicas! ............................434 Informações gerais...........................437 Indicações de segurança ........................437 Finalidade ............................441 Declaração de conformidade CE ......................441 Introdução ............................442 Descrição ............................442 ..................442 Instalação do dispositivo / Instalação....................444 ..........................445 2.3.2 Desembalar, transporte e armazenamento ..................447 2.3.3 Volume de entrega ..........................447 ..........448 2.3.5 Conexão de uma impressora opcional ....................449 2.3.6...
- Page 436 Avarias e erros de funcionamento ....................471 Mau funcionamento da subida e descida da placa de medição ............471 ® ..................472 Medição incorreta ..........................473 ® Remoção prematura do S-Sedivette ....................474 Falha de rede .............................476 Assistência e manutenção .......................476 Limpeza do dispositivo ........................476 Controlo de qualidade e S-Sedivettes de teste ...................477 Ótica de medição ..........................479 Manutenção no fabricante ........................479...
-
Page 437: Informações Gerais
Informações gerais Indicações de segurança ® O dispositivo de medição da hemossedimentação Sediplus S 2000 NX foi concebido de acordo com a mais recente tecnologia de ponta e os regulamentos de segurança reconhecidos. Observe as instruções No entanto, durante a operação, podem surgir perigos para o utilizador, para terceiros ou danos no dispositivo ou outros bens materiais. - Page 438 • Vibrações do sistema de sedimentação cheio levam a um aumento dos valores de sedimentação. centrifugadora. • Os S-Sedivettes não podem, de modo algum, estar arranhados, empoeirados ou contaminados. • A inclinação do sistema de sedimentação preenchido leva a um aumento dos valores de sedimentação.
- Page 439 Como suporte de sangue do paciente para Sediplus ® S 2000 NX, utilize exclusivamente o S-Sedivette ® da SARSTEDT. ® Observe sem falta as instruções sobre o manuseamento do S-Sedivette SARSTEDT. Instruções de utilização online: S-Sedivette ® ; GB 512 em: www.sarstedt.com/en/download/instructions-for-use...
- Page 440 Observe impreterivelmente as instruções para limpar o dispositivo. A limpeza descuidada ou não observância dos regulamentos poderão levar a avarias! • Para o limpar, desligue o dispositivo da alimentação de tensão • Tem a possibilidade de mover a mesa de medição para a posição mais alta, para limpar as peças da caixa por baixo da placa de medição e de desativar o ecrã...
-
Page 441: Finalidade
1:4 (1 porção de citrato + 4 porções de sangue) em S-Sedivettes (art. n.º 06.1690.xxx). Declaração de conformidade CE A declaração de conformidade CE poderá ser consultada na página inicial da SARSTEDT AG & Co KG. www.sarstedt.com; https://www.sarstedt.com/en/download/declarations-of-conformity/... -
Page 442: Introdução
Introdução Descrição Com base nos muitos anos de experiência da SARSTEDT no campo da hemossedimentação, o Sediplus ® S 2000 NX, de transmissão IR. ® O Sediplus ® , a hemossedimentação pode ser ® preenchido numa posição de medição livre. - Page 443 O Sediplus ® ® ½ e 2 horas. Os valores de referência devem ser estabelecidos a nível local de acordo com as recomendações para valores referência. Considerando o aumento progressivo da VHS com a idade, para cada década de vida adulta em homens e mulheres, valores de referência locais.
-
Page 444: Instalação Do Dispositivo / Instalação
Instalação do dispositivo / Instalação • Vibrações do sistema de sedimentação cheio levam a valores de sedimentação incorretos. centrifugadora. • Os S-Sedivettes não podem, de modo algum, estar arranhados, empoeirados ou contaminados. • A inclinação do sistema de sedimentação preenchido leva a valores de sedimentação incorretos. posição vertical e que possam ser carregados por cima com os S-Sedivettes. - Page 445 S 2000 NX Dados do fabricante e do dispositivo ® Dispositivo: Sediplus S 2000 NX SARSTEDT n.º 90.1092 Fabricante: SARSTEDT AG & Co. KG Endereço: Sarstedtstraße 1 D-51582 Nümbrecht Dados do dispositivo Medição da hemossedimentação no S-Sedivette ® SARSTEDT Conversão para valores Westergren Precisão de medição:...
- Page 446 ® Transportador de amostras: Sedivette SARSTEDT Estações de medição: 40 posições Armazenamento de dados: Uma bateria integrada garante a retenção de dados (dados de medição, data, hora) em caso de falha de eletricidade Emissão de dados em: - Visor - Impressora - Sistema de processamento de dados/HL7 Fonte de alimentação:...
-
Page 447: Desembalar, Transporte E Armazenamento
2.3.2 Desembalar, transporte e armazenamento ® O Sediplus • • empresas de transporte individuais (ferroviário, correios, serviços de encomendas ou de transporte). Possivelmente demorará apenas 24 horas. • • • A embalagem de transporte não deve ser descartada. • Para transportar o dispositivo, por exemplo, para enviá-lo para o fabricante para manutenção •... - Page 448 Teclado AT para PC, sistema de processamento de dados e/ou impressora), o Sediplus ® S 2000 NX tem de estar obrigatoriamente desligado da rede de alimentação! ® No painel traseiro do Sediplus ® imediatamente utilizados.
-
Page 449: Conexão De Uma Impressora Opcional
2.3.5 Conexão de uma impressora opcional impressão: Figura 3: Impressão de teste... -
Page 450: Descrição Da Interface Hl7
Segmento MSH Posição Dados Descrição Nome do segmento Separador de campos ^~\& outros separadores S2000 Aplicação enviada Sarstedt Processo enviado Receiving Application Receiving Facility AAAAMMDDHHMMSS Hora da criação da mensagem Vazio OML^O21 Tipo de mensagem e evento Modo de processamento... - Page 451 Segmento OBR Posição Dados Descrição Nome do segmento 1 para OBR 1 2 para OBR 2 Vazio Vazio Vazio AAAAMMDDHHMMSS Horário da medição Vazio Vazio Vazio Vazio Vazio Vazio Vazio Vazio Vazio Vazio Vazio Vazio Valor de medição Eventuais informações adicionais sobre o valor de medição (?) Exemplo: Todas as informações necessárias para conectar o dispositivo ao seu LIS poderão ser introduzidas no menu de...
-
Page 452: Elementos Funcionais Do Sediplus ® S 2000 Nx
(movimento para cima e para baixo durante a medição). ® Como suporte de sangue do paciente para Sediplus S 2000 NX, utilize exclusivamente o ® S-Sedivette da SARSTEDT. Com outros tubos, por exemplo, tubos Westergren, irá obtém valores errados de hemossedimentação. -
Page 453: Os Leds Da Placa De Medição
Os LEDs da placa de medição Os LED indicam os diferentes estados das respetivas posições ou de todo o dispositivo. Todos os 40 LEDs piscam em simultâneo. então os S-Sedivettes. O LED de uma determinada posição não acende e a posição associada está desocupada. ®... -
Page 454: O Visor
O visor ® O Sediplus S 2000 NX possui um moderno ecrã tátil para o controlo e a exibição dos valores medidos. Com a ajuda do mover para cima e para baixo, tocando no ecrã tátil, e no canto inferior direito poderá ordenar os resultados da medição de acordo com suas necessidades. -
Page 455: Funcionamento Do Sediplus S 2000 Nx
® Funcionamento do Sediplus S 2000 NX Ligação do dispositivo Ligue o Sediplus ® S 2000 NX no interruptor de rede, na parte traseira do dispositivo. Verá a seguinte vista do visor. No Figura 07: Ecrã inicial Figura 08: Ecrã inicial com a indicação de estado. 1. -
Page 456: Preparação Das Amostras
Ao clicar no campo no canto superior esquerdo da vista do visor, poderá visualizar o menu, no qual pode fazer Figura 09: Consultar o menu Preparação das amostras ® • Utilize exclusivamente os S-Sedivettes para o sistema de hemossedimentação Sediplus S 2000 NX SARSTEDT. • • ® inserida e que o cone no S-Sedivette ®... -
Page 457: Inserir O S-Sedivette ® E Iniciar Uma Medição
® percorra 5 vezes toda a ® o Sarmix M 2000 ® Utilize o Sarmix SARSTEDT para misturar com cuidado e suavidade. Armazenamento da amostra de sangue: não pode ter coagulado. ® Inserir o S-Sedivette e iniciar uma medição ®... - Page 458 Opção 2: (ou seja, não apenas no S-Sedivette ® ® ® , poderá colocar um S-Sedivette numa posição de medição livre sem primeiro premir uma tecla. - Com a inserção, a medição inicia automaticamente. Surge o seguinte visor: ® Figura 11: Início de uma medição através da inserção de um S-Sedivette consecutivamente a um paciente) pressionando o botão [OK].
- Page 459 - Surge o seguinte visor: consecutivamente a um paciente) pressionando o botão [OK]. - Surge o seguinte visor: Figura 14: Colocar S-Sedivette ® - Coloque um S-Sedivette numa posição qualquer livre. ® - A medição começa automaticamente assim que colocar um S-Sedivette numa inserção livre, em seguida, ®...
-
Page 460: Seleção Dos Tempos De Medição
Seleção dos tempos de medição Figura 15: Seleção dos tempos de medição antes do início da medição (opcional). ® Com o Sediplus - Se pressionar a tecla vermelha ou inserir um S-Sedivette ® consecutivo. - Page 461 (opcional) ® questionário do paciente.) ® ® S-Sedivette Segura o S-Sedivette ® sempre na posição vertical! No campo no canto inferior direito, poderá oculta novamente o teclado do ecrã. Figura 17: Teclado do ecrã...
-
Page 462: Considerar Valores Que Já Foram Determinados Durante A Medição
Considerar valores que já foram determinados durante a medição medidos convertidos em valores Westergren. Figura 18: Vista principal ® o S-Sedivette Figura 19: Indicador de eventos... - Page 463 Atenção! Se posicionar um novo S-Sedivette ® , o registo de medição do S-Sedivette ® imediatamente eliminado desta posição. É recomendado que utilize as opções de transmissão de dados do sistema de processamento de ® O Sediplus É feita a distinção entre: - Dois sons curtos, rápidos e sucessivos.
-
Page 464: Imprimir Novamente / Repetir O Processo De Impressão
Imprimir novamente / Repetir o processo de impressão ® Desde que o S-Sedivette não tenha sido removido do dispositivo, tem a opção de selecionar a linha com os resultados da campo de impressão. Figura 20: Imprimir novamente / Repetir o processo de impressão Eliminar resultados de medições •... -
Page 465: Menu
Menu Figura 21: Consultar o menu 5.1.1 Idioma Existe a possibilidade de escolher entre o idioma alemão e inglês... -
Page 466: Id Inicial
5.1.2 ID inicial ® cada S-Sedivette 5.1.3.1 Tipo de medição ® S 2000 NX oferece a possibilidade de determinar e emitir os valores medidos de ½h e 1h em vez dos valores medidos de 1h e 2h. Isto não altera o funcionamento do dispositivo. -
Page 467: Eliminar Medições
® - Se o S-Sedivette ® - Se o S-Sedivette anticoagulante/sangue. (ver instruções de utilização do S-Sedivette ® www.sarstedt.com/en/download/instructions-for-use). ® assistente. Da mesma forma que a avaliação dos resultados da medição de S-Sedivettes ® 5.1.4 Eliminar medições Atenção! Não é possível desfazer esta função. -
Page 468: Data
5.1.5 Data O Sediplus ® 5.1.6 Hora ® O Sediplus... - Page 469 (Impressão de teste). ® ® prematura de um S-Sedivette Figura 32: Não é possível imprimir mensagem de aviso...
- Page 470 No visor surge um aviso por baixo dos valores medidos Figura 33: Indicador de eventos com erro de impressão Neste item do menu são inseridos os dados necessários para conectar o dispositivo a um LIS (sistema de informação laboratorial). São necessários os seguintes dados: •...
-
Page 471: Assistência
Assistência Erros Figura 36: Eliminar mensagem de erro Avarias e erros de funcionamento Mau funcionamento da subida e descida da placa de medição Não deve haver objetos sobre ou ao lado da placa de medição. Figura 37: Mensagem de erro Mesa de medição bloqueada... - Page 472 ® instruções de utilização dos der S-Sedivettes). Instruções de utilização online: S-Sedivette ; GB 512 em: www.sarstedt.com/en/download/instructions-for-use • Os S-Sedivettes estão preenchidos corretamente quando o êmbolo estiver totalmente estendido e, ® ao quebrar a haste do êmbolo, este não for empurrado novamente para trás para o S-Sedivette •...
-
Page 473: Medição Incorreta
® . Já neste momento, o dispositivo ® ® Figura 38: S-Sedivette ® ® O aviso de que um S-Sedivette ® Figura 39: Indicador de eventos com S-Sedivette Medição incorreta Observe: ® Repita a medição. Se o erro persistir, contacte o departamento de assistência da DESAGA GmbH em... -
Page 474: Remoção Prematura Do S-Sedivette
® Remoção prematura do S-Sedivette O dispositivo reconhece a remoção prematura de um S-Sedivette ® quando um S-Sedivette ® for removido da sua posição, mas a medição ainda não tiver terminado ® e iniciar uma medição). ® Se tiver retirado um S-Sedivette ®... - Page 475 Figura 41: Os resultados são exibidos com o aviso Medição atrasada Atenção! S-Sedivette ® seja usado nesta posição. Tenha atenção ao seguinte: O S-Sedivette ® ® colocado de volta na sua posição pouco antes da medição de 1 hora, o dispositivo recupera a medição ®...
-
Page 476: Falha De Rede
Falha de rede Se o dispositivo for desconectado da rede de alimentação durante uma medição, nenhum erro ocorrerá, desde que não ® . A medição não pode ser ® realizada lá porque o S-Sedivette foi removido. O dispositivo trata tanto os erros operacionais como os erros da mesma maneira. -
Page 477: Controlo De Qualidade E S-Sedivettes De Teste
Observe impreterivelmente as instruções para limpar o dispositivo. A limpeza descuidada ou não observância dos regulamentos poderão levar a avarias! • Para o limpar, desligue o dispositivo da alimentação de tensão • Exceção: • Tem a possibilidade de mover a mesa de medição para a posição mais alta, para limpar as peças da caixa por baixo da placa de medição e de desativar o ecrã... - Page 478 • Pressione o botão Iniciar medição • Insira o primeiro S-Sedivette de teste totalmente cheio no dispositivo • • • e em mm Westergren. • mesma posição • Figura 44: Medição de teste Para interpretar os resultados, compare os valores exibidos no seu dispositivo com a seguinte tabela: Tabela 2 Deslocamento: 72-68 mm...
-
Page 479: Ótica De Medição
Ótica de medição Manutenção no fabricante DESAGA em Wiesloch ou com a sua agência de vendas local da SARSTEDT. Nunca tente abrir ou reparar o dispositivo. menu de assistência, ver Menu-Assistência-Serviço (5.2 Assistência). Tenha em atenção, tanto no painel de controlo (ecrã tátil) como na mesa de medição, quais os softwares instalados. -
Page 480: Desativação / Descarte
Desativação / Descarte Quando desativar o dispositivo, entre em contacto com o fabricante SARSTEDT AG & Co. KG, que devolverá o dispositivo e o descartará adequadamente. O S-Sedivette ® SARSTEDT e as amostras de sangue utilizadas ou inseridas no dispositivo Sediplus ®... -
Page 481: Informações De Encomendas
CB 200 BSG, com escala no painel traseiro 90.1091 SARSTEDT AG & Co. KG Sarstedtstraße 1 D-51582 Nümbrecht Tel: +49 2293 305 0 Fax: +49 2293 305 3450 info@sarstedt.com www.sarstedt.com ou contacte a sua agência de vendas local da SARSTEDT. -
Page 482: Garantia E Responsabilidade
Intervalo de temperatura, 18-25°C de acordo com CLSI H02 – A5(1), Interface HL7 Interface para transmissão de dados de medição para um sistema de informação laboratorial (LIS) Velocidade de hemossedimentação ® S-Sedivette Sistema seguro de colheita de sangue da SARSTEDT Westergren Valor de sedimentação em mm/h... -
Page 483: Índice De Imagens
Índice de imagens ® Figura 1: Painel traseiro do Sediplus S 2000 NX ....................445 .....................448 Figura 3: Impressão de teste...........................449 ® S 2000 NX ..................452 ® Figura 5: S-Sedivette retirado ........................453 Figura 6: Vista principal ...........................454 Figura 07: Ecrã inicial ............................455 Figura 08: Ecrã... - Page 484 1) CLSI* H2-A5 2011: Procedures for Erythrocyte Sedimentation Rate Test. 2) Thomas, L.: Labor und Diagnose. Digitale Ausgabe Labor & Diagnose 2020; Kapitel 19.3.2 Blutkörperchensenkungs- Reaktion (BSR) (www.labor-und-diagnose-2020.de/k19.html#_idTextAnchor8638) 3) ICSH recommendations for measurement of erythrocyte sedimentation rate. J. Clin. Pathol. 1993 46:198-203 *CLSI (Clinical and Laboratory Standards Institute) 4) Bruhn et al;...
-
Page 485: Lista De Símbolos E Sinais
Lista de símbolos e sinais ® 2000 NX. • São dados avisos importantes. • • Pode ser encontrada uma nota sobre situações perigosas. materiais. informações gerais para uma melhor compreensão. O não cumprimento das instruções pode resultar na sobre como utilizá-lo de maneira ideal. Observar as instruções de utilização Intervalo de temperatura permitido Armazenar protegido da luz do sol... - Page 486 Marcação CE in vitro Fabricante Data da fabricação competente.
-
Page 487: Questionário Sobre Contaminação
Questionário sobre contaminação Antes de enviar o dispositivo Sediplus ® S 2000 NX para a DESAGA GmbH/SARSTEDT GROUP para reparação, solicitamos que preencha o questionário de contaminação. DESAGA GmbH/GRUPO SARSTEDT Departamento de assistência In den Ziegelwiesen 1-7 D-69168 Wiesloch Tel.: +49 (0) 62 22/92 88 65 service.des@desaga-gmbh.de... -
Page 488: Základné Upozornenia
® ® Sediplus , Sedivette , Sarmix a Monovette sú registrované ochranné známky Nümbrecht máj 2022 SARSTEDT AG & Co. KG Údaje o zariadení: Výrobca a adresa zákazníckeho servisu: (vyplní zákazník) SARSTEDT AG & Co. KG ® Typ: Sediplus S 2000 NX Postfach 1220 D-51502 Nümbrecht... - Page 489 Obsah Základné upozornenia! ..........................488 Všeobecné informácie ........................491 ........................491 ............................495 ES vyhlásenie o zhode ........................495 Úvod..............................496 Opis ..............................496 Meraná hodnota „sedimentácia krvi“ ....................496 ...........................498 ..........................499 2.3.2 Vybalenie, preprava a skladovanie ......................501 2.3.3 Obsah dodávky ..........................501 ............502 .......................503 2.3.6 Opis rozhrania HL7 ..........................504 ®...
- Page 490 Poruchy a chyby obsluhy .........................525 Porucha pohybu meracej dosky nahor a nadol ...................525 ® ................526 ..........................527 ® ..................528 ........................530 ..........................530 ..........................530 ..............531 Meracia optika ............................533 ..........................533 Vyradenie z prevádzky / likvidácia ....................534 ................534 Obmedzenia .............................534 Informácie pre objednávanie ......................535 ........................536 Slovník ..............................536 Zoznam obrázkov ..........................537 Literatúra ............................538...
-
Page 491: Všeobecné Informácie
Všeobecné informácie ® Zariadenie na meranie sedimentácie Sediplus • • • • sedimentácie krvi. • • len k uzemnenej zásuvke. • • • POVINNOSTI PERSONÁLU • •... - Page 492 • • • • • ® • • • krvi alebo plazmy. • • ® Napájanie zariadenia Sediplus in-vitro (IVD). ® S 2000 NX od elektrickej siete!
- Page 493 Na prenos krvi pacienta do Sediplus ® ® ® ® ; GB 512 na: www.sarstedt.com/en/download/instructions-for-use ® • • • S-Sedivette ® • • • ® ® ® , ktorá bola...
- Page 494 • • Výnimka: • • kvapalina. • • • • • • • zariadenia. „Dodacie a platobné podmienky“ • • • • • • • •...
-
Page 495: Vyhlásenie O Zhode
® Princíp fungovania: ® Vzorka: ES vyhlásenie o zhode https://www.sarstedt.com/en/download/declarations-of-conformity/... -
Page 496: Úvod
Úvod Opis ® Zariadenie Sediplus ® ® ® ® ® ® ® intenzity svetla. Meraná hodnota „sedimentácia krvi“ Fyzikálno-chemický princíp: ® ® ® S 2000 NX. ® Sediplus... - Page 497 ® Vek (roky) Horná hranica normy <7,1 <10,7 <7,8 <11,0 <10,6 <13,2 <12,2 <18,6 <12,7 <20,2 >70 10,1 <30 <35 • • sedimentácie krvi.
- Page 498 • • • sedimentácie. • • • ® • • krvi alebo plazmy. • • • • • ® • Napájanie zariadenia Sediplus • in-vitro (IVD). • • prevádzku.
- Page 499 Poistky zariadenia ® Obrázok 1: Zadná stena prístroja Sediplus S 2000 NX Údaje o výrobcovi a zariadení ® Zariadenie: Sediplus S 2000 NX SARSTEDT AG & Co. KG Adresa: Sarstedtstraße 1 D-51582 Nümbrecht Parametre zariadenia ® Rozsah merania: ® ®...
- Page 500 Meracie miesta: 40 miest Ukladanie do pamäte: - displej Napájanie: 16 W Poistky: in-vitro (IVD). Rozmery: prostredia okolia pri...
-
Page 501: Vybalenie, Preprava A Skladovanie
2.3.2 Vybalenie, preprava a skladovanie ® Zariadenie Sediplus • • • • • • • • • 2.3.3 Obsah dodávky Sediplus ® Sediplus ® S 2000 NX Kryt na ochranu pred prachom... - Page 502 ® S 2000 NX od elektrickej siete! ® Na zadnej strane zariadenia Sediplus ® S 2000 NX.
-
Page 504: Opis Rozhrania Hl7
2.3.6 Opis rozhrania HL7 ® Sediplus zariadenia, pozri kapitolu 5.2. Segment MSH Miesto Údaje Popis Názov segmentu ^~\& S2000 Sarstedt YYYYMMDDHHMMSS Prázdne OML^O21 Prázdne Prázdne Segment PID Miesto Údaje Popis Názov segmentu Prázdne Segment ORC Miesto Údaje Popis Názov segmentu... - Page 505 Segment OBR Miesto Údaje Popis Názov segmentu 1 pre OBR 1 2 pre OBR 2 Prázdne Prázdne Prázdne YYYYMMDDHHMMSS Prázdne Prázdne Prázdne Prázdne Prázdne Prázdne Prázdne Prázdne Prázdne Prázdne Prázdne Prázdne Nameraná hodnota siete/HL7...
-
Page 506: Meracia Doska
® S 2000 NX ® S-Sedivette Vodiace otvory pre ® Displej ® S 2000 NX Meracia doska Na prenos krvi pacienta do Sediplus ® ® S inými skúmavkami, napr. skúmavkou Westergren, dostanete skreslené hodnoty sedimentácie krvi. - Page 507 ® ® ® ® zo zariadenia. ® Obrázok 5: S-Sedivette ® odstránená...
-
Page 508: Displej
Displej ® Sediplus Obrázok 6: Hlavná obrazovka Miesto ® . Na kryte meracej dosky Typ merania 1. Hodnota 2. Hodnota ® Trvanie do zariadenia a ® zo zariadenia. -
Page 509: Obsluha Sediplus ® S 2000 Nx
® Obsluha Sediplus S 2000 NX Zapnutie zariadenia Zapnite Sediplus ® Obrázok 07: Úvodná obrazovka Obrázok 08: Úvodná obrazovka so zobrazením stavu kapitole 4.3: 1. Skenovanie ID vzorky ®... - Page 510 Obrázok 09: Vyvolanie ponuky ® • • • ® S-Sedivette ® S-Sedivette na odber krvi ® ®...
-
Page 511: A Spustenie Merania
S-Sedivette ® samostatnej pipety. ® prejde ® sarmix M 2000 (pozri kapitolu 9 Informácie pre objednávanie). ® Uchovávanie vzorky krvi: ® a spustenie merania ® ® ® S-Sedivette. ® (y). ® ® naskenujú. ® ® alebo na ® ® Obrázok 10: Spustenie merania naskenovaním ID ®... - Page 512 ® ® ® ® ® ® ® skúmavky S-Sedivette so znamienkom plus...
- Page 513 Obrázok 13: Zadanie ID ® ® ® S-Sedivette...
- Page 514 ® Na Sediplus ®...
- Page 515 ® ® ® S-Sedivette ® zvislo! v pravom dolnom rohu. Obrázok 17: Klávesnica na obrazovke...
- Page 516 sedimentácie. Obrázok 18: Hlavná obrazovka ® Obrázok 19: Zobrazenie výsledkov...
-
Page 517: Akustická Podpora
Pozor! ® ® Akustická podpora ® Sediplus • ® • OK]; • • ® • pred koncom merania; •... - Page 518 ® • ® ® • ® • ® •...
-
Page 519: Ponuka
Ponuka Obrázok 21: Vyvolanie ponuky Nastavenia Obrázok 22: Nastavenia 5.1.1 Jazyk Obrázok 23: Nastavenia jazyka... -
Page 520: Nastavenia Merania
® 5.1.3 Nastavenia merania 5.1.3.1 Typ merania ® S 2000 NX Obrázok 25: Nastavenia merania... - Page 521 ® S-Sedivette ® Príklad: ® ® ® S-Sedivette www.sarstedt.com/en/download/instructions-for-use). ® ® Pozor! ® Obrázok 26: Vymazanie meraní...
-
Page 522: Dátum
5.1.5 Dátum Sediplus ® Obrázok 27: Nastavenie dátumu Obrázok 28: Nastavenie formátu dátumu ® Sediplus... - Page 523 ® ®...
-
Page 524: Nastavenia Siete / Hl7
5.1.8 Nastavenia siete / HL7 • IP servera • Port servera • Prijatá aplikácia • ® zo zariadenia, ® Obrázok 34: Nastavenia siete HL7 Obrázok 35: Zobrazenie výsledku s chybou siete... -
Page 525: Servis
Servis Chyby Obrázok 36: Vymazanie chybového hlásenia Poruchy a chyby obsluhy Porucha pohybu meracej dosky nahor a nadol Obrázok 37: Chybové hlásenie Meracia doska blokovaná... - Page 526 ® ® ; GB 512 na: www.sarstedt.com/en/download/instructions-for-use • ® • • ® ® na displeji. Hodnoty sedimentácie v závislosti od výšky naplnenia P 0: P 1: 5 mm pod P 0 ® P 2: 10 mm pod P 0 ®...
- Page 527 ® ® ® ® ® ® Vezmite, prosím, na vedomie: S-Sedivette ®...
- Page 528 ® ® ® ® a spustenie merania). ® ® Obrázok 40: S-Sedivette odstránená • • ® • • ® S-Sedivette vybraná. ® ® ® ® ® ® ® ® ®...
- Page 529 Obrázok 41: Zobrazenie výsledku s informáciou o oneskorení merania Pozor! S-Sedivette ® Vezmite na vedomie: ® ® ® ® ® ®...
- Page 530 vykonanie merania. ® ® Príklad poruchy napájacieho napätia: • •...
- Page 531 • • Výnimka: • • • • • • • • • •...
- Page 532 • • • • • • • Obrázok 44: Skúšobné meranie Posun: Nameraná hodnota 1: 40 mm – 44 mm Nameraná hodnota 1: Nameraná hodnota 2: 63 mm – > 65 mm Nameraná hodnota 2: • • sedimentácie krvi.
-
Page 533: Meracia Optika
Meracia optika (5.2 Servis). Obrázok 45: Systém DESAGA GmbH / SARSTEDT-GRUPPE Serviceabteilung In den Ziegelwiesen 1-7 D-69168 Wiesloch Tel.: +49 (0) 62 22 / 92 88 65 service.des@desaga-gmbh.de... -
Page 534: Vyradenie Z Prevádzky / Likvidácia
Vyradenie z prevádzky / likvidácia odborne. odoberie a riadne ho zlikviduje. ® ® Obmedzenia ® (pozri pokyn na strane 7). -
Page 535: Informácie Pre Objednávanie
ESR, bez mierky na zadnej stene 90.1060.062 ® Microvette 18.1325 ® Microvette 18.1325.100 ® Stojan na sedimentáciu pre Microvette CB 200 ESR 90.1091 adrese: SARSTEDT AG & Co. KG Sarstedtstraße 1 D-51582 Nümbrecht Tel: +421 232 184 930 Fax: +49 2293 305 3450 info.sk@sarstedt.com www.sarstedt.com... -
Page 536: Slovník
• • • • • • • • Slovník Antikoagulant ® krvi Dokumentácia Meracie miesta Meracia doska Meracie miesta ® Izbová teplota Rozhranie HL7 Pokles erytrocytov v x mm/h S-Sedivette ® Westergren Hodnota sedimentácie v mm/h... -
Page 537: Zoznam Obrázkov
Zoznam obrázkov ® S 2000 NX ..................499 ...................502 ..........................503 ® S 2000 NX ..................506 ® Obrázok 5: S-Sedivette odstránená ......................507 Obrázok 6: Hlavná obrazovka .........................508 Obrázok 07: Úvodná obrazovka ........................509 ..................509 Obrázok 09: Vyvolanie ponuky ........................510 ..................511 ® ..............512 ..................512 Obrázok 13: Zadanie ID ..........................513 ®... -
Page 538: Literatúra
Literatúra 1) CLSI* H2-A5 2011: Procedures for Erythrocyte Sedimentation Rate Test. 2) Thomas, L.: Labor und Diagnose. Digitale Ausgabe Labor & Diagnose 2020; Kapitel 19.3.2 Blutkörperchensenkungs- Reaktion (BSR) (www.labor-und-diagnose-2020.de/k19.html#_idTextAnchor8638) 3) ICSH recommendations for measurement of erythrocyte sedimentation rate. J. Clin. Pathol. 1993 46:198-203 *CLSI (Clinical and Laboratory Standards Institute) 4) Bruhn et al;... - Page 539 ® S 2000 NX. • • • Uchovávajte v suchu...
- Page 540 in-vitro diagnostike Krajina pôvodu...
-
Page 541: Dotazník O Dekontaminácii
Dotazník o dekontaminácii ® DESAGA GmbH / SARSTEDT-GRUPPE Servisné oddelenie In den Ziegelwiesen 1-7 D-69168 Wiesloch Tel.: +49 (0) 62 22/92 88 65 service.des@desaga-gmbh.de Dotazník o dekontaminácii pre objednanie opravy Firma: Oddelenie: Miesto: Ulica: Meno: Tel.: Týmto potvrdzujeme: Zariadenie nie je kontaminované.
Need help?
Do you have a question about the Sediplus S 2000 NX and is the answer not in the manual?
Questions and answers