Table of Contents
Advertisement
Quick Links
INSTRUCTION MANUAL
FUJI DRI-CHEM
CLINICAL CHEMISTRY ANALYZER
FUJI DRI-CHEM NX600
FUJI DRI-CHEM NX600i
This Manual describes details on how to operate
the FUJI DRI-CHEM NX600/NX600i and
cautions to be observed when operating it.
Please read this manual thoroughly before
actually operating the FUJI DRI-CHEM NX600/
NX600i. After reading this manual, store it
nearby the FUJI DRI-CHEM NX600/NX600i so
that you can see it whenever necessary.
EN
Safe Usage and
Handling Precautions
Part Names and
Consumables
Measurement
Applicable Usage
Methods
Loading Consumables
Maintenance
Quality Control
Troubleshooting
Function Menu
Other Functions
USM
Specifications
Glossary
2nd Edition
897N203029A January 2022
1
2
3
4
5
6
7
8
9
10
11
12
13
Advertisement
Table of Contents
Troubleshooting

Subscribe to Our Youtube Channel
Related Manuals for FujiFilm FUJI DRI-CHEM NX600


Summary of Contents for FujiFilm FUJI DRI-CHEM NX600
- Page 1 This Manual describes details on how to operate the FUJI DRI-CHEM NX600/NX600i and cautions to be observed when operating it. Please read this manual thoroughly before actually operating the FUJI DRI-CHEM NX600/ 2nd Edition NX600i. After reading this manual, store it nearby the FUJI DRI-CHEM NX600/NX600i so that you can see it whenever necessary.
- Page 3 Installation may only be conducted by authorized service personnel. <Intended Purpose> The FUJI DRI-CHEM NX600 and FUJI DRI-CHEM NX600i (henceforth, the FDC NX600) is an in vitro diagnostic medical device to automatically quantitate the concentration or the activity of the components in blood or urine by colorimetric end-point, rate and ISE tests, using the FUJI DRI-CHEM SLIDEs.
- Page 4 So for the latter, sections that describe the unit can be skipped). Name PF Unit FUJI DRI-CHEM NX600 FUJI DRI-CHEM NX600i NOTE: 4 : The PF Unit is mounted on the device. - : The PF Unit is not mounted on the device.
-
Page 5: Table Of Contents
1.14 Handling Samples ………………………………………………………………………… 1-7 1.15 Sampler Cover …………………………………………………………………………… 1-8 1.16 Diluents and Reference Fluid …………………………………………………………… 1-8 1.17 FUJIFILM PF Plasma Filters …………………………………………………………… 1-8 1.18 FUJI DRI-CHEM AUTO TIPS, FUJI Sample Tubes, and FUJI DRI-CHEM MIXING CUPS …………………………………………………… 1-8 1.19 Light Source Lamp ……………………………………………………………………… 1-9 1.20 Recording Paper …………………………………………………………………………... - Page 6 Table of Contents Sample Tubes for the FDC NX600 ……………………………………………………… 3-30 3.9.1 Blood Collection Tubes ………………………………………………………… 3-30 3.9.2 FUJI Sample Tubes …………………………………………………………… 3-32 3.9.3 Assembling the Sample Rack ………………………………………………… 3-33 3.10 QC Card System ………………………………………………………………………… 3-37 Applicable Usage Methods CRP Calibration …………………………………………………………………………… 4-1 4.1.1 Calibration Measurement ………………………………………………………...
- Page 7 Table of Contents Quality Control Control Fluids ……………………………………………………………………………… 7-1 Measurement with Control Fluids ……………………………………………………… 7-1 Monitoring Results………………………………………………………………………… 7-1 Control Mode ……………………………………………………………………………… 7-1 Troubleshooting Quality Control Results ……………………………………………… 7-1 Control Chart ……………………………………………………………………………… 7-2 Troubleshooting Error Display ……………………………………………………………………………… 8-1 8.1.1 Error Log ………………………………………………………………………… 8-2 8.1.2 Error Code and Reference Section Table ……………………………………...
- Page 8 Table of Contents 9.3.17 Control Fluid Setting …………………………………………………………… 9-36 9.3.18 Control Measurement Setting ………………………………………………… 9-37 9.3.19 Operator ID Setting ……………………………………………………………… 9-37 9.3.20 Test Item Name Setting ………………………………………………………… 9-38 9.3.21 Default Sample Type Setting …………………………………………………… 9-39 9.3.22 Password Setting ……………………………………………………………… 9-39 10 Other Functions 10.1 Data Communication ……………………………………………………………………...
-
Page 9: Safe Usage And Handling Precautions
This section contains the safety precautions that must be followed for safe operation of the FUJI DRI-CHEM NX600 (For the remainder of the manual, FUJI DRI-CHEM NX600 is shortened to “FDC NX600”). Before using this analyzer, please read this chapter carefully and follow the precautions given, so that you can operate it correctly. -
Page 10: Biohazards And Disposal
1 Safe Usage and Handling Precautions Biohazards and Disposal WARNING: Items such as measured slides, tips, mixing cups, and sample tubes coated with samples such as blood and urine, and cotton swabs and cloths used to clean the equipment are infectious industrial waste. -
Page 11: Warnings Regarding Electric Shock
1 Safe Usage and Handling Precautions Warnings Regarding Electric Shock WARNING: The voltage supplied to the equipment is AC 100 - 240 V. To avoid electrical shock, observe the fol- lowing precautions. • Avoid installation locations in which water may splash on the equipment. •... -
Page 12: Caution Regarding Moving Parts
1 Safe Usage and Handling Precautions Caution Regarding Moving Parts WARNING: Do not place your fingers near moving parts (sampler and consumable disk) when operating the equipment, including during maintenance. Also be sure not to get your fingers, hair, clothing, or accessories caught in moving parts. WARNING: During sample processing, ensure the sampler cover is closed and locked with the sampler cover lock key to prevent injuries and biohazards. -
Page 13: Action For Malfunction
1 Safe Usage and Handling Precautions CAUTION: Hold the handle of the device when lifting or moving it. Handle CAUTION: • When moving the device to another installation location, remove all slides, samples, diluent, refer- ence fluid, mixing cups, tips, and other consumables beforehand. •... -
Page 14: Measurement Results
1 Safe Usage and Handling Precautions 1.10 Measurement Results IMPORTANT: Make a diagnosis in a comprehensive manner, considering other relevant test results or clinical symptoms. IMPORTANT: When an equipment problem (error) appears before or during measurement, or a warning appears in the measurement results, the measurement results may not be accurate. -
Page 15: Crp Measurement
1 Safe Usage and Handling Precautions 1.12 CRP Measurement WARNING: As calibrator CP is derived from blood, it should be handled in the same way as a patient sample. When handling calibrator CP, always follow biohazard procedures (wear gloves, a lab coat, and safety goggles) in accordance with the sample handling rules of your facility. -
Page 16: Sampler Cover
FUJIFILM plasma filter PF is shortened to "PF" in this document. IMPORTANT: Before using a FUJIFILM PF, refer to “Instructions for Use” provided with the PF, paying special at- tention to the precautions concerning the samples measured and the blood collection tubes used. -
Page 17: Light Source Lamp
1 Safe Usage and Handling Precautions WARNING: Do not touch used tips, tubes, and mixing cups with your bare hands as this may cause infection. If you accidentally touch an item, immediately rinse the contaminated area thoroughly under running water, and then disinfect the area. Seek medical assistance if necessary. WARNING: Used tips, tubes, and mixing cups are infectious industrial waste. -
Page 18: Labels
1 Safe Usage and Handling Precautions 1.21 Labels The following safety labels are affixed to the FDC NX600. Power button Sampler cover lock Biohazard label key caution label Refer to Section 1.15 Biohazard Moving parts label caution label High tempera- Lamp caution PF tube caution Biohazard label... -
Page 19: Symbols
1 Safe Usage and Handling Precautions 1.22 Symbols Sign Description Warning, Caution, Important, consult documents Biological risks High temperature caution Power button Power switch LAN terminal RS-232C connector USB connector Fragile item, handle carefully Protect from rain This way up Stacking limitation Temperature limitation Manufacturer... - Page 20 1 Safe Usage and Handling Precautions Sign Description Date of manufacture Authorized representative in the European Community In vitro diagnostic medical devices CE mark of conformity Importer Consult an electronic Instructions for Use (e-IFU) Unique device identifier Near-patient testing 1-12 897N203029A FDC NX600 Instruction Manual 2022.01...
-
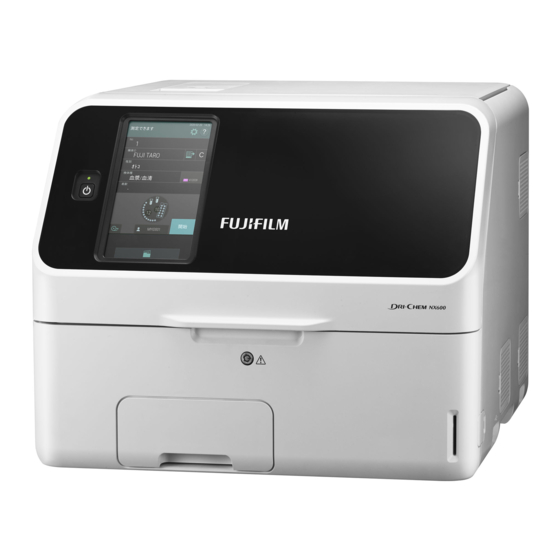
Page 21: Part Names And Consumables
Part Names and Consumables Part Names NOTE The following is an illustration of the FDC NX600 (full option model). FDC NX600i has slight difference. Printer Sampler cover LCD (touch panel) Power button Sampler cover lock Front bottom cover Card reader Disposal box Sampler Incubator cable... - Page 22 2 Part Names and Consumables Air filter (Louver) USB connector (For sample barcode reader only) * Do not connect other USB devices. LAN terminal CAUTION: RS-232C connector Do not remove the cover to look into the QR code read- USB connector er’s illuminator.
- Page 23 2 Part Names and Consumables Disposal box Light source lamp Slide cartridge Reference fluid holder Diluent holder Sample rack Mixing cup Tip rack Sample application unit cover 897N203029A FDC NX600 Instruction Manual 2022.01...
- Page 24 2 Part Names and Consumables < Details of PF unit > PF unit PF sensor / suction PF reference plate PF sample rack PF pump 897N203029A FDC NX600 Instruction Manual 2022.01...
-
Page 25: Touch Panel Screen Names And Functions
2 Part Names and Consumables Touch Panel Screen Names and Functions 2.2.1 Measurement Preparation Screen (Top Screen) If the power is switched on, the Measurement-preparation screen (top screen) is displayed after startup. 1 Help button Display the help screen. Refer to Section 2.2.2 ... -
Page 26: Help Screen
2 Part Names and Consumables 2.2.2 Help Screen You can tap the button on the Measurement preparation screen to check the procedures about measurement, maintenance, consum- able exchange, and other actions on the FDC NX600. 897N203029A FDC NX600 Instruction Manual 2022.01... - Page 27 2 Part Names and Consumables button The Measurement-preparation screen ap- pears. button Return to the previous screen. 897N203029A FDC NX600 Instruction Manual 2022.01...
-
Page 28: Names And Functions Of Software Keyboard Screens
2 Part Names and Consumables Names and Functions of Software Keyboard Screens When data entry for operations and configura- tions is necessary, the software keyboard ap- pears on the LCD automatically. Enter alphanu- meric characters and symbols. (LCD touch panel) 1 Alphabetical characters, numbers, and symbols buttons Enter alphabetical characters, numbers,... - Page 29 2 Part Names and Consumables Change the entry screen by using the [ABC], [abc], [123], or [-#/], button. < When the [ABC] button is selected > < When the [abc] button is selected > < When the [123] button is selected > <...
-
Page 30: Bundled Items
2 Part Names and Consumables Bundled Items Recording paper 2 rolls Slide cartridge Slide weight Light source lamp O-ring Tip rack Sample rack assembly kit 1 set Sampler leak check tool PF leak check tool (For FDC NX600) FUJI DRI-CHEM AUTO TIPS 1 case FUJI PLAIN TUBE 0.5 (0.5 mL type) 1 pack... -
Page 31: Consumables And Optional Items
2 Part Names and Consumables Consumables and Optional Items To purchase the consumables or optional items listed below, please contact the dealer from whom you purchased the FDC NX600. 2.5.1 Consumables Name Package/unit * FUJI DRI-CHEM AUTO TIPS 6 cases FUJI Sample Tubes FUJI HEPARIN TUBE (1.5 mL) 500×1 box... -
Page 32: Optional Items
2 Part Names and Consumables 2.5.2 Optional Items Name Package/unit * Sample rack assembly kit 1 set * Slide cartridge * Slide weight Sample barcode reader CAUTION: The sample barcode reader specified for the FDC NX600 can be used. Do not connect a barcode reader other than specified for the FDC NX600. Otherwise, physical damage or danger of fire may result. -
Page 34: Measurement
Measurement Operation Overview On the FDC NX600, first load the consumables and other items to prepare for measurement (Step 1), and then perform the actual measurement (Step 2). Step 1 - Measurement preparation Cleaning the disposal box Refer to Section 3.2(1) Checking the recording paper Refer to Section 3.2(2) Starting the FDC NX600... - Page 35 3 Measurement Step 2 - Measurement Basic ISE test measurements Refer to Section 3.5 Refer to Dilution measurements Refer to Section 3.6 Section 3.3 measurements CRP measurements Refer to Section 3.7 Sample Slide Check Check the sample type Plasma/Serum the tips START button...
- Page 36 3 Measurement Measurement Preparation (1) Cleaning the disposal box Empty the disposal box. IMPORTANT: If the disposal box is full, a slide transfer error or tip disposal error may occur, which may negatively af- fect the measurement values. IMPORTANT: After emptying the disposal box, be sure to load the disposal box.
- Page 37 3 Measurement (2) Checking the recording paper Press the area shown in the illustration to release Cover the lock ( 1 ), and then lift up the cover ( 2 ). Press the concave section. Check the remaining recording paper (FUJI thermal paper).
- Page 38 3 Measurement (3) Starting the FDC NX600 Press the power button to start the FDC NX600. NOTE If the equipment is connected to DMS, switch on the equipment before starting DMS. Failure to observe this precaution could interfere with data transfer. IMPORTANT: If the power has been shut off during measurement due to a power outage or other issue, replenish...
- Page 39 3 Measurement (4) Checking the date and time Check that the date and time displayed on the LCD are correct. If they are incorrect, set the date and time using [Date & Time settings] in Normal mode. (Refer to Section 9.2.1) ...
-
Page 40: Basic Measurements
3 Measurement Basic Measurements NOTE By default, this analyzer switches off the light source lamp to save lamp life when the ana- lyzer has not been used for the time configured under [Lamp management] in Normal mode. When the lamp is off, refer to Section 3.3.1 before operating the equipment. WARNING: When handling samples (blood or urine), always follow biohazard procedures (wear gloves, a lab coat, and safety goggles) in accordance with the sample handling rules of your facility. - Page 41 3 Measurement (3) Loading samples and slides WARNING: When handling samples (blood or urine), always follow biohazard procedures (wear gloves, a lab coat, and safety goggles) in accordance with the sample handling rules of your facility. If you acci- dentally touch a sample, immediately rinse the contaminated area thoroughly under running water, and then disinfect the area.
- Page 42 3 Measurement 4. Load the dedicated sample rack for the blood collection tube or FUJI sample tube to be used. NOTE To avoid a suction error or malfunction, use a sample tube that matches the la- bel on the sample rack. NOTE Refer to Section 3.9 for sample tubes that can be used.
- Page 43 3 Measurement (4) Registering sample information Enter or select the sample information (sample num- ber, sample ID, reference standard, and sample type). 1 Enter the sample number using the software key- board (Section 2.3). 2 Obtain order information from the host PC via a DMS connection.
- Page 44 3 Measurement (5) Starting measurement Close the sample cover, and then lock it with the sampler cover lock key. WARNING: Ensure the sampler cover is locked during sample processing to prevent injuries and infection. When the display reads [Ready to test], the sam- pler cover can be opened.
- Page 45 3 Measurement When the spotting operation is completed, the screen on the left is displayed and the time until the measurement is completed is displayed. Time until the end of measurement Measurement start time 897N203029A FDC NX600 Instruction Manual 2022.01 3-12...
- Page 46 3 Measurement (6) Checking the measurement results After measurement, tap the button to check the test results. The test results are printed out in the order that the slides were loaded in the cartridge. To retest (Section 4.4), tap the (retest) button.
-
Page 47: Lamp Off And Measurement-Start Scheduling
3 Measurement 3.3.1 Lamp Off and Measurement-start Scheduling By default, when this analyzer has not been used for some time (a time from 20 through 240 min- utes can be set) while [Ready to test] is displayed on the LCD, it switches off the light source lamp to save lamp life. -
Page 48: Measurement Results Screen
3 Measurement Measurement Results Screen After measurement has ended, tap button, and then check the measurement results. NOTE Results of the last 270 samples are backed up in data. Result data display area < Display of measurement results > Green: Within reference interval Red: Outside reference interval Or, when the measurement result is not displayed due to an error... - Page 49 3 Measurement < Buttons of the measurement results screen > button Close the measurement results screen, and then return to the Measurement-preparation screen. 2 Change sample No. button Change the sample number for which meas- urement results are to be displayed. 3 Feed button Feed the recording paper with a fixed amount.
- Page 50 3 Measurement < Calendar display > 1 Measurement month scroll buttons Change the display of the calendar month. 2 Date buttons Display the measurement results screen of a date. The currently displayed date is dis- played in blue. NOTE Dates with no measurements are displayed in gray and cannot be se- lected.
-
Page 51: Ise Tests
3 Measurement ISE Tests IMPORTANT: Analyzer cannot detect expiries of ISE slides if the installed software is version 1.0. Be sure manu- ally that slides are still valid. Otherwise, with the software version 1.1 or later is installed, analyzer can automatically detect ex- piries of the ISE slides that will expire 2023 or later or whose lot numbers are 130000 to 139999. - Page 52 3 Measurement 4. Check the sample type setting. Register sample information as necessary. Refer to Section 3.3 (4) Sample type setting Remaining number of mixing cups 5. Load a sample and slides. Arrows pointing Place the ISE slide in the slide cartridge with right 矢印右向き...
- Page 53 3 Measurement 7. Tap the [START] button to start measure- ment. 897N203029A FDC NX600 Instruction Manual 2022.01 3-20...
-
Page 54: Dilution Tests
3 Measurement Dilution Tests There are 2 types of dilution measurement. • Dilute and measure automatically by using [Dilution setting] in Mode function for administrator to preset dilution factors for each test and sample type. Refer to Section 9.3.14 •... - Page 55 3 Measurement (Example) When diluting Sample 2x 1. Check the quantity of the consumables Diluent (tips and mixing cups). If consumables are insufficient, supplement or replace them. • Loading tips Refer to Section 5.2 • Loading mixing cups Refer to Section 5.3 ...
- Page 56 3 Measurement 5. In the list, tap [x2]. - : Dilution is performed according to [Dilution setting] in Mode function for administra- tor. None : No dilution NOTE If necessary, enter or choose other sample information. 3-23 897N203029A FDC NX600 Instruction Manual 2022.01...
- Page 57 3 Measurement 6. Close the sample cover, and then lock it with the sampler cover lock key. WARNING: Ensure the sampler cover is locked during sample processing to prevent injuries and infection. When the display reads [Ready to test], the sam- pler cover can be opened.
-
Page 58: Crp Tests
3 Measurement CRP Tests NOTE Each time a new box of CRP slides is used, the new QC card must be read. Refer to Section 3.10 NOTE Calibration is necessary for CRP measurements under the following conditions. • When the slide lot has changed •... - Page 59 3 Measurement 4. Set the sample type to [Plasma/Serum]. NOTE To further set the dilution factor to 3x for CRP measurements, tap the [Dilution] button, and then specify 3x. Refer to Section 3.6 NOTE If necessary, enter or choose other sample information.
-
Page 60: Shutting-Down The Fdc Nx600
3 Measurement Shutting-down the FDC NX600 1. Remove the samples. Sample 2. Remove the tubes of diluent and refer- ence fluid from the analyzer. Diluent Reference fluid 3. Close the sampler cover. Sampler cover 4. Make sure that measurement and mode operation are not in progress. CAUTION: Do not switch off the power during measurement or mode operation. - Page 61 3 Measurement 5. Press the power button. Power button 6. Tap [OK]. CAUTION: Shutdown will be automatically performed after the process completed. Make sure NOT to turn the power switch off. CAUTION: Were you not able to operate on the screen, press the power button at front to turn off the power.
- Page 62 3 Measurement 7. Empty the disposal box. WARNING: Do not touch used slides and tips with your bare hands, as this may cause infection. If you accidentally touch an item, immediately rinse the contaminated area thoroughly under run- ning water, and then disinfect the area. Seek medical assistance if necessary.
-
Page 63: Sample Tubes For The Fdc Nx600
3 Measurement Sample Tubes for the FDC NX600 The following sample tubes can be used on the FDC NX600. • Ø16×100 mm blood collection tube • Ø16×100 mm blood collection tube (when using PF) • Ø13×100 mm blood collection tube •... - Page 64 3 Measurement (2) Tube contents and inspection items that can be measured IMPORTANT: Refer to the “Instructions for Use” of the slides for usable blood collection tubes and observe the listed items. IMPORTANT: For contents, inspection items, cap colors, and other details, contact the manufacturer of the blood collection tube to be used.
-
Page 65: Fuji Sample Tubes
3 Measurement 3.9.2 FUJI Sample Tubes Use these tubes in the place of blood collection tubes when the sample volume is low. WARNING: When handling samples (blood or urine), always follow biohazard procedures (wear gloves, a lab coat, and safety goggles) in accordance with the sample handling rules of your facility. If you acci- dentally touch a sample, immediately rinse the contaminated area thoroughly under running water, and then disinfect the area. -
Page 66: Assembling The Sample Rack
3 Measurement 3.9.3 Assembling the Sample Rack Assemble the sample rack according to the type of blood collection tube and tube to be used. IMPORTANT: Incorrect assembly may cause bad suction, which may adversely affect the test results or cause a failure. - Page 67 3 Measurement <Sample rack variations> (a) Sample rack for φ16mm × 100mm Affix the label After setting the 8 spacer, insert the 2 tube holder Set the 8 spacer (H=32mm) (hole is down) Insert the 0 pin as shown (b) Sample rack for φ13mm × 100mm Affix the label After setting the 8 spacer, insert the 3...
- Page 68 3 Measurement (e) Sample rack for FUJI sample tube 0.5mL Insert the 5 tube Affix the label holder 0 Pin (f) Sample rack for φ16mm × 100mm when using plasma filter PF Affix the label 0 Pin 0 Pin (g) Sample rack for φ13mm × 100mm when using plasma filter PF Affix the label 0 Pin...
- Page 69 3 Measurement (i) Sample rack for calibrator CP Insert the 6 calibrator CP Affix the label holder 0 Pin 0 Pin 897N203029A FDC NX600 Instruction Manual 2022.01 3-36...
-
Page 70: Qc Card System
3 Measurement 3.10 QC Card System (1) Overview The QC card system compensates for variations between lots of FUJI DRI-CHEM slides and ensures uniform performance. Calculation method A variety of the reference fluids developed for FUJI 標 DRI-CHEM slides are measured on each lot of 準... - Page 71 (4) Using DI cards When you receive DI cards from FUJIFILM due to a change of the slide’s manufacturing pro- cess, read the DI cards according to the instructions. The reading method is the same as for QC cards.
-
Page 73: Applicable Usage Methods
Applicable Usage Methods CRP Calibration 4.1.1 Calibration Measurement Calibrate when you start a new production number (lot) of CRP slides or when calibration has ex- pired. WARNING: As calibrator CP is derived from blood, it should be handled in the same way as a patient sample. When handling calibrator CP, always follow biohazard procedures (wear gloves, a lab coat, and safety goggles) in accordance with the sample handling rules of your facility. - Page 74 4 Applicable Usage Methods 1. Read the QC card via the analyzer. Read the QC card of the slide to be calibrated. Refer to Section 3.10 2. Tap the button. 3. Tap the [Calibration] button. 4. Check the displayed calibrator concen- tration settings (CP1, CP2, and CP3).
- Page 75 4 Applicable Usage Methods 5. Tap the [START Calibration] button. The guide for setting consumables such as cali- brators is displayed. 6. Check the quantity of the consumables (tips and mixing cups). If consumables are insufficient, tap the [Set con- sumables] button to replenish or replace them.
- Page 76 4 Applicable Usage Methods 8. Prepare for measurement of calibrator CP1. NOTE A set of calibration requires 6 CRP slides in total. (a) Set the sample rack for the calibrator CP. NOTE Set the sample rack securely so that it does not rise up.
- Page 77 4 Applicable Usage Methods 9. Tap the [START] button. The CP1 calibra- tion spotting screen is displayed. 10. After CP1 sampling, open the sampler cover, take CP1 out from the sample rack, and then firmly close the lid. The CP2 calibration measurement start screen is displayed. 897N203029A FDC NX600 Instruction Manual 2022.01...
- Page 78 4 Applicable Usage Methods 11. Perform measurement of calibrator CP2. Perform (b) to (d) of Step 8, and then tap the [START] button. The CP2 calibration spotting screen is dis- played. NOTE If a slide with a different lot number has been loaded, an error screen is dis- played.
- Page 79 4 Applicable Usage Methods 12. After CP2 sampling, open the sampler cover, take CP2 out from the sample rack, and then firmly close the lid. The CP3 calibration start measurement screen is displayed. 13. Perform measurement of calibrator CP3. Perform (b) to (d) of Step 8, and then tap the [START] button.
- Page 80 4 Applicable Usage Methods 14. After CP3 sampling, open the sampler cover, take CP3 out from the sample rack, and then firmly close the lid. The calibration measuring screen is displayed. 15. When measurement ends, the Calibra- tion measurement result screen is dis- played. NOTE Print the calibration measurement re- sults and store them for the calibration validity term.
- Page 81 4 Applicable Usage Methods (Supplement) List display area The lot numbers (6 digits) and validity terms of read QC cards (CRP) are displayed in a list. Items are displayed in the order the QC card was read. Items within their validity term have their dates displayed in black.
-
Page 82: Configuring Calibrator Concentration
4 Applicable Usage Methods 4.1.2 Configuring Calibrator Concentration Correct the calibrator concentration when the concentration included with the calibrator CP to be used and the concentration in the calibrator concentration display area at the Calibration Lot No. screen are different. 1. Tap the [Settings] button. The administrator password entry screen ap- pears. - Page 83 4 Applicable Usage Methods 3. Tap the [Input] field of each CP. The software keyboard screen appears. 4. Enter a value, and then tap the [OK] button. For the details of the software keyboard screen, refer to Section 2.3. IMPORTANT: Enter the value using Unit (A) (mg/dL). 897N203029A FDC NX600 Instruction Manual 2022.01 4-11...
- Page 84 4 Applicable Usage Methods 5. If the button is tapped, the entered values are registered, and the analyzer returns to the Calibration Lot No. screen. NOTE If the [Reset] button is tapped, the en- tered values are reset. If the button is tapped, the entered values are regis- tered and printed.
-
Page 85: Manual Spotting (Colorimetric Slide)
4 Applicable Usage Methods Manual Spotting (Colorimetric Slide) 4.2.1 Measuring by Manual Spotting (Colorimetric Slide) WARNING: When handling samples (blood or urine), always follow biohazard procedures (wear gloves, a lab coat, and safety goggles) in accordance with the sample handling rules of your facility. If you acci- dentally touch a sample, immediately rinse the contaminated area thoroughly under running water, and then disinfect the area. - Page 86 4 Applicable Usage Methods 3. Tap the [START Manual pipetting] button. 4. Register the measurement information. NOTE You can also display the measurement results screen from the screen on the left and request a retest. Refer to Section 4.4 5.
- Page 87 4 Applicable Usage Methods 7. Aspirate the sample by using the pipette. NOTE Refer to the “Instructions for Use” of the slide for the amount of sample to be aspirated (applied). 8. Prepare sample pipetting. Hold the pipette and touch the tip mounted on the pipette to the guide (your side corner) of the Manual pipette cover.
- Page 88 4 Applicable Usage Methods 11. After the progress bar has finished (all □ change to ■), apply the sample to the slide while [Spot now] is displayed. The spotted slide is automatically transferred to the measurement section after the display of [Spot now] disappears.
-
Page 89: Using A Pipette
4 Applicable Usage Methods 4.2.2 Using a Pipette WARNING: When handling samples (blood or urine), always follow biohazard procedures (wear gloves, a lab coat, and safety goggles) in accordance with the sample handling rules of your facility. If you acci- dentally touch a sample, immediately rinse the contaminated area thoroughly under running water, and then disinfect the area. -
Page 90: Tests Using A Plasma Filter (Pf)
4 Applicable Usage Methods Tests Using a Plasma Filter (PF) By using a PF, you can filter a plasma sample from a whole blood sample without using a centrifuge. NOTE The FDC NX600i cannot measure using a PF. IMPORTANT: Read the “Instructions for Use” of the PF before measurement. IMPORTANT: Be sure to read the PF card when changing to a new production lot of PFs. - Page 91 4 Applicable Usage Methods PF cards (1) Overview When the measurement values for filtered plasma are compared to the values for plasma sep- arated on a centrifuge, systematic differences may be found. Always read the PF card before using a PF. The PF card contains information to compensate for these differences. (2) Using PF cards One PF card is included in one PF box (with 50 filters).
-
Page 92: Measurement
4 Applicable Usage Methods 4.3.1 Measurement 1. Prepare the slides. 2. Prepare the consumables. Prepare the tips, mixing cups, diluent, and refer- ence fluid as required. • Loading tips Refer to Section 5.2 • Loading mixing cups Refer to Section 5.3 ... - Page 93 4 Applicable Usage Methods 4. Load the sample. (1) Place the specified amount of whole blood sample in a blood collection tube. NOTE The PF has about 3 mL of dead vol- ume (that will be absorbed into the filter). If the sample volume is low, the filtered sample volume will be too low for measurement.
- Page 94 4 Applicable Usage Methods 6. Close the sample cover, and then lock it with the sampler cover lock key. WARNING: Ensure the sampler cover is locked during sample processing to prevent injuries and infection. When the display reads [Ready to test], the sam- pler cover can be opened.
-
Page 95: Blood Collection Tubes For Tests Using A Pf
4 Applicable Usage Methods 4.3.2 Blood Collection Tubes for Tests Using a PF NOTE The FDC NX600i cannot measure using a PF. The following blood collection tubes can be used with PF measurements: φ16×100 mm, φ13×100 mm, and φ13×75 mm. (Outer diameter of Ø16 indicates Ø15.0 to 16.6 mm and Ø13 indicates Ø12.0 to 13.3 mm.) IMPORTANT: Use blood collection tubes containing Heparin. -
Page 96: Retesting
4 Applicable Usage Methods Retesting You can test again using the previous sample number, sample ID, sample type setting, and refer- ence interval setting by tapping the (retest) button at the measurement results screen. Further- more, when a measurement cannot be performed due to an error, you can skip the re-entry and re- configuration of the setting information by tapping the (retest) button. - Page 97 4 Applicable Usage Methods < How to retest > 1. When [Ready to test] appears on the LCD, make sure that the analyzer is not applying samples, and then load the consumables and sample. Refer to Section 3.3 NOTE If the amount of remaining sample is insufficient, run the test with manual pi- petting.
- Page 98 4 Applicable Usage Methods 3. Close the sample cover, and then lock it with the sampler cover lock key. WARNING: Ensure the sampler cover is locked during sample processing to prevent injuries and infection. When the display reads [Ready to test], the sam- pler cover can be opened.
-
Page 99: Slide Loading Order When Measuring Different Items Simultaneously
4 Applicable Usage Methods 4.5 Slide Loading Order When Measuring Different Items Simul- taneously NOTE Any order of slide stacking can be measured. However, please follow the recommended slide stacking rules below. Otherwise, the analyzer may consume excessive amounts of dis- posal tips and cups. (1) Measuring CRP and CM (colorimetric) slides Always put a CRP slide first or last. -
Page 100: Automatic Acquisition Of Sample Information (Work Lists)
4 Applicable Usage Methods Automatic Acquisition of Sample Information (Work Lists) If the analyzer is connected to DMS, you can receive patient IDs and their sample information by tapping the button at the Measurement-preparation screen before measurement. NOTE DMS is sold separately. 1. - Page 101 4 Applicable Usage Methods The work list measurement items of the regis- tered sample information are displayed. NOTE If the button is tapped, registration is cleared. NOTE The work list measurement items can be printed by tapping the button. 3. Tap the [OK] button to finish registration. The Measurement preparation screen (top screen) returns.
-
Page 102: Editing Sample Numbers And Sample Ids
4 Applicable Usage Methods Editing Sample Numbers and Sample IDs You can edit the sample number and sample ID of measurement results. You can also send edited data to a host computer. 1. To edit the sample number, tap the [No.] button at the measurement results screen (Refer to Section 3.4). -
Page 103: Using The Sample Barcode Reader (Sold Separately)
4 Applicable Usage Methods Using the Sample Barcode Reader (Sold Separately) You can easily enter the sample ID and operator ID by using the optional sample barcode reader. IMPORTANT: If the sample barcode reader malfunctions or the print quality of the barcode label is poor, incor- rect barcode data may be read. - Page 104 4 Applicable Usage Methods 2. Read the barcode of the sample using the barcode reader. After reading is complete, the analyzer makes a beep sound. The sample ID is displayed on the LCD and is registered. バーコードを読み取ります NOTE Position the sample barcode reader properly facing to the barcode label.
- Page 105 4 Applicable Usage Methods <When inputting the operator ID> 1. Tap the operator ID button. The software keyboard appears. 2. Read the operator ID using the sample barcode reader. After reading is complete, the analyzer makes a beep sound. The operator ID is displayed on the LCD and is registered.
-
Page 107: Loading Consumables
Loading Consumables Loading Consumables To load tips and mixing cups, tap the display of consumables to display the loading screen. When loading is complete, press the [Finish] button to exit. NOTE If there are not enough consumables (tips, mixing cups, diluent, reference fluid, etc.), sam- ple application may be stopped. -
Page 108: Setting Tips
5 Loading Consumables Setting Tips Tips are required for all measurements. Check the number of remaining tips on the LCD before per- forming measurements. If necessary, add new tips. WARNING: During sample application, tap the [STOP] button to stop application, and then load the tips. Load- ing is unsafe during sample application because the sampler and the consumable disk are mov- ing. - Page 109 5 Loading Consumables 4. Remove the tip rack from the consum- able disk. NOTE Always remove the tip rack from the consumable disk before loading tips. Tip rack 5. Load tips in all holes of the tip rack. NOTE Always set tips in all holes of the tip rack.
- Page 110 5 Loading Consumables 7. Check that tips have been set in all holes of the tip rack. And then, tap the [Replenish] button of tips. 8. Tap the [Finish] button to exit. 897N203029A FDC NX600 Instruction Manual 2022.01...
-
Page 111: Loading Mixing Cups
5 Loading Consumables Loading Mixing Cups Mixing cups are necessary for measurements requiring dilution (refer to Section 3.6) and CRP measurements (refer to Section 3.7). Furthermore, mixing cups are also necessary when urine (U) is selected for the sample type during an ISE measurement because measurement is performed automatically at 2x dilution. - Page 112 5 Loading Consumables 4. Remove the mixing cups from the con- Mixing cups sumable disk, and then set new mixing cups. WARNING: Used mixing cups are infectious industrial waste. Process this waste in compliance with any appli- cable regulations in your country, such as by incin- eration, melting, sterilization, or disinfection.
-
Page 113: Loading Diluent
5 Loading Consumables Loading Diluent Diluent is necessary for dilution measurements (refer to Section 3.6) and CRP measurements (refer to Section 3.7). Dilution and CRP measurements each require a specified diluent. Before measure- ment, refer to the technical documentation for the diluent to be used. Furthermore, mixing cups are also necessary when urine (U) is selected for the sample type during an ISE measurement because measurement is performed automatically at 2x dilution. - Page 114 5 Loading Consumables 2. With [Warming up] or [Ready to test] dis- played on the LCD, make sure that the analyzer is not applying samples. 3. Load a tube containing diluent. Diluent NOTE Tap the consumables display on the top screen and select the [Diluent] tab to dis- play the diluent setting guidance screen.
-
Page 115: Loading Reference Fluid
5 Loading Consumables Loading Reference Fluid Reference fluid is necessary for ISE measurements. (Refer to Section 3.5). WARNING: When handling reference fluid, follow biohazard procedures (wear gloves, a lab coat, and safety goggles) in accordance with the medical handling rules of your facility. If you accidentally touch an item, immediately rinse the contaminated body part thoroughly under running water. - Page 116 5 Loading Consumables 3. Load the tube containing the reference Reference fluid fluid. Press the lever to open the lid and load the con- tainer. IMPORTANT: Clean the cap of the reference fluid every time you load the reference fluid. Refer to Section 6.8 ...
-
Page 117: Maintenance
Maintenance 6 Maintenance To keep the performance of the FDC NX600 at its best, users must perform daily and periodic mainte- nance, and designated repair personnel must perform maintenance. When repairs are necessary, con- tact repair personnel. WARNING: When you clean the analyzer, always wear gloves, a lab coat, and safety goggles. If you accidentally touch a contaminant, immediately rinse the contaminated area thoroughly under running water, and then disinfect the area. -
Page 118: Periodic Maintenance Items
6 Maintenance Periodic Maintenance Items 6.1.1 Items for Daily and Periodic Inspection by the User Users must perform the daily and periodic maintenance and replacement of parts in the following table. Inspection Location Cleaning interval Replacement interval Procedure interval Refer to Air filter Once a month Section 6.2. -
Page 119: Items For Maintenance And Inspection By Repair Personnel
6 Maintenance 6.1.2 Items for Maintenance and Inspection by Repair Personnel Designated repair personnel must perform the maintenance and replacement of parts in the follow- ing table. Parts Replacement interval Interference filter Once every 4 years Syringe Once every 3 years Incubator pressure plate Inspection once every 3 years WARNING:... -
Page 120: Cleaning The Air Filters
6 Maintenance Cleaning the Air Filters The air filters should be checked and cleaned once a month. IMPORTANT: If the air filters are not cleaned, an increase in the temperature inside the analyzer may negatively affect the measurement values. NOTE Clean all 4 filters. - Page 121 6 Maintenance 3. Remove dust adhering to the filter with a Air filter vacuum cleaner or running water. NOTE If you wash the filter with running water, make sure it is dried well before setting in the analyzer. 4. Insert the filter into the louver and put the louver back in the analyzer.
-
Page 122: Inspecting And Cleaning The Transfer Bar, Incubator, Sample Application Unit
6 Maintenance Inspecting and Cleaning the Transfer Bar, Incubator, Sam- ple Application Unit, and ISE Unit Measuring results are affected by stains (from blood samples, etc.) inside of the incubator and ISE unit. These parts should be checked and cleaned at least once every three months. When a slide transfer error or a tip ejecting error occurred, clean the sample application unit. - Page 123 6 Maintenance 6.3.1 Reference Plate Level Check Perform [Reference plate level check] before cleaning. 1. Tap the button. 2. Tap the [Normal mode] button. 897N203029A FDC NX600 Instruction Manual 2022.01...
-
Page 124: And Ise Unit
6 Maintenance 3. Tap the [Reference plate level check] button to run a check. If check ends, the Check results screen appears. 4. Check the results of [Reference plate level check]. When has appeared in the check results, cleaning is necessary. Tap the [OK] button. Using the procedure on the following pages, clean the transfer bar, incubator, sample application unit, and ISE unit. - Page 125 6 Maintenance 6.3.2 Cleaning the Transfer Bar, Incubator, Sample Application Unit, and ISE Unit (1) Cleaning the transfer bar 1. Tap the [Cleaning mode] button in Normal mode. 2. Remove the slide cartridge and the tip rack from the analyzer. 3.
- Page 126 6 Maintenance 4. The screen to the left appears. 5. Loosen the 2 thumbscrews and pull the sample application unit cover frontward to remove it. Thumbscrew 6. Remove the two slide transfer weights. NOTE There are 2 types of slide transfer weight, one each for CM tests and ISE tests.
- Page 127 6 Maintenance 8. Use gauze or a cotton swab that has Transfer bar been soaked in lukewarm or cold water to wipe the upper surface of the transfer bar visible in the sample application unit. 9. Next, clean the incubator, sample appli- cation unit, and ISE test unit.
- Page 128 6 Maintenance WARNING: Always unplug the power cord before the following procedure. (2) Incubator 1. Open the sampler cover and panel unit. Remove the panel unit pedestal. Panel unit pedestal Connector 2. Unplug the connector of the incubator cable (low end) by turning it to the left. 3.
- Page 129 6 Maintenance 4. Loosen the 5 screws on the upper sur- face of the incubator, and then remove the incubator. Thumbscrew 5. Moisten the cloth with lukewarm water. IMPORTANT: Wring the cloth when it is soaked too much. If wa- ter gets inside the machine, it will cause rust.
- Page 130 6 Maintenance 8. Wipe the tapered part of each pres- sure plate (the metallic luster taper part Tapered part around the black part). NOTE Wipe the entire circumference as blood stains may be difficult to see by eye. 9. Wipe the surface (black part) of each Surface pressure plate.
- Page 131 6 Maintenance 11. Loosen the 2 screws fixing the reference plate and remove the plate from the ana- lyzer. Thumbscrew Reference plate 12. Turn over the reference plate and clean Reference Reference black plate white plate the white plate and black plate with a dry cotton swab. 13.
- Page 132 6 Maintenance (3) Sample application unit 1. Make sure that the sample application unit cover and two slide transfer weights were removed for cleaning of the trans- fer bar. 2. Wipe the sample application unit with Sample application unit gauze or a cotton swab moistened with lukewarm or cold water.
-
Page 133: Reassembling Parts And Ending Cleaning
6 Maintenance 6.3.3 Reassembling Parts and Ending Cleaning 1. Reassemble the incubator. Align the arrow marks on the incubator and the reference plate, and then tighten the 5 thumb- screws evenly by tightening opposing thumb- screws in numerical order ( 1 to 5 ). IMPORTANT: Tighten the five thumbscrews securely. -
Page 134: Replacing Recording Paper
6 Maintenance Replacing Recording Paper When red lines appear along the sides of the recording paper, the printer is nearly out of paper, so replace the recording paper roll with a new one. NOTE Use the recording paper specified for the FDC NX600. 1. -
Page 135: Replacing And Cleaning The Light Source Lamp
6 Maintenance Replacing and Cleaning the Light Source Lamp The average life of the lamp is about 1,000 hours. Replace the lamp if a lamp replacement error oc- curs or the cumulative lighting time of the lamp approaches 1,000 hours. CAUTION: The light source lamp gets very hot. - Page 136 6 Maintenance 4. Wipe the light source unit lens using a dry cotton swab. Lens 5. Turn the thumbscrew of the lamp unit to the left, remove the lamp, and then re- place it with a new one. Lamp base IMPORTANT: Tighten the thumbscrews securely.
- Page 137 6 Maintenance 6. Insert the connector of the light source Thumbscrew B lamp. 7. Insert the lamp unit into the analyzer with thumbscrew B facing up. Tighten thumbscrew A securely. IMPORTANT: Tighten the thumbscrew securely. Otherwise, the measurement results may be negatively affected. Thumbscrew A Connector 8.
-
Page 138: Maintenance Of Sampler O-Ring
6 Maintenance Maintenance of Sampler O-ring The sampler nozzle O-ring wears over time. Perform weekly cleaning, monthly inspection, and an- nual replacement. WARNING: When inspecting and replacing O-rings, always wear gloves, a lab coat, and safety goggles. If you accidentally touch a contaminant, immediately rinse the contaminated area thoroughly un- der running water, and then disinfect the area. - Page 139 6 Maintenance 4. While holding the arm with one hand, wipe the O-ring while rotating the damp cloth 3 to 4 turns around the circumfer- ence. Next, wipe down from the top to cover the entire circumference. Similarly, wipe the other O-ring around the circum- ference and down from the top.
-
Page 140: Inspecting The Sampler O-Ring
6 Maintenance 6.6.2 Inspecting the Sampler O-ring 1. Tap the button. 2. Tap the [Normal mode] button. 3. Tap [Sampler leak check]. 6-24 897N203029A FDC NX600 Instruction Manual 2022.01... - Page 141 6 Maintenance 4. Follow the on-screen instructions to pre- pare for the leak check. 5. Tap the nozzle to be checked to select it, and then run the leak check. Once check ends, the Check results screen ap- pears. CAUTION: Keep your fingers clear as the sampler unit and consumable disk move.
- Page 142 6 Maintenance If the check results are [NG], tap the [Replace O-ring] button, and then replace the O-ring according to the following procedure. NOTE The check results can be printed by tapping the button. 7. Once the check ends, open the sampler cover, and then remove the sampler leak check tool mounted on the sampler noz- zle by hand.
-
Page 143: Exchanging The Sampler O-Ring
6 Maintenance 6.6.3 Exchanging the Sampler O-ring The sampler nozzle O-ring wears over time. Replace it once a year. WARNING: Process used O-rings as infectious waste. IMPORTANT: If you do not replace the O-ring periodically, the sample application volume will be inaccurate, which may negatively affect the measurement values. - Page 144 6 Maintenance 4. Tap [Replace O-ring]. 5. Tap the [START] button. The sampler nozzles turn to the replacement position. CAUTION: Keep your fingers away as the sampler unit moves. 6. Follow the on-screen instructions to replace the O-ring. If this button is tapped, the following expla- nation appears.
- Page 145 6 Maintenance 7. Tap [Leak check] to check for leaks. Refer to Section 6.6.2 897N203029A FDC NX600 Instruction Manual 2022.01 6-29...
-
Page 146: Cleaning The Slide Reading Section
6 Maintenance Cleaning the Slide Reading Section When a slide-detection error has occurred, dust and other soiling may be the cause. Clean the slide reading section to avoid these errors. WARNING: Always wear gloves, a lab coat, and safety glasses while working. If you accidentally touch a contaminant, immediately rinse the contaminated area thoroughly un- der running water, and then disinfect the area. -
Page 147: Cleaning And Replacing The Reference Fluid Cap Packing
6 Maintenance Cleaning and Replacing the Reference Fluid Cap Packing Clean the reference fluid cap packing each time the reference fluid is replaced. Replace the reference fluid cap packing once every three months. IMPORTANT: If you do not clean and replace the reference fluid cap packing, the reference fluid will be concen- trated, which may negatively affect the measurement values. - Page 148 6 Maintenance 4. Set the reference fluid cap packing prop- erly. NOTE Do not touch the bottom side (reference fluid side) of the reference fluid cap packing. Reference fluid cap packing 6-32 897N203029A FDC NX600 Instruction Manual 2022.01...
-
Page 149: Pf Unit Maintenance
6 Maintenance PF Unit Maintenance WARNING: During maintenance, always wear gloves, a lab coat, and safety glasses. If you accidentally touch a contaminant, immediately rinse the contaminated area thoroughly un- der running water, and then disinfect the area. Seek medical assistance if necessary. WARNING: Dispose of contaminants used for cleaning as infectious waste. - Page 150 6 Maintenance 3. Tap [PF maintenance]. 4. Tap the [Cleaning] button. 5. Remove the sample rack, mixing cup, and tip rack. 6. Tap the [OK] button. CAUTION: Keep your fingers clear as the PF part moves. 6-34 897N203029A FDC NX600 Instruction Manual 2022.01...
- Page 151 6 Maintenance 7. Clean according to the on-screen in- structions. 8. Tap the [OK] button to end cleaning. Surface of PF sensor PF Suction Pad (glass surface) (black) PF reference plate 9. Run the leak check. Refer to Section 6.9.2 ...
-
Page 152: Inspecting The Pf Suction Pad
6 Maintenance 6.9.2 Inspecting the PF Suction Pad The PF suction pad must be inspected monthly and replaced every two years. 1. Touch the [PF Maintenance] button as in the previous section. 2. Tap the [Leak check] button. 6-36 897N203029A FDC NX600 Instruction Manual 2022.01... - Page 153 6 Maintenance 3. Follow the on-screen instructions to load the PF sample rack and PF leak check tool to the sample position, and then tap the [START] button to run the leak check. If check ends, the Check results screen appears. CAUTION: Keep your fingers clear as the PF part moves.
-
Page 154: Replacing The Pf Suction Pad
6 Maintenance 6.9.3 Replacing the PF Suction Pad Replace a PF suction pad once every 2 years. WARNING: Process used PF Suction Pad as infectious waste in compliance with any applicable regulations in your country. 1. Touch the [PF Maintenance] button as in the previous section. - Page 155 6 Maintenance 3. Remove the sample rack, mixing cups, and tip rack. Sample rack Tip rack Mixing cups 4. Tap the button to switch off the power. 897N203029A FDC NX600 Instruction Manual 2022.01 6-39...
- Page 156 6 Maintenance 5. Turn the PF Suction Pad in the direction shown and remove it while loosening. 6. Install the new PF Suction Pad by turn- ing it in the opposite direction. NOTE Be sure to tighten the PF Suction Pad securely.
-
Page 157: Replacing The Pf Pump Tube
6 Maintenance 6.9.4 Replacing the PF Pump Tube WARNING: Before the following procedure, always switch off the power of the analyzer, and unplug the power cord. Replace the PF pump tube once every 2 years. Replacement is also necessary if the PF has not been used for one month or longer. - Page 158 6 Maintenance 4. While pushing the head of joint (G), pull PF pump the joint (G) to the right to remove the Joint (G) tube (D). Red tube (D) Pull off joint (G) to the right Joint (G) while pushing this part to the right.
- Page 159 6 Maintenance 8. Attach the front bottom cover. NOTE Put the front bottom cover back horizon- tally as it was. 9. Attach the disposal box. 10. After the replacement, run the leak check. If the check results are [NG], perform the re- placement again.
-
Page 161: Quality Control
Quality Control IMPORTANT: To maintain the accuracy of your test results, it is recommended to perform quality control on routine bases by use of control fluids. Perform quality control in compliance with local regulation and proce- dure which you have to obey. Also, it is also recommended to do after major repairs are performed on the analyzer. -
Page 162: Control Chart
7 Quality Control Control Chart 1. Tap the button. 2. Tap the [Control] button. 3. The measurement-preparation screen of control mode appears. 4. Tap the (graph display) button. 897N203029A FDC NX600 Instruction Manual 2022.01... - Page 163 7 Quality Control 5. Tap the button of the measurement item to be viewed. 6. The control chart appears. NOTE If the control liquid button is tapped, you can change the control liquid to be dis- played. NOTE Measurement results of outside of measurement range (@), disposal box open (*), and expired slide (#) are not reflected in the control chart.
- Page 164 7 Quality Control 7. If a measurement date is selected and then the [Detail] button is tapped, the de- tail screen appears. < Display of measurement results > Green: when within the acceptable range of control Red: when outside of the acceptable range of control Acceptable Acceptable range...
-
Page 165: Troubleshooting
Troubleshooting WARNING: When you troubleshoot, always wear gloves, a lab coat, and safety goggles. If you accidentally touch a contaminant, immediately rinse the contaminated area thoroughly under running water, and then disinfect the area. Seek medical assistance if necessary. IMPORTANT: If an analyzer malfunction (error) appears before or during measurement or warnings appear in the measurement results, the measurement results may be inaccurate. -
Page 166: Error Log
8 Troubleshooting 8.1.1 Error Log You can view the history of errors that occurred by using [Error log] in the function menu. 1. Tap the button. 2. Tap the [Error log] button. An error log list is displayed. 3. Tap an error. The error details are displayed. - Page 167 8 Troubleshooting 897N203029A FDC NX600 Instruction Manual 2022.01...
-
Page 168: Error Code And Reference Section Table
8 Troubleshooting 8.1.2 Error Code and Reference Section Table Error code Error description Reference Reference section page E0021 The disposal box was open during measurement 8.2.15 8-42 E0035 Photometric control system error 8.2.8 8-24 E0050 Light source lamp is burned out 8.2.5 (2) 8-20 E0080... - Page 169 8 Troubleshooting Error code Error description Reference Reference section page E1502, E1503, Temperature control error 8.2.7 8-23 E1504 E1510, E1511, ISE temperature control error 8.2.7 8-22 E1512, E1514, E1515 E1520, E1521 Installation environment temperature error 8.2.7 8-22 E1530, E1531, Signal system error inside circuit board 8.2.8 8-25 E1532...
- Page 170 8 Troubleshooting Error code Error description Reference Reference section page W0020 The disposal box is open 8.2.15 8-42 W0022 The disposal box is full 8.2.15 8-42 W0030 Insufficient light intensity 8.2.5 (1) 8-19 W0036 Reference black plate soiling 8.2.5 (1) 8-19 W0040, W0041 The sample type configuration and sample type...
- Page 171 8 Troubleshooting Error code Error description Reference Reference section page W4013, W4014, QC card error 8.2.9 (5) 8-30 W4015 W4440 Setting value reset warning 8.2.15 8-43 W4460-W4475, Signal system error inside circuit board 8.2.8 8-26 W4477, W4483 W4500, W4501, Serial communication error 8.2.13 (1) 8-37 W4502...
-
Page 172: Printout Reference Table
8 Troubleshooting 8.1.3 Printout Reference Table Printout Meaning and conditions Troubleshooting Measurement value is higher than the upper limit of the preset reference interval. Measurement value is lower than the lower limit of the preset reference interval. > Measurement value is higher the upper limit of the meas- urement range. - Page 173 8 Troubleshooting The valid term of the slide has expired. For immuno-chemical tests, the validity term of the slide or the validity term of calibration has expired. IMPORTANT: The measurement value might be incorrect. IMPORTANT: Expired slides cannot be used. Always use valid slides.
-
Page 174: Troubleshooting
8 Troubleshooting Troubleshooting 8.2.1 Startup Errors (1) The analyzer does not start after the power button is pressed. Check that the power cable is properly connected. And, turn the power switch OFF and ON again, and press the power button. If the analyzer still does not start, please contact your dealer for assistance. -
Page 175: Slide Reading Errors
8 Troubleshooting 8.2.3 Slide Reading Errors Error Error message Error condition Troubleshooting code W0173 Slide identification The slide information Clean the slide reader, and then rerun on backside of the slide the measurement. could not be read cor- No slide information. Refer to Section 6.7 ... - Page 176 8 Troubleshooting (2) When tip cannot be ejected Error Error message Error condition Troubleshooting code E0086 Sample tip eject ERR Tips cannot be dis- After analyzer shutdown, empty dis- carded. posal box, and then turn the power ON. After analyzer shut- down, please check the disposal box.
- Page 177 8 Troubleshooting (3) When there are insufficient number of or no mixing cups Error Error message Error condition Troubleshooting code W0151 Lack of mixing cup There are not enough After you replace the mixing cups, re- mixing cups. run from the measurement request. Lack of mixing cups. Refer to Section 5.3 ...
- Page 178 8 Troubleshooting (5) During a sample aspiration or application error Error Error message Error condition Troubleshooting code E0111 Aspiration clogging Clogging was detected The sample may contain fibrin deposits. ERR (sample) during sample aspira- After checking the sample, rerun from tion.
- Page 179 8 Troubleshooting (6) When application is poor Error Error message Error condition Troubleshooting code Sample application problem Because the sample is Check the following points. not applied to the slide, (a) Make sure that FUJI DRI-CHEM the error mark [<] or [@] AUTO TIPS are being used.
- Page 180 8 Troubleshooting (7) During a diluent/reference fluid volume error Error Error message Error condition Troubleshooting code W0141 Surface detection ERR There is too much dilu- Follow the instructions of the error code (diluent) ent volume. to replace the diluent or reference fluid, and then rerun from measurement re- Diluent volume is too quest.
- Page 181 8 Troubleshooting (8) During a diluent / reference fluid error Error Error message Error condition Troubleshooting code E0121 Aspiration clogging Clogging was detected Be sure that FUJI tubes configured in ERR (diluent) during diluent aspira- Tube setting for diluent and reference tion. fluid ( Refer to Section 9.3.15) are ...
- Page 182 8 Troubleshooting (9) During a sampler drive system error Error Error message Error condition Troubleshooting code W0070 S p o t t i n g p o s i t i o n Rotation error of the Turn the analyzer off after the meas- sampler has occurred.
-
Page 183: Photometric System Errors
8 Troubleshooting 8.2.5 Photometric System Errors IMPORTANT: If a photometric system error has occurred, perform each troubleshooting step listed below and rerun the measurement. (1) During a fluctuation of light source intensity Error Error message Error condition Troubleshooting code Soiled black plate W0036 The reference plate is Switch off the analyzer and clean each WARNING dirty. - Page 184 8 Troubleshooting (2) When lamp is burned out Error Error message Error condition Troubleshooting code E0050 Lamp replacement The light source lamp Switch off the power and replace the is burned out. light source lamp. Switch the analyzer Low light intensity. on again after replacement.
-
Page 185: Transfer Errors
8 Troubleshooting 8.2.6 Transfer Errors Error Error message Error condition Troubleshooting code E0200- Feed motor ERR Movement error of the The sample application unit or the incu- E0203, slide supply motor bator may be dirty or the disposal box Problem with the slide E0220- may be full of slides and tips. -
Page 186: Temperature Controller Errors
8 Troubleshooting 8.2.7 Temperature Controller Errors Error Error message Error condition Troubleshooting code E0565 ISE temperature con- When the measure- Please contact your dealer for assis- trol ERR ment results are ap- tance. pended with a “+” or “-” Problem with ISE. mark or an error listed Contact your dealer. - Page 187 8 Troubleshooting Error Error message Error condition Troubleshooting code E1502 Temperature control When the measure- Switch off the power and connect the ment results are ap- incubator cable again. pended with a “$” mark Incubator temperature NOTE After inserting the connector of or an error listed to the sensor disconnected.
-
Page 188: Circuit Board Signal Errors
8 Troubleshooting 8.2.8 Circuit Board Signal Errors Error Error message Error condition Troubleshooting code E0035 Light too intense A circuit board signal If the error still occurs after switching error has occurred. the analyzer off and on, please contact Light too intense. your dealer for assistance. - Page 189 8 Troubleshooting Error Error message Error condition Troubleshooting code E0540 ISE AD conversion A circuit board signal When an error occurs after turning the initialization ERR error has occurred. power on and off, please contact your dealer for assistance. Tests other than For ISE measurement, ISE do not require a restart.
- Page 190 8 Troubleshooting Error Error message Error condition Troubleshooting code E4454 Memory loading ERR A circuit board signal Please contact your dealer for assis- error has occurred. tance. Contact your dealer. W4460 Memory recovery WARNING (Example: W4461 setting info.) W4464 Recovery performed W4469 from backup memory.
- Page 191 8 Troubleshooting Error Error message Error condition Troubleshooting code E4475, Memory initial-value A circuit board signal Please contact your dealer for assis- E4478- recovery ERR error has occurred. tance. E4481 Recovery performed from backup memory. Contact your dealer. W4477 M e m o r y r e c o v e r y Check the operator ID setting.
- Page 192 8 Troubleshooting Error Error message Error condition Troubleshooting code W4721 Clock control failure A circuit board signal Set the date and time using [Date & WARNING error has occurred. Time settings] in Normal mode. Set date & time. Refer to Section 9.2.1 ...
-
Page 193: Qc Card, Pf Card, And Di Card Errors
8 Troubleshooting 8.2.9 QC Card, PF Card, and DI Card Errors (1) When data is not displayed after a QC card is read Error Error message Error condition Troubleshooting code Problem reading QC Read the QC card again after making card information sure its correct orientation. - Page 194 8 Troubleshooting (4) When a DI card has not been read Error Error message Error condition Troubleshooting code W4012 No DI info. There is no DI card Please contact your dealer for assis- information. tance. No DI info found. Can- not read this card.
-
Page 195: Slide Loading Errors
8 Troubleshooting 8.2.10 Slide Loading Errors Error Error message Error condition Troubleshooting code W0040 I n c o r r e c t s a m p l e The sample type se- Match the configuration by the [Sample WARNING lected by the [Sample type] button and the sample type to type] button and the... - Page 196 8 Troubleshooting Error Error message Error condition Troubleshooting code E0160 Incorrect diluent type Diluent type does not Use specified diluent for the test name, error match the slide to be and rerun the measurement from the used. beginning. Diluent type is incor- rect.
-
Page 197: Ise Measurement Errors
8 Troubleshooting 8.2.11 ISE Measurement Errors IMPORTANT: ISE measurement values to which error codes have been appended (E1 - E8) may not be correct. Perform the following troubleshooting and rerun the measurement. (1) When a self-test error occurred Error Error message Error condition Troubleshooting code... - Page 198 8 Troubleshooting (2) Errors are appended to measurement results During an ISE measurement, the checks listed Check menu Description in the table to the left are performed. If there is a problem with a measurement value, Checking abnormal time course Drift check an error code from E1 through E8 is appended (voltage) during testing...
- Page 199 8 Troubleshooting (3) Other Errors Error Error message Error condition Troubleshooting code W0091 U n a c c e p t a b l e I S E An ISE measurement Check ISE measurement errors that oc- test error has occurred, curred before this error, and then carry and ISE measurement out the corresponding troubleshooting.
-
Page 200: Pf Errors
8 Troubleshooting 8.2.12 PF Errors Error Error message Error condition Troubleshooting code E0132 PF pressure ERR A pressure error oc- Replace the PF Tube. curred during the filter- Replace the PF pump Refer to Section 6.9.4 ing process. tube. E0133, PF sensor ERR A PF sensor error has... -
Page 201: Errors Related To Data Communication, Sample Barcode Reader
8 Troubleshooting 8.2.13 Errors Related to Data Communication, Sample Barcode Reader (1) When a communication error occurs Error Error message Error condition Troubleshooting code W4500, Serial communica- Serial communication Check the following: communication W4501, tion ERR error cable, host computer, and communica- W4502 tion destination settings. - Page 202 8 Troubleshooting (2) Sample barcode reader error Error Error message Error condition Troubleshooting code W5330 Barcode reader not The sample barcode Connect the sample barcode reader to connected reader is not connected. the USB connector, and then turn the analyzer off and on. Check the barcode reader connection.
-
Page 203: Calibration Errors
8 Troubleshooting 8.2.14 Calibration Errors (1) An immuno-chemical test has been performed without calibration. Error Error message Error condition Troubleshooting code W0180 Calibration not per- An immuno-chemical Perform the calibration. formed test has been per- Refer to Section 4.1 formed without calibra- Perform calibration. - Page 204 8 Troubleshooting (4) Calibration result problem Error Error message Error condition Troubleshooting code E4201 Calibration variation The variation of meas- Rerun 2 measurements for the printed error urement values during level. calibration is large. Variations in measured value for the following calibration are large.
- Page 205 8 Troubleshooting (6) Measurement errors during calibration Error Error message Error condition Troubleshooting code E4204 Calibration measure- Error marks such as Troubleshoot the printed errors and ment ERR “ * ”, “ ? ”, and “$” are then calibrate again from the beginning. printed on the meas- Error in measured urement results.
-
Page 206: Other Errors
8 Troubleshooting 8.2.15 Other Errors Error Error message Error condition Troubleshooting code W0020 No disposal box Measurement was Insert the disposal box completely, and started with the dis- then start measurement. Put Disposal box to posal box pulled out. the end and then press START key. - Page 207 8 Troubleshooting Error Error message Error condition Troubleshooting code W4440 Setting value reset The settings have Check settings for the reference in- WARNING been reset. terval range and the control fluid, and check correlation coefficients. The reference interval range setting, control fluid setting, and corre- lation coefficients have been reset.
-
Page 208: Slide Code Table
8 Troubleshooting Slide Code Table Slide code Slide code Test Test Test code Sample code Test code Sample code GOT/AST GPT/ALT TCHO CKMB TBIL AMYL DBIL HDLC NOTE Slide codes are subject to change without notice. Check the slide code printed on the slide box. 8-44 897N203029A FDC NX600 Instruction Manual 2022.01... -
Page 209: Function Menu
Function Menu If the (Function menu) button is tapped, the Function menu screen appears. Function menu list Function menu items Settings Advanced settings Reference section Calibration — — 4.1.1 Control — — START — — Manual pipetting Date & Time settings —... - Page 210 9 Function Menu Function menu items Settings Advanced settings Reference section Language setting — 9.3.1 Host connection setting None 9.3.2 Serial connection LAN connection Calculated Parameter — 9.3.3 Unit conversion — 9.3.4 Switch measurement range dis- 9.3.5 — play Reference interval range setting —...
-
Page 211: Control
9 Function Menu Control This mode is used for measurement of control serum (FUJI DRI-CHEM CONTROL QP) and for per- forming control surveys. When control mode is set, measurements are performed under the condi- tions listed below. • Correlation coefficients: follow [Control measurement setting] (Initial values disabled (a=1, b=0)) of the function menu. - Page 212 9 Function Menu 5. Enter or choose the sample information. 1 Enter the sample number using the software key- board (Section 2.3). 2 Enter the sample ID using the software keyboard (Section 2.3). 3 Select the control liquid from the list (when nec- essary).
- Page 213 9 Function Menu 6. Close the sample cover, and then lock it with the sampler cover lock key. WARNING: Ensure the sampler cover is locked during sample processing to prevent injuries and infection. When the display reads [Ready to test], the sam- pler cover can be opened.
- Page 214 9 Function Menu 8. After measurement, tap the button to check the measurement results. IMPORTANT: After using control mode, always tap the [HOME] button to clear control mode. <Display of measurement results> Green: when within the acceptable range of control Red: when outside of the acceptable range of control Acceptable Acceptable...
-
Page 215: Normal Mode
9 Function Menu Normal Mode General operators use this function menu to, for example, set the time and configure the brightness of the LCD. Settings Advanced settings Reference section Date & Time settings — 9.2.1 Brightness • Volume Display brightness 9.2.2 Error sound Other general sound... -
Page 216: Date & Time Settings
9 Function Menu 9.2.1 Date & Time Settings This mode is used to set the date and time settings stored in the memory. • Tap “ ” or “ ” to change the date and time values. • Configure the order of the year, month, and date by using [Date format setting]. -
Page 217: Lamp Management
9 Function Menu 9.2.3 Lamp Management Display and reset the cumulative illumination time of the lamp currently installed in the analyzer. Fur- thermore, choose whether to turn off the lamp automatically when the analyzer has not been used for some time. •... -
Page 218: Mode Function For Administrator
9 Function Menu Mode Function for Administrator NOTE To display Mode function for administrator, open the Function menu page, tap the [Mode function for administrator] button, and then enter the password. NOTE In order to prevent other people from oper- ating the analyzer, the input dialog for the password will appear when no operation is performed for a fixed period of time during... -
Page 219: Language Setting
9 Function Menu 9.3.1 Language Setting Configure the language to be used. Tap the button of language to be configured. NOTE Rebooting the device is necessary for the setting to take effect. The confirmation di- alog for the power-off will appear when is tapped to exit Mode function for adminis- trator. - Page 220 9 Function Menu • If [Serial connection] is set, configure the com- munication type and whether to output from the printer. You can choose from 3 communication types. - Type 1: Bidirectional connection - Type 2: Unidirectional connection (bidirectional format) - Type 3: Unidirectional connection (standard format) NOTE...
- Page 221 9 Function Menu If the button is also tapped when Type 4 was selected, the settings screen of Type 4 of page 3 becomes active. • Tap [Examination code] to select the standard for examination item classification code to be used in communication.
-
Page 222: Calculated Parameter
9 Function Menu 9.3.3 Calculated Parameter You can configure the settings to calculate the following items from simultaneously measured values and then display the results. Items registered for calculation have their measurement results dis- played and printed. Test name Calculation Unit Calculation formula test name... - Page 223 9 Function Menu If the [Calculated Parameter] button is tapped in Mode function for administrator, precautions for use of calculation items are displayed. To use calcula- tion items after confirming the precautions, tap the [OK] button. Configure the calculation items to be used. NOTE If the QC card of an item to be used for cal- culation has not been read, the calculation...
-
Page 224: Unit Conversion
9 Function Menu 9.3.4 Unit Conversion Configure the main unit and secondary unit for each measurement item. The following table shows the units that can be used for each configuration item and the conversion coefficient Test Test Unit (A) Unit (B) Conversion Test Test Unit (A) Unit (B) Conversion... -
Page 225: Switch Measurement Range Display
9 Function Menu 9.3.5 Switch Measurement Range Display Switch the display method for data outside the measurement range (passing the upper/lower limit of the determination range) for all tests. • If [@] is configured, an [@] symbol is added to indicate the displayed measurement value is outside the measurement range. -
Page 226: Reference Interval Range Setting
9 Function Menu 9.3.6 Reference Interval Range Setting You can add, edit, and change the order of the reference interval names that can be selected when registering sample information. (Refer to Section 3.3 (4)) Furthermore, you can set a reference inter- val for each sample type ([P/S, W] or [U]) of a reference interval name. - Page 227 9 Function Menu Changing the display order Tap the button of the test for which you want to change the display order. Next-page buttons Tap the field of the test for which you want to con- figure the transfer destination, and then tap the [OK] button.
- Page 228 9 Function Menu 9.3.7 Sample No. /ID Settings • Configure whether to display the sample number in the measurement results under [Edit and print No.]. • Configure whether to record the sequence num- ber of the analyzer under [Store No.]. 9.3.8 Work List Selection Setting Configure whether to display the sample ID or pa- tient ID at the Work list index screen.
- Page 229 9 Function Menu 9.3.9 Correlation Coefficients Enter, reset, or print the correlation coefficients for each sample type ([P/S,W] or [U]). For details, refer to “Description of the correlation function” at the end of the document. IMPORTANT: Incorrect entry of “a” and “b” causes incorrect measurement results. Always make sure that the entries (a, b) are correct.
- Page 230 9 Function Menu Tap the button of the measurement item you want to edit. NOTE Only measurement items for which QC cards have been read are displayed. If the [Input] field of an item is tapped, the software keyboard (refer to Section 2.3) appears so you can enter the value.
- Page 231 9 Function Menu IMPORTANT: Description of the correlation function This function is designed to determine the correlation between the measured data obtained using the FDC NX600 and the data obtained using the conventional measuring method with your own instruments. Y=aX+b The X-axis shows the measured data obtained us- ing your instruments, and the Y- axis shows the measured data obtained using the FDC NX600.
- Page 232 9 Function Menu 4. Depending on the values input for (a, b), the apparent limits of the measurement range will shift as follows. (Example) GLU measurements If a=1 and b=0 (Y=X), the measure- ment range is 10 to 600 mg/dl. But by inputting regression coefficients as shown, the lower limit changes to A and the upper limit to B.
-
Page 233: Lot Compensation Coefficients
9 Function Menu 9.3.10 Lot Compensation Coefficients Enter the lot compensation coefficients (c, d, and e) printed on the QC cards of slides. This mode is needed if it is not possible to read the data directly because the QC card was lost or spoiled. IMPORTANT: Incorrect inputs for (c, d, and e) will cause incorrect measurement results. - Page 234 9 Function Menu Tap the button of the Lot No. for which you want to enter a lot compensation coefficient. NOTE If the button is tapped, all lot compen- sation coefficient settings are printed. If the [Input] field of an item is tapped, the software keyboard (refer to Section 2.3) appears so you can enter the value.
-
Page 235: Standard Curve Coefficients
9 Function Menu 9.3.11 Standard Curve Coefficients The calibration curve coefficients (A, B, C, D, E, and F) of the QC card information can be entered. IMPORTANT: Incorrect entry of calibration curve coefficients causes incorrect measurement results. Always make sure that the entered coefficients are correct. NOTE The calibration curve coefficients of this setting are entered automatically by QC card read- ing and calibration. - Page 236 9 Function Menu 3. If the [Input] field of an item is tapped, the software keyboard appears so you can enter the value. NOTE If the button is tapped, the calibra- tion curve coefficients are printed. 4. First tap the [Input] field of [Lot]. The Lot number entry screen (software key- board screen) appears.
- Page 237 9 Function Menu <Configuration of calibration curve coefficients (A, B, C, D, E, and F)> 1. Enter the calibration curve coefficient (A:), and then tap the [OK] button. The Calibration curve coefficient (B:) entry screen (software keyboard screen) appears. 2. Enter B through F using the same proce- dure. <Configuring the expiration date for use> For the expiration date for use (EXP), enter xxxx- xx (four digits for the year and two digits for the month).
-
Page 238: Lot Qualification
9 Function Menu 9.3.12 Lot Qualification This function button appears (enabled) when USM function is enabled. It is possible to (dis-)qualify slide LOTs which are registered in analyzer. 1. Select a slide name which needs to change the setting. 2. (Dis-)qualification for selected slide LOT can be changed by selecting [ON] or [OFF] button. -
Page 239: Pf Calibration Coefficients
9 Function Menu 9.3.13 PF Calibration Coefficients Configure the PF calculation correction coefficients. Next-page buttons Tap the [Data input] button. NOTE I f t h e b u t t o n i s t a p p e d , a l l P F calculation correction coefficients are printed. - Page 240 9 Function Menu If the [Input] field of an item is tapped, the software keyboard (refer to Section 2.3) appears so you can enter the value. NOTE If the [Reset] button is tapped, a reset con- firmation screen appears. To reset the PF calculation correction coefficients of select- ed items, tap the [OK] button.
- Page 241 9 Function Menu 9.3.14 Dilution Setting You can configure the dilution factor and position of the diluent to be used for each measurement item and sample type (PS and U). When a dilution factor is not configured for each sample on the sample information registration screen, measurement is performed using the dilution factor config- ured here.
- Page 242 9 Function Menu 3. For the dilution factor, tap a button, and then select from [None], [2], [3], [4], [5], or [10]. NOTE In the case of CRP, the selection menu to the left appears. 9-34 897N203029A FDC NX600 Instruction Manual 2022.01...
-
Page 243: Print Setting For Measured Result
9 Function Menu 9.3.15 Tube Setting for Diluent & Reference Fluid Configure the test tube type to be used for diluent and reference fluid. NOTE For the types of containers that can be used for diluent and reference fluid, refer to Section 5.4 and Section 5.5. -
Page 244: Control Fluid Setting
9 Function Menu 9.3.17 Control Fluid Setting Configure the control liquid name / lot number and acceptable range. 1. Tap the button of the control liquid to be edited. NOTE [-] (control liquid not registered) of Step 1 cannot be edited. 2. -
Page 245: Control Measurement Setting
9 Function Menu 9.3.18 Control Measurement Setting Configure whether to enable the correlation coefficient when performing a control measurement. To enable the correlation coefficient for a control measurement, tap the checkbox to select it. NOTE By default, the checkbox is cleared (not enabled). -
Page 246: Test Item Name Setting
9 Function Menu 9.3.20 Test Item Name Setting You can configure the display of item names. The names appear in the screen display and printed paper of measurement results. 1 Choose the item names to be used for display and printing. 2 Choose the names to be used for external com- munication output to the host computer. -
Page 247: Default Sample Type Setting
9 Function Menu 9.3.21 Default Sample Type Setting Set the default (initial setting) sample type. Tap a sample type to select it. 9.3.22 Password Setting When tapping the [Mode function for administrator] button on the Function menu screen, the pass- word input may be required. -
Page 249: Other Functions
Other Functions 10.1 Data Communication The analyzer can transmit measurement results to a host computer or PC that has been approved by IEC/UL60950-1 or IEC/UL62368-1. To communicate, it is necessary to prepare the software and a cable to receive data. Before you use this function for the first time, please contact your dealer for assistance. -
Page 251: Usm (User Safety Mode)
USM (User Safety Mode) 11.1 Operator ID Input When Measurement Start and In Mode Function When measurement start button or function menu button is tapped, an Operator ID input display is shown. Then, input Operator ID. If input operator ID is registered and also within expiry, the meas- urement starts or the function menu becomes active. -
Page 252: Difference Of Operable Functions Among Operator Id Level (Ope,Adm,Emg)
11 USM (User Safety Mode) 11.2 Difference of Operable Functions among Operator ID Level (OPE,ADM,EMG) Operable functions are different depending on operator ID level. NOTE OPE: Operator ADM: Administrator EMG: Emergency Measurement Result OPE/ADM: When expired slide is used, EXP is indi- cated instead of measurement result. EXP is used not only on screen indica- tion, but also on print and in communi- cation. - Page 253 11 USM (User Safety Mode) Mode function OPE/EMG: Operable function is limited to [Control], [Calibration], [START Manual pipetting] and some maintenance functions. 897N203029A FDC NX600 Instruction Manual 2022.01 11-3...
- Page 254 11 USM (User Safety Mode) ADM: All functions are operable. 11-4 897N203029A FDC NX600 Instruction Manual 2022.01...
-
Page 255: Usm Menu
Rename the file which is created by the tool to [dcn_uid.dat], Store it in the USB, WData └ GUI └ dcn_uid.dat *Please use FUJIFILM recommended USB only. 3. Select [Operator ID setting] in ADM mode. 4. Select [Operator ID import]. 897N203029A FDC NX600 Instruction Manual 2022.01... - Page 256 11 USM (User Safety Mode) 5. The left pop-up is shown. Then set USB, and after a few seconds, select [OK]. 6. The left pop-up will be shown when im- port is complete. Take off the USB and then tap [Shutdown]. 11-6 897N203029A FDC NX600 Instruction Manual 2022.01...
-
Page 257: Operator Id -Export
11 USM (User Safety Mode) 11.3.2 Operator ID -Export 1. Select [Operator ID setting] in ADM mode. 2. Select [Operator ID export]. 3. The left pop-up is shown. Then set USB, and after a few seconds, select [OK]. 897N203029A FDC NX600 Instruction Manual 2022.01 11-7... - Page 258 11 USM (User Safety Mode) 4. The left pop-up will be shown when ex- port is complete. Then tap [OK], and take off the USB. 5. Operator ID data, [dcn_uid.dat], is stored in below folder structure below in the USB. WData └ GUI └ dcn_uid.dat * Browsing and editing of dcn_uid.dat is possible in Operator ID Editor.
-
Page 259: Editing Registered Operator Id
11 USM (User Safety Mode) 11.3.3 Editing Registered Operator ID Registered Operator ID can be edited as the following procedure. NOTE Editable items are the expiry of ID and the level. 1. Select [Operator ID setting] in Mode function for administrator screen. 2. - Page 260 11 USM (User Safety Mode) 4. To change the expiry, touch the expiry field and edit it using the software key- board. 5. To change the level, select either [ADM/ OPE]. 11-10 897N203029A FDC NX600 Instruction Manual 2022.01...
-
Page 261: Editing Emergency Id
11 USM (User Safety Mode) 11.3.4 Editing Emergency ID (Dis-)qualification of registered Emergency ID can be set. Also measurement limit count by use of Emergency ID can be set. 1. Select [Operator ID setting] in Mode function for administrator screen. 2. - Page 262 11 USM (User Safety Mode) 4. To edit the total limit count, select [Edit emergency ID count]. 5. To reset the current count, tap [Reset] button. To set a new limit count, select either [0], [50] or [100]. In case of 0, emergency ID does not function.
-
Page 263: Specifications
Within 70 dB (including buzzer sound) Data transfer RS-232C (1 port); USB (2 port); LAN (1 port) External dimensions (W) 470× (D) 360× (H) 370 mm Weight FUJI DRI-CHEM NX600: 28Kg FUJI DRI-CHEM NX600i: 26Kg 897N203029A FDC NX600 Instruction Manual 2022.01 12-1... - Page 264 12 Specifications Effective period of service 6 years after installation (service life) (This period is valid as long as the precautions for use are followed and regular periodic maintenance is performed correctly.) 12-2 897N203029A FDC NX600 Instruction Manual 2022.01...
-
Page 265: Glossary
Glossary Glossary of the display & printout messages NOTE Because the display spaces and printouts are limited, some abbreviations are used. NOTE Periods will not be used after abbreviations on the display and printout messages. Abbreviation Meaning Analog/Digital administrator average Bef comp Before compress cali... - Page 268 26-30, NISHIAZABU 2-CHOME, MINATO-KU, TOKYO 106-8620, JAPAN https://www.fujifilm.com/ Heesenstrasse 31, 40549 Duesseldorf, Germany Oudenstaart 1, 5047 TK Tilburg, The Netherlands...
Need help?
Do you have a question about the FUJI DRI-CHEM NX600 and is the answer not in the manual?
Questions and answers