Table of Contents
Advertisement
Quick Links
Advertisement
Table of Contents

Subscribe to Our Youtube Channel
Related Manuals for DVDO Camera-Ctl-1


Summary of Contents for DVDO Camera-Ctl-1
- Page 1 DVDO-Camera-Ctl-1 IP Camera Control Keyboard User Manual Version 1.0.0...
-
Page 2: Table Of Contents
Table of Contents Product Description ................3 Brief Description Features Keyboard Appearance Keyboard Interface System Diagram System Settings ..................6 Language Setting Hardware Settings Network Settings System Upgrade About System PTZ Mode ..................... 8 Equipment Management 3 1 1 Auto Search 3 1 2 Add Manually 3 1 3 Delete Device Video Display... -
Page 3: Product Description
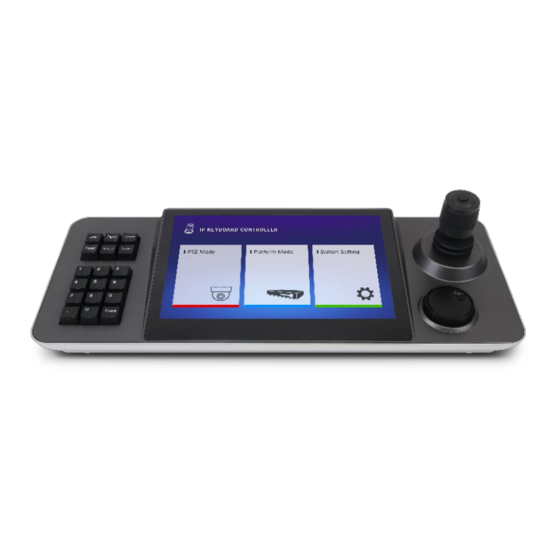
1. Product Description 1.1 Brief Description This product is an Android-based network touch keyboard with a 10 1-inch capacitive touch screen and simple user interface The integrated touch screen can provide real-time previews from camera feeds, and the system can output the image to an external display via HDMI It supports single viewing of H 265 4K@30fps or H 264 1080p@60fps;... -
Page 4: Keyboard Interface
Left side button controls: Preset, cruise, scan and other programmable functions Large middle screen area: 10 1-inch capacitive touch screen for operation and display Right-side joystick control: PTZ control joystick (left/right/up/down/zoom) and customizable shuttle dial 1.4 Keyboard Interface Name Function ①... -
Page 5: System Diagram
④ Reserved Manufacturer use only ⑤ Device upgrade control or external mouse control ⑥ Reserved Manufacturer use only ⑦ HDMI Synchronized external display with 10 1-inch screen ⑧ RS-232 For Pelco-D / Pelco-P / Visca control ⑨ RS-485 For Pelco-D / Pelco-P /Visca control 1.5 System Diagram... -
Page 6: System Settings
2. System Settings Language Setting Select Chinese or English Hardware Settings Toggle key-touch sound on / off... -
Page 7: Network Settings
2.3 Network Settings Network settings are static / DHCP optional Please save after modification Note: The IP address of keyboard must be the same network segment as PTZ camera(s) 2.4 System Upgrade Please copy the upgrade file onto a USB flash drive, then insert the flash drive into the USB port on the back of the keyboard Select [System Update], then select [Install] on the pop-up upgrade dialog box Once application is installed, select [Open] Note: Do not modify the name of the upgrade file Do not power off during upgrade process... -
Page 8: About System
2.5 About System Shows software version number of system 3. PTZ Mode 3.1 Equipment Management Click the pop-up menu bars at the upper right corner of the PTZ mode screen, then select [Device Management] to enter the device management interface as shown below... -
Page 9: 1 1 Auto Search
Note: In the PJZ control page, you can enter the last digits of the camera’s IP address directly on the keyboard and then press the [Address] button to connect the PTZ camera In this example, you may enter “239” to add the camera at 192 168 0 239; please use the actual last digits of your camera’s specific IP address 3.1.1 Auto Search Click [Search] / [Quickly Add] to search for IP cameras, then the [Search Results] dialog box... -
Page 10: Video Display
3.2 Video Display In [PTZ Mode], click the at the upper right corner Select [Video Display] to display a four- image window Click on the screen to open the [Device Add] dialog box Double-click the IP address of the camera to display the screen -10-...
Need help?
Do you have a question about the Camera-Ctl-1 and is the answer not in the manual?
Questions and answers