Mitsubishi Electric PUMY-P36NKMU3 Installation Manual
Air-conditioners outdoor unit
Hide thumbs
Also See for PUMY-P36NKMU3:
- Technical & service manual (156 pages) ,
- Installation manual (44 pages)
Advertisement
Quick Links
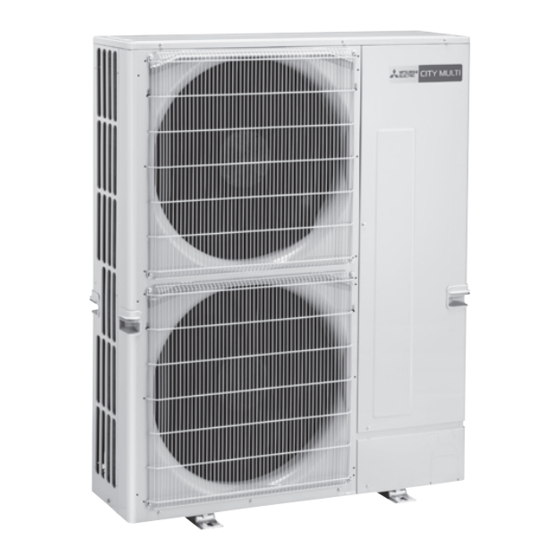
Air-Conditioners OUTDOOR UNIT
PUMY-P36/48/60NKMU3(-BS)
PUMY-HP36/48NKMU1
INSTALLATION MANUAL
For safe and correct use, please read this installation manual thoroughly before installing the air-conditioner unit.
MANUEL D'INSTALLATION
Veuillez lire le manuel d'installation en entier avant d'installer ce climatiseur pour éviter tout accident et vous
assurer d'une utilisation correcte.
MANUAL DE INSTALACIÓN
Para un uso seguro y correcto, lea detalladamente este manual de instalación antes de montar la unidad de aire
acondicionado.
FOR INSTALLER
POUR L'INSTALLATEUR
PARA EL INSTALADOR
HFC
utilized
R410A
English
English
English
Français
Français
Français
Español
Español
Español
Advertisement

Related Manuals for Mitsubishi Electric PUMY-P36NKMU3


Summary of Contents for Mitsubishi Electric PUMY-P36NKMU3
- Page 1 Air-Conditioners OUTDOOR UNIT PUMY-P36/48/60NKMU3(-BS) PUMY-HP36/48NKMU1 utilized R410A INSTALLATION MANUAL FOR INSTALLER English English English For safe and correct use, please read this installation manual thoroughly before installing the air-conditioner unit. MANUEL D’INSTALLATION POUR L’INSTALLATEUR Français Français Français Veuillez lire le manuel d’installation en entier avant d’installer ce climatiseur pour éviter tout accident et vous assurer d’une utilisation correcte.
-
Page 2: Table Of Contents
Contents 1. Safety precautions ..........1 5. - Page 3 1. Safety precautions 1.3. Before electric work Caution: • Be sure to install circuit breakers. If not installed, electric shock may result. • Be sure to ground the unit. Do not connect the ground wire to gas or water • Please follow applicable federal, state, or local codes to prevent potential pipes, lightning rods, or telephone grounding lines.
-
Page 4: Installation Location
Outdoor unit The capacity of Number of units that Capacity range of model name outdoor unit can be connected connected units PUMY-P36NKMU3 36 kBtu/h 1 - 11 units 18 - 46.8 kBtu/h PUMY-HP36NKMU1 PUMY-P48NKMU3 48 kBtu/h 1 - 12 units 24 - 62.4 kBtu/h... - Page 5 2. Installation location (inch) Fig. 2-5 Fig. 2-6 Fig. 2-7 Fig. 2-8 Fig. 2-9 Fig. 2-10 Fig. 2-11 Fig. 2-12 Fig. 2-13 Fig. 2-14 Fig. 2-15 Fig. 2-16 Fig. 2-17 2.5.2. When installing a single outdoor unit 2.5.3. When installing multiple outdoor units Minimum dimensions are as follows, except for Max., meaning Maximum dimen- Leave 1"...
-
Page 6: Installing The Outdoor Unit
3. Installing the outdoor unit • Be sure to install the unit in a sturdy, level surface to prevent rattling noises during (inch) operation. (Fig. 3-1) <Foundation specifications> Foundation bolt M10 (3/8") Thickness of concrete 120 mm (4-23/32") Length of bolt 70 mm (2-3/4") Weight-bearing capacity 320 kg (705 lbs) - Page 7 4. Installing the refrigerant piping 4.2. Pipe length and height difference (Fig. 4-1) A, B, C, D (mm [inch]) Liquid pipe Gas pipe PUMY-P36/48 ø15.88 [5/8] PUMY-HP36/48 ø9.52 [3/8] PUMY-P60 ø19.05 [3/4] a, b, c, d, e, f (mm [inch]) A Outdoor Unit Model number Liquid pipe...
- Page 8 4. Installing the refrigerant piping 4.3. Connecting pipes (Fig. 4-2) (Fig. 4-3) • Conduct sufficient anti-condensation and insulation work to prevent water drip- ping from the refrigerant piping. (liquid pipe/gas pipe) • Increase insulation depending on the environment where the refrigerant piping is installed, or condensation may occur on the surface of the insulation material. A Liquid pipe (Insulation material Heat-resistant temperature: 120 °C, 248 °F, Thickness: B Gas pipe...
- Page 9 4. Installing the refrigerant piping 4.4. Refrigerant piping (Fig. 4-5) Remove the service panel D (three screws) and the front piping cover A (two screws) and rear piping cover B (two screws). 1 Perform refrigerant piping connections for the indoor/outdoor unit when the outdoor unit’s stop valve is completely closed.
-
Page 10: Drainage Piping Work
4. Installing the refrigerant piping 4.6. Stop valve opening method The stop valve opening method varies according to the outdoor unit model. Use the * The figure to the left is an example appropriate method to open the stop valves. only. (1) Gas side (Fig. 4-7) The stop valve shape, service port 1 Remove the cap, pull the handle toward you and rotate 1/4 turn in a counterclock- position, etc., may vary according to wise direction to open. -
Page 11: Electrical Work
Symbol Allowable number of controllers When the wiring length exceeds 10 m [32 ft], use Outdoor unit controller – Remarks cable with the same specifications as transmis- PUMY-P36NKMU3 sion line wiring. 1 to 11 units per 1 OC PUMY-HP36NKMU1 Indoor unit controller PUMY-P48NKMU3 PUMY-HP48NKMU1 1 to 12 units per 1 OC... - Page 12 6. Electrical work I M-NET Remote Controller I MA Remote Controller (51) (51) (01) (02) (05) (06) (01) (02) (05) (06) TB15 TB15 TB15 TB15 M1 M2 S M1 M2 S M1 M2 S M1 M2 S M1 M2 S M1 M2 S M1 M2 S M1 M2 S...
- Page 13 6. Electrical work Minimum wire thickness (mm /AWG) Local switch (A) Ground-fault interruper *1 Breaker for wiring Total operating current of the indoor unit (if you use) (NFB) Main Cable Branch Ground Capacity Fuse F0 = 15 A or less *2 2.1/14 2.1/14 2.1/14...
-
Page 14: Test Run
7. Test run 7.1. Before test run ► After completing installation and the wiring and piping of the indoor and • The insulation resistance drops due to accumulation of refrigerant in the outdoor units, check for refrigerant leakage, looseness in the power sup- compressor. The resistance will rise above 1 MΩ after the compressor is ply or control wiring, wrong polarity and no disconnection of one phase in warmed up for 12 hours. -
Page 15: Special Functions
8. Special Functions 8.1. OUTDOOR UNIT INPUT/OUTPUT CONNECTOR • State (CN51) A Distant control board E Lamp power supply B Relay circuit F Procure locally C External output adapter (PAC-SA88HA-E) G Max. 10 m [33 ft] CN51 D Outdoor unit control board L1: Error display lamp L2: Compressor operation lamp X, Y: Relay (Coil standard of 0.9W or less for DC 12V) - Page 16 Index 1. Consignes de sécurité ..........1 5.
- Page 17 1. Consignes de sécurité 1.3. Avant l’installation électrique Précaution: • Veiller à installer des coupe-circuits. Dans le cas contraire, un choc élec- • Veiller à mettre l’appareil à la terre. Ne pas relier le fil de terre aux conduites trique peut se produire. de gaz ou d’eau, aux paratonnerres ou aux lignes de terre téléphoniques.
- Page 18 Plage de capaci- Nom de modèle Capacité de reils pouvant être tés des appareils appareil extérieur l’appareil extérieur raccordés raccordés PUMY-P36NKMU3 36 kBtu/h 1 - 11 appareils 18 - 46,8 kBtu/h Fig. 2-1 PUMY-HP36NKMU1 PUMY-P48NKMU3 48 kBtu/h 1 - 12 appareils...
- Page 19 2. Emplacement d’installation (inch) (pouce) Fig. 2-5 Fig. 2-6 Fig. 2-7 Fig. 2-8 Fig. 2-9 Fig. 2-10 Fig. 2-11 Fig. 2-12 Fig. 2-13 Fig. 2-14 Fig. 2-15 Fig. 2-16 Fig. 2-17 2.5.2. Lors de l’installation d’un seul appareil extérieur 2.5.3. Lors de l’installation de plusieurs appareils extérieurs Le dimensions minimales sont les suivantes, à...
- Page 20 3. Installation de l’appareil extérieur (pouce) • Bien installer l’appareil sur une surface solide et de niveau, de façon à éviter tout bruit de crécelle pendant le fonctionnement. (Fig. 3-1) <Spécifications de la fondation> Boulon de fondation M10 (3/8 ème de pouce) Epaisseur de béton 120 mm (4-23/32 ème de pouce) Longueur des boulons...
Need help?
Do you have a question about the PUMY-P36NKMU3 and is the answer not in the manual?
Questions and answers