Table of Contents
Advertisement
Quick Links
Advertisement
Table of Contents

Subscribe to Our Youtube Channel
Related Manuals for Korg HAVIAN 30


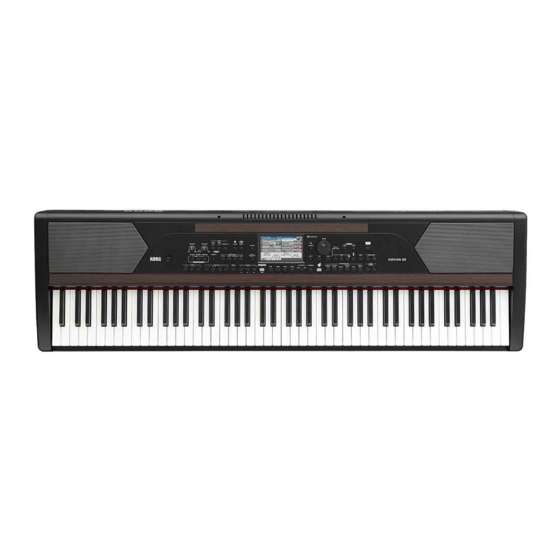
Summary of Contents for Korg HAVIAN 30
- Page 2 CE mark which is attached to our company’s DECLARATION OF CONFORMITY (FOR USA) products of AC mains operated apparatus Responsible Party: KORG USA INC. until December 31, 1996 means it conforms Address: 316 SOUTH SERVICE ROAD, MELVILLE to EMC Directive (89/336/ EEC) and CE mark Directive (93/68/EEC).
- Page 3 ▪ Unplug this apparatus during lightning storms or when unused for long periods of CAUTION – HAVIAN 30 is for use only with time. the KORG ST-H30-BK stand. Use with other ▪ Refer all servicing to qualified service per- stands may result in loss of stability, and may sonnel.
- Page 4 ©2007 “The FreeType Project” (www. freetype.org). All rights reserved. Automatic power-off To avoid wasting power, HAVIAN 30 will by de- Disclaimer fault automatically enter standby mode after The information contained in this manual have two hours of non-active use (playing, pressing been carefully revised and checked through.
-
Page 5: Table Of Contents
Contents Part I LET’S START! Introduction Welcome to HAVIAN 30! Before starting to play… Overview of the instrument Setting up the accessories Connecting the damper pedal Connecting the headphones Assembling the music stand Powering Turning the instrument on Calibrating the touch screen... - Page 6 Playing the Songs Choosing the Songs Playing a Song Playing all the Songs in a folder Lyrics, chords, score and markers Reading lyrics and chords Reading the music score Moving through a Song with the markers Using the SongBook Choosing the SongBook Entries Using the Custom Lists Searching for files and other items Using the Search function...
- Page 7 Part I: LEt’S Start!
-
Page 8: Introduction
The real piano experience So much of the HAVIAN 30 digital ensemble piano has been designed to give you a great piano experience. The high-quality, weighted piano-like keybed gives you a completely authentic feel and touch. The grand piano, recorded in multiple dynamic levels, sounds absolutely natural. - Page 9 Easy to use, like a real piano Using your HAVIAN 30 is easy, thanks to the touch screen and the clean, clearly laid-out user interface. This easy-to-use, handy technology, driving every aspect of the instrument, will make advanced features seem as easy as touching real objects in the real world.
- Page 10 Open to the world, ready to the future The USB ports allow for connecting the HAVIAN 30 to any external storage device or personal computer, smartphone or tablet without the need for a dedicated MIDI interface. The use of standard MID or MP3 file formats opens a world of possibilities when exchanging files.
-
Page 11: Before Starting To Play
Before starting to play… What’s in the box After you get your HAVIAN 30, please check that all the following items are included in the package. If any of the following items is missing, please con- tact your KORG dealer immediately. -
Page 12: Overview Of The Instrument
Use the keyboard to play notes and chords. Depending on the SPLIT indica- tor, the keyboard may be joint or split between different sounds. Music stand holes A music stand comes standard with your HAVIAN 30. Use these holes to insert the supplied music stand, as shown on page 13. - Page 13 Overview of the instrument |9 Control panel The control panel is the part of the front panel where you can find the instru- ment’s controls. Metronome and Display Navigation area Tempo area Styles area Player area Sounds area Display Use this touchscreen display to interact with the instrument. Display navigation aids for blinds or visually impaired Marks on the border of the display will help you build a virtual grid of refer- ences, to quickly locate objects on the screen with your fingers.
- Page 14 Introduction Styles area Styles supply the automatic Accompaniment with a virtual band (see page 59). Player area Songs can be played and controlled by the Player (see page 71). Sounds area Sounds, organized in Performances and STSs, are what you can play on the keyboard (see page 48).
- Page 15 Overview of the instrument |11 Navigation area Use these controls to go though the menus, pages and parameters, and search for the various musical resources. Metronome and Tempo area Use these controls to practice with the metronome and control the Tempo of the metronome, the Styles and the Songs (see page 54).
- Page 16 Power supply connector USB connectors Use these connectors to connect your HAVIAN 30 to a personal computer (DEVICE) or to connect an USB memory device, like an USB pendrive (HOST). Pedal connector This is where you will connect the supplied DS2H damper pedal, or any other pedal or footswitch.
-
Page 17: Setting Up The Accessories
Connecting the damper pedal Use the PEDAL connector to connect the supplied KORG DS2H damper ped- al. This pedal supports all the nuances of half-pedaling on some Grand Piano sounds. You can experiment how it works by gradually pressing it down, and... -
Page 18: Powering
Powering Powering turning the instrument on Connecting the power adapter Plug the supplied power adapter AC cable into a wall power socket, and the DC power adapter cable into the DC IN 15V connector on the back of the instrument. To avoid cable jamming, fix the power cable to the dedicated cable holder. -
Page 19: Calibrating The Touch Screen
Calibrating the touch screen |15 Calibrating the touch screen Calibrating the screen From time to time (for example, after loading a new operating system), cali- brating your Color TouchView™ display may be necessary to make pointing more precise. To be more accurate, use a tablet stylus or the tip of a pen cap. Warning: Do not use sharp objects, or you will damage your screen! Keep the... -
Page 20: Listening To The Demo Songs
Powering Listening to the Demo Songs Access the Demo mode ▪ Press the DEMO buttons together. Listen to all the Demo Songs ▪ After accessing the Demo mode, do not press any button. All the Demo Songs will be played back. Choose a single Demo Song ▪... -
Page 21: Interface Basics
The main page |17 Interface basics the main page Main page of the Style Play mode appears when turning the instrument on. You can return to this page by pressing the EXIT button while in Style Play mode, or the STYLE PLAY button when in a different mode. -
Page 22: Navigating Through The Pages 21 Selecting The Musical Resources
Interface basics Navigating through the pages Going to a page Through this manual, page addresses are shown as in the following example: Style Play > Mixer/Tuning > EQ Gain Mode Edit section Page Here is how the above works: Press the STYLE PLAY button to go to the Style Play... - Page 23 Navigating through the pages |19 Touch the Mixer/Tuning button in the edit menu to choose the Mixer/Tuning section. If the page is not yet shown in the display, touch the EQ Gain tab to choose EQ Gain page. Edit the parameters.
- Page 24 Interface basics Try a different page in the same edit section. Touch the Volume/Pan tab to go to the Volume/Pan page, and edit the parameters. Press the EXIT button to return to the main page of the Style Play mode. If you were in Song Play mode, pressing...
- Page 25 Pages You can always exit from this window by pressing the EXIT button. In HAVIAN 30, Select windows automatically close after a few seconds, or after you select something. If you prefer they stay always open until you press the...
- Page 26 Interface basics Using the display navigation aids If you are blind or visually impaired, you can explore and use the Select win- dows with your fingers, thanks to the reference marks around the display. We suggest you to leave the Display Hold parameter on.
- Page 27 Selecting the musical resources |23 Choosing the element When you are in the desired page, you can choose the element with the help of the grid created intersecting the lines coming from the small linear marks around the display.
- Page 28 Interface basics...
-
Page 29: Playing
Part II: PLaYING... -
Page 30: The Easy Mode
The Easy Mode the Easy Mode turning the Easy Mode on or off You can turn the Easy Mode on or off by using the page menu. Turn the Easy Mode on Touch the little down-pointing arrow on the top right corner of the display to open the page menu. -
Page 31: The Easy Style Play Page
The Easy Style Play page |27 the Easy Style Play page Title bar Page menu Selected Style Right-hand/ Upper Sounds Selected Performance Left-hand/ (may change to Lower Sound Selected STS) Touch to set Touch to open the split pont the Mixer page Touch to open the Effects page... - Page 32 The Easy Mode Play/Mute icon Mute ) icon may appear on the right of the Sound’s name. Touch the instrument family icon to turn the Sound on (Play) or off (Mute). Mixer Touch the Mixer button to adjust the Sound volume and pan. Effects Touch the Effects...
-
Page 33: The Easy Song Play Page
The Easy Song Play page |29 the Easy Song Play page Title bar Page menu Selected Song Right-hand/ Upper Sounds Selected Performance Left-hand/ (may change to Lower Sound Selected STS) Touch to set Touch to open the split pont the Mixer page Touch to open the Effects page... - Page 34 The Easy Mode Mixer Touch the Mixer button to adjust the Sound volume and pan. Effects Touch the Effects button to choose and adjust the effects. Split Point Touch the Split Point button, and play the lowest note of the Upper part of the keyboard to set the new split point.
-
Page 35: Playing The Sounds
Playing Grand Piano |31 Playing the Sounds Playing Grand Piano Choosing the Grand Piano Sound ▪ Press the GRAND PIANO ) button to choose the Grand Piano Sound. Choosing the Sounds Choosing a Performance You can choose a Performance from the control panel or from the display. Open the Performance Select window from the control panel ▪... - Page 36 Playing the Sounds Select a Performance As soon as you press the button or touch the display, the Performance Select window appears. In case you want to choose a different group of Performances, either press a different button in the PERFORMANCE section, or touch one of the tabs...
- Page 37 Choosing the Sounds |33 peatedly press the button of the selected group of Performances in the PERFORMANCE section of the control panel. Touch the name of the Performance you want to choose. If you want to close the Performance Select window (and it does not close by itself), press the EXIT...
- Page 38 Playing the Sounds In the end, you will see the name of the selected Performance in the dedi- cated area of the Main page. The Sounds assigned to the keyboard (shown in the right half of the display) will change. Choosing an STS You can choose an STS from the control panel or from the display.
- Page 39 Lower). In Styles and MIDI Songs, Sounds are assigned to tracks. Tracks are the equivalent of recorder tracks (with the associated mixer channels). In fact, HAVIAN 30 does include a recorder and a digital mixer! Assigning single Sounds to tracks simplifies the way you can mix and record them.
-
Page 40: Customizing The Sound Sets
Customizing the Sound sets Customizing the Sound sets Playing different Sounds with the left and right hand Splitting the keyboard Split the keyboard into a Lower (left hand) and Upper (right hand) part ▪ Press the SPLIT button on the control panel to light up its indicator. The keyboard will be divided into a Lower (left hand) and Upper (right hand) part. - Page 41 Playing different Sounds with the left and right hand |37 SPLIT Keyboard Left hand (Lower) Sounds Right hand (Upper) Sounds indicator mode Full No Lower Sound Up to three Upper Sounds as- signed to the full extension of the keyboard Split A single Lower Sound as- Up to three Upper Sounds as-...
-
Page 42: Playing Two Or Three Sounds At The Same Time (Play And Mute)
Customizing the Sound sets Playing two or three Sounds at the same time (Play and Mute) Turning the Keyboard Sounds on or off You can play up to three layered Sounds on the keyboard. This is useful to add, for example, a layer of Strings or Synth Pads to the Grand Piano sound. The Sounds will be assigned to the Upper part of the keyboard. -
Page 43: Tranposing The Sounds To A Different Octave
Tranposing the Sounds to a different octave |39 tranposing the Sounds to a different octave Transposing all the Upper Sounds All Upper Sounds can be transposed to an upper or lower octave at the press of a single button. Transpose the Upper Sounds one octave up ▪... -
Page 44: Master Transpose
Customizing the Sound sets Master transpose Transposing the whole instrument The instrument’s key can be transposed to make singing or playing together with another instrument more comfortable. The transpose value is usually shown in the page header. Transpose down from the control panel ▪... -
Page 45: Using The Ensemble To Add Harmony
Using the Ensemble to add harmony |41 Using the Ensemble to add harmony There are several types of Ensemble, but with most of them the right-hand playing will be harmonized with the chords you play with your left hand. Turning the Ensemble on or off Turn the Ensemble function on Be sure the SPLIT... - Page 46 Customizing the Sound sets Use the Type parameter to choose an Ensemble type. Ensemble type How it works Duet Adds a single note to the melody. Close Adds a closed-position chord to the melody. Open 1 Adds an open-position chord to the melody. Open 2 As the above, but with a different chord shape.
- Page 47 Using the Ensemble to add harmony |43 Use the Ensemble Track Assign parameter to set the Ensemble function for each of the Upper Sounds. Ensemble Track Meaning Assign No harmonization Normal This Sound is included in the harmonization Mute This Sound only plays the Ensemble notes, but not the original note. Exit the Ensemble settings page ▪...
-
Page 48: Tempo And Metronome
Tempo and Metronome tempo and Metronome tempo Setting the Tempo value While an optimal Tempo value is saved with each Style or Song, you can freely adjust it at your will. This will also set the Tempo for the Metronome. Adjust the Tempo value from the control panel ▪... - Page 49 Tempo |45 Activate the Tap Tempo function ▪ While the Accompaniment is not playing, keep the SHIFT button pressed and press the METRO button. The Tap Tempo window will open. Beat the Tempo value ▪ Beat the Tempo on the START/STOP button.
-
Page 50: Metronome
Tempo and Metronome Metronome Turning the metronome on and off Turn the metronome on ▪ Press the METRONOME ) button to turn its indicator on. The Metronome window will open, and the metronome will start playing, beating the current Tempo. Turn the metronome off ▪... - Page 51 Metronome |47 Turn the accent on or off ▪ Choose the accent by using the Accent parameter. Metronome Mode Meaning Normal No accent. Accent The first beat of each measure is accented. Bell A bell sound is heard at the first beat of each measure. Adjust the metronome volume ▪...
-
Page 52: Playing The Styles
Different sections can be selected to let you create a complete song in realtime. Accompaniment parts Accompaniment parts are like the members of a band. With HAVIAN 30 you get five pitched instrument players (for example: guitar, piano, strings, synthesizers), a bass player, a percussion player, and a drum player. - Page 53 Choosing the Styles |49 Choosing a Style You can choose a Style from the control panel or from the display. Go to the Style Play mode ▪ When turning the instrument on, you are already in Style Play mode. If you are not, press the STYLE PLAY button in the control panel.
- Page 54 Playing the Styles Choose a Style Browse through the Styles in the Style Select window. ▪ To choose one of the available types of Styles, touch the buttons at the top of the window. Type of Styles Meaning Factory Standard Styles, that cannot be modified. User Locations where you can load new Styles from an external device, or save new or edited Styles.
- Page 55 Choosing the Styles |51 If you want to close the Style Select window (and it does not close by itself), press the EXIT button. (When a window does not close by itself, it means the Display Hold is turned on. See Display Hold on page 35).
- Page 56 Playing the Styles Playing the Styles Starting and stopping the Style You can manually start and stop the Accompaniment. Start the Accompaniment Press the START/STOP button. Play some chords with your left hand, while playing a melody with your right hand.
- Page 57 Playing the Styles |53 Make the Accompaniment start and stop automatically (Synchro Start and Stop) Press the SYNCHRO > START/STOP button again, to ligh up both the START STOP indicators. Play a chord to start the Accompaniment, and keep the keys pressed. Lift your hands from the keyboard, and see how the Accompaniment will automatically stop.
- Page 58 While the Accompaniment is going, you can see the Variation’s length in the display (‘L’ parameter). Automatically choosing a Fill If you like, you can let HAVIAN 30 automatically choose a Fill when you choose a Variation. Style Element Suggested use...
- Page 59 Playing the Styles |55 Turn the Autofill function off ▪ When you no longer need this function, press the AUTOFILL button again to turn the indicator off. Choosing a Break A break introduces a short pause in your song, creating a suspension and a sense of surprise.
- Page 60 Playing the Styles The indicator on the button will start flashing, and the pattern will start re- peating. Exit from the loop Do one of the following: ▪ Press the same Style Element button again, or ▪ Select a different Style Element. Keep a Style Element in loop while its button is pressed ▪...
-
Page 61: The Chord Sequencer
The Chord Sequencer |57 the Chord Sequencer Recording a Chord Sequence You can record a Chord Sequence, that will remain in memory until you turn the instrument off. Record a Chord Sequence Press the START/STOP button to start the Accompaniment. Press the CHORD SEQUENCER >... - Page 62 Playing the Styles will be sent to the arranger, and the Accompaniment will play following the recorded chords. Play your solo part, while the Chord Sequence plays the chords for you. During Chord Sequence looping, you can freely select any Fill or Variation, as if you where playing chords with your hands.
-
Page 63: Mixing The Accompaniment Sounds
Mixing the Accompaniment Sounds |59 Mixing the accompaniment Sounds Grouped Accompaniment Sounds As in a mixer, the Accompaniment Sounds can be grouped together. For example, instead of separately muting the guitar and the strings parts in the Accompaniment, you can mute the Accompaniment (ACCOMP) group by touching a single button. - Page 64 Playing the Styles Turning the individual Accompaniment Sounds on or off Sounds can be muted, in case you don’t want to hear them in the mix. As an example, the Accompaniment might contain a Piano part, and you want to play it live on the keyboard.
-
Page 65: Playing The Songs
MIDI Songs’ jargon name is Standard MIDI File, often abbreviated as SMF. The filename extension is .mid. The Standard MIDI File is the industry stan- dard format for songs, and is used by HAVIAN 30 as the native file format when playing and recording MIDI Songs. - Page 66 Playing the Songs Choosing a Song from the list Switch to the Song Play mode Press the SONG PLAY button. Title bar Page menu Selected Song Right-hand/ Upper Sounds Selected Style Left-hand/ Selected Lower Sound Performance (may change to Selected STS) Tabs recalling STS pane other panes...
- Page 67 Choosing the Songs |63 Browse through the Songs While in the Song Select window, browse through the files to find the Song you are looking for. Current path Storage device ▪ Choose a storage device by using the Device menu. If the Song is contained in an external USB device, connect the device to the USB HOST port.
- Page 68 Playing the Songs ▪ By touching the label again, the order of the files will switch between cending and descending. Select the Song Touch the name of the Song you want to choose to highlight it. Touch the Select button. If a Song is already playing, it will stop, and the new Song will be ready to play.
-
Page 69: Playing A Song
Playing a Song |65 Playing a Song Starting, stopping and controlling the Player Start the Player ▪ Press the PLAY/STOP ( button. The button’s indicator will light up. While the Song is playing, the indicators on the display will show the current position. - Page 70 Playing the Songs Balancing the Song against the keyboard While playing, you may want to balance the Keyboard Sounds against the Song, to make the soloist stand out of the background or go back in the mix. Balance the Song against the keyboard ▪...
- Page 71 Playing a Song |67 Mute/unmute the Song tracks ▪ If the Sound you want to mute is in Play, touch the Play/Mute icon to set it to Mute. Play Mute status status ▪ If the Sound you want to hear is in Mute, touch the Play/Mute icon to set it to Play.
-
Page 72: Playing All The Songs In A Folder
Playing the Songs Playing all the Songs in a folder Playing all the Songs in a folder Open the Song Select window from the control panel ▪ Press the SONG button. Open the Song Select window from the display ▪ Touch the name of the Song on the display. -
Page 73: Lyrics, Chords, Score And Markers
Reading lyrics and chords |69 Lyrics, chords, score and markers reading lyrics and chords Where are lyrics and chords contained? Lyrics and chords in the MIDI Songs Lyrics and chords may be contained inside MIDI Songs. They are included as MIDI events. Lyrics and chords in the MP3 Songs Lyrics may be contained into MP3 Songs. - Page 74 Lyrics, chords, score and markers Reading the lyrics and chords contained in a Song Open the Lyrics page ▪ Press the LYRICS button on the control panel. The Lyrics page will appear. Read the lyrics ▪ While the Song is playing, lyrics contained in a MIDI or MP3 Song will auto- matically scroll in the display, in time with the music.
- Page 75 Reading lyrics and chords |71 Activate the chord transposition Go to the Global > Tuning > Transpose Control page. Activate Transpose on the Player, and deactivate it on the Style and Keyboard tracks. Reading the lyrics and chords loaded as a text file If the text has been linked or loaded as a text (TXT) file, it will not scroll au- tomatically while the Song is playing back.
- Page 76 Lyrics, chords, score and markers On-the-fly loading of Lyrics and chords from an external text file When no lyrics or chords are contained or associated to the Style or Song, you can load a text (TXT) file after having chosen a Style or Song. Load a TXT file on-the-fly The “No lyrics”...
-
Page 77: Reading The Music Score
Reading the music score |73 reading the music score Creating and reading the music score Create the music score While in Song Play mode, choose a MIDI Song to play. Press the SCORE button to open the Score page. A score of the selected track will be generated. - Page 78 Lyrics, chords, score and markers Clef Meaning Treble Standard Treble clef. Treble+8 Treble clef with transposition one octave upper. Treble-8 Treble clef with transposition one octave lower. Bass Standard Bass clef. Bass-8 Bass clef with transposition one octave lower. Exit from the Score page ▪...
- Page 79 Reading the music score |75 Read the note names ▪ Touch the Note button to make the note name appear or disappear next to each note. Note names are shown either according to the English or Italian system, de- pending on the selected language. Muting the selected track Mute the selected track ▪...
-
Page 80: Moving Through A Song With The Markers
Moving through a Song with the markers Using the markers Song Marker events contained in a MID file (that is, a MIDI Song) can be read by HAVIAN 30. They are immediately shown in the Markers page. Jump to a marker... - Page 81 Moving through a Song with the markers |77 Creating and editing markers You can add your own marker points to a MIDI Song, then save them into the MID file. Open the Markers page ▪ While in Song Play mode, press the MARKER buttons.
- Page 82 Lyrics, chords, score and markers Edit the name and position of a marker Touch the marker to be edited in the markers list. Touch the Edit button to start editing the marker. The Edit Marker window will appear. While in the Edit Marker window, edit the position and name of the selected marker.
-
Page 83: Using The Songbook
Styles. You can add your own Entries to the SongBook, as well as edit the ex- isting ones. KORG already supplies some hundred Entries as standard. Furthermore, the SongBook allows you to create various custom lists, that may suit your different types of show. - Page 84 Using the SongBook Choose a SongBook Entry While you are in Style Play Song Play mode, press the SONGBOOK but- ton to open the SongBook page. Browse through the Entries. Use the scrollbar or the VALUE dial to scroll. Keep the SHIFT button pressed and touch one of the arrows...
- Page 85 Choosing the SongBook Entries |81 Identifying the type of Entry The icons in the Type column will help you identify the Entry. Type Meaning Style-based Entry. When chosen, it will select a Style and switch to the Style Play mode. MIDI Song-based Entry.
- Page 86 Using the SongBook Filtering the Entries When you are looking for a particular artist, genre or other categories, you may ‘filter’ the list to only see the type of Entries you are looking for. Please note that you can also find items inside the SongBook database by pressing SEARCH button on the control panel, but the Filter...
- Page 87 Choosing the SongBook Entries |83 If you like, select a Meter and/or a range of Tempo values to be included in your filter criteria. Delete the filter criteria you don’t need: ▪ Touch the Clear button to delete the text string or reset the parameter to a default value.
- Page 88 Using the SongBook If you selected a Style-based Entry: Name of the selected Entry Asosciated Style If you selected a Song-based Entry: Name of the selected Entry Asosciated Song If the Selected Entry (N:) area is blank (---), the selected Entry has been modified, or no Entry has been selected.
-
Page 89: Using The Custom Lists
Using the Custom Lists |85 Using the Custom Lists What are Custom Lists? Custom Lists are selections from the full Book list. They allow for smaller, customized lists, suitable for a single gig or your own music preferences. We already included some example lists, that you can use for your own shows. Playing a Custom List Choose a Custom List containing the songs already selected for your show. -
Page 90: Searching For Files And Other Items
Searching for files and other items Searching for files and other items Using the Search function Searching Depending on the page, you can search for different types of data. For ex- ample, while in the Media pages you can only search for files, while in Style Play or Song Play mode you can search for several different types of data (Styles, Songs, Lyrics…). - Page 91 Using the Search function |87 Choose the type of file to look for ▪ If needed, use the Type menu to choose the type of item you are looking for. Choose a storage device and folder When searching for Files, Songs or Lyrics, you can choose a storage device and folder where to focus your search.
- Page 92 Searching for files and other items Type the name and start searching Type the name of the file you are looking for. There is no difference between upper and lower cases (“LOVE” is the same as “Love” or “love”). When finished entering the name, touch the Search button.
- Page 93 Using the Search function |89 Exit from the Search window without stopping the Search operation ▪ Touch the Cancel button in the display, or press the EXIT SEARCH ( button on the control panel, to exit from the Search window and carry on other operations.
- Page 94 Searching for files and other items...
-
Page 95: Recording
Part III: rECOrDING... -
Page 96: Recording Mp3 Songs
Recording MP3 Songs recording MP3 Songs recording and saving an MP3 Song Recording an MP3 Song Enter MP3 Record mode ▪ While in Style Play Song Play mode, keep the SHIFT button pressed and press the RECORD button. MP3 Record dialog will appear. - Page 97 Recording and saving an MP3 Song |93 button will change to Stop, and the Idle label will change to Recording. Start playing your song. During recording, use the MP3 Record dialog to check the Recording time, File length and the Free space on the storage device.
- Page 98 Recording MP3 Songs Saving the MP3 Song Save the MP3 Song After having stopped recording, the MP3 Record dialog will allow you to choose a location for saving the MP3 file. Touch the Text Edit ( icon to give the MP3 file a name. Touch the Browse button to select a...
-
Page 99: Appendix
Part IV: aPPENDIX... -
Page 100: Shortcuts
Shortcuts Shortcuts Shift functions You can keep the SHIFT button pressed, and press another button on the control panel to directly jump to an edit page or dialog box. Shift + Functions Any modes Dial Tempo Change Scroll Arrows When a list is shown: Goes to Next/Previous alphabetical section of the currently selected column Global Selects the Global >... - Page 101 Shift + Functions Sequencer mode Sequencer Selects the Global > Mode Preferences > Song & Seq page Long keypress You can keep a button pressed for about one second to directly jump to an edit page or dialog box. Long keypress Functions Any operating modes Split...
-
Page 102: Specs
Specs Specs KORG HAVIAN 30 Features Keyboard 88 Weighted Hammer keys, Velocity sensitive Sounds Factory: More than 950 including Stereo Gran Coda (with reso- nance), Stereo Upright (with resonance) and GM2 Sounds; 64 Drum Kits User: 256 Sounds, 128 Drum Kits... - Page 103 KORG HAVIAN 30 Features SongBook Fully programmable music database, recalling Styles, MIDI Songs, Karaoke Songs, MP3 Songs, with automatic selection of Style Play and Song Play modes User-definable Custom Lists, filtering options Search Style, Song, Performance, SongBook, Sound and Lyrics TXT...
- Page 104 100| Specs...
- Page 106 Address KORG Italy SpA Via Cagiata, 85 I-60027 Osimo (An) Italy www.korg.com © KORG Italy 2016. All rights reserved PART NUMBER: MAN0010089...
Need help?
Do you have a question about the HAVIAN 30 and is the answer not in the manual?
Questions and answers