Table of Contents
Advertisement
Quick Links
Troubleshooting
The following guide should assist in case of difficulty.
No digital satellite channels available in remote room
Check that the signal feed from the Digibox or PVR (RF OUT-2) via the extension cable or distribution
system is properly connected to the remote room TV via the coupler. Check that the remote room
TV is tuned to the correct channel for your Digibox or PVR output.
No terrestrial TV channels
Check that the coaxial cable from the aerial is connected correctly into the VCR and Digibox or PVR,
as described in your Digibox or PVR user manual.
Remote control not working (unable to change channel on the Digibox or PVR from the
remote room)
Check that the red LED power indicator on the coupler is alight. If not, try the following.
n Check that you have changed the second outlet power supply option in the installer menu, as
described under configure the Digibox or PVR above (applies only for direct extension cable
connections to Digibox or PVR).
n Ensure that the coupler is connected as shown in the wiring plans, with the female coaxial
connector connected to the feed from the Digibox, PVR or amplifier. Remote control will not
work if the coupler is connected the wrong way round.
n Switch off the Digibox or PVR and disconnect the mains plug. After 10 seconds, reconnect the
mains plug and switch the Digibox or PVR on.
n Check that there is a direct connection between the output of the Digibox (or PVR) or the
distribution amplifier and the coupler with no other parts in line, for example, isolated wall
plates. If there are wall plates, check that they are non-isolated. If necessary, replace with non-
isolated wall plates as descibed on page 3. If a distribution amplifier is in use check that it is
compatible with the proSAT1EYE kit – i.e. that it has an RF return path and provides 9 V DC
power at the outputs for infra-red ‘eyes’.
n Check the cable between the Digibox, PVR or distribution amplifier and the coupler. In particular,
check all the coax plug connectors (see page 3). If you have a multimeter, check for the presence
of approximately 9 V DC at the incoming cable connection to the coupler.
2-Year Guarantee
This guarantee covers failure of your Proception product resulting from manufacturing defect
within a period of 2 years from the date of supply to the end-user. This guarantee does not
cover damage to the product caused by abuse, tampering, defective installation or natural
causes such as lightning discharge. Repair or attempted repair, other than by the manufacturer,
will render this guarantee void. This guarantee does not affect a consumer’s statutory rights.
Proception Limited,
177-187 Rutland Road
SHEFFIELD
S3 9PT
United Kingdom
Web:
http://www.proception.co.uk/
e-mail:
support@proception.co.uk
Page 4
PROception
INSTRUCTIONS
This kit allows you to control a Sky* Digibox digital satellite receiver or Sky+* personal video recorder
(PVR) from another room. It is useful where you have wired the output of the Digibox or PVR to one
or more remote rooms so that the selected digital satellite channel (or disk playback) can be viewed
on additional TV sets.
The wiring can be as simple as a direct extension cable from the Digibox or PVR to a single remote
room – described in this leaflet – or it can be a feature of a more comprehensive signal distribution
system using a suitable amplifier such as the Proception PROamp24R, ‘26R or ‘28R (see page 2).
Compatibility
The proSAT1EYE is for use with Sky* digital satellite equipment only and is compatible with all
makes of Digibox and Sky+* PVR.
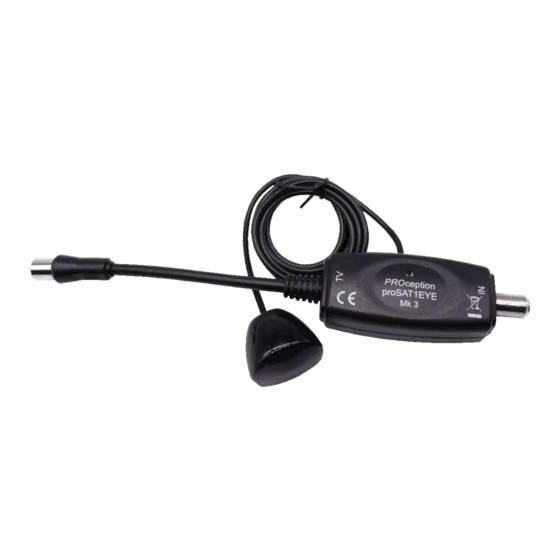
Contents of kit
coupler
PROception
proSAT1EYE
INSTALLATION NOTES
Wiring
If there is no extension cable or distribution system in place already, start by installing coaxial cable
(not supplied) between the RF OUT-2 connector on the back of the Digibox or PVR and the remote
room, as shown in Wiring Plan 1.
Wiring Plan 2 shows the connections required if you already have (or intend to install) a signal
distribution system. For the remote control function to work the amplifier must be of the type which
has a return path capable of passing remote control signals at 6 MHz. Installation of this type of
system is beyond the scope of this leaflet and should be covered in the instructions supplied with
the amplifier.
Remote room installation
Place the receiver eye on or near the TV in the remote room and connect the coupler into the TV
signal cable as shown in the wiring plans. Ensure that the eye faces into the room and is visible
from your viewing position.
Notes: If you are using a VCR or other accessory equipment in the remote room the coupler must
be connected on the aerial (extension) cable side of the VCR or accessory, not on the TV side. Note
that the female coaxial connector (marked ‘IN’) of the coupler must face the incoming signal cable
and the male coaxial connector (marked ‘TV’) must face the TV equipment side. The remote control
function will not work if the coupler is connected in-line the wrong way round. The short
flylead supplied should always be used as shown, in preference to plugging the coupler directly into
the TV etc. – this prevents the weight of the coupler and its leads damaging the aerial socket.
*Sky and Sky+ are registered trade marks of British Sky Broadcasting Group plc.
proSAT1EYE
Digital Satellite TV Control Extender
receiver eye
flylead
Page 1
Advertisement
Table of Contents

Related Manuals for PROception proSAT1EYE


Summary of Contents for PROception proSAT1EYE
- Page 1 PROception proSAT1EYE compatible with the proSAT1EYE kit – i.e. that it has an RF return path and provides 9 V DC power at the outputs for infra-red ‘eyes’. n Check the cable between the Digibox, PVR or distribution amplifier and the coupler. In particular, check all the coax plug connectors (see page 3).
- Page 2 1EYE The TV connection in the remote room may use a wall ‘outlet plate’. Note that some types of existing outlet plate, particularly the isolated types illustrated, are not compatible with the proSAT1EYE Wiring Plan 2 – with distribution system system and will need to be replaced.
Need help?
Do you have a question about the proSAT1EYE and is the answer not in the manual?
Questions and answers