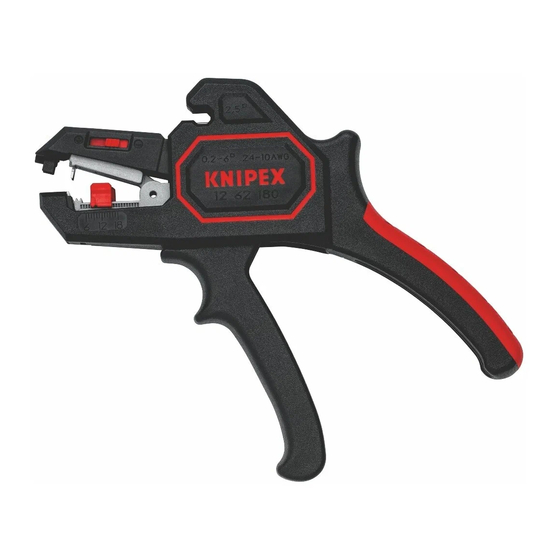
Summary of Contents for KNIPEX 12 62 180
- Page 1 KNIPEX Quality – Made in Germany Operating instructions 12 62 180 Automatic Insulation Stripper for stripping single, multiple and fine stranded conductors 12 62 180...
-
Page 2: Table Of Contents
CONTENTS General Notes on operating instructions Symbols Copyright Guarantee and warranty Safety Intended use Design and function Design Function Operation Cutting cables to length Stripping cables (with solid, stranded and fine-stranded conductors) 7 Maintenance Changing the length stop Replacing of the blades Technical data Disposal Status: 26.10.21... -
Page 3: General
1.3 Copyright These operating instructions and all documentation supplied with this tool are protected by copyright and remain the property of KNIPEX.The reprint- ing of these instructions, even in extract form, is only permitted with the written consent of C. Gustav Putsch KG. -
Page 4: Guarantee And Warranty
• Repairs or conversions are carried out by unauthorized persons. • No original accessories or spare parts from KNIPEX are used. • Defective components are not repaired immediately to minimise the extent of the damage and so as not to impair the safety of the tool (ob- ligation to repair).For the rest, reference is made to the liability and... -
Page 5: Design And Function
DESiGN aND fuNCTiON Design and function 3.1 Design < 2,5 0,2 - 6 24 - 10 AWG 12 62 180 0,2 – Design of the stripping tool Holder for cables / conductors Cutter for stripping Adjustable length stop (6.0 - 18.0 mm) -
Page 6: Operation
OpEraTiON Operation 4.1 Cutting cables to length < 2,5 mm Cutting cables 1. Insert the end of the cable to be shortened between the two blades of the wire cutter. 2. Firmly press the two handles together. Status: 26.10.21... -
Page 7: Stripping Cables (With Solid, Stranded And Fine-Stranded Conductors)
OpEraTiON 4.2 Stripping cables (with solid, stranded and fine-stranded conductors) » Set the length stop to the required size (6 to 18 mm). » Insert the end of the cable into the holder. » Firmly press the two handles together. 0,2 - 6 mm Stripping the individual conductors »... -
Page 8: Maintenance
MaiNTENaNCE Maintenance 5.1 Changing the length stop Replacing the length stop 1. Squeeze the length stop slightly and pull it off the guide. 2. Place the new length stop onto the guide and gently press it together until it clicks into place. 3. - Page 9 MaiNTENaNCE 5.1.1 Replacing the top blade 1. Use small flat nose pliers to pull out the top blade. Removing the top blade 2. Use the flat nose pliers to push the new blade in at the same position. If necessary, press it down a little with the pliers. Note: Pay attention to the correct position.
- Page 10 MaiNTENaNCE 5.1.2 Replacing the bottom blade 1. Use the metal pin provided to slide the bottom blade out from below. Remove the bottom blade 2. Use the flat nose pliers to push the new blade in at the same position from above.
-
Page 11: Technical Data
TEChNiCal DaTa Technical data Technical data Unit Article number pliers – 12 62 180 Article number spare blades – 12 69 21 Article number spare length stop – 12 69 23 Length Weight Material housing – Plastic, glassfibre-reinforced Material blade –... - Page 12 Status: 26.10.21...
- Page 13 KNIPEX-Werk C. Gustav Putsch KG 42337 Wuppertal Tel.: +49 202 – 47 94-0 Fax: +49 202 – 47 74 94 info@knipex.com www.knipex.com...


Need help?
Do you have a question about the 12 62 180 and is the answer not in the manual?
Questions and answers