
Related Manuals for Monster Grill MG5BBQSS


Summary of Contents for Monster Grill MG5BBQSS
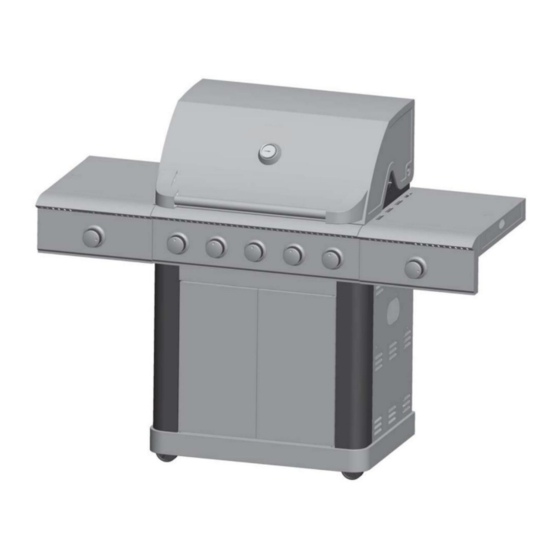
- Page 1 OWNER’S MANUAL MG5BBQSS GAS GRILL WITH 5 MAIN BURNERS WITH SIDE BURNER AND INFRARED SIDE BURNER...
-
Page 2: Table Of Contents
CONTENTS Important Safety Information General Information for Successful Assembly Parts Listing Assembly Gas Supply Information Connecting the gas bottle to the appliance Checking for leaks Lighting Instructions Safely using your BBQ Flare-up Control Fat Fires Cleaning and Care Outside Surface Interior of the BBQ Cooking Grid Cleaning the Burners... -
Page 3: Important Safety Information
IMPORTANT SAFETY INFORMATION Please read this user manual before using this BBQ and keep it safe for future reference. Read the following instructions carefully propane or LPG mixtures are used. Butane ⚫ and be sure your BBQ is properly installed, can be used but because of the power of assembled and cared for. -
Page 4: Parts Listing
PARTS LIST Description Image Cart Left Warming Door Rack Cart Right MFCS System Door Flame Tamer Cart Horizontal Fuse Board Cover Magnet Main Burner Cart Back Panel Hood Cart Left Side Panel Grease Tray Right Side Left Side Burner Trivet Burner Valve Right Side Grease Cup... - Page 5 FIXTURES AND FITTINGS Description Image M6x16 M6x14 M6x10 M4x10 M5x12 EXPLODED DIAGRAM OF PARTS...
-
Page 6: Assembly
ASSEMBLY Step1: Secure 16 CC screws to the four castors. Step 2: Attach the cylinder floor plates and castors onto the base using 12 FF x 20 screws. Step 3: Turn the base over so that the castors are on the floor. - Page 7 Step 4: Repeat this step for the other side panel and then attach the door stop (37) to the base using two EE screws. Step 5: Attach the back panel onto the base and two side panels using seven BB screws. Step 6: Use five BB screws to secure the corner panel...
- Page 8 Step 7: Using 5 BB screws, attach the second corner panel to the base. Step 8: Slide the two front panels 23 and 24 into the space between the two corner panels. Secure them into place using five BB screws. Step 9: Secure the top of the BBQ unit to the assembled...
- Page 9 Step 10: Open the BBQ lid and secure the side shelf (15) to the main BBQ body using 2 DD washers and 2 BB screws. Step 11: On the outside of the main unit, use four AA screws and two BB screws to further secure the side shelf.
- Page 10 Step 13: On the outside of the main unit, use four AA screws and two BB screws to further secure the side shelf. Step 14: Use two EE screws to secure the dial onto part Step 15: Use two EE screws to secure the dial onto part...
- Page 11 Step 16: Slide the side burner into position on the valve and lock into position using 2 EE screws on the underside of the side burner. Step 17: Connect the right-side burner to the unit using the electrode and the electrode wire.
- Page 12 Step 19: Attach the grease cup hanger to the left side burner and hook the grease cup onto the hanger. Step 20: Insert the grills and right-side burner trivet into the BBQ as shown. Then, slide the grease tray underneath the back of the unit.
-
Page 13: Gas Supply Information
GAS SUPPLY INFORMATION This appliance is only suitable for use with low pressure Butane, Propane, or LPG mixtures, fitted with the appropriate low-pressure regulator via a flexible hose. The hose should be secured to a regulator and the appliance with hose clips. This BBQ is set to operate with a 30mbar regulator when used with Butane and Propane gas, and 30 or 50 mbar for LPG mixtures. -
Page 14: Checking For Leaks
CHECKING FOR LEAKS BEFORE USE CHECK FOR LEAKS Never check for leaks with a naked flame, always use a soapy water solution • Make 50 – 75ml of leak detecting solution by mixing ¼ washing up liquid with 3/4 water. •... -
Page 15: Safely Using Your Bbq
SAFELY USING YOUR BBQ FLARE-UP CONTROL Flare-ups can occur during barbequing, and are caused by fat and juices falling onto a hot surface. Avoid excessive flare-ups to prevent food from being burnt. The flame tamers are designed to help limit the amount of flare ups, but these must be kept in good condition and free of grease to be effective. -
Page 16: Cleaning And Care
When the appliance is not in use for a period of time it should be carefully packed for storage and stored in a dry, dust free environment. A cover is available to buy separately from your Monster Grill stockist, order code BBQC5B. -
Page 17: Technical Information
TECHNICAL INFORMATION 0359-21 MG5BBQSS Appliance Code 1189 x 1518 x 637mm Product Size Assembled (HxWxD) 22.1kW (1607 g/h) Main Burners: 16kW (1163 g/h) Total Heat Input (All Gas Categories) Side Burner Left: 2.6kW (189 g/h) Side Burner Right: 3.5kW (254.5g/h) -
Page 18: Troubleshooting
After barbecue cools, remove and clean all parts. MANUFACTURER SUPPORT 0330 390 3062 Office hours: 9AM - 5PM Monday to Friday Monster Grill Unit J6, Lowfields Business Park Lowfields Way, Elland West Yorkshire, HX5 9DA...
Need help?
Do you have a question about the MG5BBQSS and is the answer not in the manual?
Questions and answers