
Related Manuals for Frye FONIX 7000


Summary of Contents for Frye FONIX 7000
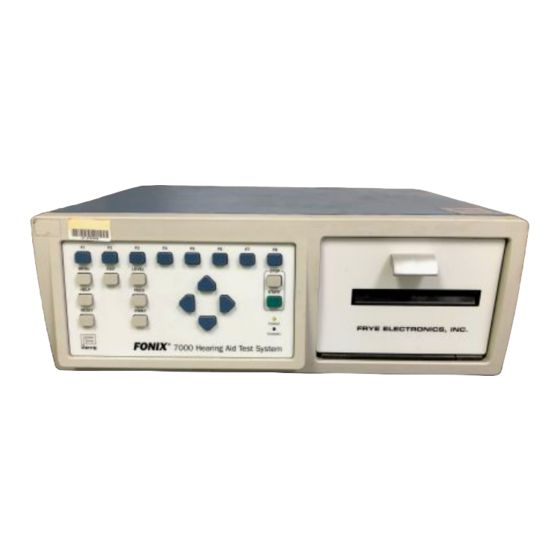
- Page 1 FONIX 7000 ® Maintenance Manual Rev. 9—March 31, 2010 ©2010, Frye Electronics, Inc. All rights reserved March, 2010...
-
Page 3: Table Of Contents
Contents 1. Overview . . . . . . . . . . . . . . . . . . . . . . . . . . . . . . . . . . . . . . . . . . . . . . . . . . . . . . . . . . . . . . . . . . . . . . . . . . . . . . . . . . . . . . . . . . . 1 1 . - Page 4 4 . 1 . 1 . 6 Flash ROM: . . . . . . . . . . . . . . . . . . . . . . . . . . . . . . . . . . . . . . . . . . . . . . . . . . . . . . . . . . . . . . . . . . . . . . . . . . . 17 4 .
- Page 5 4 . 3 . 6 . 1 Battery Current Measurement: . . . . . . . . . . . . . . . . . . . . . . . . . . . . . . . . . . . . . . . . . . . . . . . . . . . . . . . 28 4 .
- Page 6 4 . 9 . 4 . 2 Probe Preamp: . . . . . . . . . . . . . . . . . . . . . . . . . . . . . . . . . . . . . . . . . . . . . . . . . . . . . . . . . . . . . . . . . . . . . . . . 41 4 .
-
Page 7: Overview
1. Overview The 7000, in composite mode of operation, produces a complete set of tones from 200 to 8000 Hz simultaneously, and is able to analyze the response of the hearing aid to this complex signal, and displays 79 components from 200 to 8000Hz simul- taneously on a graphical display. -
Page 8: Component Amplitude Weighting Considerations
RMS amplitude of signal has a low peak value. A computer program was used to determine the optimum set of phase values. FONIX 7000 Maintenance Manual... -
Page 9: Special Distortion Measurements
1.1.4 Special Distortion Measurements Harmonic distortion tests can be run by generating a signal consisting of only one sine component at a time, and using the Fast Fourier analysis program to determine the spectral distribution of harmonics. Intermodulation tests are automatically run using the composite waveform. If pres- ent, this type of distortion is immediately apparent when viewing the gain or power response of the hearing aid. -
Page 10: Noise Reduction
The change of phase is accomplished by movement of the hearing aid in a sound field while the measurement is in process. The effect of phase changes is a dropout of the signal and an eventual recovery to the correct level when the motion has ceased. FONIX 7000 Maintenance Manual... -
Page 11: Specifications
2. Specifications ACOUSTICAL OUTPUTS Frequencies: 200-8000 Hz in 100 Hz intervals (user interface) 200-8000 Hz in 50 Hz intervals (RS232) Frequency Accuracy: Amplitudes: 40-100 dB in 5 dB intervals coupler, 40-90 dB in 5 dB intervals real-ear (user interface) 40-100 dB in 0.01 dB intervals coupler, 40-90 dB in 0.01 dB intervals real-ear (RS232) Accuracy Coupler: ±1 dB from 300 to 5000 Hz, all others ±3 dB... -
Page 12: Digital Readout Of Sound Pressure Level
Accuracy: ±10 % or ± 2 ms, whichever is larger Signals: Puretone: 200-8000 Hz, in 100 Hz intervals (user inter- face), 50 Hz intervals (RS232), Composite AVAILABLE TESTS Automated Test Sequences: ANSI S3.22-1987, ANSI S3.22-1996, ANSI S3.22-2003, IEC 60118-7:1994, IEC 60118-7:2005, ANSI S3.42-1992, JIS:2000 FONIX 7000 Maintenance Manual... -
Page 13: Power
Additional Coupler Tests: Enhanced DSP , Input/Output, Attack & Release, Battery Current, Coupler Multicurve Real-ear Test Screens: Audiogram Entry, Target Edit, Insertion Gain, Real-ear SPL, Visible Speech POWER Source voltage: 100-240 volt AC. Frequency Range: 50-60 Hz. Power Requirement: 0.6 A. Fuse: 0.63A / 250 V~, Type T, IEC 60127-2 Sheet III (Slo-Blo Type, Glass, 5mm x 20mm). -
Page 14: Monitor Headset
2.14 GUARANTEE The FONIX 7000 and its accessories are guaranteed to be free from manufacturing defects which would prevent the products from meeting these specifications for a period of one year from date of purchase. FONIX 7000 Maintenance Manual... -
Page 15: Specification Test Procedure
3. Specification Test Procedure 3.1 SOURCE FREqUENCY ACCURACY Instrument required: Frequency counter accurate to 0.1 percent and capable of mea- suring 1000 Hz. Setup: Enter the Coupler screen. From the menu, set static tone to single. Exit the menu. Set the amplitude to 90dB and the frequency to 1000Hz. Connect the frequency counter to the sound chamber connector, on the 7000, pin 2, ground to pin 3. -
Page 16: Source Output Amplitude Accuracy
In the test screen, adjust the amplitude of the telecoil amplitude. The measured electrical output on the meter should correspond to the displayed telecoil field strength within 2 dB plus the tolerance of the current meter in the fol- lowing chart: FONIX 7000 Maintenance Manual... -
Page 17: Battery Simulator Voltage Accuracy
Electrical output Field Strength 0.044 mA 1 mA/meter 0.079 mA 1.78 mA/meter 0.140 mA 3.16 mA/meter 0.250 mA 5.62 mA/meter 0.444 mA 10 mA/meter 0.790 mA 17.8 mA/meter 1.404 mA 31.6 mA/meter 2.485 mA 56.2 mA/meter 4.44 mA 100 mA/meter For example, if the telecoil amplitude is set to 10 mA/m, the meter should read .444 mA within tolerance. -
Page 19: Circuit Description
4. Circuit Description Logic Notation Some logic circuit inputs and outputs operate with positive true logic. A “+” voltage at such a point is equivalent to a “one.” Other inputs and outputs operate just the opposite, with negative true logic. The circuit descriptions which follow label negative true inputs and outputs by a “\.”... - Page 20 The Printer Board provides connections to the internal printer for the thermal print- er head, paper feed motor, paper sensor and head up detection. An external parallel interface (25 pin D) is provided some HP and Epson compat- ible external printers. HPCL5 and ESC/P2 languages are used. FONIX 7000 Maintenance Manual...
-
Page 21: Cpu Board (061-0160-Xx)
The POWER SUPPLY BOARD contains voltage requlators, a 64dB source attenuator, and speaker amplification circuitry. This board contains the external connectors for the sound chamber, sound field speaker, and earphone. On the KEYBOARD, silicon rubber DPST button elements are used along with LEDs for state indications. -
Page 22: Cpu Board Cpu Section
• A Chip Select unit. We’re using two of its chip selects. • General Purpose I/O pins. We’re using 1 of them on this page. • A Watchdog Timer. • BDM port. 4.1.1.4 CPU Buss: The following lines on the 68331 comprise the CPU Buss: • ADDR0 through ADDR23 are the address buss. • DATA0 through DATA15 are the data buss. • CLKOUT, AS#, DS#, R/W#, SIZ0, SIZ1, CS0#, CS2# are the control buss outputs. • DSACK0# AND DSACK1# are the acknowledge inputs. FONIX 7000 Maintenance Manual... -
Page 23: Cpld
4.1.1.5 CPLD: The CY37128 CPLD(U2:C) on this page: • Interfaces to the CPU Buss. • Generates these additional control buss signals: RD#, WR#, IUDS#, & ILDS#. • Provides the acknowledge signals to the CPU for the Flash and several peripherals. • Provides the control signals to and from the Flash ROM. • Provides two keyboard related interrupts to the CPU. 4.1.1.6 Flash ROM: U6(AM29F160D) is a FLASH ROM device that holds the 7000 program. This part is non-volatile when power is removed, but can be written to by the CPU. The chip select(FL_CS#) is always active low. The CPLD line WP# is used to control the Write Protect line. -
Page 24: Display Controller
CPLD(U2:A). The key column outputs(KC0 to KC4) are gen- erated by the CPLD. The CPLD also drives the three LEDs(KEY_LED1 to 3). Each key connects one column to one row. The only exception is the Reset key which connects DS2 to ground. FONIX 7000 Maintenance Manual... -
Page 25: Ps2 Keyboard Interface
4.1.3.2 PS2 Keyboard Interface: The PS2 keyboard is connected to rear panel connector J10. The keyboard clock(AT1_CLK) comes in J10 pin 5, is cleaned up by U8 and R28 and R29, then passed to CPLD pin 99. The keyboard can be held off by holding the clock line low using CPLD pin 68 and Q3. -
Page 26: I2C Buss
R46, & R49. This board contains the following external connectors: Serial Port A: 9 pin D, female. Serial Port B: 9 pin D, male. External Keyboard: 6 pin mini DIN. External Monitor: 15 pin D, female. FONIX 7000 Maintenance Manual... -
Page 27: Signal Generator Board (061-1025-Xx)
4.2 Signal Generator Board (061-1025-xx) This board is designed to generate the signal that is used to test the device. The basic components are a counter, clock signal logic, data input buffers, RAM chips, 12-bit D to A converter, low pass filter, and output amplitude control. Refer to 7000 Signal Generator Board schematics (drawing 999-2449-XX through 999-2453-XX) for the following. -
Page 28: Ram
RAM table of data, the disruption of signal will be a relatively infrequent affair. Programs have also been developed so that when necessary, the RAM is load- ed in synchronism with the system so that only a small signal transient is generated by the load process. FONIX 7000 Maintenance Manual... -
Page 29: Logic Used By The Digitizer Board
4.2.4 Logic Used by the Digitizer Board The 74LS21 (U3H) and 74LS08 (U4B) tied to the outputs of the divide by 3 and 8 counters provide a short basic clock signal labeled RAM\. The two sections of the 74LS260 (U4A), a dual 5 input NOR, in combination with the 74LS08 (U4B), provides another signal for the A to D converter called 0SET. -
Page 30: Digital To Analog Converter
This board contains circuits to preamplify the incoming signals with prescaling controlled by the CPU, a brick wall filter to reduce the high frequency components above 8 kHz, a switch to allow either audio signals or battery current signals to FONIX 7000 Maintenance Manual... -
Page 31: Digitizer Board Bus Interfaces & Counter Section
be measured, a sample and hold circuit, an A/D converter, RAM for holding the sampled data in 12-bit words, a counter for deriving addresses for the RAM in data collection, and logic circuits to control the board. A circuit is also included that supplies a battery equivalent voltage and a current voltage converter that ranges up to +5 volts for a current drain of 25 mA. -
Page 32: Logic
2 to 0. The low voltage resets flip-flop (U15) and stops the sampling. At the same time, (U23) pin 10 is connected to C22, and this voltage is perma- nently connected to the input of the readout op-amp (U24) TL071. FONIX 7000 Maintenance Manual... -
Page 33: Analog To Digital Converter
4.3.2.2 Analog to Digital Converter: Analog to digital conversion is performed by the AD574A chip. It is connected to process 12 bits at a shot, and also to load these 12 bits all at once to RAM when commanded. It requires 35 uS to make a conversion. Layout around this part is extremely critical to avoid noise problems. -
Page 34: Low Pass Filter
4.4 Digitizer Connector Board (061-0165-xx) This board provides external connectors and controls associated with the Digitizer, CPU and Probe Interface Boards. Additionally, circuitry for ESD protection is pro- vided for each connector. FONIX 7000 Maintenance Manual... -
Page 35: Printer Controller Board (061-0161-Xx)
The digitizer board contains the following external connectors and controls: Probe Module: 15 pin D, female. Scope Monitor: BNC, Coaxial. Microphone: 8 pin DIN. Microphone Gain: Trimming pot. Refer to 7000 Digitizer Connector Board schematic (drawing 999-2343-XX). 4.5 Printer Controller Board (061-0161-xx) The Printer Controller Includes: •... -
Page 36: Cpu Supervisor
512K word ram memory. The CPLD U5:E decodes the CPU buss to generate the RD_RAM\, WR_H\, and WR_L\ signals. 4.5.2.6 Internal Flash ROM: The Program that controls the Printer Board is located in the 64K bytes of Flash Rom inside the microcontroller U4. FONIX 7000 Maintenance Manual... -
Page 37: External Flash Rom
4.5.2.7 External Flash ROM: U8 and U9(AT49F001T) are both 128K byte flash roms. These roms are not currently being used. 4.5.3 Top Buss Interface Section: Refer to 7000 Printer Board schematic (drawing 999-2309-XX) for the following: The CPLD(U5:C) provides the interface between the Printer Board CPU Buss and the Top Buss which is at connector(J2). -
Page 38: Printer Sensor Interface
(Drawing 999-2312-XX) The +5D supply come from the bottom buss pins 3 and 4. The other supplies on the bottom buss are currently not used except at the factory. (Drawing 999-2311-XX) The +24V supply comes from J13. FONIX 7000 Maintenance Manual... -
Page 39: Power Supply Board (061-0162-Xx)
4.6 Power Supply Board (061-0162-xx) The Power Supply Board Includes: • The Voltage Regulators for the Signal Generator, RS232 drivers, & -5A. • A 64dB source attenuator. • The Speaker/Earphone amplifier. • The Chamber speaker/Sound field speaker/Earphone&Telecoil select circuitry. • A pass through connector for the Battery Simulator on the Digitizer. • The Sound Chamber, Sound field speaker, and Earphone rear panel connec- tors. • Power on LED indicator. 4.6.1 Power Supply Regulator Section: Refer to 7000 Power Supply Board schematics(drawing 999-2338-XX) for this dis- cussion. -
Page 40: Shift Register
One pole of each LED is connected to ground. Other poles are connected to pins on the 20-pin connector (J5) on the CPU Board (061-0160-XX). See also Table 4.2.1. Lines 1 through 5 and 12 through 15 of J5 carry the push button switch connec- tions to CPU Board CPLD (U2). FONIX 7000 Maintenance Manual... -
Page 41: 7020 Sound Chamber
7000 Switch Pattern CON1 Switch CON1 Switch 1-12 F1 (SW21) 4-12 Up (SW19) 1-13 F2 (SW1) 4-13 Down (SW5) 1-14 F3 (SW12) 4-14 Left (SW9) 1-15 F4 (SW15) 4-15 Right (SW6) 2-12 F5 (SW20) 5-12 Stop (SW22) 2-13 F6 (SW2) 5-13 Start (SW16) 2-14... -
Page 42: Sound Chamber Board (061-0084-Xx)
(hand held cable connected remote control) and accessories. The Quik-Probe remote module includes 4 circuit boards: a. Probe Keyboard (P/N 061-0163-XX) b. Preamp Board (P/N 061-0088-XX) c. Probe Connector Board (P/N 061-0164-XX) d. EQ Board (P/N 061-0010-XX) FONIX 7000 Maintenance Manual... -
Page 43: Probe Interface Board (061-1089-Xx)
4.9.1 Probe Interface Board (061-1089-xx) The 7000 Interface Board has the following functions: Refer to 7000 Probe Interface Board schematics (drawing 999-2437-XX through 999- 2439-XX) for the following discussion. a. Provides electrostatic discharge protection for the 7000 remote module con- nector. -
Page 44: Interface Board Cpu Addresses
Remote module mic select; 0 = probe mic; 1 = ref Normally 1; set to 0 then back to 1 to reset the key sense R-S flip flops after reading the remote mod- ule keyboard D2 D3 D4 D5 SPARE D8 - D15 Not used FONIX 7000 Maintenance Manual... -
Page 45: Probe Keyboard (061-0163-Xx)
4.9.2 Probe Keyboard (061-0163-xx) There are only passive circuit elements on the keyboard. The keyboard connects the remote module to the 7000 cable to the preamp board. It contains etched switch contacts for use with silicon rubber switch buttons. Each switch, when pressed, will connect keyboard data lines to keyboard ground (or via 100 ohms to chassis). -
Page 46: Probe Connector Board (061-0164-Xx)
There are only passive circuit elements on the connector board: a. The probe/reference microphone connector. b. The probe monitor headphones jack. b. The probe monitor headphones level control. Refer to Probe Connector Board schematic (drawing 999-2342-XX). FONIX 7000 Maintenance Manual... -
Page 47: Preamp Board (061-0088-Xx)
4.9.4 Preamp Board (061-0088-xx) 4.9.4.1 Ref Mic Preamp: U6 provides a high impedance load for the reference microphone and also a small amount of gain to allow calibration pot VR2 to be centered for the “aver- age” reference microphone. 4.9.4.2 Probe Preamp: U2 provides a high impedance load for the probe microphone. -
Page 48: Power Supplies
The EQ board contains a high frequency boost circuit (pins 1, 2 and 3) and a low pass filter (pins 4, 5, 6 and 7) to remove frequencies above the 8000 Hz measurement limit of the 7000. FONIX 7000 Maintenance Manual... -
Page 49: Calibration
5. Calibration There are few calibration adjustments on the 7000, both external and internal to the instrument. Those available are covered in this section. Microphones There are three possible microphones on the FONIX 7000 analyzer: • Coupler microphone (M1750E or M1950E) • Probe microphone • Reference microphone There are several variations of these microphones that may be available, depending upon when the analyzer was manufactured and whether or not it includes the Real- ear Option. - Page 50 Turn on the sound level calibrator. Adjust the "Microphone Gain" pot on the back of the 7000 so that the "Coupler microphone" read- ing agrees with the calibrator level. Figure 5.1.1: Coupler microphone inserted into sound calibrator. FONIX 7000 Maintenance Manual...
- Page 51 5.1.2 Calibrating the Probe Microphone From the Opening Screen, press [MENU] to enter the Setup Menu. Press F6 to enter the Microphone Calibration screen. Use the down arrow key to select "Probe Microphone." Put the 14-mm-to-1 inch microphone adapter into the sound level calibrator. Attach a new probe tube to the probe microphone.
- Page 52 5.1.4 Calibrating the 14-mm Reference Microphone Follow the instructions found in Section 5.1.3. However, instead of using the rect- angular reference microphone adapter, use the 14-mm-to-1 inch adapter. See Figure 5.1.1. FONIX 7000 Maintenance Manual...
-
Page 53: Service And Repair
6. Service and Repair 6.1 Fuse Replacement If a fuse is blown for some reason, replace it with a like kind and voltage rating. 6.1.1 Line Fuse Replacement To change the line fuse, first unplug the line cord from the power entry module. Then using a small screwdriver, pry the top of the module off at the notch near the line cord socket. -
Page 54: Removal And Replacement Of Circuit Boards
Note that these boards do not have guides to restrict lateral move- FONIX 7000 Maintenance Manual... -
Page 55: Replacement Of Bezel
ment. The board should now be free to remove from the instrument. When board is installed into electronics module, reverse the procedure for removal. Note that when boards are installed, the small cable connectors that go to them are color coded. Each connector has a specific color and a color dot marking one end, usually at pin number 1 of the connector. -
Page 56: Replacement Of Switched Power Entry Module
Reassembly of the keyboard should be done in reverse order. Keyboard-to-bezel nut torque: 35 in-oz +/- 5 in-oz. It is critical that keyboard-to-bezel nuts are not over torqued. If silicone keypad material to overcompressed, the keys will not be properly vented, and key function may be compromised. 6.2.5 Replacement of Switched Power Entry Module Remove the wraparound (see 6.2.1). - Page 57 Reassemble new switching power supply in reverse order. Note, if substitute retain- ing screws are used, maximum thread length shall not exceed ¼" . Potential dam- age and/or short circuit may occur to switching power supply and/or instrument if screw contacts circuit board in switching power supply. Chapter 7: Maintenance...
- Page 58 FONIX 7000 Maintenance Manual...
-
Page 59: Maintenance
7. MAINTENANCE For your safety, disconnect the 7000 from main power while cleaning. Wipe the 7000 with a slightly moist but not dripping cloth. Use plain water or water with mild dishwashing detergent. Wipe away any detergent with a slightly moist cloth, then dry the 7000. - Page 60 FONIX 7000 Maintenance Manual...
-
Page 61: Safety Information
8 Safety Information 8.1 Rear Panel Safety Markings Symbol Meaning “FOR CONTINUED PROTECTION AGAINST FIRE AND ELECTRI- CAL SHOCK, REPLACE ONLY WITH SAME TYPE AND RATING FUSE.” The fuse specifications indicated on the 7000 Rear Panel are as fol- lows: Marking: T 630mAL Type:... -
Page 62: Safety Classification For Iec 60601-1
8.2 Safety Classification for IEC 60601-1 Type of protection against electric shock: Class 1 Degree of protection against electric shock: Type B Protection against harmful ingress of water: Ordinary Mode of operation: Continuous The 7000 does not require sterilization or disinfection. Warning: This equipment is not suitable for use in the presence of a flammable anaesthetic mixture with air or with oxygen or nitrous oxide. -
Page 63: Disposal Of The 7000 And Accessories
2. Increase the distance between the 7000 and the receiver. 3. Connect the 7000 to a different outlet than the receiver. In some cases radio transmitting devices, such as cellular telephones, may cause interference to the 7000. In this case try increasing the distance between the trans- mitter and the 7000. - Page 64 FONIX 7000 Maintenance Manual...
-
Page 65: Electromagnetic Compatibility
IEEE 1284 Accessories with which the 7000 complies with IEC 60601-1-2 Description Manufacturer Model/Part Number Sound Chamber Frye Electronics, Inc. 7020 Coupler Microphone Frye Electronics, Inc. M1950E LCD VGA monitor Warning: The 7000 should not be used adjacent to or stacked with other equipment. - Page 66 CISPR 11 those directly connected to the public low-voltage power supply network that Harmonic emissions supplies buildings used for domestic Class A purposes. IEC 61000-3-2 Voltage fluctuations/ flicker emissions Complies IEC 61000-3-3 FONIX 7000 Maintenance Manual...
- Page 67 Guidance and manufacturer’s declaration – electromagnetic immunity The 7000 is intended for use in the electromagnetic environment specified below. The customer or the user of the 7000 should assure that it is used in such an environment. Immunity test IEC 60601 Compliance level Electromagnetic environ- test level...
- Page 68 Voltage dips, <5% U <5% U Mains power quality short interrup- (>95% dip in U (>95% dip in U should be that of a typi- tions and volt- for 0.5 cycle for 0.5 cycle cal commercial or hos- age variations pital environment.
- Page 69 Guidance and manufacturer’s declaration – electromagnetic immunity The 7000 is intended for use in the electromagnetic environment specified below. The customer or the user of the 7000 should assure that it is used in such an environment. Immunity test IEC 60601 test level Compliance Electromagnetic environment level...
- Page 70 NOTE 1 At 80 MHz and 800 MHz, the separation distance for the higher frequency range applies. NOTE 2 These guidelines may not apply in all situations. Electromagnetic propagation is affected by absorption and reflection from structures, objects and people. FONIX 7000 Maintenance Manual...
-
Page 71: Schematics
10. Schematics PAGE CIRCUIT BOARD DESCRIPTION PART # DRAWING # 7000 CPU Board, CPU Section 061-0160-XX 999-2295-XX 7000 CPU Board, VGA Display Interface 061-0160-XX 999-2296-XX 7000 CPU Board, Keyboard Interface 061-0160-XX 999-2297-XX 7000 CPU Board, Top Bus Interface 061-0160-XX 999-2298-XX 7000 CPU Board, RS232 Ports 061-0160-XX 999-2299-XX... - Page 72 7000 Power Distribution Wiring 999-2420-XX 7000-to-7020 Cable 119-0204-XX 999-2424-XX 7020 Sound Chamber Wiring 999-2445-XX M400 Microphone 999-2446-XX M1950E Microphone 999-2535-XX Printer Wiring 999-2448-XX 7000/6500 Telewand Telecoil 043-1053-XX 999-2645-XX 7000 Probe interface board cable dist. 999-2667-XX M757 Microphone M757 999-2859-XX FONIX 7000 Maintenance Manual...
Need help?
Do you have a question about the FONIX 7000 and is the answer not in the manual?
Questions and answers