Table of Contents
Advertisement
Quick Links
Advertisement
Table of Contents

Related Manuals for Innoband 8520-B1

Summary of Contents for Innoband 8520-B1
- Page 1 Innoband 8520-B1 User Manual Version 1.0...
- Page 2 Innoband is a trademark of Innoband Technologies, Inc. The trademarks, logos and service marks (“Marks”) displayed on this manual are the property of Innoband or other third parties. Users are not permitted to use these Marks without the prior written consent of Innoband or such third party that may own the Mark. IBM is a registered trademark of International Business Machines Corporation.
-
Page 3: Table Of Contents
Table Content Getting started ...................... 5 Unpacking......................5 Choosing right place for your Device ..............5 Subscription of Internet Service ................6 Overview ......................6 Physical Outlook ....................7 Front Panel ......................7 LED Status ......................7 Rear Panel ......................8 System Requirement ................... - Page 4 Diagnostics .......................52 Management .....................53 System Log ....................53 SNMP Agent ....................54 TR-069 Client ....................55 Internet Time ....................56 Access Control / Passwords ................57 Backup ......................58 Update Software .....................59 Reboot ......................60 Exit ........................61 Back to Wizard ....................61 Troubleshooting ....................62 Problems with LAN access ...................62 Problems with WAN access ..................62 Product specification .....................63 Product specification ..................63...
-
Page 5: Getting Started
Power Adapter and Cord RJ-11 DSL Line Cable (Grey) RJ-45 Ethernet Cable (Yellow) Quick Start Guide Verify that the following items came with your INNOBAND 8520-B1 kit: INNOBAND 8520-B1 Quick Start Guide ADSL cable Ethernet cable (gray) (yellow) CD-ROM... -
Page 6: Subscription Of Internet Service
IP addresses varies according to different service provider. Overview Thank you for choosing the Innoband 8520-B1. The Router lets you access the Internet via a wireless connection or through one of its four switched ports. You can also use the Router to share resources such as computers, printers and files. -
Page 7: Physical Outlook
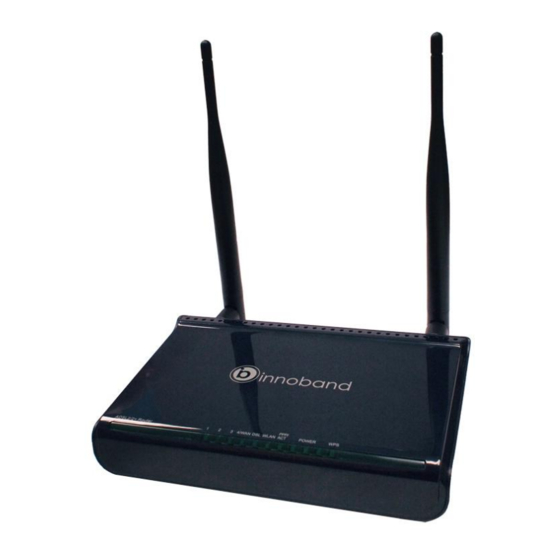
Physical Outlook Front Panel The following picture, show the front panel of the DSL Router: LED Status The ADSL WLAN Router is equipped with LED’s on the front panel as described in the table below (from left to right): Color Status Description Always On... -
Page 8: Rear Panel
Rear Panel The ADSL WLAN Router is equipped with Connectors/Switches on the rear panel as shown in the picture below: The ADSL WLAN Router is equipped with Connectors on the rear panel as described in the table below (from left to right): Connector Desription RJ-11 connector for DSL... -
Page 9: Install Your New Device
Install your new device Connect your Router This chapter is to help you accessing into Internet with a quick and convenient way. If you need more detailed information for web configuration, please get into the next chapter for the advanced configuration. NOTE: To configure the device via web browser, at least one properly-configured PC must be connected to the network (either connected directly or through an external hub/switch to the LAN port of the device). -
Page 10: Configure The Pc (Tcp/Ip Settings) Introduction
Configure the PC (TCP/IP settings) Introduction You will learn how to configure your computer to communicate with the Innoband ADSL Router. To do this, you will need to configure your PC’s network settings to obtain an IP address automatically. Computers use IP addresses to communicate with each other across a network or the Internet. -
Page 11: Configure The Pc (Tcp/Ip Settings) For Windows Xp
4. Select Obtain an IP address automatically and click OK on the subsequent screens to complete the PC’s configuration. 5. Restart your computer. Configure the PC (TCP/IP settings) for Windows XP The following instructions assume you are running Windows XP’s default interface. If you are using the Classical interface (where the icons and menus look like previous Windows versions), please follow the instructions for Windows 2000. -
Page 12: Configure The Pc (Tcp/Ip Settings) For Windows Vista
4. Select Obtain an IP address automatically and click OK on the subsequent screens to complete the PC’s configuration. 5. Restart your computer. Configure the PC (TCP/IP settings) for Windows Vista 1. Click on Start -> Control Panel. Click on the Network and Sharing Centre icon. -
Page 13: Configure The Pc (Tcp/Ip Settings) For Windows 7
4. Select Obtain an IP address automatically and click on OK on the subsequent screens to complete the PC’s configuration. 5. Restart your computer. Configure the PC (TCP/IP settings) for Windows 7 1. Click on Start -> Control Panel. Click on the Network and Sharing Centre icon. -
Page 14: Configure The Pc (Tcp/Ip Settings) For Mac Os 9.X
4. Select Obtain an IP address automatically and click on OK on the subsequent screens to complete the PC’s configuration. 5. Restart your computer. Configure the PC (TCP/IP settings) for Mac OS 9.x 1. From the Apple Menu, point to Control Panels and then click TCP/IP. 2. - Page 15 2. Click on the Network icon in the Internet & Network area. 3. From the Show pull-down select Built-in Ethernet. On the TCP/IP tab, select Using DHCP from the Configure pull-down menu. 4. On the PPPoE tab, make sure that the Connect using PPPoE check box is NOT activated.
-
Page 16: Web Configuration
Web configuration After setting up the Router with the Setup Wizard (located on the CD-ROM), the Router will be ready for use. However, if you’d like to change its advanced settings, use the Router’s web-based utility. This chapter describes each web page of the utility and each page’s key functions. - Page 17 Status: Shows you the current status of your ADSL router VPI (Virtual Path Identifier): Identifies the virtual path between endpoints in an ATM network. The valid range is from 0 to 255. To enter the setting, please refer to the setting that the ISP gave you. VCI (Virtual Channel Identifier): Identifies the virtual channel endpoints in an ATM network.
-
Page 18: Access To The Router Advanced Configuration
Access to the Router advanced configuration If you want to go deeper into the configuration of you Router, please enter the setup wizard screen below (as explained above) and then click “Advanced Settings” on the upper right corner as shown in the figure below: A login screen will appear. -
Page 19: Info
Info The first screen that appears is the Info screen under the Info tab. This displays information about the Router and its current settings. Under the main tab Info you have the following additional tabs: Device Information, DSL Line, Internet Connection, Traffic Statistics, DHCP Table, Wireless Clients, Routing Table and ARP Table. -
Page 20: Wan
This page displays the connection information for your router, such as PVC Name, Category, Protocol, invoking NAT and QoS or not, WAN IP address and the connection Status Traffic Statistics This table shows the records of data going through the LAN and WAN interface. Route The Routing Table screen displays all of the current routing rules in your router. -
Page 21: Arp Table
ARP Table The ARP Table screen displays all of the IP-to-physical address translation entries recorded in your router. -
Page 22: Advanced Configuration
Advanced Configuration The Advanced Configurations are available under the Advanced Setup tab. Connection Mode This router supports two connection modes: DSL mode and Ethernet mode. Select DSL mode, if you access Internet through telephone line and Ethernet mode through network cable. -
Page 23: Wan Service
WAN Service In DSL mode, you are required to configure parameters for ATM interface. To enter the ATM Interface page, click “Advanced Setup”---“Connection Mode” (Select DSL mode and click “Apply”)--- “WAN Service”---ATM Interface. And then click “Add” to configure the relevant parameters. On this page, you can configure VPI and VCI values (consult your local ISP if you are not clear). -
Page 24: Lan
service. It is the idea service for timely and fixed bandwidth. Non Realtime VBR/ Realtime VBR: This service mode provides assurance such as latency and bit loss rate and is often associated with video and time sensitive service. None Realtime VBR allows more time delay than Realtime VBR. - Page 25 Enter the desired settings and click Apply/Save to activate the new IP settings. Note: I you have changed the settings of your LAN you need to adapt the connected devices with the new LAN Settings to access the Internet.
-
Page 26: Dhcp Settings / Client
DHCP Settings / Client This page displays DHCP client’s information such as host name, MAC address, IP address, and lease time. NAT / Virtual Server Virtual Server allows you to direct incoming traffic from WAN side (identified by Protocol and External port) to the Internal server with private IP address on the LAN side. The Internal port is required only if the external port needs to be converted to a different port number used by the server on the LAN side. - Page 27 To allow a virtual server, click Add. After that, the following screen will appear: 1. Use Interface: Select the wan interface you want the service to traffic from. 2. Service Name: Select a service from service list or enter a service name in Custom Service field.
-
Page 28: Nat / Port Triggering
NAT / Port Triggering Some applications such as games, video conferencing, remote access applications and others require that specific ports in the Router's firewall be opened for access by the applications. You can configure the port settings from this screen by selecting an existing application or creating your own (Custom application) and click "Apply/Save"... -
Page 29: Nat / Dmz Host
3. Triggered Port: For each application, enter the starting and ending port numbers of the triggered port number range. Check with the Internet application documentation for the port number(s) needed. 4. Triggered Protocol: Select the triggered protocol, TCP or TCP/UDP. 5. -
Page 30: Security / Ip Filtering Outgoing
Security / IP Filtering Outgoing By default, all outgoing IP traffic from LAN is allowed, but some IP traffic can be BLOCKED by setting up filters. To add outgoing IP filters, click Add: The feature allows you to create a filter rule to identify outgoing IP traffic by specifying a new filter name and at least one condition below. -
Page 31: Security / Ip Filtering Incoming
Security / IP Filtering Incoming When the firewall is enabled on a WAN or LAN interface, all incoming IP traffic is BLOCKED. However, some IP traffic can be ACCEPTED by setting up filters. By default, the firewall on wan interface is enabled, the Router allows the following incoming IP filters on Interface ppp0: ICMP, http, telnet, snmp. -
Page 32: Security / Url Filter
Security / URL Filter To use URL filter, first select URL List Type: Exclude or Include URL filter, then click Add. The following screen will appear, after you click Add. 1. URL Address: Enter the URL Address you want to filter 2. -
Page 33: Time Restriction
Time restriction This feature can do a time restriction to a special LAN device connected to the Router. A maximum 16 entries can be configured. To add a time restriction, click Add. 1. User Name: Enter the user name which you want to restrict. 2. -
Page 34: Quality Of Service
Quality of Service QoS (Quality of Service) is an industry-wide initiative to provide preferential treatment to certain subsets of data, enabling that data to traverse the Internet or intranet with higher quality transmission service. If the “Enable QoS” checkbox is selected, choose a default DSCP mark to automatically mark incoming traffic without reference to a particular classifier. -
Page 35: Quality Of Service / Queue Config
Quality of Service / Queue Config The screen allows you to configure a QoS queue entry and assign it to a specific network interface. Each of the queues can be configured for a specific precedence. The queue entry configured here will be used by the classifier to place ingress packets appropriately. Click Add, to add a new Queue configuration... -
Page 36: Routing / Default Gateway
1. Name: The name of the configured rule. 2. Interface: Enable/Disable the rule. 3. Precedence: The interface that needs to configure priority. Precedence: Set a priority for the selected interface. To Apply or save the queue, click Apply/Save. Routing / Default Gateway Gateway is the path for sending packets when your computer is communicating with computers on other networks. -
Page 37: Routing / Static Route
settings. Routing / Static Route A static route is a pre-determined pathway that network information must travel to reach a specific host or network. A maximum 32 static route entries can be configured. To add a Static Route, click Add. -
Page 38: Dns / Dns Server
1. Destination IP Address: The address of the remote network or host to which you want to assign a static route. 2. Use Interface: This interface tells you whether the Destination IP Address is on the LAN &Wireless (Ethernet and wireless networks) or the WAN (Internet). -
Page 39: Dynamic Dns
After entering the DNS server IP address, click “Apply/Save” to save the settings. Note: After saving the settings, you need to reboot the router to bring the new configuration into effect. Please keep the default settings if there’s no special requirement for incorrect DNS settings will cause the LAN computer to be unable to access the Internet via the domain name. - Page 40 1. DDNS provider: Select the DDNS service provider you use, DDNS screen will vary depending on which DDSN service provider you use. 2. Hostname: This is the DDNS URL assigned by the DDNS service. 3. Interface: Select the interface 4. Username / Password: Enter the Username/Password for your DDNS account.
-
Page 41: Dsl
The screen configures the DSL settings. These settings should only be adjusted by an expert administrator. Click the checkbox to enable corresponding modulation modes, and then click “Apply/Save” to complete the settings. UPnP Universal Plug and Play (UPnP) allows Microsoft Windows to automatically configure the Router for various Internet applications, such as gaming and video conferencing. -
Page 42: Interface Grouping
Interface Grouping Interface Grouping supports multiple ports to PVC and bridging groups. Each group will perform as an independent network. Click Add to create new interface group. To support Interface Grouping feature, you must create mapping groups with appropriate LAN and WAN interfaces. Then click Save/Apply. Only the default group has IP interface. - Page 43 Grouped LAN Interfaces list. Available LAN interfaces These are the available LAN interfaces on 8520-B1. Automatically Add Clients Configure a DHCP vendor ID. Any DHCP client with the following DHCP...
-
Page 44: Multicast / Igmp Configuration
Multicast / IGMP Configuration You can configure IGMP parameters on this screen, if you are not clear about the IGMP, we recommend using the default configuration. If you want to modify the configured parameters, please make sure whether the router’s IGMP feature is enabled. -
Page 45: Wireless
Wireless The Wireless Configurations are available under the Wireless tab. Basic To set the basic configuration for the wireless features, please open Basic item from the Wireless menu. To enable the Wireless Network, select Enable Wireless and click Apply/Save. You will get the screen below. -
Page 46: Security
WPS (Wi-Fi protected Setup). WPS uses a push- button or a PIN to simplify the secure network setup. With WPS, 8520-B1 can automatically set the SSID or network name as part of the setup process and provide strong encryption keys to client devices. - Page 47 successfully connected. 3. PIN: To use PIN, you must know wireless client’s PIN code and input it in its text box, then save this configuraton. Meanwhile, use the same PIN code in the client for connection. Note: The WPS feature only functions with wireless network available. Network Authentication: To secure your wireless network, system provides several authentication modes: ...
- Page 48 WPA Group Rekey Interval: Enter a Key Renewal period. WPA Encryption: WPA supports 3 methods TKIP (default), AES and TKIP+AES with dynamic encryption keys. 5. WPA2: WPA Encryption: The default is AES. 6. WPA2-PSK: WPA Encryption: The default is AES. 7.
-
Page 49: Mac Filter
MAC Filter Wireless access can be filtered by using the MAC addresses of the wireless devices transmitting within your network’s radius. To filter wireless users by MAC Address, select Allow or Deny according to your demand. If you do not wish to filter users by MAC Address, keep the default setting, Disabled. If you want to add a MAC Filter, click Add. -
Page 50: Wireless Bridge
Wireless Bridge This page allows you to configure wireless bridge features of the wireless LAN interface. You can select Wireless Bridge (also known as Wireless Distribution System) to disable access point functionality. Selecting Access Point enables access point functionality. Wireless bridge functionality will still be available and wireless stations will be able to associate to the AP. - Page 51 Click Refresh, to refresh the Authenticated Stations list.
-
Page 52: Diagnostics
Diagnostics The Diagnostics are available under the Diagnostics tab. To check the link status for the network and your computer, a diagnostic test can guide you to detect the network problem. The testing items are listed and accomplished one by one. If the previous one is failed, than the items below that failed one will be failed too. -
Page 53: Management
Management The Management Settings are available under the Management tab. System Log The System Log dialog allows you to view the System Log and configure the System Log options. To view the System Log, click Enable, then click View System Log. -
Page 54: Snmp Agent
SNMP Agent Simple Network Management Protocol (SNMP) is a troubleshooting and management protocol that is used to communicate between clients and servers. The DSL device can be monitored locally or remotely by SNMP Click Save/Apply, to apply the SNMP Configuration setting. -
Page 55: Tr-069 Client
TR-069 Client WAN Management Protocol (TR-069) allows a Auto-Configuration Server (ACS) to perform auto-configuration, provision, collection, and diagnostics to this device. 1. ACS URL: Enter the URL of the ACS (Auto Config Server) you used. 2. ACS User Name/Password: Enter the user name and password of your ACS account. 3. -
Page 56: Internet Time
Internet Time The router’s clock must synchronize with global Internet’s time. The time you set in the screen will be adapted to system log. 1. Automatically synchronize with Internet time servers: If you want the router to Automatically synchronize with Internet time servers, select this item to enable it. -
Page 57: Access Control / Passwords
Access Control / Passwords Access to your DSL router is controlled through three kinds of user rights: admin, support, and user. Currently only one is available. 1. Username: Admin: The admin has unrestricted access to change and view configuration of your DSL Router. Only available in customized version: Support: Is used to allow an ISP technician to access your DSL Router for maintenance and to run diagnostics. -
Page 58: Backup
Backup To backup your configuration for the router to your computer, you can use Management Settings Backup web page to save the settings. To save the Backup Settings, click Backup Settings and save the file on your PC. Update To restore the DSL router settings, you may restore your router settings using your saved files. -
Page 59: Update Software
1. Settings File Name: Browse the saved Config file on your PC and click OK. 2. To restore the browsed Backup Settings, click Update Settings. Settings / Restore Default Restore DSL router settings to the factory defaults. Note: Do not restore the factory defaults unless you are having difficulties with the Router and have exhausted all other troubleshooting measures. -
Page 60: Reboot
NOTE: The Router may lose the settings you have customized. Before your upgrade the firmware, write down all of your custom settings. After you upgrade the firmware, you will have to re-enter all of your configuration settings. 1. Step 1: Obtain an updated software image file form your ISP. -
Page 61: Exit
Exit Select the Exit menu and click Ok on the appearing dialog to log out from the router’s web- based utility. Back to Wizard Click Back to Wizard menu, you will come back to the router’s Quick setup... -
Page 62: Troubleshooting
Troubleshooting If the suggested solutions in this section do not resolve your issue, contact your system administrator or Internet service provider. Problems with LAN access PCs on the LAN cannot get IP addresses from the Router The chances are that the interface used as DHCP server is modified and the client PCs do not renew IP addresses. -
Page 63: Product Specification
Product specification Product specification NOTE: Please Refer to the Datasheet_Innoband_8520-B1.pdf on your CD-ROM... -
Page 64: Safety Notes
Safety Notes For Installation Use only the type of power source indicated on the marking labels. Use only power adapter supplied with the product. Do not overload wall outlet or extension cords as this may increase the risk of electric shock or fire. -
Page 65: Caution
this device must accept any interference received, including interference that may cause undesired operation. Caution Any changes or modifications not expressly approved by the party responsible for compliance could void the authority to operate equipment. -
Page 66: Glossary
Glossary 3G - Third Generation network 3G refers to the third generation of mobile telephony technology. The evolution of 3G technology is as follows: 802.11 (b, g, n) A set of WLAN communication standards in the 2.4, 3.6 and 5 GHz frequency bands Access Point A device that allows wireless communication devices to connect to a wireless Network using a standard such as Wi-Fi... - Page 67 If you enable DHCP server on a private IP address, a public IP address will have to be assigned to the NAT IP address, and NAT has to be enabled so that the DHCP IP address can be translated into a public IP address. By this, the client PCs are able to access the Internet. DHCP Server A server or service with a server that assigns IP addresses.
- Page 68 HSPA - High Speed Packet Access A family of 3G services that is available to GSM carriers. It is a major enhancement from WCDMA. HSUPA - High Speed Uplink Packet Access A 3G mobile telephony protocol with up-link speeds up to 5.76 Mbps. HTTP - Hypertext Transfer Protocol An application-level protocol for accessing the World Wide Web over the Internet.
- Page 69 NAT - Network Address Translation - IP Address NAT is an Internet standard that translates a private IP within one network to a public IP address, either a static or dynamic one. NAT provides a type of firewall by hiding internal IP addresses.
- Page 70 PRL - Preferred Roaming List A list that your wireless phone or device uses to determine which networks to connect with when you are roaming. (Network operator specific) Protocol A standard that enables connection, communication, and data transfer between computing endpoints.
- Page 71 UA - User Agent Any device or software used to access a web page. A user agent might be a web browser, a smart phone, or a screen reader. UDP - User Datagram Protocol UDP is a connectionless transport service that dispenses with the reliability services provided by TCP.
- Page 72 Wi-Fi - Wireless Fidelity Any system that uses the 802.11 standard developed and released in 1997 by the IEEE (Institute of Electrical and Electronics Engineers) Wi-Fi Client A wireless device that connects to the Internet via Wi-Fi. WLAN - Wi-Fi LAN A typically low-power network that transmits a wireless signal over a span of a few hundred feet and usually only to stationary devices.
-
Page 73: Certifications
But if it does, the user will be required to correct the interference at his or her own expense. The authority to operate this equipment is conditioned by the requirement that no modifications will be made to the equipment unless Innoband expressly approves the changes or modifications. - Page 74 FCC Part 68 Notice This equipment complies with Part 68 of FCC Rules. On the base unit of this equipment is a label that contains, among other information, the FCC Registration Number and Ringer Equivalence Number (REN) for this equipment. IF REQUESTED, THIS INFORMATION MUST BE GIVEN TO THE TELEPHONE COMPANY.
-
Page 75: Warranty
Warranty Innoband warrants that equipment furnished will be free from defects in material and workmanship for a period of one year from the confirmed date of purchase of the product new from the retail location. Upon written notice of any such defect, the manufacturer will, at its option, repair or replace the defective item under the terms of this warranty, subject to the provisions and specific exclusions listed herein. - Page 76 Registration Card Innoband 8520-B1 Product Registration Name: Company: Address: City/State/Zip: Phone: E-mail: Serial Number: Purchased from: Date of Purchase: Please cut out the above Product Registration Card and send in with a self-addressed stamped envelope Innoband Technologies, Inc. 2526 Qume Dr. Ste 21...
-
Page 77: Contact Information
Contact information We would more than love to help if you have further technical questions, please visit our Website at http://www.innoband.com or send E-mail to support@innoband.com Company Address Innoband Technologies, Inc 2526 Qume Dr. Ste 21 San Jose, CA 95131...
Need help?
Do you have a question about the 8520-B1 and is the answer not in the manual?
Questions and answers