Table of Contents
Advertisement
Quick Links
User manual
LSK FuelGaugePro2
Digital Universal Floatless Fuel gauge
Thank you for showing interest in our products. I strongly advise you to read this user
manual thoroughly. It contains important instructions about installation, setup and use of the
gauge. By obeying these instructions, the product will reward you with long time flawless
functionality.
Rev. 1.3, Date: 28.5.2018
1
Advertisement
Table of Contents

Subscribe to Our Youtube Channel
Related Manuals for LSK FuelGaugePro2


Summary of Contents for LSK FuelGaugePro2
- Page 1 User manual LSK FuelGaugePro2 Digital Universal Floatless Fuel gauge Thank you for showing interest in our products. I strongly advise you to read this user manual thoroughly. It contains important instructions about installation, setup and use of the gauge. By obeying these instructions, the product will reward you with long time flawless functionality.
-
Page 2: Table Of Contents
This device is useful for a motorcycles (and ultralight aircrafts, excavators, tractors etc.) without the built-in float in the tank. LSK FuelGaugePro2 is easy to setup for a wide range of fuel tanks. It's function is based on measuring of the hydrostatic pressure of the fuel. Advantage of this principle is minimal installation intervention (no need to make any holes into the fuel tank). -
Page 3: Main Features
two units, sensor unit and display unit. The universal fuel gauge must be calibrated before using. The working principle not allows to connect the gauge to hose, into which the fuel is drawn by the fuel pump. It cannot be used on bikes without on-board battery. The electricity from the generator is too •... -
Page 4: Package Contents
Package contents ✔ FuelGaugePro sensor unit ✔ LED display unit ✔ Permanent magnet for setup ✔ Fuel hose for connecting to the fuel system ✔ Plastic pipe T shape three way quick connector ø6mm ✔ Plastic pipe T shape three way quick connector ø8mm ✔... -
Page 5: Usage Restrictions
Usage restrictions Fuel Pump: External Fuel Pump: Fuel Tank Air Intake: CAUTION: We cannot guarantee the correct function on all motorcycles with a fuel pump. The external fuel pump may cause problems with measuring on some motorcycles. If this problem occurs, you can return FuelGauge to us and we will return your money back to you. -
Page 6: Device Mounting
Device mounting Find a suitable place for the sensor It can be over or under the fuel tank. It is better to mount it under the fuel tank and fill the hose up with fuel. This will make the gauge the most accurate. Do not place the unit on hot places. -
Page 7: Placement With The External Fuel Pump
Placement with the external fuel pump... -
Page 8: The Fuel Gauge Sensor Alternative Placement
The fuel gauge sensor alternative placement... -
Page 9: Electrical Parts Connection
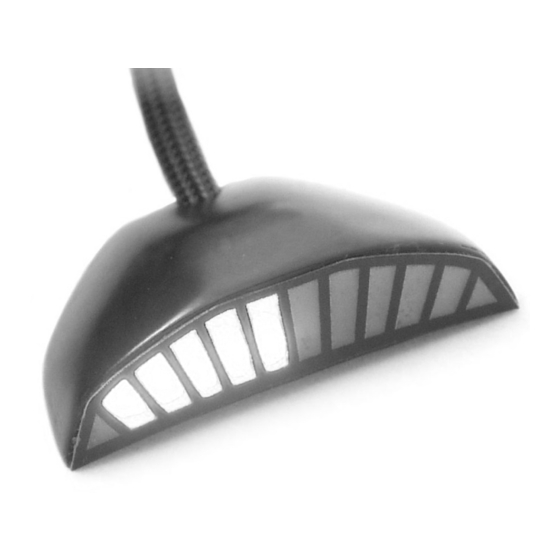
Electrical parts connection Pressure sensor: See previous chapter „Find a suitable place for the sensor “. Display: Pick a suitable place and secure it. If you decide to use tape, clean the surface before mounting the display (using degreasing agent – ethanol or other). Supply leads: Connect over the ignition switch, then the gauge will be switched on together with the ignition key. -
Page 10: Connect The Gauge To The Fuel Hose
Connect the gauge to the fuel hose Connection should be made according to the two pictures on previous page. Do not forget to secure the hoses with the clips included in the package. Check the system for any fuel leaks after a few kilometres and also after longer distances periodically. -
Page 11: Display Settings
3) Insert "calibration nozzle" into fuel hose under T-shape fuel connector and insert it into the jerry can. 4) Prepare Auto-calibration with setup button (settings menu diagram is in next chapter) 5) Open fuel cock and wait a few seconds 6) Start Auto-calibration process by setup button (by confirming menu item) 7) Autocalibration process will be automatically terminated when the fuel level reached the fuel cock. -
Page 12: Restore Default
Reverse display: With this settings, the order of LEDs can be reversed. Different between normal and reverse mode of displaying a same fuel level is drawn below. Reverse direction Normal direction 3) Restore Default Confirming this setup item restores device settings to default. Caution ! All saved settings and calibration data will be lost ! Setup button Setup button is located in the right corner of display. -
Page 13: Enter To The Setting Menu
Enter to the setting menu The menu is entered by holding the magnet near the sensor for ca. 2 seconds. Menu entering is confirmed by display double flashing. After double flashing event, first item from the main menu is active. The settings diagram is explained in the following chapter. For browsing the menu exists two events, first event is called "click"... -
Page 14: The Settings Diagram
The settings diagram Di splay set ting s Cal ibrati on secti on Res tore defau lt EXI T CLICK CLICK CLICK CONFIRM ( ! ! ! ) CONFIRM CONFIRM Bar/dot showing mode Empt y tan k level FACTORY RESET (all data is default !) (Min-max mode) EXIT... -
Page 15: Examples Of Various Settings
Examples of various settings Some examples of the basic settings for fuel gauge with short notes. Useful for fast using FuelFaugePro2. Basic use (Min/max mode) It's required prepared and connected device to the fuel system, fuel tank must be empty in this example.( The fuel tank may be full or empty, it depends on order of saving fuel levels. -
Page 16: Enable Dot Mode And Disable Blinking Of First Led
empty fuel tank.) The calibration process should be self terminated if fuel tank is empty. If not, manually • termination by clicking is possible. Settings menu is closed • Enable dot mode and disable blinking of first led Holt magnet near sensor for time more than 2 sec. (enter to the settings menu) •... -
Page 17: Warranty Period
device. – If the gauge flash at start but then doesn’t show anything, try checking the fuel system (connection, fuel cock on/off). – If the gauge shows nonsense and is calibrated correctly, try checking, if you filled up the fuel hoses like explained on "Device mounting"chapter. –... -
Page 18: Recycling
Recycling Worn out (broken) device should be handed to authorities on places designed for collecting old electrical devices. Packaging should be thrown out into an appropriate bin. Manufacturer LSK Motorcycle electronics Website: www.lskelectronics.com Manufactured in compliance with RoHS norm.
Need help?
Do you have a question about the FuelGaugePro2 and is the answer not in the manual?
Questions and answers