
Related Manuals for SYCLOPE electronic COOLTouch


Summary of Contents for SYCLOPE electronic COOLTouch
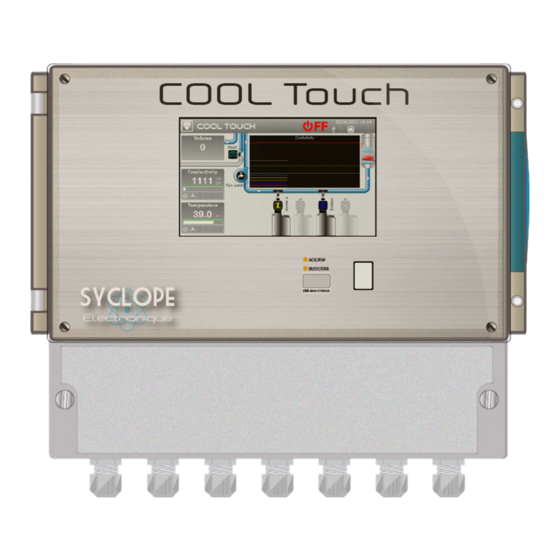
- Page 1 SYCLOPE COOLTouch ® Controller for Cooling tower managements (Part 1) Installation and starting instructions Reference: DOC0484 Rev: 1 Installation and starting instructions...
- Page 2 Part 3: Communication programming instructions General information: SYCLOPE Electronique 2021 ® Manual of 25/08/2021 Rev 1 Professional controller for cooling towers. Product line COOLTOUCH ® Part 1: Installation and starting instructions (Ref: DOC0484) Editor: SYCLOPE Electronique S.A.S. Z.I. Aéropole Pyrénées Rue du Bruscos 64 230 SAUVAGNON - France –...
-
Page 3: Table Of Contents
RS485 communication bus connections ................30 a) Connection to a USB port on a computer ..............30 b) Polarization and termination of the RS485 bus ............31 General use .........................32 Commissioning the SYCLOPE COOLTouch ® ..............33 VII. Display mode and type....................34... - Page 4 Contents Page 4/57 Main screen display ......................34 a) The upper banner....................34 b) Display details of the channels ................. 37 “Detailed” display of a channel ..................38 a) Bleed valve ......................38 b) Water flow switch ....................39 c) Biocide ........................39 d) Inhibitor / Dispersant ....................
-
Page 5: Generality
Its remarkable adaptability to the various structures of cooling towers enables him to settle in all the difficult cases where the control of the process and the water treatment in a cooling tower are decisive. Designed according to the needs of the customer, the COOLTouch ®... -
Page 6: Fcc Conformity
Generality Page 6/57 2) FCC conformity The SYCLOPE COOLTouch ® controller complies with Part 15 of the FCC Rules. Operation is subject to the following two conditions: (1) this device may not cause harmful interference (2) this device must accept any interference received, including interference that may cause undesired operation FCC Regulations state that unauthorized changes or modifications to this equipment may void the user’s authority to operate it. -
Page 7: Use Of The Document
Generality Page 7/57 3) Use of the document Please read carefully the entire document before starting the installation and the commissioning of the controller device, in order to ensure the safety of swimmers, users and equipment’s. The information provided in this document must be strictly observed. SYCLOPE Electronique S.A.S. declines all responsibility in cases where failure to comply with the instructions of this documents. -
Page 8: Storage And Transport
Page 8/57 5) Storage and transport It is important to store and to transport the SYCLOPE COOLTOUCH controller in its original packaging in order to minimize risk of damage. Furthermore, the package must be stored in an environment that is protected against humidity and exposure to chemical products. -
Page 9: Safety And Environmental Instructions
Do not use the device for measurements on the network directly, but only on the secondary circuit under very low safety voltage. 2) User obligations The user undertakes not to allow its employees to work with the SYCLOPE COOLTouch ® controller described in this manual unless they: ... -
Page 10: Identification And Location Of Nameplate
Safety and environmental instructions Page 10/57 Take care when choosing the location for installing the controller! SYCLOPE COOLTouch ® controller should not be installed in a hazardous environment and should be protected against splashing with water or chemical products. It should be installed in a dry, well-ventilated and isolated location. -
Page 11: Disposal And Conformity
Safety and environmental instructions Page 11/57 5) Disposal and conformity The recyclable packaging of the SYCLOPE COOLTouch ® equipment must be disposed of according to current regulations. Elements such as paper, cardboard, plastic or any other recyclable elements must be taken to a suitable sorting centre. -
Page 12: Technical Characteristics And Functions
Technical characteristics and functions Page 12/57 III. Technical characteristics and functions 1) Technical characteristics Main features Type(s) Specification(s) Marker(s) Consumption 6,5A Max (Without connected dosing accessories) 100 - 240 VAC (± 10%) 50/60Hz Power supply requirements Fuse 550mA, F4 & F5 Electrical protection Reset by power interruption Operating temperature (°C) -
Page 13: Main Functions
Technical characteristics and functions Page 13/57 Relay outputs 1 electronic relay output 50mA Max ; 48VAC Max Analog outputs 2 0/4…20 mA analog outputs Max ; 12VDC Max ; 500 Ω & AO2 1 24V power output ; 100mA Power output Communication port RS485 1 RS485 communication port... - Page 14 Technical characteristics and functions Page 14/57 0 to 2000 mg/l ± 0,5 % 0,02 to 2 mg/l ± 0,5 % Active chlorine 0,1 to 10 mg/l ± 0,5 % 0 to 2000 mg/l ± 0,5 % 0,01 to 0,5 mg/l ±...
- Page 15 Technical characteristics and functions Page 15/57 Installation and starting instructions...
-
Page 16: Installation Et Connections
2) Wall installation of the device Prior to installing the devices and connections of cables, pipes and fittings, cut power supplies! The IP54 protection class is guaranteed only if the closure caps of the SYCLOPE COOLTouch ® are closed and the wires correspond to the diameter of the cable gland! ►... -
Page 17: Open / Close Transparent Door
Installation et connections Page 17/57 3) Open / Close transparent door In order to guarantee IP65 class, the transparent door must absolutely be closed after use while ensuring the quality of the closure seal. The case has a closing system with automatic locking as soon as its handling is carried out correctly. -
Page 18: Tightening Torque
Otherwise, it is essential to use a crimped cable ends to ensure that no strand can come into contact with neighbouring cables! Secure the wire connections on the terminal blocks using a cable tie. SYCLOPE COOLTOUCH ® must be slaved to the filtration of the swimming pool using digital input. -
Page 19: Changing The Internal Fuse Of Po1 Output
Installation and connections Page 19/57 7) Changing the internal fuse of PO1 output SYCLOPE COOLTouch ® has a spare fuse located in position F5, which allows you to quickly replace a fuse if necessary. If you are led to using it, don’t forget to replace it…... -
Page 20: Primary Power Connections
► Connect the phase on L1 and the neutral on the N of the main terminal block X1 ► Connect the earth on the PL1 stud using an M4 eyelet terminal ► Tighten the cable gland to seal. Your SYCLOPE COOLTouch ® doesn’t have a power switch. So, it’s directly supplied when it’s connected to the mains. -
Page 21: Measurement Inputs Connections
Installation and connections Page 21/57 9) Measurement inputs connections SYCLOPE COOLTouch ® has ten inputs: 1 Input RI1 RTD isolated for (Pt100 / Pt1000) 1 Input RI2 isolated for conductivity 2 Inputs AI1 & AI2 4-20mA isolated for temperature, chlorine, bromine, etc measure ... -
Page 22: C) Isolated Analog Inputs 4
Installation et connections Page 22/57 c) Isolated analog inputs 4…20mA AI1 & AI2 Controller has 2 isolated analog inputs 4…20mA on which a chlorine, bromine, ozone, hydrogen peroxide, peracetic acid, dissolved oxygen or PHMB sensor can be connected. The definition of supported sensors is as follows: Free chlorine •... -
Page 23: D) Digital Inputs Di1 To Di5
Installation et connections Page 23/57 d) Digital inputs DI1 to DI5 Controller has 5 digital inputs on which a tank bottom, flow, R.I.C (Remote Input Control), or another sensor can be connected. The definition of supported sensors is as follows: Flow •... -
Page 24: E) Serial Input Si1
Installation et connections Page 24/57 Connection of a flowmeter sensor on DI3: Preferably use a two-strand cable. Connect one sensor strand to the DI3 sw (20) connection. Connect the other sensor strand to the DI3 - (21) connection. ... -
Page 25: Self-Powered Relays Outputs Connections Po1
Installation et connections Page 25/57 10) Self-powered relays outputs connections PO1 The self-powered PO1 power relay output (Primary supply voltage = Voltage available on P3) can be used for dosing, alarm, timer… ► Strip the 3 wires of the power cable of the dosing device on 7mm ►... - Page 26 Installation et connections Page 26/57 ► Use a 2-wire cable with a section appropriate for the voltage and current. ► Remove the protective sheath ► Strip wires on 7mm ► Pass the cable through a cable gland ► Connect a cable on the midpoint COMMUN (45) of the terminal block ►...
-
Page 27: Electronic Relay Outputs Connections Ro1
Installation and connections Page 27/57 12) Electronic relay outputs connections RO1 The electronic relay output is mainly dedicated to controlling the dosing pumps in impulse mode. It can also serve as alarm relay or be controlled in timer mode according to your needs. This relay is electronic component to make contact, it is used to drive pumps by their impulse input or to control an external power relay. -
Page 28: Ma Outputs Connections (Ao1 To Ao2)
Installation and connections Page 28/57 13) 4…20mA outputs connections (AO1 to AO2) 4…20mA outputs are used to send information to a building management system or to control a dosing device via a 4…20mA signal. The analog outputs are generative and operate with an internal voltage of 12 VDC. -
Page 29: Power Supply Output Connection (Pwr)
Installation et connections Page 29/57 14) Power supply output connection (PWR) If necessary, chlorine or bromine sensors may be used that require external power. Use a 2-wire cable. Pass the cable through a cable gland Connect the strand + of the alimentation on +24V (17) ... -
Page 30: Rs485 Communication Bus Connections
Configuration: All switches on "ON" Contact us for more information about the product. Respect the bus wiring. A USB/RS485 converter is recommended to connect the SYCLOPE COOLTOUCH ® to a computer. Please refer to converter documentation to realize the connection. -
Page 31: B) Polarization And Termination Of The Rs485 Bus
For security reasons, it’s imperative to turn OFF the power of your device before opening the case to switch the micro-switches! For more information about the RS485 converter configuration, see « DOC0461 Communication programming instructions COOLTOUCH ENG Rev1 ». Installation and starting instructions... -
Page 32: General Use
V. General use SYCLOPE COOLTOUCH ® is intended for measurement, regulation and treatment of swimming pool water. The installation of SYCLOPE COOLTOUCH ® equipment is based on the principle of measurement and regulation on the pool filter circuit. The evaporated water from the cooling tower is supplemented by new water. A stand-alone level switch keeps the water level constant. -
Page 33: Commissioning The Syclope Cooltouch
VI. Commissioning the SYCLOPE COOLTouch ® You have just made the electrical connections and the connections of the various measurement and regulation devices. You are ready to realize the commissioning of your SYCLOPE COOLTouch ® Switch ON the device. -
Page 34: Display Mode And Type
The touch screen is a resistive technology, you must press firmly on the screen to validate the action. Make sure that your SYCLOPE COOLTOUCH ® controller is correctly programmed! An excess of product, or even a mixture, can cause harmful actions on human health and the environment. - Page 35 External touch button Realize the option configured in « Menu User »; « General configuration »; « Button ». Start/Stop function set as standard. See “DOC0485 - General programming instructions COOLTOUCH ENG Rev1” for more information. Communication Info Press it to display communication information...
- Page 36 GSM connection MySyclope connection DOC0461 - Communication programming No connections to MySyclope server (See. instructions COOLTOUCH for more information) USB key detected but not compatible, not readable (USB key must be formatted in FAT32) DOC0461 - Communication programming instructions Connections to WIFI impossible (See.
-
Page 37: B) Display Details Of The Channels
Display mode and type Page 37/57 Tower indicators Manual operation Operation on timer Stop b) Display details of the channels Volume channel Type of measurement Volume Measured value & Unit Conductivity channel Type of measurement Conductivity Measured value & Unit 1111 µS/ Value higher the scale... -
Page 38: Detailed" Display Of A Channel
Display mode and type Page 38/57 Temperature channel Temperature Type of measurement Measured value & Unit 39.0 °C Value higher the scale Value lower the scale Servitude notifications area Value not displayable Empty Water Polarization in Overdose R.I.C Value unmeasurable tank level progress... -
Page 39: B) Water Flow Switch
Display mode and type Page 39/57 b) Water flow switch To open the detailed display screen, press on of the main screen. Water flow switch Input(s) used for flow switch Last flow time 43m11s Last no flow time c) Biocide Example with Biocide A To open the detailed display screen, press on of the main screen. -
Page 40: D) Inhibitor / Dispersant
Display mode and type Page 40/57 d) Inhibitor / Dispersant To open the detailed display screen, press on of the main screen. FO3 : Inhibitor - INACTIVE Start biocide cycle Clear 2m00s Total injection time Tank level not empty Fill e) Dosing mode To open the detailed display screen, press on of the main screen. -
Page 41: F) Tower Management
Display mode and type Page 41/57 Tower management To open the detailed display screen, press on of the main screen. RO1 : Operating - INACTIVE Manuel start tower Tower state unknown Stop Next time slot 00:00 12:00 Installation and starting instructions... -
Page 42: Graphical Part
Display mode and type Page 42/57 3) Graphical part Conductivity Press it to open following screen: Operating information Mesure information 27/08/2021 – 15:02 27/08/2021 – 15:02 Value: 1111 Controller state: Setpoint: 4000 Enable Hysteresis: Halt Parameter state: Circulation Enable Bleed state: Halt Free Polarization... -
Page 43: Input Mode
Input mode Page 43/57 VIII. Input mode The SYCLOPE COOLTOUCH ® controller has a 5’’ touch screen. All orders are made by pressing areas of the screen provided. 1) Setup or Settings code entry screen This screen will appear if a Setup or Setting code is programmed. -
Page 44: Alphanumeric Keyboard
Input mode Page 44/57 « OFF » button used to deactivate a value, example, deactivate an alarm threshold. 3) Alphanumeric keyboard Entry field Delete Validate Shift key Caps lock Keyboard Cancel type key Other characters key a) « Shift » key This key switch the keyboard from lowercase to uppercase and vice versa. -
Page 45: D) " Other Characters " Key
Input mode Page 45/57 d) « Other characters » key This key switch the keyboard to symbols or other characters not available in the lower and upper case. Key released lowercase uppercase mode active. => Press Key pressed other character mode active. e) «... -
Page 46: Main Input Elements
Input mode Page 46/57 4) Main input elements a) Opening a selection list Press to open a list. Open a list b) Multi selection button Check box Press to change the state Inactive/Active Multi selection version, press the item to select Press to change the state NO / NC State box... -
Page 47: Selection List
Input mode Page 47/57 Selection list Open a list When an action is symbolized by this type of button, a list will open with the corresponding elements. The “simple” list offers maximum of 6 items, in the event that the list is longer, navigation buttons will appear to move through the list. -
Page 48: G) Navigation Bar
Input mode Page 48/57 g) Navigation bar In the programming menu each selection of a function adds a button in the navigation bar. It’s possible at any time to go down one or more levels in the programming by clicking on one of the menu buttons. -
Page 49: Annexes
Annexes Page 49/57 IX. Annexes 5) “Configuration & Installation” – “Reset Factory” menu [0831] Menu Press then to open following screen. SETUP FACTORY RESET « RESET FACTORY » menu will allow you to reset the regulator configuration by choosing some pre-set operating options. - Page 50 Annexes Page 50/57 Biocide A (FO1) Biocide B (FO2) Inhibitor (FO3) Dispersant (FO4) Bleed valve (PO1) is always selected. Press « SAVE » button to validate your configuration. The following window appears asking you if you really want to clear the current configuration. The current configuration will be definitely lost.
- Page 51 Annexes Page 51/57 Installation and starting instructions...
-
Page 52: User " - " Date & Time " Menu [0311]
Annexes Page 52/57 6) « User » - « DATE & TIME » menu [0311] Menu Press then to open following screen User DATE & TIME « DATE & TIME » menu will allow you to access the configuration of the time parameters. Date and time parameters change mm/dd/yy dd/mm/yy Friday... - Page 53 Annexes Page 53/57 Automatic time change Press the time zone map (UTC +1:00) Central Africa - West (UTC +1:00) Amsterdam, Berlin, Bern, Rome, Stockholm, Vienna Scroll the list up or down, remaining (UTC +1:00) Belgrade, Bratislava, Budapest, Ljubljana, Prague pressed until the desired time zone is on (UTC +1:00) Brussels, Copenhagen, Madrid, Paris...
-
Page 54: Backup Battery Change
Annexes Page 54/57 7) Backup battery change Before changing the battery, switch off the power supply! Always use the same battery as the original. Open the transparent door and unscrew the 4 front screws using an appropriate screwdriver. Carefully disconnect the connection flat cable connecting the bottom card and the upper part of the device, ... - Page 55 Annexes Page 55/57 Remove the button cell Put the new button cell Reconnect the flat cable between the cards and reassemble the front panel using the 4 fixing screws. Don’t overtighten because the screws are fixed in the plastic case. Reconnect the flat cable and replace the front panel before switching on the power supply.
- Page 57 SYCLOPE Electronique S.A.S. Z.I. Aéropole Pyrénées 64 230 SAUVAGNON Tel: (33) 05 59 33 70 36 Fax: (33) 05 59 33 70 37 Email: service-technique@syclope.fr © 2020 by SYCLOPE Electronique S.A.S. Subject to modification.
Need help?
Do you have a question about the COOLTouch and is the answer not in the manual?
Questions and answers