
Related Manuals for SYCLOPE electronic TERE'O Touch XL


Summary of Contents for SYCLOPE electronic TERE'O Touch XL
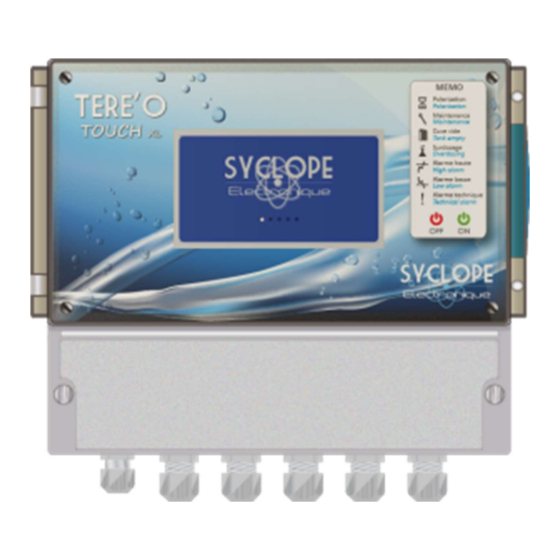
- Page 1 SYCLOPE TERE’O Touch XL ® Controller for public swimming pool (Part 1) Installation, starting and programming instructions Reference: DOC0464 Rev: 2.0...
- Page 2 General information Page 2/55 Part of the general documentation Part 1: Installation, starting and programming instructions ► Part 2: Communication instructions General information: SYCLOPE Electronique 2019-2020 ® Manual of 27/03/2020 Rev 2.0 Analysers/Controllers for swimming pools. Product line TERE’O Touch ®...
-
Page 3: Table Of Contents
Summary Page 3/55 Summary Generality ..........................4 Scope ........................... 4 FCC conformity ........................5 Use of the document ......................6 Symbols and signs ......................... 6 Storage and transport ......................7 Packaging ..........................7 Warranty ..........................7 Safety and environmental instructions ..................8 Use of the equipment ...................... -
Page 4: Generality
Generality Page 4/55 Generality 1) Scope SYCLOPE TERE’O Touch ® analyser/controller you have purchased is a high-tech electronic device. It was designed and created carefully for your enjoyment and your peace of action. Its remarkable faculty to adapt to different swimming pool structures allows it to settle in all difficult environments where mastery of water treatment is most decisive. -
Page 5: Fcc Conformity
Generality Page 5/55 2) FCC conformity The SYCLOPE TERE’O Touch ® controller complies with Part 15 of the FCC Rules. Operation is subject to the following two conditions: (1) this device may not cause harmful interference (2) this device must accept any interference received, including interference that may cause undesired operation FCC Regulations state that unauthorized changes or modifications to this equipment may void the user’s authority to operate it. -
Page 6: Use Of The Document
Generality Page 6/55 3) Use of the document Please read carefully the entire document before starting the installation and the commissioning of the controller device, in order to ensure the safety of swimmers, users and equipment’s. The information provided in this document must be strictly observed. SYCLOPE Electronique S.A.S. declines all responsibility in cases where failure to comply with the instructions of this documents. -
Page 7: Storage And Transport
Generality Page 7/55 5) Storage and transport It is important to store and to transport the SYCLOPE ODI TOUCH controller in its original packaging in order to minimize risk of damage. Furthermore, the package must be stored in an environment that is protected against humidity and exposure to chemical products. -
Page 8: Safety And Environmental Instructions
Safety and environmental instructions Page 8/55 II. Safety and environmental instructions Please: Read this manual carefully before the unpacking, the installing or the commissioning of this equipment Take into account all the hazards and of recommended precautionary measures The failure to respect these procedures can result in serious injury to users or damaging the device. -
Page 9: Identification And Localization Of The Nameplate
Safety and environmental instructions Page 9/55 Chemical sensors are sensitive elements using consumable parts. They must be supervised, maintained and calibrated regularly using specific calibrator systems not-provided with this equipment. In the event of defect, a surplus possible hazard of chemical injections can be noted. In the doubt, a service contract must be taken near your reseller/installer or failing this near our engineering services. -
Page 10: Disposal And Conformity
Safety and environmental instructions Page 10/55 5) Disposal and conformity The recyclable packaging of the SYCLOPE TERE’O Touch ® equipment must be disposed of according to current regulations. Elements such as paper, cardboard, plastic or any other recyclable elements must be taken to a suitable sorting center. -
Page 11: Technical Characteristics And Functions
Technical characteristics and functions Page 11/55 III. Technical characteristics and functions 1) Technical characteristics Main features Type Specification(s) Marker(s) Consumption 12 W Max (Without connected dosing accessories) Power supply requirements 90-240VAC 50/60Hz Electrical protection Fuse 160 mA. Reset by power interruption Operating temperature (°C) -5 °C to 45 °C (23 °F to 113 °F) Case material... -
Page 12: Main Functions
Technical characteristics and functions Page 12/55 2) Main functions Main functions Function Specification(s) Note(s) Injection time calculated in % P.I.D Regulation mode 1800 s relay injection cycle time All or nothing Type of actuators Power relay outputs Width modulation control Direction of Up or down regulation... -
Page 13: Installation And Connections
Installation and connections Page 13/55 IV. Installation and connections 1) Installation conditions To guarantee the user safety and to ensure correct operation of your SYCLOPE TERE’O Touch ® , please observe the following installation instructions: Install the controller in a dry location ... -
Page 14: Open / Close Transparent Door
Installation and connections Page 14/55 3) Open / Close transparent door In order to guarantee IP65 class, the transparent door must absolutely be closed after use while ensuring the quality of the closure seal. The case has a closing system with automatic locking as soon as its handling is carried out correctly. -
Page 15: Electrical Connection
Installation and connections Page 15/55 5) Electrical connection Electrical installations must be carried out in accordance with the standards in force and by authorized personnel! A 30-mA differential circuit breaker must be installed! A 10A circuit breaker must be installed near the device and easily accessible in order to cut the primary supply. - Page 16 Installation and connections Page 16/55 Cut off the power supply Open the transparent door and unscrew the 4 front screws using an appropriate screwdriver. Carefully disconnect the connection flat cable connecting the bottom card and the upper part of the device ...
-
Page 17: Primary Power Connection
Installation and connections Page 17/55 7) Primary power connection SYCLOPE TERE’O Touch ® has a switch-mode power supply. It can be powered by an alternating voltage between 90V and 240V 50/60Hz. ► Use a 3-point 1.5 mm to wire the power supply ►... -
Page 18: Potential-Free Relay Connections (P2)
Installation and connections Page 18/55 ● Self-powered relays outputs connection Chlorine/Bromine P4 The self-powered relays outputs P4 (Primary supply voltage = voltage available on P4) used for chlorine/bromine parameter regulation. ► Strip the 3 wires of the power cable of the dosing device on 7mm ►... -
Page 19: Potential-Free Relay Connections (P1)
Installation and connections Page 19/55 10) Potential-free relay connections (P1) The potential-free relay outputs can be used as regulation for pH. Use a 2-wire cable with a section appropriate for the voltage and current. Remove the protective sheath. ... -
Page 20: Measurement Inputs Connections
Installation and connections Page 20/55 11) Measurement inputs connections TERE’O Touch ® has three inputs: POT: Input connection for pH sensor. In1: Isolated 4-20mA input for temperature measurement. In2: Isolated 4-20mA input for chlorine or bromine measurement. a) pH input ... - Page 21 Installation and connections Page 21/55 c) Chlorine or Bromine input Preferably use a two-strand cable. Wire a strand on Iin2(+) (8). Wire the other strand on Iin2(-) (9). Tighten the cable gland to seal. NOTE: Be careful to respect the polarity of the sensor. Chlorine / Bromine sensor d) Power input When necessary, it’s possible to use chlorine or bromine sensor requiring external power.
-
Page 22: Remote Control Input Or Flow Switch Connection
Installation and connections Page 22/55 12) Remote control input or flow switch connection SYCLOPE TERE’O Touch ® controller has a remote-control input or dry contact flow switch control that performs a stop function of the regulators. For safety reasons, it’s imperative to enslve your SYCLOPE TERE’O Touch ®... -
Page 23: Tank Bottom Connections
Installation and connections Page 23/55 Connections : Brown : Vref + (10) Blue : Com - (11) Black : IN2- (9) The inductive detector provided by SYCLOPE Electronique is of type NPN with 3 wires. 13) Tank bottom connections SYCLOPE TERE’O Touch ®... -
Page 24: Bus Rs485 Communication Connection
Installation and connections Page 24/55 b) Chlorine/bromine input tank level (K2): Preferably use a two-strand cable. Connect one sensor strand to the K2 (+) (27). Connect the other sensor strand to the K2(sw) (28). Tighten the cable gland to seal. Contact 14) Bus RS485 communication connection SYCLOPE TERE’O Touch... - Page 25 Installation and connections Page 25/55 Blue (Terminal block n°3): AA’ RS485 White (Terminal block n°4): BB’ RS485 Black (Terminal block n°5): GND RS485 Configuration: All switches on "ON" Please, contact us for more information on these products. Respect the connection polarities of the bus.
-
Page 26: General Use
General use Page 26/55 V. General use The SYCLOPE TERE’O Touch controller is intended to measurement and to control parameters for ® water treatment of swimming pools. The installation of SYCLOPE TERE’O Touch equipment is based ® on the principle of measuring and regulating the filtration circuit. This type of installation is recommended in the event of single swimming pool where filtration circuit is independent. -
Page 27: Commissioning
Commissioning Page 27/55 VI. Commissioning You have just carried out electrical connections, you have installed sensors and you have connected dosing equipment, you are thus ready to carry out the startup of your SYCLOPE TERE’O Touch ® controller. Apply the power supply on the controller Check if no visual problem appears, if the controller is well lit and if the other equipment’s of the installation are not disturbed. - Page 28 Programming the controller Page 28/55 a) The upper panel Programmable Flow-Switch input Active Programmable Flow-Switch input Inactive Non-programmed Flow-Switch input Time No temperature sensor No USB key connected Temperature display USB key connected Relay not programmed No modem installed Relay programmed but inactive GSM modem installed Relay programmed and active WIFI modem installed...
- Page 29 Parameter setting Page 29/55 c) Touch zone of a measurement channel Cancel the polarization time Direct calibration of the channel Reset the daily Change the control setpoint dosing time Change the high alarm threshold Change the low alarm threshold Polarization hourglass: - On Fixed: Programmed delay - waiting for countdown (faulty sensor or Flow Switch circulation in default) - On Flashing: Delay in countdown...
-
Page 30: Input Mode
Parameter setting Page 30/55 2) Input mode The controller has several input modes depending on the type, list, numeric or alphanumeric. a) Mode « List » When a programming element proposes a list of choices, this type will be displayed with two arrows and a central indication area of the selected element. - Page 31 Parameter setting Page 31/55 c) Mode « Alphanumeric » When a programming element is alphanumeric keypad appears when typing. Input type Enter the GSM APN Cancel key Lowercase Uppercase key Entered value Backspace key Azerty, Qwerty Keyboard Change Validation key Azerty, Qwerty Keyboard Change Press on toggle in uppercase, a second press locks the keyboard in uppercase...
-
Page 32: Programming Menu " Installer
Parameter setting Page 32/55 3) Programming menu « Installer » The installer programming menu allows the general programming of your TERE’O Touch ® controller. To open the programming menu, press the menu button for 3 seconds. When the message "INSTALLER" appears, you can release the button. INSTALLER MENU When the "MENU"... - Page 33 Parameter setting Page 33/55 a) Language and time This paragraph is valid for versions LOWER than 4.02. Pressing the « Language – Time » button opens the programming window. Language - Time Language English Time Date Press the number you want to change ...
- Page 34 Parameter setting Page 34/55 Change language, time or date: See previous paragraph. User: Enable or disable the User menu lock with a Password. Installer: Enable or disable the Installer menu lock with a Password. When you decide to put a User or Installer password follow the following steps: Enter the «...
- Page 35 Programming the controller Page 35/55 c) Screen Pressing the « Screen » button opens the programming window. Screen Screen Settings Screen protector setting Backlight Enable screen 100 % Activation delay in seconds Backlight 20 % The brightness, contrast and backlight settings are made by moving the adjustment slider from left to right while pressing and holding it.
- Page 36 Parameter setting Page 36/55 d) Dosing relay Pressing the « Dosing relay » button opens the programming window. Dosing relay Chlorine Select the dosing relay Select the dosing relay Powered - P3 Auto-Alim – P4 C.R.T - P1 C.R.T - P2 If you use P2 the relay function on alarm or contact is not available Use P3 as a power relay...
- Page 37 Parameter setting Page 37/55 e) Contact & Relay Pressing the « Contact & Relay » button opens the programming window. Contact & Relay Flow-Switch Output relay setting setting Not used Not used Active - NO Active on timer Active - NC Active on alarm Activation delay in seconds...
- Page 38 Parameter setting Page 38/55 One timer for the entire week: By checking this box, you can then program three timers that will happen every day of the week. Day of the week selection: If you use different timers depending on the days of the week, you have to select day after day and set for each day the start and end times.
-
Page 39: Communications
Parameter setting Page 39/55 g) Communications Pressing the « Communication » button opens the programming window. Communications MODBUS MODEM Speed Type 19200 Parity APN SIM card GSM module None Stop bit(s) Mysyclope detting Address IP setting WIFI setting MODBUS section (Local communication RS485 port) ... - Page 40 Parameter setting Page 40/55 Section MODEM (Communication avec site web mysyclope) Change Modem type: Use the buttons on either side of the selection area to scroll through the different parities (NO, GSM, Ethernet, WIFI) in one direction or the other. Depending on the type of modem selected, the shaded areas below become accessible in configuration.
- Page 41 Parameter setting Page 41/55 Ethernet configuration DHCP Active DNS Automatic IP address Preferred DNS Mask Auxillary DNS Gateway Press the number you want to change DHCP Active: If the local Ethernet network on which the controller is connected has a DHCP that automatically distributes IP addresses, you must check this box.
- Page 42 Parameter setting Page 42/55 WIFI configuration WIFI SSID Country code Mode Infra. ETSI Security Disabled Security key SSID: Name of the WIFI network you want to connect to. To change it, press the enter button to open the alpha numeric keypad and enter the name of your network . ...
- Page 43 Parameter setting Page 43/55 h) Maintenance Pressing the « Maintenance » button opens the programming window. Maintenance 7.18 - Offset : 0mV – Gain : 100% - pH 13.0 23.26 °C - Temperature - Offset : 0.0mA – Gain : 100% 11.2 6.04 - Chlorine...
- Page 44 Parameter setting Page 44/55 i) Test Mode Pressing the « Test Mode » button opens the programming window. Mode Test Activating relays Test MODEM Relay P1 Relay P2 No modem program Relay P3 Relay P4 Activating relays: It is possible to activate the relays one by one and to force their state to test the wiring, to do this simply press the corresponding relay button.
- Page 45 Parameter setting Page 45/55 Signal level messages Searching …: Waiting for the Modem module answer. Error: No answer from the modem, check the hardware connection of the module. Low: No sufficient level to make the connection. ...
- Page 46 Parameter setting Page 46/55 Pressing the « Initialization » button opens the programming window. Initialization Type of sensor channel AUX Gain Chlorine 15A/ppm Bromine 30A/ppm 45A/ppm WARNING : All parametters will be erased Initialization Type of sensor channel IN2: Select the desired type of sensor.
-
Page 47: Parameter Setting
Parameter setting Page 47/55 VIII. Parameter setting The user programming menu allows the programming of each measuring channel of your SYCLOPE TERE’O Touch ® To open the programming menu, press the menu button. When the "USER" message appears, you can release the button. USER MENU The channel selection menu to be programmed opens, you must choose the channel you want to... -
Page 48: Tank Level
Parameter setting Page 48/55 During the programming or while the menu is open the channel is put in pause and the dosing is stopped. 1) Tank level Pressing the « Tank level » button opens the programming window. Settings pH channel Tank level ... -
Page 49: Control
Parameter setting Page 49/55 2) Control Pressing the « Control » button opens the programming window. Settings pH channel Control Change dosing mode: The proportional mode allows to regulate according to a Dosing mode selection linear calculation, the control of dosage is calculated only Hysteresis from the component «... -
Page 50: Dosing
Parameter setting Page 50/55 When the dosing direction of the pH channel is configured in upstream mode. In proportional mode, when the error (setpoint - measurement) is equal to the proportional band, the control requirement is 100%, by reducing the value of the proportional band, you increase the dosing control for the same measurement value. -
Page 51: Timings
Parameter setting Page 51/55 4) Timings Pressing the « Timings » button opens the programming window. Settings pH channel Timings Sensor polarization time: Sensor polarization time This button is used to enter a sensor start delay between 0 and 480 minutes. During this time the alarms and dosing will in minutes not be active. - Page 52 Parameter setting Page 52/55 a) pH Pressing the « Calibration » button opens the programming window. Offset Gain Erasing Settings Settings Settings pH channel pH channel pH channel Calibration Calibration Calibration Offset Gain Clear Offset Gain Clear Offset Gain Clear Calibration type selection Calibration type selection Calibration type selection...
- Page 53 Parameter setting Page 53/55 Press calibrate to validate the entry. Calibrate In case of correct calibration "Calibration OK" is displayed in green In case of calibration error "Error Calibration" is displayed in red Reset to factory calibration Clear Select the Erase tab. Press Clear.
-
Page 54: Maintenance
Parameter setting Page 54/55 Gain calibration of sensor Gain Select the Gain tab. Press the key to open the new keypad. Press calibrate to validate the entry. Calibrate In case of correct calibration "Calibration OK" is displayed in green In case of calibration error "Error Calibration"... - Page 55 SYCLOPE Electronique S.A.S. Z.I. Aéropole Pyrénées 64 230 SAUVAGNON Tel: (33) 05 59 33 70 36 Fax: (33) 05 59 33 70 37 Email: service-technique@syclope.fr © 2019 - 2020 by SYCLOPE Electronique S.A.S. Subject to modifications.
Need help?
Do you have a question about the TERE'O Touch XL and is the answer not in the manual?
Questions and answers