Table of Contents
Advertisement
Quick Links
Advertisement
Table of Contents

Subscribe to Our Youtube Channel
Related Manuals for Atag CU902555RM


Summary of Contents for Atag CU902555RM
- Page 1 INSTRUCTIONS FOR USE CU902511RM Cooker hood CU902555RM CU122511RM CU122555RM...
-
Page 2: Table Of Contents
Contents Pictograms used ........Wi-Fi-connectivity ........Safety ............Wi-Fi/ConnectLife-app ...................... Maintenance ..........Your cooker hood ........Cleaning ............Dear customer! ..........Filter indication ..........Description hood ......... Lighting ............Description user interface ......Battery of the remote ........Operation ............ Technical data .......... -
Page 3: Pictograms Used
Pictograms used The following symbols are used throughout the manual, and they have the following meanings: INFORMATION! Information, advice, tip, or recommendation WARNING! Warning general danger ELECTRIC SHOCK! Warning danger of electric shock HOT SURFACE! Warning danger of hot surface DANGER OF FIRE! Warning danger of fire... -
Page 4: Safety
Safety WARNING! READ CAREFULLY AND KEEP IT FOR FUTURE REFERENCE! Safe use This appliance is only designed for household use. CAUTION: Accessible parts may become hot when used with cooking appliances. This appliance can be used by children aged from 8 years and above and persons with reduced physical, sensory or mental capabilities or lack of experience and knowledge if they have been given supervision or instruction concerning use of the... - Page 5 Safety Do not use the cooker hood if the grease filter has not been fitted properly! Do not lean against the cooker hood. Never use the cooker hood as a working surface unless this is indicated explicitly. Grease and oil are inflammable when overheated. Remain in the cooking area when preparing meals.
- Page 6 Safety The light emitted by LED lights is very dazzling and can damage the eyes. Do not look directly into the switched on LED lights for longer than 100 seconds. When washing grease filters in the dishwasher it is recommended to use a short, non-intensive programme.
-
Page 7: Your Cooker Hood
Your cooker hood Dear customer! Please read the operating instructions before use. They include general tips, information about the settings and adjustments you can make, and the best way to take care of your appliance. TIP! You can find the most recent version of the instructions for use on our website. Enjoy your cooking! -
Page 8: Description Hood
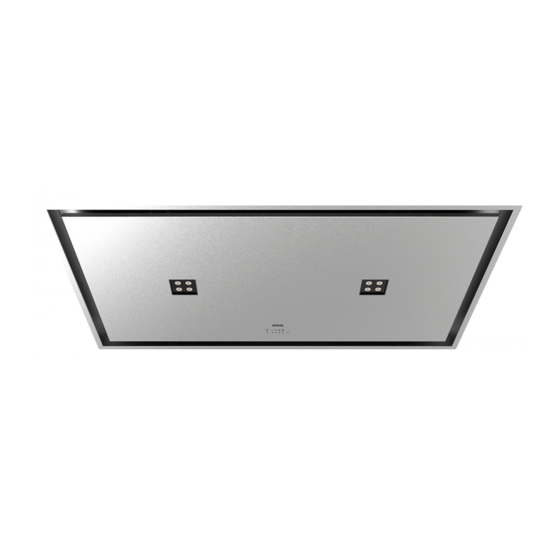
Your cooker hood Description hood 1. User interface 2. LED spot 3. Edge extraction panel 4. Grease filter 5. Latch Description user interface 1. Filter reset button, signals when filters require cleaning 2. Speed level 1 indicator 3. Speed level 2 indicator 4. -
Page 9: Operation
Operation Description remote control 1. Timer function 2. Increase light intensity 3. Colder light temperature 4. Decrease light intensity 5. Decrease air extraction capacity 6. Clean Air function 7. Warmer light temperature 8. Switch on/off lighting 9. Increase air extraction capacity 10. -
Page 10: Switching Extraction On And Off
Operation Switching extraction on and off 1. Press and hold the ‘Fan’ key on the remote for 1 second. The cooker hood will switch on at the lowest setting. 2. Press the ‘+’ key again for a higher fan setting. Press and hold the ‘+’ key for 1 second to select the highest setting (boost). -
Page 11: Switching On Recirculation Mode
Operation Switching on recirculation mode When the light and fan are off, simultaneously hold the timer key and the light key until the filter indicator flashes 3 times. The carbon filter indicator is activated. Switching off recirculation mode When the light and fan are off, simultaneously hold the timer key and the light key until the filter indicator lights up for 3 seconds and then turns off. -
Page 12: Clean Air Function
Operation Clean Air function The Clean Air function allows you to freshen the air in your kitchen for a maximum of 24 hours at level 1. 1. Switch off the cooker hood. 2. Press and hold the ‘Clean Air’ key for approximately 3 seconds. The cooker hood will switch on automatically for 10 minutes every hour at the lowest speed setting. -
Page 13: Making The Connection Between Cooker Hood And Hob
Operation Making the connection between cooker hood and hob To operate the cooker hood with the hob, you must make a connection between the hob and the hood. To make the connection, the Connection setup mode of the cooker hood and the hob must be activated. -
Page 14: Wi-Fi-Connectivity
Wi-Fi-connectivity Wi-Fi/ConnectLife-app The appliance is fitted with a Wi-Fi module that allows the appliance to connect to a mobile device such as a smartphone or tablet. It offers to monitor the appliance status via the mobile device. NOTE! The monitoring function via mobile device shall not be used to replace the personal supervision of the cooking process directly on the appliance. - Page 15 Wi-Fi-connectivity First steps to set up the Wi-Fi connectivity: 1. Check the “Requirements” as described above. 2. The hood and lights must be switched off. 3. Touch and hold simultaneously the – (minus) key and the + (plus) key for 3 seconds. All the indicators on the hood and remote will blink.
- Page 16 Wi-Fi-connectivity Depending on the Wi-Fi state, there are 1 to 3 options available in the menu: The Connection Setup Mode The Pairing Mode Remote control mode If more than 1 option is available then use the + (plus) and - (minus) keys to toggle between the options.
- Page 17 Wi-Fi-connectivity Remote control mode switch on and off To be able to change function settings remotely, the appliance must be switched on and the ConnectLife-app must be enabled. Speed level 4 indicator and Wi-Fi indicator will lit static. Remote control mode is only available if the Wi-Fi connectivity setup has been performed. Touch the timer key to enable 'Remote control'.
- Page 18 Wi-Fi-connectivity Switching on Wi-Fi: The hood and lights must be switched off. Touch and hold simultaneously the – (minus) key and the + (plus) key for 3 seconds. All the indicators on the hood and remote will blink. Press any key to enter the Wi-Fi configuration menu. Speed levels 2, 3 and 4 indicators light up. Touch the –...
- Page 19 Wi-Fi-connectivity Displaying the Wi-Fi status: Wi-Fi module disabled: Wi-Fi indicator is off. Configuration in progress: Wi-Fi indicator flashes. Connected to home network router: Wi-Fi indicator flashes. Connected to home network router and cloud: Wi-Fi indicator continuously lit. Wi-Fi troubleshooting Symptom Possible cause Solution Wi-Fi icon not shown.
-
Page 20: Maintenance
Maintenance Cleaning WARNING! Important! For all maintenance, first, switch off the mains power to the cooker hood by pulling the plug out of the socket or by turning off the home's master switch. The hood needs to be cleaned regularly, both inside as well as outside (at least as often as the grease filter). Do not use abrasive cleaning products. - Page 21 Maintenance Removing cassette filter 1. Switch off the motor and lighting. 2. Push in the latches and open the panel. 3. Open the filter’s access latch. Support the filter with your hand. 4. Remove the filter from the hood. Cleaning The filters can be cleaned in the dishwasher.
-
Page 22: Filter Indication
Maintenance Active carbon filters The regenerable active carbon filter must be washed by hand with neutral cleaning products, or in the dishwasher at a maximum temperature of 65 °C (the washing should be done without any plates, dishes, cups, etc. in the machine). Do not use washing detergent. Remove the excess water without damaging the filter, remove the holder and let the filter dry in the oven for at least 40 minutes at a maximum temperature of 70 °C. -
Page 23: Battery Of The Remote
Maintenance Battery of the remote NOTE! When the batteries are replaced the pairing connection will remain. Replace the batteries in time, as the receiving distance will be shortened if the voltage of the battery is too low. Don’t forget to remove the batteries if you don’t use the remote for a long time. Don’t leave the remote lying upside down on a conductive surface. -
Page 24: Technical Data
Technical data EU Product Sheet Data determined according to: Standard EN61591 and Commission Regulations (EU) no. 65/2014 and (EU) no. 66/2014. CU902511RM CU122511RM Trademark ATAG ATAG Type of model WC90BA-BCC01 WC12BA-BCC01 Annual Energy Consumption (AEC ) [kWh/a] 35.3 34.8 hood... -
Page 25: Eu Product Fiche
Technical data CU902555RM CU122555RM Trademark ATAG ATAG Type of model WC90BA-BCC01 WC12BA-BCC01 Annual Energy Consumption (AEC ) [kWh/a] 35.3 34.8 hood Energy efficiency class Fluid Dynamic Efficiency (FDE ) [%] 37.6 37.9 hood Fluid Dynamic Efficiency class Lighting Efficiency (LE ) [lux/W] 235.3... -
Page 26: Compliance Information
Wi-Fi module Operating frequency range 2412 - 2472 MHz (16 channels) Maximum output power 17.7 dBm EIRP average (calculated) Maximum antenna gain 2.7 dBi Hereby, ATAG declares that the radio equipment type Cooker hood is in compliance with Directive 2014/53/EU. -
Page 27: Installation
Installation Safety regulations WARNING! This appliance should only be connected by a registered installer. Always follow the installation instructions in the installation manual provided. Check the appliance for transport damage. Do not connect a damaged appliance. Faulty parts may only be replaced by original parts. The manufacturer can only guarantee that original parts meet safety requirements. - Page 28 Installation WARNING! Never open the casing of the appliance. Disconnect the appliance from the mains supply before starting any repair work. We advise you to wear protective gloves when assembling the cooker hood because of the possible sharp edges. The distance between the lowest point of the cooker hood and the supporting surface for the cooking vessels gas hob should be at least 65 cm.
-
Page 29: Preparations For Installation
Installation Preparations for installation CAUTION! Do not fit the appliance directly onto plasterboard (or similar lightweight materials) in a suspended ceiling. Install the appliance with a fixing material which is sufficiently stable and has been adjusted accordingly for both the structural conditions and the weight of the appliance. -
Page 30: Appliance Dimensions
Installation Flexible channel installation Fixed channel installation Appliance dimensions I+fl w+fl CU905xxRM CU12xxRM 1140 1164 CU127xxRM 1200 1224... -
Page 31: Built-In
Installation Built-in liter CU9055TMM ±2 ±2 CU1255TMM 1147 ±2 ±2 CU12754TMM 1207 ±2 ±2... - Page 32 Installation Fixed channel installation...
- Page 33 Installation...
- Page 34 Installation Max. 8 Nm...
- Page 35 Installation...
- Page 36 Installation Flexible channel installation...
- Page 37 Installation...
- Page 38 Installation...
-
Page 39: Environment
Environment Tips for energy-efficient cooking with hoods Use a low extractor setting and use the highest setting (boost) if necessary. A well-ventilated kitchen makes the range hood more efficient. Clean filters regularly and replace filters when needed to keep the filter efficiency high, as a saturated filter cannot perform and leads to longer usage times. -
Page 40: Your Notes
864560 We reserve the right to make changes.
Need help?
Do you have a question about the CU902555RM and is the answer not in the manual?
Questions and answers