Table of Contents
Advertisement
Available languages
Available languages
Quick Links
INSTALLATION INSTRUCTION
Thank you for selecting and buying V-TAC product. V-TAC will serve you the best.
Please read these instructions carefully before starting the installation and keep this
manual handy for future reference. If you have any another query, please contact
our dealer or local vendor from whom you have purchased the product. They are
trained and ready to serve you at the best.
OUTDOOR WIFI CAMERA
[VT-5158]
INTRODUCTION
Multi-Language
Manual - QR CODE
Please scan the QR code
to access the manual in
multiple languages.
ENGLISH
WEEE Number: 80133970
This marking indicates that
this product should not be
disposed of with other
household wastes.
Advertisement
Table of Contents

Related Manuals for V-TAC VT-5158


Summary of Contents for V-TAC VT-5158
- Page 1 [VT-5158] INTRODUCTION Thank you for selecting and buying V-TAC product. V-TAC will serve you the best. Please read these instructions carefully before starting the installation and keep this manual handy for future reference. If you have any another query, please contact our dealer or local vendor from whom you have purchased the product.
-
Page 2: Installation Diagram
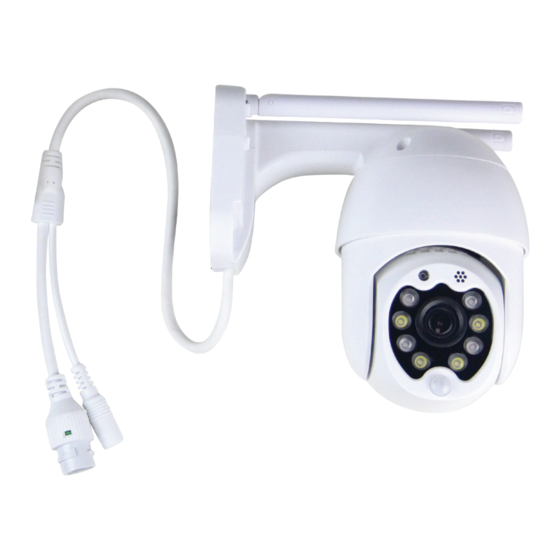
ENGLISH INSTALLATION DIAGRAM PACKAGING CONTENTS ADAPTER CAMERA SCREW NUTS SCREWS FITTING STEEL PIN (1PC) (1PC) (3PCS) (3PCS) (1PC) (1PC) -
Page 3: Main Function
ENGLISH MAIN FUNCTION TECHNICAL DATA • DC:12V±5% Input Power • 10 meters Night Vision • Auto tracking • 25–30fps Frame Rate • Motion & Sound Detection • Two way Audio • 2.4~2.4835 Ghz Wireless Frequency • Wireless Security: WEP/WPA-PSK/W- • 220°/ 90° Pan/Tilt PA2-PSK data encryption •... - Page 4 ENGLISH REGISTER NEW ACCOUNT LOGIN USING EMAIL 1. Tap on “Sign Up” to register with your email address as user ID and tap on “Next” to create a password. 2. Tap on “Next” - The APP will send a confirmation link to your email ID. Please confirm the link to complete the registarion process.
- Page 5 ENGLISH ADDING CAMERA DEVICE TO THE APP TIP: First, connect the power adapter to the camera, then the camera will sound "Please configure camera by AP hotspot or by scanning code" then using the YCC365 Plus APP start adding the camera to the APP. If you do not hear the sound, press and hold the "RESET"...
- Page 6 ENGLISH A. DEVICE ADDING BY SCANNING THE CODE • Tap on “device adding by scanning the code” (Ref Figure 9). • Please refer to "TIP" before tapping on Next. After you hear the sound from camera "Please configure camera by AP hotspot or by scanning code"...
- Page 7 ENGLISH FIGURE 15 FIGURE 14 FIGURE 13 B. ADDITION OF AP HOTSPOT • Tap on “addition of AP Hotspot” (Ref Figure 9). • Please refer to "TIP" before tapping on "Go to setting". After you hear the sound from camera "Please configure camera by AP hotspot or by scanning code"...
- Page 8 ENGLISH • Select your network Wi-Fi and input Wi-Fi password (note: this password must be your network Wi-Fi password). Then Tap “confirm” [Figure 19], the camera will sound with two beeps and voice “Network is connecting, please wait”. Then wait till the camera confirms with “Internet connected welcome to use cloud camera”.
- Page 9 ENGLISH D. AP DIRECT MODE (SPECIAL) • Open the YCC365 plus APP to enter the login interface. Tap on "Local direct connection" as shown in Figure 22[A] • Tap on plus sign on the top right hand corner as shown in Figure 22[B]. •...
-
Page 10: Function Introduction
ENGLISH FUNCTION INTRODUCTION Real-time preview interface A: Settings Menu B: Video C: Snapshot D: Full Screen E: Pan-tilt reset F: Preset G: Pan&Tilt H: Message I: Video quality J: Hold to talk K: Sound L: More Control white light. View cloud albums. Video to the phone. - Page 11 ENGLISH By sliding steering wheel or sliding the screen on the live preview you can control the camera's rotation. PRESET 1. Click the preset icon to enter the preset management interface (Figure 24). 2. Adding presets. Refer Figure 25. 3. Delete the preset: Click the edit icon to delete the preset that has been added. ADD THE PRESET FIGURE 24 FIGURE 25...
-
Page 12: Video Playback
ENGLISH VIDEO PLAYBACK Note: Video playback by default is cloud recording, if you want to playback the video on the TF card, you can switch “play videos from” to “SD card”. • Cloud video has color variations, dark blue indicates the alarm recording and light blue indicates non-alarm recording. - Page 13 ENGLISH DOWNLOAD CLOUD VIDEO / SHARE CLOUD VIDEO Click the cloud album icon and click the video clip, click “Download” to save the video to your phone or click “Share” to share your Video on Facebook and YouTube. FIGURE 30 FIGURE 29 CLOUD VIDEO PLAYBACK...
- Page 14 ENGLISH PREFERENCES Click “ “ in the preview screen, check the settings menu FIGURE 33...
- Page 15 ENGLISH ALARM TONE FUNCTIONALITY Turn ON the Alarm Tone [Go to Settings Menu > Tap on Alarm Tone]: When detected moving object, camera will make an alarming sound, it will last 30 seconds by default, if it is triggered continuously in 30 seconds, the alarm sound will prolong.
- Page 16 ENGLISH SET TF CARD RECORDING MODE Insert the TF card into the card slot and power on the camera. (Ensure to install the TF card only when the camera is powered OFF). TF card requirements : 1. Memory space 8-128G 2. C10 TF card 3. Use after formatting.
-
Page 17: Frequently Asked Questions
ENGLISH SPLIT SCREEN FEATURE 1. Applicable only for multiple cameras under the same account. 2. Click on the split screen button to simultaneously preview multiple devices. Note: To use this feature you must have 2 or more cameras installed under the same account. FIGURE 35 HOW TO USE THE CAMERA ON A COMPUTER Log In: www.ucloudcam.com... - Page 18 ENGLISH There are four voice prompts in the progress (1) “Please configure camera by AP hotspot or scanning code” (2) Select your Wi-Fi and login with your password, after the device makes a noise like “beep” you will hear this “Please wait for Wi-Fi connecting”. (3)“Please wait for internet connecting”...
- Page 19 ENGLISH 11. How can I get my camera connected to the other Wi-Fi? Two ways: A: When you need to change to another Wi-Fi without moving the place. Setting Menu >> Wi-Fi Network >> select the Wi-Fi B: When the camera is moved to another place, please start the camera, you will see the “Device disconnected”...
-
Page 20: Istruzioni Per L'installazione
ISTRUZIONI PER L'INSTALLAZIONE INTRODUZIONE Grazie per aver scelto e acquistato il prodotto della V-TAC. La V-TAC Le servirà nel miglior modo possibile. Si prega di leggere attentamente queste istruzioni prima di iniziare l’installazione e di conservare questo manuale a portata di mano per riferi- menti futuri. -
Page 21: Schema Di Installazione
ITALIAN SCHEMA DI INSTALLAZIONE CONTENUTO DELLA CONFEZIONE CAMERA ADAPTER SCREW NUTS SCREWS FITTING STEEL PIN (1PC) (1PC) (3PCS) (3PCS) (1PC) (1PC) -
Page 22: Dati Tecnici
ITALIAN FUNZIONE PRINCIPALE DATI TECNICI • 10 metri di visione notturna • DC: 12V ± 5% di potenza in ingresso • Tracciamento automatico • Frequenza fotogrammi 25–30 fps • Rilevamento di movimenti e suoni • Audio bidirezionale • Frequenza wireless 2,4 ~ 2,4835 Ghz •... - Page 23 ITALIAN REGISTRAZIONE DI UN NUOVO PROFILO ACCESSO CON IL E-MAIL 1. Fare clic su "Registrarsi" per registrarsi con il proprio indirizzo e-mail come ID utente e fare clic su "Avanti" per creare una password. 2. Fare clic su "Avanti"- l’applicazione invierà un link di conferma al suo ID e-mail. Si prega di confermare il link per completare la procedura di registrazione.
- Page 24 ITALIAN AGGIUNTA DEL DISPOSITIVO DELLA VIDEOCAMERA ALL'APPLICAZIONE SUGGERIMENTO: Innanzitutto, collegare l'alimentatore alla fotocamera, quindi la fotocam- era invierà il messaggio vocale "Please configure camera by AP hotspot or scanning code" (Configurare la fotocamera mediante l'aggiunta dell'AP hotspot o scansionando il codice). Utilizzando l'APPLICAZIONE YCC365 Plus iniziare ad aggiungere la fotocamera all'APPLICA- ZIONE.
- Page 25 ITALIAN A. AGGIUNTA DEL DISPOSITIVO MEDIANTE LA SCANSIONE DEL CODICE • Fare click sul “device adding by scanning the code” (aggiunta del dispositivo mediante la scansione del codice) (Fare riferimento alla Figura 9). • Leggere il "TIP" (SUGGERIMENTO) prima di fare click sul Next (Avanti). Dopo aver ascoltato il messaggio vocale dalla fotocamera "Please configure camera by AP hotspot or by scanning code", fare click sul Next (Avanti) (Figura 10).
- Page 26 ITALIAN FIGURA 15 FIGURA 13 FIGURA 14 B. AGGIUNTA DELL'AP HOTSPOT • Fare click sul “addition of AP Hotspot” (aggiungere l’AP hotspot) (Fare riferimento alla Figura 9). • Leggere il "TIP" (SUGGERIMENTO) prima di fare click sul "Go to setting" (Vai alle impostazioni). Dopo aver ascoltato il messaggio vocale dalla fotocamera "Please configure camera by AP hotspot or by scanning code", fare click sul "Go to setting"...
- Page 27 ITALIAN • Selezionare la propria rete Wi-Fi ed inserire la propria password della rete Wi-Fi (nota: questa password deve essere la password della tua rete Wi-Fi). Quindi fare click sul “confirm” (conferma) [Figura 19], la fotocamera invierà due segnali acustici e il messaggio “Network is connecting, please wait”...
- Page 28 ITALIAN D. APPLICAZIONE MODALITÀ DIRETTA (SPECIALE) • Aprire l'APPLICAZIONE YCC365 Plus per accedere all'interfaccia di accesso. Fare click sul "Local direct connection" (Connessione diretta locale) come mostrato nella Figura 22 [A]. • Fare click sul segno “+” nell'angolo in alto a destra come mostrato nella Figura 22 [B]. •...
- Page 29 ITALIAN INTRODUZIONE DELLA FUNZIONE Interfaccia di anteprima in tempo reale A: Menu delle impostazioni B: Video (riproduzione) C: Istantanea D: Schermo intero E: Reimpostazione della panoramica-inclinazione F: Reimpostazione G: Panoramica ed inclinazi- H: Messaggio I: Qualità video J: Tieni premuto per parlare K: Suono L: Altro Controlla la luce...
- Page 30 ITALIAN Facendo scorrere la rotellina o facendo scorrere lo schermo di anteprima in tempo reale è possibile controllare la rotazione della camera. REIMPOSTAZIONE 1. Fare click sull'icona delle reimpostazioni per accedere all'interfaccia di gestione delle reimpostazioni (Figura 24). 2. Aggiunta delle reimpostazioni. Fare riferimento alla Figura 25. 3.
-
Page 31: Riproduzione Video
ITALIAN RIPRODUZIONE VIDEO Nota: per impostazione predefinita viene riprodotto il video registrato nel cloud, se si desidera riprodurre il video dalla scheda TF, è possibile passare da “play videos from” (riprodurre video da) a “SD card” (scheda SD). • La registrazione video nel cloud può avere due colori, il blu scuro indica la registrazione di allarme e l'azzurro indica la registrazione non di allarme. - Page 32 ITALIAN SCARICARE VIDEO DAL CLOUD/CONDIVIDERE VIDEO NEL CLOUD Fare click sull'icona dell'album nel cloud e quindi sul video clip, fare click sul "Download" per salvare il video sul telefono o fare click sul " Share" (Condividere) per condividerlo su Facebook e YouTube. FIGURE 30 FIGURE 29 VIDEO NEL CLOUD...
- Page 33 ITALIAN PREFERENZE Fare clic su " " nella schermata di anteprima, controllare il menu delle impostazioni. FIGURE 33...
- Page 34 ITALIAN FUNZIONALITÀ DEL TONO DELL’ALLARME Attiva il tono dell’allarme [Vai al menu delle impostazioni> Fare click sul tono dell’allarme]: Quando viene rilevato un oggetto in movimento, la telecamera emette un segnale di allarme, che per impostazione predefinita dura 30 secondi, se viene attivato continuamente per 30 secondi, il segnale dell'allarme si prolungherà.
- Page 35 ITALIAN IMPOSTA LA MODALITÀ DI REGISTRAZIONE SULLA SCHEDA TF Inserire la scheda TF nello slot per le schede ed attivare l'alimentazione alla fotocamera (installare la scheda TF soltanto quando la fotocamera è disattivata). Requisiti per la scheda TF 1. Spazio di memoria 8-128G 2.
-
Page 36: Domande Frequenti
ITALIAN FUNZIONE SCHERMO DIVISO 1. Applicabile soltanto per più camere con lo stesso account. 2. Fare click sul pulsante dello schermo diviso per visualizzare in anteprima contemporaneamente più dispositivi. Nota: per utilizzare questa funzione è necessario che 2 o più camere siano installate con lo stesso account. FIGURE 35 COME USARE LA FOTOCAMERA CON IL COMPUTER Accedere al: www.ucloudcam.com... - Page 37 ITALIAN Sono presenti quattro messaggi vocali attivi 1. “Please configure camera by AP hotspot or scanning code” (Configurare la fotocamera mediante l'aggiunta dell'AP hotspot o scansionando il codice). 2. Selezionare la propria rete Wi-Fi ed accedere con la propria password, dopo che il dispositi- vo emette un segnale acustico "beep"...
- Page 38 ITALIAN 9. Quante persone possono utilizzare contemporaneamente l'account? Non ci sono limiti teorici. 10. Perché l'aggiunta della camera ad un altro account non funziona? Una telecamera – un account, se la telecamera deve essere aggiunta ad un altro account, rimuovere la telecamera dall'account corrente ed aggiungerla al nuovo account. 11.
Need help?
Do you have a question about the VT-5158 and is the answer not in the manual?
Questions and answers