Advertisement
Quick Links
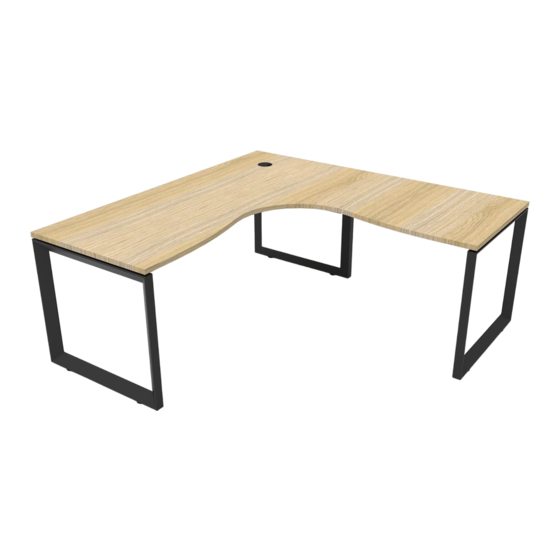
Assembly Instructions:
Deluxe In nity Loop Leg Corner Workstations
Time Required:
30-45 minutes
Tools Required:
Screwdriver, Electric Drill, Pencil, Measuring tape/Ruler
*Tools are not included.
Skill Required:
Easy
The Assembly Skill Rating is a 5-point system that shows the degree of e ort needed in assembling
a speci c product. With 1 being easy for the average person and 5 requiring an expert.
For most products, two persons are recommended.
Please note, as this is a commercial product, some intermediate skills are required.
*No pre-drill holes or markings are provided on tops.
• As this is a commercial product, some intermediate skills may be required.
• If you are missing any hardware, please contact your Rapidline reseller. Please ensure you have the name of the item,
• Assemble on a clean, at, smooth surface such as a rug or carpet to avoid parts from being scratched.
• Remove all wrapping materials, including staples and packing straps before you start to assemble
• Do not use this product unless all bolts and screws are rmly secured and tightened.
• If parts are missing, broken, damaged or worn stop using the product until all repairs are made.
Hard
• No pre-drill holes or markings are provided on our table or desk tops.
• Please check you have all hardware before assembling.
required hardware part and quantity.
• Please retain your receipt as proof of purchase to validate your warranty.
• Keep all hardware parts out of reach of children.
• Heavy product. Do not attempt to lift or move without help
• Do not tighten screws and bolts until completely assembled.
• Failure to follow these warnings could result in serious injury.
NOTE
CAUTION
WARNING
Advertisement

Related Manuals for Rapidline Deluxe Infinity Loop Leg Corner Workstations


Summary of Contents for Rapidline Deluxe Infinity Loop Leg Corner Workstations
- Page 1 • No pre-drill holes or markings are provided on our table or desk tops. • Please check you have all hardware before assembling. • If you are missing any hardware, please contact your Rapidline reseller. Please ensure you have the name of the item, required hardware part and quantity.
-
Page 2: Important Note
Assembly Instructions MODEL NO: Loop Leg Corner Workstation Screw ax16 22PCS Screw 5x20 32PCS STEP1 STEP2 1200W=1110 1500W=1410 1800W=1710 1200W=1 1500W=1 STEP3 STEP4 • Place all laminated parts on a clean and smooth surface such as a rug or carpet to avoid the parts from being scratched. •... - Page 3 Assembly Instructions MODEL NO: Loop Leg Corner Workstation with Screen STEP2 STEP3 1200W=1 1500W=1 1800 6X16 Screw � � STEP1 1200W=1110 1500W=1410 1800W=1710 IMPORTANT NOTE: IMPORTANT NOTE: • Place all laminated parts on a clean and smooth surface such as a rug or carpet to avoid the parts from being scratched. •...
- Page 4 Assembly Instructions MODEL NO: Loop Leg Corner - 2 Person without screen STEP2 Screw Bx16 � � 44PCS 1PCS � � STEP1 STEP4 2PCS IMPORTANT NOTE: IMPORTANT NOTE: • Place all laminated parts on a clean and smooth surface such as a rug or carpet to avoid the parts from being scratched. •...
- Page 5 Assembly Instructions MODEL NO: Loop Leg Corner - 2 Person with Screen STEP4 SC1'8W 8xl6 STEP1 STEP2 STEPS 2PCS 1800W=1193 � IMPORTANT NOTE: IMPORTANT NOTE: • Place all laminated parts on a clean and smooth surface such as a rug or carpet to avoid the parts from being scratched. •...
- Page 6 Assembly Instructions MODEL NO: Loop Leg Corner - 4 person without Screen STEP2 Screw 8x[6 � � 88PCS 1PCS � � STEP1 STEP4 STEPS 4PCS IMPORTANT NOTE: IMPORTANT NOTE: • Place all laminated parts on a clean and smooth surface such as a rug or carpet to avoid the parts from being scratched. •...
- Page 7 Assembly Instructions MODEL NO: Loop Leg Corner - 4 person with Screen 8lll6 S:rcmw � � 86PCS 'IIPCS: ijll 16 S.::wi�w � SPCS 61PCS 5�20 ICW®W i.� '146❖4f'CS STEP1 STEP2 1200W=1125 1500W=1425 1800W=1725 4PCS 1800W=1193 1200W=1125 1500W=1425 1800W=1725 IMPORTANT NOTE: •...
- Page 8 STEP3 STEP4 STEPS IMPORTANT NOTE: • Place all laminated parts on a clean and smooth surface such as a rug or carpet to avoid the parts from being scratched. • Check to be sure that you have all parts and hardware. •...
Need help?
Do you have a question about the Deluxe Infinity Loop Leg Corner Workstations and is the answer not in the manual?
Questions and answers