Table of Contents
Advertisement
Available languages
Available languages
THIS INSTRUCTION BOOKLET CONTAINS
IMPORTANT SAFETY INFORMATION. PLEASE
READ AND KEEP FOR FUTURE REFERENCE.
WARNING:
To reduce the risk of
injury, the user must read and understand the
operator's manual before using this product.
CE LIVRET D'INSTRUCTIONS CONTIENT DES
CONSIGNES DE SÉCURITÉ IMPORTANTES.
VEUILLEZ LE LIRE ET LE CONSERVER POUR
TOUTE RÉFÉRENCE FUTURE.
AVERTISSEMENT :
réduire les risques de blessures, l'utilisateur
doit lire et veiller à bien comprendre le manuel
d'utilisation avant d'employer ce produit.
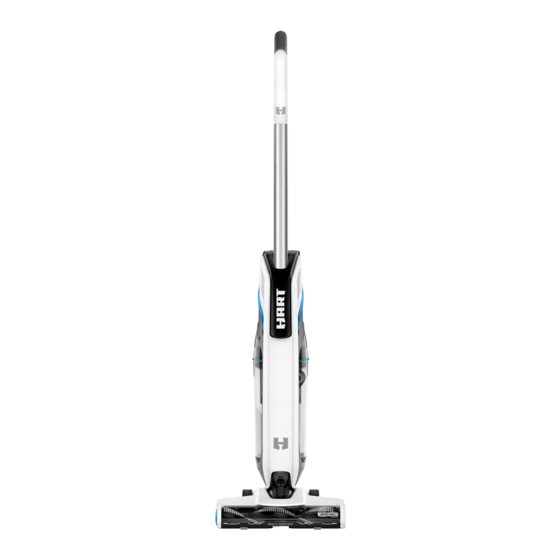
HPSV60 20V
Stick Vac
Aspirateur vertical
Aspiradora tipo escoba
OPERATOR'S MANUAL
MANUEL D'UTILISATION
Instructions importantes concernment
Commande de pièces et dépannage
MANUAL DEL OPERADOR
Pedidos de piezas y servicio
INCLUDES: Stick Vac, Handle, Operator's Manual
INCLUT : Aspirateur vertical, poignée, manuel d'utilisation
INCLUYE: Aspiradora tipo escoba, mango, manual del operador
ESTE FOLLETO DE INSTRUCCIONES CONTIENE
INFORMACIÓN DE SEGURIDAD IMPORTANTE.
LÉALO Y CONSÉRVELO PARA REFERENCIA
FUTURA.
ADVERTENCIA:
Pour
el riesgo de lesiones, el usuario debe leer y
comprender el manual del operador antes de
usar este producto.
2-3
3-4
Assembly 4
Operation 5-6
7
Illustrations
8-10
Parts/Service
Back page
2-3
la securite
3-4
Utilisation 5-6
7
Illustrations
8-10
Page arrière
2-3
de seguridad
3-4
Armado 4
Funcionamiento 5-6
7
Illustraciones
8-10
Pág. posterior
Para reducir
Advertisement
Table of Contents

Related Manuals for HART HPSV60 20V


Summary of Contents for HART HPSV60 20V
-
Page 1: Table Of Contents
HPSV60 20V Stick Vac Aspirateur vertical Aspiradora tipo escoba OPERATOR’S MANUAL Important Safety Instructions Symbols Assembly 4 Operation 5-6 Maintenance Illustrations 8-10 Parts/Service Back page MANUEL D’UTILISATION Instructions importantes concernment la securite Symboles Assemblage 4 Utilisation 5-6 Entretien Illustrations 8-10 Commande de pièces et dépannage... -
Page 2: Important Safety Instructions
IMPORTANT SAFETY INSTRUCTIONS SAVE THESE INSTRUCTIONS When using an electrical appliance, basic precautions should always be followed, including the following: WARNING! Do not use to pick up hard objects such as nails, screws, coins, etc. Damage or injury could result. Do not incinerate this appliance even if it is severely Read and understand all instructions. Failure to follow all damaged. The batteries can explode in a fire. instructions listed below, may result in electric shock, fire and/or serious personal injury. Product does not have to be plugged into an electrical outlet, therefore it is always in operating condition. READ ALL INSTRUCTIONS BEFORE USING Be aware of possible hazards when using the product or when changing accessories. -
Page 3: Symbols
IMPORTANT SAFETY INSTRUCTIONS Protect your lungs. Wear a face or dust mask if the Have servicing performed by a qualified repair person operation is dusty. Following this rule will reduce the risk using only identical replacement parts. This will ensure of serious personal injury. that the safety of the product is maintained. Check for misalignment or binding of moving parts, This product contains no serviceable parts. -
Page 4: Assembly
SYMBOLS Some of the following symbols may be used on this product. Please study them and learn their meaning. Proper interpretation of these symbols will allow you to operate the product better and safer. SYMBOL NAME DESIGNATION/EXPLANATION Safety Alert Indicates a potential personal injury hazard. Read Operator’s To reduce the risk of injury, user must read and understand operator’s manual Manual before using this product. -
Page 5: Operation
ASSEMBLY ASSEMBLING THE VACUUM To remove the handle: See Figure 1, page 8. Insert a small object into the hole on the back of the handle and press firmly. Switch off unit and remove the battery pack. Pull the handle up and away from the vacuum Place the vacuum on a flat surface in the upright position. Slide the handle into the opening at the top of the vacuum until it clicks. OPERATION INSTALLING/REMOVING BATTERY PACK WARNING: See Figure 2, page 8. - Page 6 OPERATION MODE BUTTON If necessary, step on the back of the roller bar and tilt or swivel the vacuum to avoid obstacles. See Figure 3, page 9. When vacuuming is complete, stop the unit and remove The vacuum has three modes to accommodate your cleaning the battery pack. needs. HARD FLOOR mode works well on multiple surface types including hardwood floors. CARPET mode provides EMPTYING/REATTACHING THE DUST BOWL a deeper suction and is ideal for cleaning carpets and rugs. See Figures 6 - 7, page 10. BRUSH OFF mode delivers deep suction without brush rotation and should be used on delicate surfaces. The dust bowl should be checked, emptied, and cleaned periodically for maximum dust collection.
-
Page 7: Maintenance
MAINTENANCE This product contains no serviceable parts. Slide the brush to release the cap and pull the brush from the roller bar assembly. GENERAL MAINTENANCE NOTE: Use scissors to remove any threads or hair Avoid using solvents when cleaning plastic parts. Most wrapped around the roller brush using the scissor plastics are susceptible to damage from various types of grooves. - Page 8 INSTRUCTIONS IMPORTANTES CONCERNANT LA SÉCURITÉ CONSERVER CES INSTRUCTIONS L’utilisation d’un appareil électrique demande d’observer en tout temps des précautions élémentaires, dont celles-ci : NE PAS utiliser l’appareil pour aspirer des liquides AVERTISSEMENT ! inflammables ou combustibles comme de l’essence ou dans des endroits où...
-
Page 9: Symboles
INSTRUCTIONS IMPORTANTES CONCERNANT LA SÉCURITÉ yeux consulter un médecin. Le liquide s’échappant des incorrecte ou hors des températures spécifiées peut piles peut causer des irritations ou des brûlures. endommager la pile et augmenter les risques de feu. Pour un résultat optimal, le piles de l’outil doivent être ... -
Page 10: Assemblage
SYMBOLES Certains des symboles ci-dessous peuvent être utilisés sur produit. Veiller à les étudier et à apprendre leur signification. Une interprétation correcte de ces symboles permettra d’utiliser produit plus efficacement et de réduire les risques. SYMBOLE DÉSIGNATION / EXPLICATION Symbole d’alerte de Indique un risque de blessure potentiel. -
Page 11: Utilisation
ASSEMBLAGE ASSEMBLAGE DE L’ASPIRATEUR Pour enlever la poignée : Voir la figure 1, page 8. Insérer un petit objet dans le trou au dos de la poignée, puis appuyer fermement. Mettre l’appareil hors tension et retirer le bloc-pile. ... - Page 12 UTILISATION BOUTON MODE VIDANGE / REMISE EN PLACE DU RÉCIPIENT Voir la figure 3, page 8. À POUSSIÈRE L’aspirateur dispose de trois modes pour convenir à vos Voir les figures 6 et 7, page 10. besoins de nettoyage. Le mode SOL DUR fonctionne bien La coupe à...
-
Page 13: Entretien
ENTRETIEN Glisser la brosse pour libérer le capuchon et tirer la brosse Aucune pièce de ce produit ne peut être réparée par hors de la barre à rouleau. l’utilisateur. NOTE: Utiliser des ciseaux pour enlever les fils ou les ENTRETIEN GÉNÉRAL cheveux autour de la brosse à... -
Page 14: Importantes Instrucciones
IMPORTANTES INSTRUCCIONES DE SEGURIDAD GUARDE ESTAS INSTRUCCIONES Al utilizar un aparato eléctrico, deben seguirse ciertas precauciones básicas, como las siguientes: NO utilice la unidad para recoger líquidos inflamables o ¡ADVERTENCIA! combustibles, como la gasolina, ni la utilice en lugares donde pueda haber presentes dichos líquidos. -
Page 15: Símbolos
IMPORTANTES INSTRUCCIONES DE SEGURIDAD de contacto, lávese con agua. Si el líquido llega a tocar del rango especificado puede dañar la batería y aumentar los ojos, además busque atención médica. El líquido el riesgo de incendios. de las baterías puede causar irritación y quemaduras. ... -
Page 16: Armado
SÍMBOLOS Es posible que se empleen en este producto algunos de los siguientes símbolos. Le suplicamos estudiarlos y aprender su significado. Una correcta interpretación de estos símbolos le permitirá utilizar mejor y de manera más segura el producto. SÍMBOLO NOMBRE DENOMINACIÓN/EXPLICACIÓN Alerta de Indica un peligro posible de lesiones personales. -
Page 17: Funcionamiento
ARMADO MONTAJE DE LA ASPIRADORA Para quitar el mango: Vea la figura 1, página 8. Inserte un objeto pequeño en el orificio de la parte posterior del mango y presione firmemente. Apague la unidad y quite la batería. Tire del mango hacia arriba y retírelo de la aspiradora. - Page 18 FUNCIONAMIENTO BOTÓN DE MODO Si es necesario, ponga un pie sobre la parte posterior de la barra giratoria e incline o gire la aspiradora para evitar Vea la figura 3, página 8. obstáculos. La aspiradora tiene tres modos que se adaptan a sus ...
-
Page 19: Mantenimiento
MANTENIMIENTO mm (1/4 de pulg.) vuelta en sentido antihorario para Este producto no contiene piezas que puedan repararse. desbloquear el cepillo giratorio. MANTENIMIENTO GENERAL Deslice el cepillo para liberar la tapa y tire del cepillo del conjunto de la barra giratoria. Evite el empleo de solventes al limpiar piezas de plástico. - Page 20 NOTES / NOTAS...
- Page 21 HPSV60 FIG. 1 D - ON/OFF button (interrupteur de marche/ A - Handle (poignée, mango) arrêt, botón de encendido/apagado) B - Dust bowl (récipient à poussière, colector de A - Handle (poignée, mango) E - Mode button (bouton mode, botón de modo) polvo) B - Hole (trou, orifico) F - LED indicators (voyants del, indicadores...
- Page 22 FIG. 4 FIG. 2 A - Battery pack (bloc-piles, paquete de baterías) B - Latch (loquet, pestillo) FIG. 3 FIG. 5 A - ON/OFF button (interrupteur de marche/ arrêt, botón de encendido/apagado) B - Mode button (bouton mode, botón de modo)
- Page 23 FIG. 6 FIG. 8 FIG. 11 A - Hose (tuyau, manguera) B - Hose release button (bouton de dégagement de la tuyau, perilla de liberación de manguera) FIG. 9 A - Tab (ergot, orejeta) FIG. 12 A - Dust bowl (récipient à poussière, colector de polvo) B - Dust bowl release button (bouton de dégagement du récipient à...
- Page 24 Les détails de la garantie sont disponibles sur www.HARTtools.com Une preuve d’achat est requise pour valider la garantie limitée de 3 ans. HART, le logo HART et le logo H sont des marques de commerce de Techtronic Cordless GP. Servicio/Piezas de repuesto Atención al cliente/Soporte técnico...
Need help?
Do you have a question about the HPSV60 20V and is the answer not in the manual?
Questions and answers
Power button not turning the unit on. If I hold the button, it powers up. Is there a reset?
The provided context does not include reset instructions for the HART HPSV60 20V. However, if the power button is not turning it on, you can try the following steps based on the manual:
1. Make sure the battery pack is fully charged.
2. Confirm the battery pack is properly snapped into place and secured.
3. Remove the battery pack, then reinsert it to ensure a proper connection.
4. Press the ON/OFF button again.
If the vacuum still does not turn on, further troubleshooting or service may be needed.
This answer is automatically generated
Cannot reattach hose after cleaning
To reattach the hose on the HART HPSV60 20V after cleaning, align the hose with the roller brush and insert it until it clicks into place. Make sure it is securely connected.
This answer is automatically generated
The light on botyom of vac keeps going off....cant seem to find any solutions.....thanks in advance
The light on the bottom of the HART HPSV60 20V vacuum could be going off because the vacuum is changing modes. Pressing the MODE button switches between HARD FLOOR mode, BRUSH OFF mode, and back to HARD FLOOR mode, and the corresponding LED indicator lights up. If the vacuum is accidentally switching modes or if there is a loose connection with the battery pack, the light could turn off.
This answer is automatically generated