Table of Contents
Advertisement
Quick Links
Advertisement
Table of Contents

Related Manuals for Sound Devices 833


Summary of Contents for Sound Devices 833
- Page 1 Portable Compact Mixer-Recorder User Guide v9.00...
-
Page 2: Table Of Contents
Table of Contents Welcome to the 833 Panel Views Home Screen Channel Screen Virtual Keyboard Phrase Manager Channel EQ Channel Compression Channel Copy Menus Power Channel Setup Channels 7-8 Buses Outputs Limiters Automixer Meters Timecode Record/Play Q-marks Files Slate/Coms/Returns SuperSlot... - Page 3 Supported Third-Party Controllers Toggle Switch Action Scene Name Editing Menu + PFL Switch Action Front Panel Shortcuts USB Keyboard X-KEYS® PROGRAMMABLE KEYPADS, STICKS & KEYBOARDS SD-Remote Quick Setup USB-A USB-C Specifications Legal Notices Warranty Glossary 833 User Guide...
-
Page 4: Welcome To The 833
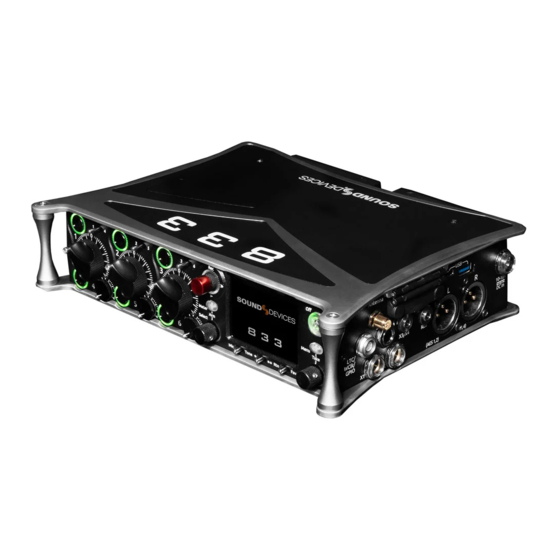
Welcome to the 833 The 833 is the professional’s tool for mobile and small productions. Like the popular Sound Devices 633, the 833 is small, lightweight, and compact. A tactile interface with dedicated faders, trim knobs, and PFL switches makes this mixer-recorder ideal for run-and-gun bag use. -
Page 5: Panel Views
Press in the Transport control to stop recording or playback. While in standby, press and hold to display next take name. Play Push down on the Transport control to begin playback of the last file recorded or file 833 User Guide... - Page 6 While in standby, push left to load the previous take. While in playback, push and hold left to rewind. When the 833 is playing back or paused, moving the joystick to the left (<<) rewinds at 2x speed, then after holding for 5 seconds, it increases to 16x speed. Push Left while holding Select to delete the current Q-mark.
- Page 7 Balanced connection for Com Return audio input. [pin-1 = Ground, pin-2 = hot (+), pin-3 = cold (-)]. 5: Mic/Line Inputs 4-6 TA3 Jacks Active-balanced analog microphone or line-level inputs. [pin-1 = ground, pin-2 = hot (+), pin 3 = cold (-)]. 833 User Guide...
- Page 8 Routing determined in the Outputs menu. [pin-1 = Ground; pin-2 = hot (+); pin-3 = cold (-). Unbalance by floating pin-3]. 8: Aux In 3.5 mm Jack Auxiliary input used for extra inputs or camera return [Sleeve = ground, tip = left, ring = right]. 833 User Guide...
- Page 9 Rear Panel 1: Battery 1, Battery 2 Docking Sony L-Mount type batteries may be used. When connected to an external DC source via DC the L-Mount batteries can be charged if enabled in the Power menu. 833 User Guide...
- Page 10 Top Panel 1: Expansion Port Used for connecting XL-AES 8 Channel AES3 Input Expander and SL-2 Dual SuperSlot Wireless Module. 833 User Guide...
-
Page 11: Home Screen
The isolated track indicators turn red to indicate that the tracks are armed for record. 7: Selected Headphone Preset Indicates the currently-selected headphone preset. 8: Return Meter Indicates audio level for the return. 9 & 10: Sample Rate / Frame Rate/ Temporary Level Display 833 User Guide... - Page 12 13: LR Mix Bus Meters With Arm/Disarm Indication Indicates the peak and VU audio levels of the L/R mix. The L and R indicators turn red to indicate that the tracks are armed for record. 833 User Guide...
-
Page 13: Channel Screen
1 to L and 2 to R. MS spread can be adjusted either in the odd channel’s MS balance field by holding */** and rotating Select or by using the even channel’s front panel trim pot. See Channel Setup menu. When unlinking from a stereo or MS pair, odd and even channel pans get set back to center. 6: HPF (High Pass Filter) 833 User Guide... - Page 14 17: Noise Suppression (NA or NX) Indicates whether the channel is selected for Sound Devices NoiseAssist (NA) or CEDAR sdnx (NX) and how much is applied. Field is grayed out when the Noise Suppression is disabled. White ‘--’ (dashes) when Noise Suppression is enabled but channel not selected;...
- Page 15 Channel Input Source Channel Bus Sends 833 User Guide...
-
Page 16: Virtual Keyboard
Quick flick toggles between A-Z and a-z in keyboard. Hold ‘abc’ switch Momentary selection of other case. Delete Deletes character to the left of flashing cursor. Hold Delete Repeatedly deletes characters to the left of flashing cursor. Space Inserts space at the flashing cursor position. 833 User Guide... - Page 17 Switches to the Shifted functions: Clear, End, Home, Exit. When shifted functions are active, their text changes to white and the non-shifted functions change to gray. Clear Clears text from the text edit field. End/Home Moves cursor to end/start of text. Exit Exits screen without saving text edits. 833 User Guide...
-
Page 18: Phrase Manager
SD Card volume label etc. Clear Clears all phrases. Delete Deletes selected phrases. Creates a new phrase. Edit Edits the selected phrase. Insert Inserts selected phrase into text. Replace Replaces text with current selected phrase. 833 User Guide... -
Page 19: Channel Eq
Selects Q (bandwidth) of selected band [0.5 - 10] (use Sel or HP knob to adjust). Toggles filter type of LF and HF band [Peak, Shelf*]. The Low Cut value is represented by the leftmost value on the graph and is adjustable in the channel screen. 833 User Guide... -
Page 20: Channel Compression
Selects Attack time [1 to 200 ms in 1 ms steps] Selects Release time [50 to 200 ms in 1 ms steps, 200 to 1000 ms in 10 ms steps] Note: Compression can also be applied to Buses. 833 User Guide... -
Page 21: Channel Copy
Choose which channels to apply the copied settings. Multiple destination channels can be selected. Then choose which settings to copy. Select any combination from EQ, HPF, Compressor, Limiter, Iso, Phase, Pan, Mute, Source, Name, Routing, Delay, and Arm. To copy, toggle the Fav switch. 833 User Guide... -
Page 22: Menus
Menus Main Menu 833 User Guide... -
Page 23: Power
Selects how the unit should operate when DC power is lost. [Switch to Next Supply*, Turn Off]. Smart Battery Data Displays Time Remaining, Percent Remaining, Cycle Count, and Temperature of Smart Battery. Note: This menu is only displayed when a smart battery is connected. 833 User Guide... - Page 24 Selects battery charging mode when connected to an external DC source. [Disabled, When Power Off, When Power On, Always*]. USB-A Charge Port Allows charging of compatible external USB devices such as Android tablets [500 mA or 1.5 A*]. 833 User Guide...
-
Page 25: Channel Setup
See Channel Screen>Channel Trim Value for more detail. Four channel groups are possible; channels grouped can only be assigned to one group. Group 1 [1-8] Group 2 [1-8] Group 3 [1-8] Group 4 [1-8] Note: When the optional +4 Plugin is installed, channels 1-12 are available for grouping. 833 User Guide... - Page 26 Selects how the MS spread is controlled when a pair of channels are MS-linked. [PFL Screen, Even Trim Pot]. PFL Screen = MS spread controlled by holding the odd channel’s PFL screen */** toggle and rotating Select. Even Trim Pot = MS spread controlled by rotating the front panel’s even trim pot. 833 User Guide...
-
Page 27: Channels
Hold toggle then rotate Select to adjust ch 7 fader. Gain values are displayed in the Home Screen sample rate field. Press Select to Ch 8 Fader/PFL (Moment) Hold toggle then rotate HP to adjust ch 8 fader. Gain values are displayed in the Home Screen sample rate field. Press HP to PFL 833 User Guide... -
Page 28: Buses
ISOs as bus sends instead of pre or post-fader, you can adjust the ISO mix on playback. Use Buses B3-B4 for this purpose since Bus L, R, B1, and B2 can be recorded and are reserved for playing back their own recorded audio. 833 User Guide... - Page 29 Use ** toggle to select and adjust selected bus gain in 1 dB increments. [Off-16 dB] 12. Mute Coms Selects muting of Coms 1, 2 sends and returns. 13. Mute All Indicates mute status of bus. Blue icon = muted. Toggle Mute All On/Off with the “Fav” toggle. 833 User Guide...
-
Page 30: Outputs
Enters the Output screen. The bus can also be entered by pressing the Sel or HP knob. Selected source will contribute to the Output. (Green = Prefade, orange = Post-fade [1-8]) [L,R, 1-4, HP-L, HP-R] Routes Com Return directly to the output. Return Routes Return 1 or 2 directly to the output. 833 User Guide... - Page 31 From the AES Output Routing menus, route any bus to any AES Output using the Select knob. Change Level back to Line, -10, or Mic to cancel AES Output and return to the L and R Output menus. HP Presets 833 User Guide...
- Page 32 Selects a preset in the list allowing it to be listed in the HP Preset menu (Press HP knob in Home Screen). Selects a favorite preset. The name turns green when selected. The “Fav” switch recalls this HP preset when in the Home Screen. 833 User Guide...
-
Page 33: Limiters
Selects the ratio of the limiter. [Inf:1, 10:1, 12:1, 14:1, 16:1, 18:1, 20:1*] Bus Knee Selects the bus limiter Knee. [Hard, Soft] Bus Attack Selects the bus limiter attack Bus Release Time Selects the release time of the limiters in 10 ms increments. 100 ms* [50-1000 ms] 833 User Guide... -
Page 34: Automixer
Dugan gain display bars range from 0 dB (at the top, aligned with 0 dBFS, no attenuation) to -15 dB (max attenuation). The -15 dB value is indicated by a purple horizontal graticule mark near the top of a channel’s signal meter when that channel is enabled for Dugan in Menu>Automixer. 833 User Guide... - Page 35 The ring LEDs for ch 1-6 show Dugan gain for ch 1-6. The ring LEDs begin to glow purple at 15 dB attenuation and increase in intensity at 0 dB attenuation. MixAssist Mode 833 User Guide...
- Page 36 There are two independent MixAssist processing groups, Bus L and Bus R. Channels 1-8 can be routed to Bus L, Bus R, both equally (Center), or both unequally (L or R pan increments) by using a channel’s pan control. 833 User Guide...
-
Page 37: Meters
Selects the Release Time for the PPM meter ballistics. [400 ms* to 1600 ms in 200 ms steps] Meter Range Selects the range of the meters from bottom to top of scale. [50 dB*, 40 dB, 20 dB] Meter View 833 User Guide... - Page 38 When in LR, Outputs and LR, and Buses Meter Views, turn the Select knob to scroll to an output or bus. Pressing the Select knob acts as a shortcut to that outputs or bus routing screen. Pressing the Select knob acts as a shortcut to that outputs or bus routing screen. 833 User Guide...
-
Page 39: Timecode
Indicates the Received TC, Generator TC and the calculated difference between the two. Received and Generator UBits are shown. Jamming to external TC and UBits is supported. Jam TC- Toggle Rtn/Fav switch to jam to external TC. 833 User Guide... - Page 40 The 833 is on and powered by L-Mount batteries or the TA4 DC In. The 833 is off, power is connected to the TA4 DC In, and the Power>Batt Charging option is set to Always or When Power is Off.
-
Page 41: Record/Play
Select the WAV Format using the Rtn/Fav toggle switches. RF64 allows for WAV files larger than 4 GB. SSD- [ISO, L/R, Bus1/2, ALL] SD1- [ISO, L/R, Bus1/2, ALL] SD2- [ISO, L/R, Bus1/2, ALL] To differentiate between the ISO and L/R mix poly files: 833 User Guide... - Page 42 False Takes Press HP + << to false take the last recording. This moves the last take to the FALSETAKES folder at the root of each drive and decrements the take number in preparation for the next take. 833 User Guide...
-
Page 43: Q-Marks
Tip: To check the last few seconds or minutes of a long take, Press >> after the last Q-mark has been passed. This will pause playback at the end of the take. Then rewind or reverse scrub to the point of interest and press play. 833 User Guide... -
Page 44: Files
FOLDER menu. By default, the RECORD FOLDER menu displays a list of record folders at root. Navigate to nested folders by highlighting a record folder and pressing the Sel/HP knob. To navigate back up the folder hierarchy, press Menu or select “\..” at the top of the folder list. The screen’s title identifies the folder path. 833 User Guide... - Page 45 Select New to record in a new Daily folder. Tip: To store new recordings in the root directory, highlight ‘None’ in the Root screen then select the */** toggle (SET Current). When ‘None’ is selected, the date is embedded as Tape metadata. 833 User Guide...
- Page 46 When the monophonic WAV file format is selected (in the Record/Play > Track to Media Routing menu), all mono files created for a take follow the name of the take and are stored in a take folder within the selected record folder. 833 User Guide...
- Page 47 The ‘+’ prefix is added to a filename if an existing take is edited such that it would duplicate the name of another existing take in the same record folder. The ‘A’ suffix is added if the NEXT take’s name is edited such that when recording is started, it would duplicate the name of an existing take in the same record folder. 833 User Guide...
- Page 48 File List Menu>Files>File List enters the File List. The File List displays the 833’s internal SSD and SD cards and their contents. Various details of each drive, folder, and WAV file are indicated on the right side of the display: TC, FPS, duration, format, tracks, date, time, size.
- Page 49 081320_ROLL8_2.csv (on SD2) Tip: It is possible to simultaneously create sound reports on all three media for the current Record Folder by setting a Toggle Switch Action, Controller Midi Mapped button, or GPIO to the ‘Create Sound Report’ function. 833 User Guide...
- Page 50 Select to erase/format SD2. Enter a custom volume name for the SD card when prompted. USB File Transfer Enters USB file transfer mode. Files may be transferred between a Mac or PC and 833 via USB-C port. When in USB file transfer mode, playback, record and controller functions are suspended.
-
Page 51: Slate/Coms/Returns
Duck HP Program (Prgm) By: [0 to -40 dB, -inf] COM Send Routing Selects the destination(s) for Com Send. Output: [L,R, X1-X4] Bus: [L,R, 1-4] HP: [HP-L, HP-R] Duck Bus Prgm By: [0 to -40 dB, -inf] 833 User Guide... - Page 52 Duck HP Program By Ducks all audio sent to headphones by a user defined amount. When sending coms or slate signal to outputs the program routed to that output is replaced by the com or slate signal. 833 User Guide...
-
Page 53: Superslot
Hirose DC Outputs, each supplying up to 500 mA. Up to eight channels of audio can be routed from the SL-2 to the 833. The eight channels can be comprised of audio from dual or quad channel slot in receivers and/or the four AES inputs. - Page 54 Wisycom MCR54 Powering the SL-2 The SL-2 is powered by the 833 via the Expansion Port. No additional power source is needed to power the SL-2. To activate the SL-2, set the System>Expansion Port menu to On. Save power when the SL-2 is not in use by setting the Expansion Port menu to Off. When the Expansion Port is set to Off, the SuperSlot menu is grayed out.
- Page 55 RF overload (A20-RX only). A red bar signifies receiver RF overload (A10-RX and A20-RX only). RX Antenna Icon Indicates RF signal status. Solid white = locked to antenna signal Flashing white = antenna signal unlocked Solid Red = antenna signal overload Gray = no receiver detected 833 User Guide...
- Page 56 Instigates an RF Scan of the environment using one or both receivers depending on the receiver model. Use the */** toggle switch to start the scan. Options Access the SL-2 Options menu by using the Rtn/Fav toggle switch. 833 User Guide...
-
Page 57: Sl-2 Options
Sets the duration of the RF HISTORY plot. Select from 30 to 600 seconds in 10 second steps, default duration is 30 seconds. Use Wireless Names The name associated with the receiver channel is automatically applied to the isolated track receiving the signal. This feature is supported by the Audio Ltd. A10-RX, A20-RX, Shure ADX5D, and the Wisycom MCR54. 833 User Guide... - Page 58 510-700, 510-600. When Filter is set to Tunable, Filter Frequency can be adjusted in 40 MHz blocks from 410-450 to 690-730 in 1 MHz steps.] Antenna A/B Settings Provides access to additional Antenna A or B settings. 833 User Guide...
- Page 59 Sets the duration of Antenna A/B display timeout in steps of 1 second. [5 to 240 seconds] Display Rotate Sets the rotation of the Antenna A/B display. [0 or 180] Sets Antenna A/B LED activity. [On or Off] Version Info Displays system information about the Wisycom LFA-B-F1. 833 User Guide...
-
Page 60: Receiver Setup Screens
Select knob. 1: Post-trim Channel Metering Displays the post-trim audio level of the 833 channel receiving audio from the SL-2 source. When the SL-2 source is not routed to an 833 channel, no signal is displayed on the meters. - Page 61 The RF History Levels setting determines the source of the data drawn. RSSI is displayed in green and Quality in purple. The RF History Levels option is available on Audio Ltd A10-RX, Sound Devices A20-RX, Shure ADX5D, and Wisycom MCR54. A yellow bar signifies receiver is approaching RF overload (A20-RX only).
- Page 62 When the A20-RX/A10-RX receiving A20-Mini signal is slotted into the SL-2, the A20-RX/A10-RX Input menu settings are bypassed and all gain, low cut, and limiter activity are performed and controlled by 833. See the A20-Mini and A10-RX User Guides for more information.
- Page 63 Third-Party Supported SuperSlot Receivers The following pages show the Receiver Setup screens and the options menus for third-party supported SuperSlot receivers. Refer to the manufacturer for full details on features and functionality of these receivers. 833 User Guide...
- Page 64 Lectrosonics SRB Lectrosonics SRC 833 User Guide...
- Page 65 Sennheiser EK6042 833 User Guide...
- Page 66 SuperSlot Control of the Shure ADX5D is only available when Device Cfg >> Advanced >> 3rd Party Control is On. When the Shure ADX5D is in High Density Transmission mode, Groups and Channels must be set from the ADX5D interface. 833 User Guide...
- Page 67 Sony DWR-S03D Wisycom MCR42 833 User Guide...
- Page 68 Wisycom MCR54 833 User Guide...
-
Page 69: System
When…- Selects when the notification bell tones are used. [Rec/Stop, Space Low, Power Low, Warning Popup]. Level- Selects the level at which the notification bell tones will be played in 1 dB increments. [Muted, -60 to -12dBFS] Fader Calibration Selects the option to manually calibrate all faders. 833 User Guide... - Page 70 Timecode Calibration Tunes the 833 system clock to an external LTC signal. Brightness Selects the brightness of the LED display and front panel LEDs. LED Brightness- Selects the front panel LED brightness in 1% steps. [1%-100%]. Selects the front panel LCD display brightness in 10% steps. [10%-100%].
- Page 71 Shows plugins installed on the 8-Series mixer-recorder. Activates plugins on the SSD or SD card stored as LIC files. Plugins can be purchased at store.sounddevices.com 833 User Guide...
-
Page 72: Plugins
The following plugins are available for the 833: 833 +4 Adds four fully featured ISO channels/record tracks, turning your 833 into a 12 channel, 16 track mixer-recorder. NoiseAssist Suppress background noise instantly on-location with the optional NoiseAssist plugin for 8-Series mixer-recorders. Choose between... -
Page 73: The 833 +4 Plugin
The 833 +4 Plugin The 833 +4 Plugin adds four fully featured ISO channels/record tracks, turning your 833 into a 12 channel, 16 track mixer-recorder. Channels 9-12 setup screens are accessed via Menu>Channels 7-12. All features of Channels 1-8 are available on Channels 9-12. -
Page 74: Noise Suppression Plugins
Previously, using CEDAR with an 8-Series mixer-recorder required a separate hardware unit like the CEDAR DNS 2. This collaboration between CEDAR and Sound Devices marks the first time CEDAR technology has been available in-unit for any portable mixer-recorder. Now, even ultra-light portable recording setups have access to CEDAR noise suppression. - Page 75 For a Bus B1-B4: Go to Menu>Buses and select Bus 1-4, whichever has been enabled for Noise Suppression. Push Tone toggle to display more options then push the */** toggle to the right to select the NA or NX parameter and rotate the Select knob to set the amount of Noise Suppression applied to the bus. 833 User Guide...
- Page 76 To effectively use Noise Suppression, start with the default setting of -6 dB and dial in more or less depending on your environment. An ideal setting will reduce the background noise without coloring the sound. Note: NoiseAssist and CEDAR sdnx are not automatically linked when channels or buses are linked. 833 User Guide...
-
Page 77: Controllers
Controllers 833 can be controlled from the Sound Devices CL-16 or CL-12 linear fader controllers or supported third-party external controllers that conform to the MCU protocol. Controllers connect via the 833’s USB-A port either directly or via a USB hub. - Page 78 Mappable Functions All controllers have custom-mappable buttons for performing any of the following actions on 833: Function Action Add Q-mark Adds a Q-mark during record, playback, scrub or pause Auto Mixer On/Off Toggles the Auto Mixer on/off Bus Mode Bus Masters...
- Page 79 LR Returns Meter Activates the returns meter view Menu Emulates the Menu button on 833 Meter Emulates the Meter button on 833 Mic Toggle Emulates the Mic toggle on 833 Mix Low Cut Mode Activates all V-Pots to Low Cut mode on every channel. Push to reset to O Hz.
- Page 80 Toggle Jog is Select Toggles between Select and HP knob press on 833 Tone Toggles tone on/off Tone Toggle Emulates Tone toggle on 833 * Toggle Emulates * toggle on 833 ** Toggle Emulates ** toggle on 833 Display Ch. Fader Gains Selects whether the fader gains are displayed in the controller’s display.
- Page 81 Mix Trim Mode, Nav Down, Nav Left, Nav Right, Nav Up, Out Mode, Play, Play Remain Time, Record, Rewind, Rtn A, Rtn B, Rtn C, Rtn Toggle, SL-6 Receiver Overview, Scene Inc, Scene Name, Select, Slate, Slate (Latch), Slate (Momentary), Stop, Take List, Take Notes Edit, Take Number Edit, Timecode Jam, Toggle Jog is Select, Tone, Tone Toggle, *Toggle, **Toggle 833 User Guide...
- Page 82 L-X2 Metering: sets whether the L-X2 meters display bus or output levels. L-X2 Routing: sets whether L-X2 routing is to buses L-X2 or outputs L-X2. LED Brightness: sets CL-12 LED brightness SEL Follows PFL: selects whether a channel is automatically selected when its PFL is engaged. 833 User Guide...
- Page 83 Slate mic can be toggled on/off by pressing both COM 1 and COM 2 simultaneously. When adjusting EQ from the CL-12, the EQ values are displayed at the bottom of the 833 meter view. A USB-A to USB-A cable is required to connect the CL-12.
-
Page 84: Supported Third-Party Controllers
EQ Mode. For adjusting channel EQ using the VPots. Use the Select buttons to select which channel’s EQ to adjust. Faders continue to control the channel mix. Supported Third-Party Controllers The 833 supports a variety of third-party external controllers that conform to the MCU protocol. Multiple controllers may be connected simultaneously for extended control. SONOSAX SX-LC8+ Eight channel compact fader bank with faders and channel selects for channels 1-8 plus controls for slate mic, record, and stop. -
Page 85: Toggle Switch Action
Select + FAV, FAV + HP, FAV [Rtn, Com Rtn, Fav HP, Ch 7 Trim/PFL (latch), Ch 8 Trim/PFL (latch), Ch 7 Fader /PFL (latch), Ch 8 Fader/PFL (latch), Add Q-mark, Delete Q-mark, Create Sound Report, Record Folder, No Action] 833 User Guide... -
Page 86: Scene Name Editing
New Scene Name Creates a new scene name, adds it to the scene name entry list and in record, applies it to the currently recording take and next take. In stop, it is applied only to the next take. 833 User Guide... -
Page 87: Menu + Pfl Switch Action
Report Info, Slate/Coms/Returns Menu, Slate Routing, Com Send Routing, System Menu, Tone Setup, Notification Bells, Brightness, Time/Date Menu, Toggle Switch Actions, Menu+PFL Actions, Controllers Menu, Auto Mixer ON/Off, Noise Suppression menu, Edit Scene Name, Take Number, Take Notes, Scene Name, Record Folder, SuperSlot Overview] 833 User Guide... -
Page 88: Front Panel Shortcuts
Sel + PFL 1-6 Selects Bus 1-4, L,R Meter + PFL 1-6 Selects Meter Preset 1-6 * Toggle + PFL 1-2 Selects Channel Screen/PFL 7-8 ** Toggle + PFL 1-8 As defined in the System/Toggle Switch Action menu. 833 User Guide... - Page 89 As defined in the System/Toggle Switch Action menu. Default: Com Rtn 2 Sel + Tone (hold) L-Ident Tone HP + Right Transport Control Scene Increment Sel + Transport Control Right Add Q-mark Sel + Transport Control Left Delete Q-mark 833 User Guide...
-
Page 90: Usb Keyboard
USB Keyboard A USB keyboard may be connected to the 833 via the USB-A port. The keyboard may be used for metadata entry as well as the following shortcuts: Keystroke Description Enters Main Menu Enters Take List Toggles Meter Views... -
Page 91: X-Keys® Programmable Keypads, Sticks & Keyboards
P.I. Engineering’s MacroWorks Windows software. When mapped as individual commands or as macro commands to 833’s USB Keyboard shortcuts listed above, they offer quick-access to many functions including Record, Stop, Play, and many more. -
Page 92: Sd-Remote
833 except for fewer channels, buses, and outputs. SD-Remote is a mobile device application designed to pair with the 833. SD-Remote is available for Android tablets and phones in the Google Play Store or as an APK from www.sounddevices.com, and for iPhone and iPad in the App Store. An Android tablet can be hardwired to the 833 via USB or wirelessly connected via Bluetooth LE. - Page 93 Open the SD-Remote app, access the settings tab, and choose “Connect via Bluetooth”. Access any Metering tab and touch the Sound Devices logo button to display a list of 8-Series devices that can be connected to via Bluetooth. When the Devices Found list is shown, Bluetooth connection to the currently selected device is stopped.
- Page 94 “No Bluetooth Connection” popup will appear when SD-Remote does not detect presence of the selected 8-Series device. For optimal Bluetooth LE connection, the Sound Devices XL-ANT2.4 Antenna must be fitted to the SMA port of the 8-Series device. 833 User Guide...
- Page 95 Enter the password and press “Enter” to allow connection. Toggle “Remember Password” to allow the mobile device to connect without reentering password. To Remove A Password In the 8-Series menu, navigate to System-Bluetooth-Clear Password. Press “Ok” in the “Clear existing password” dialog box. 833 User Guide...
- Page 96 Fat Channel Screen Access Track Arm Channel Meter Channel Fader Channel Name Device Connection Current Take Metadata Left & Right Mix Meters Information Window 10. Next Take Metadata 11. Transport Bar 12. Arm Lock 13. Navigation Bar 833 User Guide...
- Page 97 Navigation Bar Device Connection Touch the Sound Devices insignia to view a list of available 8-Series Mixer-Recorders to connect via Bluetooth or USB. If already connected to a device, a ‘Break Connection’ popup will appear to prevent accidental disconnection Information Window...
- Page 98 From the Fat Channel screen, view a channel’s audio activity, arm/disarm the isolated track for recording, edit the track name, set trim gains, fader gains, pan, mute, PFL, channel source, HPF, Iso, delay, phase, limiter, and linking. Tablet views allow for direct access to other Fat Channel screens via the tabs on the bottom of the screen. 833 User Guide...
- Page 99 833 User Guide...
- Page 100 The Bus Meters view is similar to the Channel Meters view except that it displays metering and control for buses. To access on a tablet, tap the Buses Tab. To access on a phone, tap the Bus/Out Tab 833 User Guide...
- Page 101 A buses detailed settings (Name, Gain, Limiter, Mute, AFL, Linking, and Routing) can be configured from its Fat Bus screen which is accessed from the Bus Meters view as follows: For a tablet, tap its Fat Bus Screen Access touch zone at the bottom of each Bus strip. For a phone, tap its Bus meter. 833 User Guide...
- Page 102 The Output Meters view is similar to the Channel and Bus Meters view except that it displays metering and control for outputs. To access on a tablet, tap the Outputs Tab. To access on a phone, tap the Bus/Out Tab and swipe up. 833 User Guide...
- Page 103 Edit scene, take, notes, track names, and circle the current or previously recorded take. Take Info Displays timecode, user bits, frame rate, duration, media, roll/folder, date, time, sample rate, bit depth, channels, and whether the take is poly- or monophonic. 833 User Guide...
- Page 104 To create a report from a different day’s folder than the currently active one, go to the 888’s Take List > Next Take > Rec Folder and highlight the shoot day folder you want to create the report for, then press ‘Set Folder’. ‘[current]’ in orange text appears after the name of the current record folder. 833 User Guide...
- Page 105 Turn On to hide faders in the Meter views. Faders are still available in the channel screen. Meter View Arm Lock (Phone) Enable to prevent accidental arming disarming in the Meter views. Track arming is still available in the channel screen. File Transfer Mode Touch to put the 8-Series into File Transfer Mode. 833 User Guide...
- Page 106 833 User Guide...
-
Page 107: Quick Setup
Note: All other functionality is suspended in USB File Transfer mode. 2-In 2-Out USB audio is available via the USB-C port on the 833. All routing is handled through the channel and output routing matrices. No special drivers are needed as the built-in OS drivers will work properly. -
Page 108: Specifications
Specifications Specifications are subject to change without prior notice. For the latest information available on all Sound Devices products, visit our website: www.sounddevices.com Frequency Response 10 Hz to 80 kHz ± 0.5 dB (192 kHz sample rate, re 1 kHz) THD + Noise 0.005% max (mic in, 1 kHz, 22 Hz–22 kHz BW, trim at 20, fader at 0, -10 dBu in) - Page 109 12 tracks (8 iso channels, 4 buses) Broadcast WAV monophonic and polyphonic file format 64-bit WAV (RF64) monophonic and polyphonic; support for files > 4 GB AAC 2 track at 48 kHz, selectable bit rate 32, 64, 128, 192, 256 kbps 833 User Guide...
- Page 110 MixAssist up to 16-channels on Left and Right bus Noise Suppression Via optional paid Sound Devices NoiseAssist or CEDAR sdnx Plugins Two, four, or eight instances of Noise Suppression can run on any combination of isolated channels or buses. Attenuation range: 0-20 dB NoiseAssist operates with sampling rates of 44.1 kHz to 48.048 kHz.
- Page 111 5.1 cm x 22 cm x 17 cm; (2.0 in. x 8.7 in. x 6.6 in) Weight 2.75 lbs (unpackaged, without batteries) 1.25 kg (unpackaged, without batteries) 833 User Guide...
-
Page 112: Legal Notices
Cet appareil est conforme avec Industrie Canada, exempts de licence standard RSS (s). Son fonctionne- ment est soumis aux deux conditions suivantes: 1) ce dispositif ne peut pas causer d’interférences, et 2) ce dispositif doit accepter toute interférence, y compris les interférences qui peuvent causer un mauvais fonctionnement de l’appareil. 833 User Guide... - Page 113 Incorrect use of batteries poses a danger of explosion. Replace only with the same or equivalent type. Properly recycle batteries. Do not crush, disassemble, incinerate, dispose in a fire or expose batteries to high temperatures. Declaration of Conformity 833 User Guide...
-
Page 114: Warranty
Warranty Sound Devices, LLC warrants the items listed above against defects in materials and workmanship for a period of ONE (1) year from date of original retail purchase. Users who register their product directly with Sound Devices Technical Support using the online form or by phone, will receive an additional ONE (1) year of warranty coverage, extending the complete warranty period to TWO (2) years from the date of original retail purchase. -
Page 115: Glossary
An audio input on a mixer designed to receive the output, typically the headphone output, of a camera. Camera return inputs allow the user to monitor the level and quality of the signal received at the camera. On the 833 the Aux In can be used as a source for any channel. - Page 116 Channel grouping With the 833 all of the 8 channels can be grouped together so that their faders, record arming state mute states can be controlled together. Channel grouping can be used as an alternative to sending channels to a bus.
- Page 117 MixAssist™ An exclusive Sound Devices automatic mixing algorithm which when used across multiple microphone inputs for speech, makes decisions about which inputs should be given priority due to speech being present vs. open, but unused inputs. This allows for...
- Page 118 NoiseAssist™ An exclusive Sound Devices noise suppression algorithm which is available as an optional paid plugin from store.sounddevices.com. Use NoiseAssist to suppress background noises such as traffic, generators, HVAC noise, and more. The plugin continuously monitors background noise to give you clean audio for the entire take.
- Page 119 20 kHz is required. A general rule is that the maximum analog audio frequency is ½ the sampling rate. Scene On Sound Devices recorders the scene becomes part of the file name for a take. Scene names can be pre-loaded to quickly change between scenes. 833 User Guide...
- Page 120 TA4 connectors are used by Sound Devices for DC power connections to the 833 mixer-recorder. TA4 is also used for audio connections from lavalier microphones to some wireless transmitters. TA5 connectors are used for the 833 headset input. TA6 connectors are presently not used by Sound Devices though they are used for audio connections by other manufacturers.
- Page 121 A universal, well-supported file type for sound file recordings. WAV files can contain one or more (up to 65,535) tracks of PCM audio data at any sampling rate and bit depth. A standard WAV file is limited to a maximum file size of 4 GB. Sound Devices uses the .WAV extension for recorded files, including for files with Broadcast WAV metadata.
- Page 122 INTERRUPTION) HOWEVER CAUSED AND ON ANY THEORY OF LIABILITY, WHETHER IN CONTRACT, STRICT LIABILITY, OR TORT (INCLUDING NEGLIGENCE OR OTHERWISE) ARISING IN ANY WAY OUT OF THE USE OF THIS SOFTWARE, EVEN IF ADVISED OF THE POSSIBILITY OF SUCH DAMAGE. 833 User Guide...
- Page 123 Post Office Box 576 E7556 State Rd. 23 and 33 Reedsburg, Wisconsin 53959 USA support@sounddevices.com +1608.524.0625 main 800.505.0625 toll free (U.S. only) www.sounddevices.com 833 User Guide...
Need help?
Do you have a question about the 833 and is the answer not in the manual?
Questions and answers