Table of Contents
Advertisement
Quick Links
Advertisement
Table of Contents

Related Manuals for Sound Devices MixPre-6M


Summary of Contents for Sound Devices MixPre-6M
- Page 1 ® MixPre-6M Multitrack Recorder | USB Audio Interface User Guide...
- Page 2 Trademarks The “wave” logo is a registered trademark and Kashmir is a trademark of Sound Devices, LLC. iPad, iPhone, Mac and OS X are trademarks of Apple Inc., registered in the U.S. and other countries. Windows is a registered trademark of Microsoft Corporation in the U.S.
-
Page 3: Table Of Contents
Table of Contents Quick Start Multitrack Recording Step-by-Step ..5 Intro Powering Flexible Powering Options ... . .11 Panels Front Panel ..... . .13 Right Side Panel . - Page 4 User Guide Recording and Playback Formatting SD Cards ....39 Clearing & Deleting Cue Points ..44 Transport Controls ....39 Locating to Cue Marks .
-
Page 5: Quick Start
Multitrack Recording Step-by-Step This Quick Start chapter is meant as a “step-by-step, how-to” reference for setting up the recorder and making music with the MixPre-6M right out of the box. For more information on features and steps mentioned in this procedure, refer to later chapters in this User Guide. - Page 6 User Guide (D) Tap OK to confirm formatting of the card. Warning - all data on the SD card will be erased! ⚠ (E) Tap to return to the Home screen. Create a project. (A) Tap (B) Tap Project > New. (C) Tap Name to customize the name of the new project.
- Page 7 QUICK START (F) To hear the input as you adjust gain, first turn the Channel knob until fader setting is 0dB. Then, tap Gain (on Channel screen) and turn the HP encoder to adjust input sensitivity for the source. If possible, adjust with signal coming in at the intended level and observe the LED ring around the Channel knob.
- Page 8 User Guide You can only use Air on one track at a time. 13. (Optional) Should you want to scrap the recording and try again, tap and then tap History. Using the HP encoder, rotate to highlight and select Restart Song. 14.
-
Page 9: Intro
The MixPre-6M lets you record up to six tracks at once from any of the 4 XLR inputs, Aux in connectors, or USB inputs. The built-in metronome helps you to keep your performance in time, while the reverb and vocal air effects add char- acter to your recording and can aid in inspiring a great performance. - Page 10 User Guide Of course, the possible uses for the MixPre-6M are virtually unlimited, but a few common ones are: • Creating a multi-layered song using the track laying and overdubbing fea- tures • Mixing and recording small ensemble live performance •...
-
Page 11: Powering
Powering Flexible Powering Options In designing the MixPre-6M, we felt that it was important for it to be able to operate in a wide array of applications and environments. To support that goal, power can be supplied from several possible sources: •... - Page 12 User Guide To ensure Battery Status indicator displays accurate levels/status: 1. Tap Page through submenu and tap Power. Select the type of batteries being used in the sled. Options include: NiMH, Alkaline, L-Mount...
-
Page 13: Panels
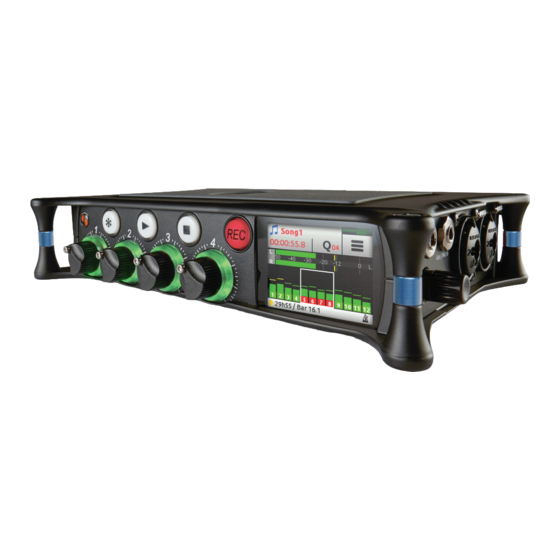
Panels Front Panel Power light, Star button for shortcuts, Channel knobs, Channel knob ring LEDs, backlit Transport buttons, and touch screen Star Button Recorder Transport Controls Power Light Channel Knobs Channel Knob Ring LEDs The Channel knobs on the front panel have two purposes: •... -
Page 14: Right Side Panel
User Guide Right Side Panel 3.5mm headphone output, 3.5mm Aux/Mic input, XLR/¼-inch TRS inputs 3-4, headphone encoder 3.5 mm Aux/Mic Input 3.5 mm Headphone Output XLR/TRS Inputs HP Encoder Back Panel Battery mounts, SD memory card slot, Allen wrench (for ¼-inch-20-thread captive screw), and anti-rotational pin Battery Mounts Allen wrench &... -
Page 15: Screens & Navigation
Screens & Navigation The MixPre-6M has a sunlight-viewable, high-resolution, touch-screen-based user interface. The touch screen interface displays the Home screen, Main Menu screen, Channel screens and various other views. For information on Channel screens, see Accessing Channel Screen Settings Input Channels chapter. - Page 16 User Guide You will find on the Home screen numerous items, such as: escrIptIoN Music Notes icon Access the Music Control menu by touching this region of the Home screen. Current name Displays name of current Music project. Time counter Indicates the current song position in hh:mm:ss:tenths.
-
Page 17: Main Menu Screen
SCREENS & NAVIGATION Main Menu Screen The Menu screen is where most of the features and functions are selected and set up. To enter the Menu screen: on the Home screen. There are three Menu pages. These pages are indicated by the Dots icon . -
Page 18: Music Control Menu
User Guide To return directly to the Home screen from the main Menu: Music Control Menu The Music Control Menu provides fast access to the Cue List, the Solo/Mute screen, metronome on/off, project render, and access to project history. For more information, see Working with Cue Points, Using... -
Page 19: Setting The Star Button
SCREENS & NAVIGATION Setting the Star Button For your convenience, the MixPre-6M has a user-programmable button, called the Star (*) button, for flexible customization. You may configure it to gain quick access to certain features. To set the Star button functionality: 1. - Page 20 User Guide...
-
Page 21: Input Channels
An input channel is the path an audio source travels before it can be mixed and recorded along with other channels. In the MixPre-6M, think of an input channel as the same as a ‘track’ in a DAW. An input channel can be fed by any of the four XLR or TRS mic/line sources, a 3.5mm Aux line/mic source (with or without... -
Page 22: Track Names
Any input can be routed to any channel. This reduces the need to rearrange instruments plugged into inputs when you want to record that input to a different track. You can also select the MixPre-6M’s mixer outputs (see Bouncing), a metronome click (see Metronome) or turn on Phantom power. -
Page 23: Enabling Monitoring
USB: -20dB - 30dB Using Solo/Mute The MixPre-6M offers a few different ways to mute or solo tracks. • From each track’s Channel screen, tap Mute to mute the selected track. This removes the signal from recorded tracks, mix and all outputs. When muted, its LED ring will glow red. -
Page 24: Arming A Track
User Guide is soloed, its LED ring will flash orange. Like Mute, soloing is non-exclusive, meaning any number of inputs may be soloed at the same time. You can quickly solo/mute several tracks from the Solo/Mute screen. All 12 tracks’ Solos and Mutes may be viewed and set from this screen. Access to it may also be set as a shortcut for Star (*) button. -
Page 25: Using Reverb
INPUT CHANNELS Using Reverb Reverb sets how much reverb is added to a track in the LR mix. Only the mix is affected, not the individual recorded tracks. To render the reverb effect into the individual recorded tracks, you must use the Bounce feature. -
Page 26: Toggling Phase Inversion
User Guide The Low Cut setting activates and sets the Low Cut filter. Range is Off, 40-160 Hz in 40 Hz steps. Toggling Phase Inversion Phase inversion, also known as polarity reversal, can be used to prevent signal cancellation when a source is dual-mic’d from opposite directions (e.g. overheads on a drum kit) or to compensate for incorrectly wired, balanced cables. -
Page 27: Track Bank Selector
INPUT CHANNELS unbalanced 2ch line source, such as smartphone headphone output, stereo line source, etc. When any of the options above are selected as the Aux In Mode, they are available as input sources to any track by selecting an Aux. ◦... - Page 28 User Guide In this example, the Channel knob track 9 must be rotated clockwise, as indicated by the arrow, from its current fader value of -18dB. Once it reaches the track’s previously stored value of -15dB, the mix level will start to be affected.
-
Page 29: Adjusting Output Level
Outputs The MixPre-6M includes the Stereo 3.5mm output, which is unbalanced. To route the L/R stereo outputs: 1. Tap Tap Outputs. Tap Stereo Out to route 3.5mm output. The stereo outputs can be fed from the LR mix (stereo or mono) or can be set to follow whatever is being output in the headphones (stereo or mono). -
Page 30: Headphone Output And Presets
The Output Mute feature may also be set as a * Shortcut. Headphone Output and Presets The MixPre-6M’s audiophile-grade headphone amplifier provides high power and very low noise performance so that you can accurately hear the audio being handled, regardless of headphones or environment. Connect headphones via 3.5mm jack to the headphone jack (located on the right side panel). -
Page 31: Leds And Metering
Metering LEDs and Metering There are several basic methods for observing input and output levels on the MixPre-6M: Channel knob ring LEDs, Channel screen meter, and Home screen’s meter view. Channel Knob Ring LEDs Channel knob ring LEDs - Each LED ring is capable of displaying green, orange and red colors. -
Page 32: Meter View
User Guide Meter View The Home screen’s meter view displays vertical metering for the 12 tracks and horizontal stereo L/R mix. The meter view also provides the Track Bank selector, which is a white-outlined box (or boxes) surrounding a group of neighboring meters in the meter view. - Page 33 Projects Each song or composition in the MixPre-6M is known as a Project. A Project is essentially a folder on the SD card that stores all your song’s audio files and settings. This makes it easy to organize, share, and copy your musical creations.
-
Page 34: Creating Projects
User Guide Creating Projects MixPre-6M will automatically create a project if record is pressed without first creating a new project. To create a new Music project: 1. Tap Tap Project > New. When the New Project screen appears, you can do any of the following: Name the project. -
Page 35: Opening Projects
TRASH folder on the SD card. Projects in this folder are still accessible using a computer. To free up space on the SD card, you can permanently delete projects in the SD card’s TRASH folder from the MixPre-6M’s SD Card > Empty Trash sub-menu. -
Page 36: Project History
User Guide Project History Each recording is logged as an item (revision) in the History list. This makes it easy to “undo” to an earlier recording or “redo” to a later recording—ideal for quickly redoing a bad take or comparing different takes. The History list is in chronological order with the most recent recording at the top. -
Page 37: Sharing Projects
SD card. There are multiple ways to share a project: • Copy Project Folder - ideal for collaborating with other MixPre-6M users. They can load the whole project from an SD card and continue working from where you left off. - Page 38 User Guide...
-
Page 39: Recording And Playback
The MixPre-6M can record and playback up to twelve audio tracks at 96 kHz, 24-bit to an SD card (SD, SDHC,or SDXC). You can record to the SD card even when using the MixPre-6M as a USB audio interface. This opens up cool opportunities for recording the computer’s USB audio output and mixing it with other mic and line sources plugged into the MixPre. -
Page 40: Record Arming
User Guide All projects start at 00:00:00.0. uNctIoN oNtroL ctIoN The button illuminates red while recording is underway. Push the REC button to manually start recording from the Record current position on the timeline. You can manually start recording during playback or when stopped. Only armed channels are recorded. -
Page 41: Working With Cue Points
RECORDING AND PLAYBACK Working with Cue Points The MixPre-6M uses cue points to make it easy to locate quickly to points of interest and set up automatic punch in/out regions. There are different types: escrIptIoN Cue mark Cue marks are cue points that define a specific position of interest (01, 02, etc) within a song, which may be used to “cue”... - Page 42 User Guide Alternatively, you can create cue marks and set them as Play In, Record In/Out, or Stop points from the Cue-List. To add cues marks: During recording, playback, or pause, tap , the Q icon at the top of the Home screen to add a cue mark exactly at that point in the song.
-
Page 43: Moving Cue Points
RECORDING AND PLAYBACK To set a cue as a Play In, Record In/Out, or Stop point: 1. From the Cue List, select a cue. Tap Set As. Tap Play In, Record In, Record Out, or Stop to set the selected cue mark as an In/Out point for recording or playback. -
Page 44: Clearing & Deleting Cue Points
User Guide Clearing & Deleting Cue Points You can delete cue marks and clear Play In, Record In/Out, or Stop points via the Cue Points menu or Cue List screen. To clear all In and Out stored values: Tap Clr In/Out. To clear an individual Play In, Record In/Out, or Stop point: Select one from the Cue List and tap Disable. -
Page 45: Bouncing
Play In, Record In/Out, and Stop points. Bouncing The MixPre-6M offers up to 12 tracks which is enough for many situations. For example, four for drums, one for bass, two for vocals, two for guitars, two for keyboards plus a spare! However, sometimes you may want to add more layers. - Page 46 User Guide feedback. You can adjust the level of the recorded bounce using the LR gain control - tap the L(left) mix meter in the home screen to quickly access LR gain. Decide which track or tracks you want to bounce from. Let’s call these the source tracks.
-
Page 47: Metronome
RECORDING AND PLAYBACK Metronome The metronome is an audible click that may be used to help you perform in time while recording and also provide a count-in so that you know when to start playing. The first beat of the bar is represented by a higher pitched click than the other beats of the bar. -
Page 48: Record Settings
User Guide The Metronome button will be disabled (appearing grayed out but with an orange icon) whenever Click is assigned as a track’s input source. Record Settings The Record submenu provides access to the settings detailed in the following table: meNu escrIptIoN ptIoNs... - Page 49 RECORDING AND PLAYBACK...
- Page 50 User Guide...
-
Page 51: Usb
The MixPre-6M has an integrated 8-in, 4-out core audio-compatible interface for use with a Mac or PC computer. For PC users, the MixPre-6M will appear as a 2x2 audio interface unless a specific ASIO driver is installed. The latest ASIO driver, along with install ®... -
Page 52: Low-Latency Monitoring
1-4 to taste. USB File Transfer The MixPre-6M supports USB file transfer between its SD card and a computer by connecting the MixPre-s USB-C port to a host computer’s USB port. To use this feature, connect the recorder to a computer and then put the MixPre-6M into File Transfer mode. -
Page 53: Usb Keyboard
Additionally, some keyboards must be connected only after the recorder is turned on. A connected wired or wireless USB keyboard may also be used as a remote control for certain functions of the MixPre-6M. See the table below for available USB keyboard shortcuts. USB Keyboard Shortcuts When a USB keyboard is attached, the following key-combinations or shortcuts are available. - Page 54 User Guide...
-
Page 55: User Presets And System Settings
User Presets and System Settings Saving and Recalling Presets Flexibility is the MixPre-6M’s M.O. To make it easy for you to use the recorder in a wide variety of situations, we created a slick feature where you can store and recall snapshots of all of the MixPre-6M’s settings. There are four internal Preset slots available. -
Page 56: System Settings
LEDs. Date/Time Provides access to set the date, time, and formats for both. Regulatory Provides full Federal Communications Commission (FCC) compliance information specific to MixPre-6M. FCC ID: 2AKLX-739M6 IC: 22225-739M6 HVIN: MIXPRE6M Version Provides the current firmware version and serial number. -
Page 57: Remote Control
Remote Control Wingman Application Sound Devices Wingman is a free app that allows wireless remote control of the Bluetooth Smart-enabled MixPre Series from iOS or Android devices. To enable Bluetooth on the MixPre recorder: 1. Tap Tap System > Bluetooth. This toggles Bluetooth On and Off. - Page 58 User Guide Wingman’s touch-screen user interface offers easy navigation and monitoring with three main areas of interest: • Status - Shows device-specific status information. • Viewing area - Displays different screen views, such as the Transport view with its transport control buttons and meters. Swiping horizontally toggles between Transport and Track views, handy when using Wingman app on devices with smaller screens.
-
Page 59: Connecting To A Mixpre Recorder
“Identifying from Wingman” message on the chosen recorder’s screen. When running Wingman, the Connection icon, which bears the Sound Devices logo, displays different colors. The color of the icon is significant:... -
Page 60: Music Projects Via Wingman
User Guide Music Projects via Wingman Beginning with version 3.20, the Wingman app includes support of Bluetooth connection to all M-models of the MixPre Series as well as support of Music projects in models with the Musician Plugin activated. Custom naming and arming of tracks may be done in Transport view (shown above) on large screen mobile devices, like tablets, or in Track view on smaller screen mobile devices, like smartphones. - Page 61 REMOTE CONTROL To arm/disarm tracks: Tap the meter label. When armed the label turns red. When on but disarmed, the label is gray. When the input is off, the label is black and cannot be armed. And in Music projects, when playing back or overdubbing, labels for on but disarmed tracks appear green.
- Page 62 User Guide...
-
Page 63: Connecting The Mixpre To A Controller
USB Controllers Beginning with firmware v3.00 and higher, the MixPre Series (including M models) can be connected to selected third party controllers for tactile control of mixing and recording. No matter whether you are creating music, podcasts or recording sound for picture, these control surfaces provide yet another cool way to interact with your MixPre in addition to operating MixPre direct from its front panel or from the Bluetooth Wingman App for iOS and Android. -
Page 64: Map User-Definable Buttons To Shortcuts
User Guide and are therefore disabled on the MixPre. Depending on the controller model, these functions may include faders, trims, pans, reverb sends, and low cut filters. Map User-Definable Buttons to Shortcuts You can customize designated buttons/knobs on a controller to operate certain functions on the MixPre. -
Page 65: Akai Midimix Interface
USB CONTROLLERS Akai MidiMix Interface uNctIoN usIc rojects uDIo rojects Fader Bank Switching Bank Left = Select fader bank to the left Bank Right = Select fader bank to the right User-Definable Shortcut Solo + Bank Left Solo + Bank Left Buttons Solo + Bank Right Solo + Bank Right... -
Page 66: Korg Nanokontrol 2 Interface
User Guide uNctIoN usIc rojects uDIo rojects Channel Screen Access Press Bank Left/Right and REC Arm Solo + REC Arm buttons to access channel screen Faders Linear faders 1-8 Linear faders 1-8 Trims Top row knobs Top row knobs Pans Bottom row knobs Bottom row knobs Reverb... - Page 67 USB CONTROLLERS uNctIoN usIc rojects uDIo rojects Record Record button Record button PLAY/Pause Play button Play button STOP Stop button Stop button FFWD X2, X16 Hold >> button Hold >> button RWD X2, X16 Hold << button Hold << button Skip Next File Tap >>...
-
Page 68: Korg Nanokontrol Studio Interface
User Guide Korg NanoKontrol Studio Interface uNctIoN usIc rojects uDIo rojects Fader Bank Switching Track < button = Select fader bank to the left Track > button = Select fader bank to the right User-Definable Shortcut Cycle + Marker Set Cycle + Marker Set Buttons Cycle + Marker <... -
Page 69: Novation Launchcontrol Xl Interface
USB CONTROLLERS uNctIoN usIc rojects uDIo rojects Channel Screen Access Press Cycle so that it’s illuminated, Select button then press a Select button Faders Linear faders 1-8 Linear faders 1-8 Trims Scene 1 then use knobs Scene 1 then use knobs Pans Scene 3 then use knobs Scene 3 then use knobs... - Page 70 User Guide uNctIoN usIc rojects uDIo rojects User-Definable Shortcut Buttons DOWN DOWN Device + UP Device + UP Device + Down Device + Down Device + Left Device + Left Device + Right Device + Right Record via user-definable shortcut via user-definable shortcut PLAY via user-definable shortcut...
- Page 71 USB CONTROLLERS uNctIoN usIc rojects uDIo rojects Metronome via user-definable shortcut Create Q via user-definable shortcut via user-definable shortcut Undo Only via History List on MixPre via user-definable shortcut Internal Mic (10M/10T only) via Input patchbay only via user-definable shortcut...
- Page 72 User Guide...
-
Page 73: Audio Inputs
Specifications Specifications are subject to change without prior notice. For the latest information available on all Sound Devices products, visit our website at: www.sounddevices.com. Audio Inputs escrIptIoN Frequency Response 10 Hz to 40 kHz +/- 0.5dB re 1 kHz @ 96 kHz sample rate Total Harmonic Distortion 0.005% max (@1 kHz, 22-22 kHz BW, gain=20 dB, -10 dBu in) -
Page 74: Audio Outputs
• Reverb types: Plate, Room, Hall (48 kHz max sampling rate) • Vocal Air escrIptIoN Audio Interface (USB-C) 8-in/4-out; 44.1 to 96 kHz; 16/24 bit; Class compliant USB 2.0 high speed or ASIO driver (supplied via download from Sound Devices’ website) Mass Storage (USB-C) USB 2.0 high speed Keyboard (USB-A) -
Page 75: Remote Control
SPECIFICATIONS Remote Control escrIptIoN Keyboard (USB-A) Text entry and control Power escrIptIoN AA Batteries 4x AA sled or 8x AA sled (NiMH or Lithium recommended) L-Mount Batteries MX-LMount: 2x L-mount sled for hot-swappable Li-Ion batteries From Computer Bus-powered via USB-C port. Use either: •... - Page 76 User Guide...
- Page 77 SOFTWARE PRODUCT remains with you. No liability for damages. In no event shall Sound Devices, LLC or its suppliers be liable for any damages whatsoever (including, without limitation, damages for loss of business profits, business interruption, loss...
- Page 78 User Guide Devices, LLC product, even if Sound Devices, LLC has been advised of the possibility of such damages. In any case, Sound Devices, LLC’s entire liability under any provision of this evaluation license shall be limited to the greater of the amount actually paid by you for the SOFTWARE PRODUCT or U.S. $5.00. Because some states/jurisdictions do not allow the exclusion or limitation of liability for consequential or incidental damag- es, the above limitation may not apply to you.
- Page 79 ® Sound Devices, LLC Customer Support Product Information E7556 Road 23 and 33 For more information about products Reedsburg, Wisconsin 53959 Toll Free: (800) 505-0625 and accessories, visit us on the web at www.sounddevices.com. Email: support@sounddevices.com Phone: +1 (608) 524-0625 http://www.sounddevices.com/support...
Need help?
Do you have a question about the MixPre-6M and is the answer not in the manual?
Questions and answers