Table of Contents
Advertisement
Quick Links
Advertisement
Table of Contents

Related Manuals for Bosch CMG636B.1


Summary of Contents for Bosch CMG636B.1
- Page 1 Oven CMG636B.1 User manual and installation instructions [en]...
-
Page 2: Table Of Contents
en Safety Futher information and explanations are available on- line: Table of contents 1 Safety Observe the following safety instructions. 1.1 General information INFORMATION FOR USE ¡ Read this instruction manual carefully. Safety .............. 2 ¡ Keep the instruction manual and the Preventing material damage ....... -
Page 3: Safety
Safety en When the cooking compartment is hot, any al- been instructed on how to use the appliance coholic vapours inside may catch fire. The ap- safely and have understood the resulting dangers. pliance door may spring open. Hot steam and jets of flame may escape. -
Page 4: Preventing Material Damage
en Safety Alcoholic vapours may catch fire in the hot WARNING ‒ Risk of suffocation! cooking compartment, and the appliance Children may put packaging material over door may spring open and may fall off. The their heads or wrap themselves up in it and door panels may shatter and fragment. - Page 5 Safety en Using the appliance for anything other than its WARNING ‒ Risk of explosion! intended purpose is dangerous. This is be- Liquids and other food may easily explode cause, for instance, overheated slippers, pil- when in containers that have been tightly lows filled with grain or cereal, sponges and sealed.
- Page 6 en Preventing material damage Never operate the appliance if the cooking WARNING ‒ Risk of electric shock! compartment door or the door seal is dam- The appliance uses a high voltage. aged. Microwave energy may escape. ▶ Never remove the casing. ▶ Never use the appliance if the cooking WARNING ‒ Risk of serious harm to compartment door, the door seal or the health!
-
Page 7: Environmental Protection And Saving En- Ergy
Environmental protection and saving energy en Placing aluminium containers in the appliance may 2.2 Microwave cause sparks, which will damage the appliance. Follow these instructions when using the microwave. Do not use aluminium containers in the appliance. ▶ ATTENTION! Operating the appliance without food in the cooking Metal touching the wall of the cooking compartment compartment may lead to overloading. -
Page 8: Familiarising Yourself With Your Appliance
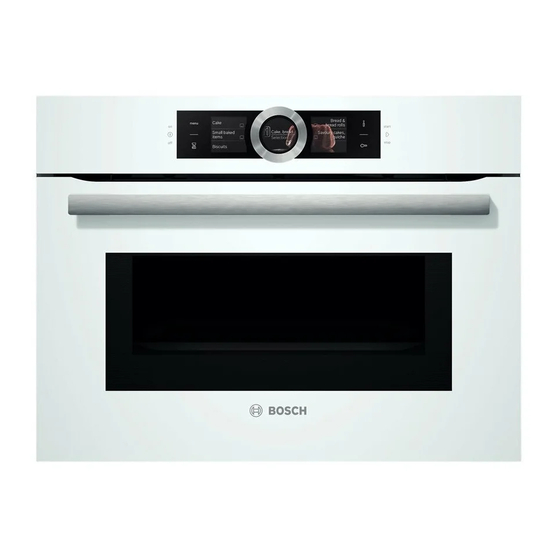
en Familiarising yourself with your appliance 4 Familiarising yourself with your appliance 4.1 Control panel Buttons The buttons on the left- and right-hand side of You can use the control panel to configure all functions the control panel have a pressure point. Press- of your appliance and to obtain information about the ing a button will execute its function. - Page 9 Familiarising yourself with your appliance en ¡ Residual heat indicator 4.5 Control ring When the appliance is switched off, the display ring You can use the control ring to change the setting val- shows the residual heat in the cooking compart- ues that are shown in the display and scroll in the ment.
- Page 10 en Operating modes Appliance door ATTENTION! Do not cover the ventilation slot above the appliance If you open the appliance door during operation, the door. The appliance overheats. operation stops. When you close the appliance door, Ensure that the ventilation slots are unobstructed. the operation continues automatically.
- Page 11 Accessories en Symbol Type of heating Temperature What it's used for and how it works range Possible additional options Grill, large area Grill settings: Grill flat items such as steak and sausages, or make toast. Grat- 1 = low inate food. 2 = medium The entire area below the grill element becomes hot.
-
Page 12: Accessories
You will find a comprehensive range of products for your appliance in our brochures and online: www.bosch-home.com Accessories vary from one appliance to another. When purchasing accessories, always quote the exact product number (E no.) of your appliance. -
Page 13: Before Using For The First Time
to switch the appliance on. ▶ the heating line appear in the display. a The Bosch logo appears in the display. The types of heating then appear. 8.4 Pausing or cancelling operation You can briefly pause operation and then continue. If 8.2 Switching off the appliance... -
Page 14: Rapid Heating
en Rapid heating Use the control ring to change the values. Changing the type of heating Press to start. When you change the type of heating, the other set- tings will also be reset. 8.6 Setting the type of heating and Press ... - Page 15 Time-setting options en To set another cooking time, press "Cooking 10.2 Setting the timer ‒ time" and use the control ring to set the time. The timer runs independently of the appliance when it To continue without setting a cooking time, press ‒...
-
Page 16: Microwave
en Microwave 11 Microwave You can use the microwave to cook, heat up, bake or Cookware and ac- Information defrost food very quickly. The microwave can be used cessories on its own or in combination with a type of heating. Metal cookware and Metal can be used with Micro- bakeware Combi. - Page 17 Microwave en ¡ To prevent condensation, the appliance automatic- ¡ Top/bottom heating ally switches on a heating element at the maximum ¡ Circulated air grilling microwave power settings of 600 watts and max. ¡ Grill, large area The cooking compartment and the accessories be- ¡...
-
Page 18: Assist
en Assist 12 Assist The "Assist" operating mode helps you to use your ap- Take note of the information for the microwave. pliance to prepare different dishes by selecting the op- → "Microwave", Page 16 timum settings automatically. 12.3 Overview of the dishes 12.1 Cookware You can find out which individual dishes are available The cooking result depends on the composition of the to you on the appliance when you call up the operating... -
Page 19: Childproof Lock
Childproof lock en Press the required category. Adding extra cooking time Press the required food. For some dishes, the appliance offers the option to add Press the required meal. extra cooking time once the cooking time has elapsed. a The settings for the dish appear in the display. You can do this as often as required. -
Page 20: Sabbath Mode
en Basic settings 15 Basic settings You can configure the appliance to meet your needs. Basic setting Selection Brand logo Display 15.1 Overview of the basic settings Do not display Dry microwave Switched on Here you can find an overview of the basic settings Switched off and factory settings. -
Page 21: Cleaning And Servicing
Cleaning and servicing en Using oven cleaner in a hot cooking compartment New sponge cloths contain residues from production. damages the enamel. Wash new sponge cloths thoroughly before use. ▶ Never use oven cleaner in the cooking compartment ▶ when it is still warm. Remove all food remnants from the cooking com- ▶... - Page 22 en Cleaning and servicing Area Suitable cleaning agents Information Glass cover for ¡ Hot soapy water Use oven cleaner to remove very heavy soiling. the oven light Rails ¡ Hot soapy water Soak any heavily soiled areas and use a brush or steel wool. Note: To clean thoroughly, detach the rails.
-
Page 23: Drying
Cleaning assistance en 17 Cleaning assistance The cleaning assistance is a quick alternative for occa- a The appliance starts to heat and the cooking time sionally cleaning the cooking compartment. The clean- counts down. ing assistance softens dirt by vaporising the soapy wa- a When the time has elapsed, a signal sounds. - Page 24 en Rails 19 Rails To thoroughly clean the rails and the cooking compart- Hook the front retainers in at the bottom and ment, or to replace the rails, you can remove the rails. straighten them . 19.1 Detaching the rails WARNING ‒ Risk of burns! The shelf supports get very hot Never touch the shelf supports when hot.
- Page 25 Appliance door en 20 Appliance door To clean the appliance door thoroughly, you can disas- WARNING ‒ Risk of serious harm to health! semble the appliance door. If the screws are undone, the safety of the appliance can no longer be guaranteed. Microwave energy 20.1 Removing the door cover may escape.
-
Page 26: Troubleshooting
en Troubleshooting Put the door cover in position and push down on it Close the appliance door. until you hear it click into place. Note: Do not use the cooking compartment again until the door panes have been correctly fitted. 21 ... - Page 27 Setting values, e.g. temperature or cooking time, depend on the recipe, quantity and food. Next time, set lower or higher values. ▶ Tip: A lot of information about the food preparation and corresponding setting values can be found on our website www.bosch-home.com. 22 Disposal Cut through the power cord. 22.1 Disposing of old appliance Dispose of the appliance in an environmentally Valuable raw materials can be reused by recycling.
-
Page 28: How It Works
en Customer Service Information about current disposal methods are This appliance is labelled in accord- available from your specialist dealer or local author- ance with European Directive ity. 2012/19/EU concerning used elec- trical and electronic appliances (waste electrical and electronic equip- ment - WEEE). - Page 29 How it works en ¡ Place the poultry onto the cookware breast-side or ¡ Place the food to be grilled directly onto the wire skin-side down. rack. ¡ Turn roasting joints, grilled items or whole fish after ¡ To catch any liquids that drip down, place the uni- approx.
- Page 30 en How it works ¡ If you are warming or cooking the ready meal in cookware, make sure that the cookware is heat-res- istant. 24.7 List of foods Recommended settings for a variety of foods, sorted into food categories. Recommended settings for various types of food Food Accessory/cook- Shelf pos-...
- Page 31 How it works en Food Accessory/cook- Shelf pos- Heating Temperature in Microwave Cooking ware ition function °C power setting time in → Page 10 in W mins Bake, savoury, cooked Ovenproof dish 200 - 220 35 - 55 ingredients Bake, savoury, cooked Ovenproof dish ...
- Page 32 en How it works Food Accessory/cook- Shelf pos- Heating Temperature in Microwave Cooking ware ition function °C power setting time in → Page 10 in W mins Millet, whole, 250 g, + Covered cookware 1. 600 1. 8 - 10 600 ml water 2.
- Page 33 How it works en Requirement: The cooking compartment is cold. 24.8 Special cooking methods and other applications Use fresh, clean, hygienic meat without bones. Place the cookware onto the wire rack at level 1 in Information and recommended settings for special the cooking compartment. cooking methods and other applications, e.g.
- Page 34 en How it works Food Accessory/cook- Shelf pos- Heating Temperature in Microwave Cooking ware ition function °C power setting time in → Page 10 in W mins Meat, whole, e.g. joint, Uncovered cook- 1. 180 1. 15 raw meat, 1 kg ware 2.
- Page 35 How it works en Food Accessory/cook- Shelf pos- Heating Temperature in Microwave Cooking ware ition function °C power setting time in → Page 10 in W mins Soup, stew, 400 ml Covered cookware 5 - 7 Chilled Plated meal, 1 portion Covered cookware ...
- Page 36 en Installation instructions Food Accessory/cookware Shelf posi- Heating Temperature in °C Cooking time tion function in mins → Page 10 Hot water sponge cake Springform cake tin, 160–170 25–35 diameter 26 cm Hot water sponge cake Springform cake tin, 160–170 30–45 diameter 26 cm...
-
Page 37: Installation Instructions
Installation instructions en 25.1 General installation instructions Follow these instructions before you start with the installation of the appliance. ¡ The installation cabinet must not have a back panel behind the appliance. There ¡ Wear protective gloves so that you do not should be a gap of at least 35 mm cut yourself. - Page 38 en Installation instructions 25.2 Appliance dimensions 25.3 Installation below a worktop You will find the dimensions of the appliance here Observe the installation dimensions and the installation instructions when installing below a worktop. ¡ To ventilate the appliance, the intermediate floor must have a ventilation cut-out. ¡...
- Page 39 Installation instructions en ¡ To ensure that the appliance door can be opened, 25.5 Installation in a tall unit you must take the minimum dimensions into consid- Observe the installation dimensions and the installation eration when installing in a corner. The dimension ...
- Page 40 en Installation instructions 25.8 Installing the appliance Slide the appliance in fully and centre it. Screw the appliance into place. For handleless kitchens with vertical bar handle strips: Attach a suitable filling piece in order to cover ‒ any sharp edges and to guarantee a safe install- ation.
- Page 44 Expert advice for your Bosch home appliances, help with problems or a repair from Bosch experts. Find out everything about the many ways Bosch can support you: www.bosch-home.com/service Contact data of all countries are listed in the attached service directory.
Need help?
Do you have a question about the CMG636B.1 and is the answer not in the manual?
Questions and answers