
Related Manuals for Makita Outdoor Adventure ADRM06


Summary of Contents for Makita Outdoor Adventure ADRM06
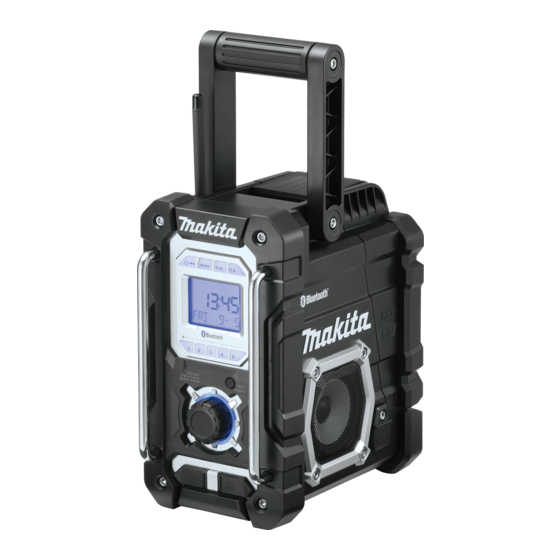
- Page 1 Job Site Radio Instruction manual ESMX Radio de Trabajo Manual de instrucciones XRM06X ADRM06...
- Page 2 7 8 9 10...
-
Page 5: Lcd Display
2. Clean only with dry cloth. ENGLISH 3. Do not block any ventilation opening. Install in (Original instructions) accordance with the manufacturer’s instruction. 4. Do not install near any heat sources such as Explanation of general view radiators, heat registers, stoves, or other apparatus (including amplifiers) that produce heat. - Page 6 ● Replace only with the same or equivalent type. 5. Do not short the battery cartridge: ● Only use genuine Makita batteries. Use of non- (1) Do not touch the terminals with any conductive genuine Makita batteries, or batteries that have material.
-
Page 7: Battery Installation
Battery Installation For United States: Note: Cautions to the user Keeping back up batteries inside the compartment The changes or modifications not expressly approved prevent stored data in preset memories from being lost. by the party responsible for compliance could void the user’s authority to operate the equipment. -
Page 8: Operating Time
OPERATING TIME * The suitable battery packs for this radio listed as the following table. * The following table indicates the operating time on a single charge in Radio mode. At speaker output = 50mW + 50mW Battery Cartridge Voltage (unit: Hour) (Approximately) Battery capacity ®... -
Page 9: Installation And Power Supply
Press the check button on the battery cartridge to indicate INSTALLATION AND POWER the remaining battery capacity. The indicator lamps light SUPPLY up for few seconds. Indicator lamps Installing or removing Slide battery Remaining capacity cartridge (Fig. 3 & 4) Lighted Blinking ●... -
Page 10: Fm Stereo (Auto)/Mono
4. Preset stations which have already been stored may 3. Press and hold the Tuning control knob to carry out an auto-tune. Your radio will scan up the AM/FM be overwritten by following the above procedure if band from the currently displayed frequency and will required. -
Page 11: Setting The Clock Time And Date
appears on the display. Press the Tuning control knob 1. Press and hold the Menu/Info button to enter the menu setting. to confirm the setting. The clock time of the radio will set up automatically according to the RDS data 2. -
Page 12: Auxiliary Input Socket
1. The buzzer alarm can be set either when the radio is 2. Keep holding the Power button and the Sleep on or off. Timer options will start switching on the display. Stop until the desired Sleep Timer setting appears on the 2. -
Page 13: Maintenance
® Pairing your Bluetooth device Charging with USB power supply port (Fig. 10) ® 1. Press the Source button to select Bluetooth function. “BT READY” will be shown on the display and There is the USB port at the front side of the radio. You “READY”... -
Page 14: Specifications
Specifications Power Requirements DC 12V/1,200mA, AC power adaptor center pin positive UM-3 (AA size) x 2 for back up Battery Cluster battery: 10.8V Slide battery: 10.8V - 18V FM 87.50-108 MHz (0.1MHz/step) Frequency coverage AM (MW) 520-1,710 kHz (10kHz/step) ® Bluetooth ®... -
Page 15: Pantalla Lcd
seguridad, incluyendo lo siguiente: ESPAÑOL 1. Lea el manual de instrucciones y el manual de (Instrucciones originales) instrucciones del cargador detenidamente antes de usarlos. 2. Limpie el equipo solo con un paño seco. EXPLICACIÓN DE LA VISTA 3. No bloquee ninguna abertura de ventilación. Instálelo GENERAL (Fig. - Page 16 (1) No toque los terminales con un material equivalente. conductor. ● Use solo baterías originales Makita. El uso de (2) Evite almacenar el cartucho de batería en baterías Makita no originales o de baterías que recipientes con otros objetos metálicos como hayan sido alteradas podría provocar la explosión...
-
Page 17: Instalación De La Batería
Instalación de la batería Para Estados Unidos: Nota: Precauciones para el usuario Mantener las baterías de respaldo dentro del Los cambios o modificaciones que no hayan sido compartimiento evita que los datos guardados en las expresamente autorizados por la entidad responsable memorias de presintonías se pierdan. -
Page 18: Tiempo De Funcionamiento
TIEMPO DE FUNCIONAMIENTO * Las baterías adecuadas para esta radio se enumeran en la siguiente tabla. * La siguiente tabla indica el tiempo de funcionamiento con una sola carga en modo de radio. CON LA SALIDA DEL ALTAVOZ = Tensión del cartucho de batería 50mW + 50mW Unidad: hora (aproximadamente) Capacidad de la... - Page 19 Pulse el botón de comprobación del cartucho de la batería INSTALACIÓN Y para indicar la capacidad restante de la batería. Las luces ALIMENTACIÓN indicadoras se encienden durante unos segundos. Luces indicadoras Instalación o extracción del cartucho Capacidad de la batería deslizante (Fig. 3 & 4) restante Iluminado Apagado...
-
Page 20: Operación
Presintonizar emisoras en modo AM/ OPERACIÓN 1. Presione el botón de encendido para encender Hay 5 presintonías de emisoras para radio AM y otras la radio. cinco para radio FM. Se usan de la misma manera en 2. Presione el botón de fuente para seleccionar el ambas bandas. -
Page 21: Establecer La Alarma
3. La hora parpadeará en pantalla. Gire el control de 3. Gire el control de sintonización hasta que en pantalla aparezca el ajuste de FM automático/mono. Si sintonización para seleccionar la hora deseada y está configurado en automático, presione el control de presione el control de sintonización para confirmar sintonización para cambiar al modo mono y reducir los... -
Page 22: Apagado Automático
3. Mientras parpadea el símbolo de la alarma de radio de sintonización para confirmar los ajustes de los minutos. , gire el control de sintonización para seleccionar la hora y presione de nuevo el control de 4. Gire el control de sintonización y la pantalla mostrará las opciones de frecuencia para la alarma. -
Page 23: Toma De Entrada Auxiliar
® 3. Una vez transcurrido el tiempo preestablecido la radio, necesitará vincular el dispositivo Bluetooth del apagado automático, la radio se apagará ella. La vinculación crea un “vínculo” permanente para automáticamente. El icono de apagado automático que los dos dispositivos siempre puedan reconocerse entre sí. -
Page 24: Mantenimiento
● Cualquier obstáculo entre la radio y el dispositivo un ordenador, ya que es muy posible que las dos puede reducir el alcance operativo. unidades se averíen. ® Desconectar el dispositivo Bluetooth MANTENIMIENTO Mantenga presionado el botón de vinculación durante PRECAUCIÓN: 2-3 segundos para desconectarse del dispositivo Nunca utilice gasolina, benceno, disolvente, alcohol o un... - Page 25 Makita Corporation 3-11-8, Sumiyoshi-cho, Anjo, Aichi 446-8502 Japan XRM06X-NA2-2109 www.makita.com 3A81eA5Z0000A (2021.09.27)