Nokia N86 User Manual
8mp
Hide thumbs
Also See for N86:
- User manual (376 pages) ,
- Service manual (20 pages) ,
- User manual (82 pages)
Table of Contents
Advertisement
Quick Links
Advertisement
Table of Contents

Related Manuals for Nokia N86


Summary of Contents for Nokia N86
- Page 1 Nokia N86 8MP User Guide Issue 1...
- Page 2 Reproduction, transfer, distribution, or storage of part or all of the contents in this document in any form without the prior written permission of Nokia is prohibited. Nokia operates a policy of continuous development. Nokia reserves the right to make changes and improvements to any of the products described in this document without prior notice.
- Page 3 IMPLIED, INCLUDING, BUT NOT LIMITED TO, THE IMPLIED WARRANTIES OF MERCHANTABILITY AND FITNESS FOR A PARTICULAR PURPOSE, ARE MADE IN RELATION TO THE ACCURACY, RELIABILITY OR CONTENTS OF THIS DOCUMENT. NOKIA RESERVES THE RIGHT TO REVISE THIS DOCUMENT OR WITHDRAW IT AT ANY TIME WITHOUT PRIOR NOTICE.
-
Page 4: Table Of Contents
Free memory..............25 Network services............12 Shared memory.............13 Your device..........26 ActiveSync..............13 Phone setup..............26 Magnets and magnetic fields........13 Nokia Switch..............26 Get started..........14 Transfer content............26 Synchronise, retrieve, or send content....27 Keys and parts (front and top)........14 Display indicators............28 Keys and parts (back and sides)........15 Shortcuts................29... - Page 5 Flash................38 Sound clips..............51 Scenes................38 Streaming links.............52 Capture images in a sequence........39 Presentations..............52 You in the picture—self-timer........39 Connectivity..........53 Tips on taking good photographs......40 Video recording.............40 Wireless LAN ..............53 Video capture indicators...........40 About WLAN..............53 Record videos.............41 WLAN connections............53 After recording a video..........41 See WLAN availability..........54 Camera settings.............42 WLAN wizard ..............54...
- Page 6 Landmarks ..............81 Listen to the radio............67 GPS data.................82 Saved stations.............67 Route guidance............82 FM radio settings............68 Retrieve position information........83 Nokia Music Store............68 Trip meter..............83 Nokia Internet Radio............68 Nokia Maps..........84 Listen to internet radio stations.......68 Favourite stations............69 About Maps..............84 Search for stations.............69 Network positioning.............84...
- Page 7 Tips on text input.............110 Define incoming files..........97 Change the writing language.........111 Define outgoing files..........98 Edit text and lists............111 Write and send messages..........111 Nokia Video Centre........99 Messaging inbox............113 View and download video clips........99 Receive messages............113 Video feeds..............100 Multimedia messages..........113 My videos..............100 Data, settings, and web service messages....113...
- Page 8 E-mail settings............119 About internet calls............133 Manage mailboxes..........119 Activate internet calls..........133 Connection settings..........119 Make internet calls .............133 User settings............120 Blocked contacts............134 Retrieval settings..........120 Manage internet call services........134 Automatic retrieval settings........121 Internet call settings..........134 Web service message settings........121 Contacts (phonebook)......135 Cell broadcast settings..........121 Other settings............122 Save and edit names and numbers......135 Manage names and numbers........135...
- Page 9 Manage calendar entries.........143 Accessories settings..........156 Slide handling settings..........157 Office............145 Sensor settings and display rotation.....157 File manager..............145 Security settings............157 About File manager..........145 Phone and SIM............157 Find and organise files..........145 Certificate management........158 Manage a memory card...........145 Security module.............159 Back up files to a memory card......145 Restore original settings.........159 Format mass memory..........146 Positioning settings..........160...
- Page 10 Save paper..............174 Learn more..............174 Accessories..........175 Battery.............176 Battery and charger information......176 Nokia battery authentication guidelines....177 Authenticate hologram...........177 Taking care of your device.......179 Recycle.................180 Additional safety information....181 Small children..............181 Operating environment..........181 Medical devices............181 Implanted medical devices........181 Hearing aids..............182 Vehicles................182 Potentially explosive environments......182 Emergency calls............183...
-
Page 11: Safety
Safety Read these simple guidelines. Not following them dropped on a hard surface or receives a may be dangerous or illegal. Read the complete user substantial impact. If the glass breaks, do guide for further information. not touch the glass parts of the device or attempt to remove the broken glass from SWITCH ON SAFELY the device. -
Page 12: About Your Device
Third-party sites The wireless device described in this guide is approved are not affiliated with Nokia, and Nokia does not for use on the (E)GSM 850, 900, 1800,1900, and UMTS endorse or assume liability for them. If you choose to 900, 1900, 2100 networks. -
Page 13: Shared Memory
Use of the Mail for Exchange is limited to over-the-air limitations that affect how you can use some features synchronisation of PIM information between the Nokia of this device requiring network support such as device and the authorised Microsoft Exchange server. -
Page 14: Get Started
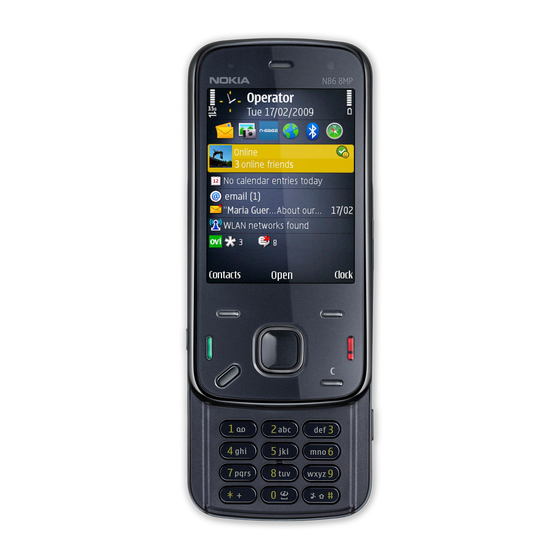
— Numeric keypad — Microphone — Scroll and selection key — Clear key C — End key — Earpiece — Secondary camera — Power key — Nokia AV Connector (3.5 mm) — Micro USB connector — Light sensor — Selection keys... -
Page 15: Keys And Parts (Back And Sides)
Keys and parts (back and Short slide keys sides) Short slide keys act as media, zoom, or gaming keys depending on the application. Short slide keys also enable multitasking, for example, if you are browsing the internet with the Music player application in the background, you can control the player with the Play/Pause key. -
Page 16: Insert Sim Card And Battery
Use only compatible microSD cards device. approved by Nokia for use with this device. Nokia uses approved industry standards for memory cards, but some brands may not be fully compatible with this device. -
Page 17: Insert The Memory Card
Doing so may damage the memory card may apply. For more and the device, and corrupt data stored on the card. information, contact a Nokia Care point or your device dealer. -
Page 18: Charge The Battery
To switch off the device, press the power key briefly, Tip: Disconnect the charger from the wall and select Switch off!. outlet when the charger is not in use. A charger that is connected to the outlet consumes power even when it is not Charge the battery connected to the device. -
Page 19: Headset
To use the headphones with a remote control unit, Antenna locations connect the unit to the Nokia AV Connector in the device, then connect the headphones to the unit. Your device may have internal and external antennas. - Page 20 — Cellular antenna The FM transmitter antenna is located in the back cover of your device. If you change the back cover, check that the new cover includes this antenna, otherwise this connection stops working. Bluetooth, WLAN, and GPS antennas are located at the back of your device.
-
Page 21: Find Help
Help texts use the not deleted in the reset. following indicators: shows a link to a related If the issue remains unsolved, contact Nokia for help topic. shows a link to the application being repair options. See www.nokia.com/repair. Before discussed. -
Page 22: Additional Applications
Updating the your device. software may also improve the device performance. Downloading software updates may involve the Nokia Software Updater is a PC application that transmission of large amounts of data (network enables you to update your device software. To service). -
Page 23: Settings
This option replaces the Start update option Personal identification number (PIN) code — This ● when updates are only available using the Nokia code protects your SIM card against Software Updater PC application. unauthorised use. The PIN code (4 to 8 digits) is View details —... -
Page 24: Prolong Battery Life
If you forget the code and your device is on battery power. WLAN on your Nokia device locked, your device will require service and deactivates when you are not trying to connect, additional charges may apply. -
Page 25: Free Memory
select Menu Tools Settings Phone Many features of the device use memory to store > > > Network Network mode > GSM. data. The device notifies you if available memory is > low. The backlight of the display increases the ●... -
Page 26: Your Device
Bluetooth connectivity, select Continue. Select and images from your previous Nokia device to your the device from which you want to transfer device. content. You are asked to enter a code on your The type of content that can be transferred depends device. -
Page 27: Synchronise, Retrieve, Or Send Content
Some earlier Nokia devices may not have the to retrieve content from the other device to Switch application. In this case, the Switch your device. With retrieval, content is transferred application is sent to the other device as a from the other device to your device. You may be message. -
Page 28: Display Indicators
transfer conflict. Select Check one by one, Priority All calls to the device are diverted to another to this phone, or Priority to other phone to solve number (network service). If you have two phone the conflict. lines, a number indicates the active line. Your device is connected to a network via Display indicators wireless LAN or UMTS (network service) and ready... -
Page 29: Shortcuts
access the applications. For example, in the main A UMTS packet data connection is active menu, press 2 to open Messaging or # to open the (network service). indicates that the connection application or folder in the corresponding location is on hold and that a connection is available. -
Page 30: Mobile Search
Mobile Search Volume and loudspeaker control Select Menu > Search. You can also access Mobile Search directly from the To adjust the volume level when you have an active active standby mode, if that has been activated in call or are listening to a sound clip, use the volume the settings. -
Page 31: Fast Downloading
Fast downloading When the offline profile is active, you can use your device without a SIM card. High-speed downlink packet access (HSDPA, also If the SIM card is not properly in place, the device called 3.5G, indicated by ) is a network service starts in the offline profile. -
Page 32: Ovi
Ovi Files For more information on Ovi services, go to www.ovi.com. With Ovi Files, you can use your Nokia N86 8MP to access content on your computer if it is switched on About Ovi Store and connected to the internet. You will need to... - Page 33 stored in a protected, online storage for access even when your computer is switched off. For support, see files.ovi.com/support.
-
Page 34: Camera
LAN connection. You can also upload them to a compatible online album. Your Nokia N86 8MP has two cameras. The main, high-resolution camera, is on the back of the device. The secondary, lower resolution camera is on the Activate the camera front. -
Page 35: Active Toolbar
the scroll key. You can also define when the active toolbar is displayed. The settings in the active toolbar return to the default settings after you close the camera. To view the active toolbar before and after capturing an image or recording a video clip, select Options Show toolbar. -
Page 36: Capture Images
locked focus indicator appears on the display. If Adjust the exposure compensation (images the focus was not locked, a red focus indicator only). appears. Release the capture key, and press it Adjust sharpness (images only). halfway down again. You can also capture an Adjust contrast (images only). -
Page 37: Panorama Mode
Panorama mode Select Menu Applications > Camera. > To add location information to all captured Select Menu Applications > Camera. > material, select Options Settings Record > > Select panorama mode from the toolbar. location > On. The location information is available only for images captured with the main To capture the first image in the panorama, camera. -
Page 38: Flash
Flash If you do not want to keep the image, select ● Delete The flash is available only in the main camera. To send the image using a multimedia message, ● Keep a safe distance when using the flash. Do not e-mail, or other connection methods, such as use the flash on people or animals at close range. -
Page 39: Capture Images In A Sequence
To make your own scene suitable for a certain The captured images are shown in a grid on the environment, scroll to User defined, and select display. To view an image, press the scroll key. If you Options > Change. In the user defined scene you used a time interval, only the last captured image is can adjust different lighting and colour settings. -
Page 40: Tips On Taking Good Photographs
Tip: In the active toolbar, select Self timer foreground. If the foreground object is too close to > 2 seconds to keep your hand steady when the camera, it may be blurred. taking a picture. Lighting conditions Changing the source, amount, and direction of light Tips on taking good photographs can change photographs dramatically. -
Page 41: Record Videos
Record videos If the camera is in the image mode, select the video mode from the active toolbar. To start recording, press the capture key. The red record icon ( ) is displayed and a tone sounds. To pause recording at any time, press Pause. Select Continue to resume. -
Page 42: Camera Settings
To immediately play the video clip you just camera, but the main settings remain the same ● until you change them again. To adjust the setup recorded, select Play settings, use the options in the active toolbar. If you do not want to keep the video, select ●... -
Page 43: Colour And Lighting Settings
to pause at the digital and extended digital step light background, such as snow, adjust the point, and allows a limited amount of zoom exposure to +1 or +2 to compensate for the background brightness. For light subjects while retaining the image resolution. Use the against a dark background, use -1 or -2. -
Page 44: Video Settings
Video settings Restore camera settings — Restore the camera ● settings to default values. To change the main settings, in the video mode, select Options Settings and from the following: > Video quality — Set the quality of the video clip. ●... -
Page 45: Photos
Photos About Photos Images and video clips can also be Select Menu Photos and from the following: > sent to you from a Captured — View all the images and videos you compatible device. ● have captured. To be able to view Months —... -
Page 46: View And Edit File Details
Organise images and videos To move images to an album for later printing, select Options Add to album Print later. > > Select Menu > Photos. You can organise files as follows: View and edit file details To view items in the Tags view, add tags to the Select Menu >... -
Page 47: Albums
Tags Play the video clip. Send the image or video clip. Use tags to categorize media items in Photos. You Upload the image or video clip to a compatible can create and delete tags in Tag manager. Tag online album (only available if you have set up an manager shows the tags currently in use and the account for a compatible online album). -
Page 48: Tv-Out Mode
Menu Tools > Settings. > from the selected file. To view the captured images and recorded video clips on a compatible TV, use a Nokia Video-Out To view only the selected images as a slide show, Cable. select Options Mark/Unmark... -
Page 49: Edit Images
TV when the Nokia to the image. Video-Out Cable is connected to the device. You can use the device microphone normally. -
Page 50: Reduce Red-Eye
Reduce red-eye formats. It does not necessarily support all features of a file format or all the variations of file formats. To reduce red-eye in an image, select Options > To edit video clips in Photos, scroll to a video clip, Add effect (Red-eye reduction). -
Page 51: Gallery
Gallery About Gallery To open a file, select the file from the list. Video clips and streaming links open and play in Video centre, and music and sound clips in Music player. Select Menu Applications > Gallery. > Gallery is a storage place for your images, video and Sound clips sound clips, songs, and streaming links. -
Page 52: Streaming Links
Streaming links Select Menu Applications Gallery > > Streaming links. To open a streaming link, select the link from the list. To add a new streaming link, select Options > link. Presentations Select Menu Applications > Gallery. > With presentations, you can view scalable vector graphics (SVG) and flash files (SWF), such as cartoons and maps. -
Page 53: Connectivity
Connectivity Your device offers several options to connect to the 802.1x authentication methods. These functions internet or to another compatible device or PC. can be used only if they are supported by the network. Wireless LAN Important: Always enable one of the About WLAN available encryption methods to increase the security of your wireless LAN connection. -
Page 54: See Wlan Availability
WLAN wizard When the device is in the Offline profile, you can still use a WLAN, if available. Remember to comply with Select Menu Tools Connectivity WLAN any applicable safety requirements when > > > wiz.. establishing and using a WLAN connection. The WLAN wizard helps you find and connect to a If you move the device to another location within wireless LAN (WLAN). -
Page 55: Connection Manager
Connection manager The available WLAN view shows a list of wireless LANs (WLAN) within range, their network mode Active data connections (infrastructure or ad hoc), and signal strength indicator. is displayed for networks with Select Menu Tools Connectivity Conn. > >... -
Page 56: Send And Receive Data With Bluetooth
(A2DP). To ensure interoperability between other Open the application where the item you want devices supporting Bluetooth technology, use to send is stored. Nokia approved accessories for this model. Check with the manufacturers of other devices to Select the item and Options Send >... -
Page 57: Pair Devices
Your wireless device will not make any calls, except computer). to the emergency numbers programmed into your A Bluetooth connection is disconnected device, while in this mode. automatically after sending or receiving data. Only Nokia Ovi Suite and some accessories such as... -
Page 58: Block Devices
To make calls, you must first leave the remote SIM To allow a paired device to connect automatically mode. If the device has been locked, enter the lock to your device, select Set as authorised. code to unlock it first. Connections between your device and the other device can be made without your knowledge. -
Page 59: Security Tips
To use Nokia Ovi Suite with your device, install connection requests from this device. If you accept Nokia Ovi Suite on your PC, connect the data cable, the query, the remote device is added to the list of and select Suite. -
Page 60: Sync
For information on Apple Macintosh support and connecting your device to an Apple Macintosh device, see www.nseries.com/mac. Sync Select Menu Tools Settings > > > Connectivity > Sync. Sync enables you to synchronise your notes, calendar entries, text and multimedia messages, browser bookmarks, or contacts with various compatible applications on a compatible computer or on the internet. -
Page 61: Browser
Browser About Browser of memory to view. If your device runs out of memory while loading such a web page, the graphics on the page are not shown. Select Menu > Web. With the Browser application, you can view To browse web pages with graphics disabled, to hypertext markup language (HTML) web pages on save memory and increase the page loading speed, the internet as originally designed. -
Page 62: Browser Toolbar
Navigate pages To view the shortcut key map, select Options > Keypad shortcuts. To edit the shortcut keys, select Edit. Mini Map and Page overview help you navigate web pages that contain a large amount of information. Tip: To minimise the browser without exiting the application or connection, press the end To activate Mini Map, select Options... -
Page 63: Widgets
The browser application automatically detects if a network. For information about data transmission web page contains web feeds. charges, contact your service provider. If web feeds are available, to subscribe to a web Content search feed, select Options Subscribe to web feeds. -
Page 64: Bookmarks
applications that are Symbian Signed or have indicates the homepage defined for the default passed the Java Verified™ testing. access point. To download an item: To go to a new web page, select Options > Select the link. New web page. -
Page 65: Connection Security
To delete the information the network server authentic, or trusted certificates for increased collects about your visits to various web pages, security to be available. Certificates have a select Options Clear privacy data > Cookies. restricted lifetime. If "Expired certificate" or >... - Page 66 Java/ECMA script — Enable or disable the use of but hide the folder from the bookmarks view, ● scripts. select Hide folder. Java/ECMA script errors — Select whether you Form data saving — Select whether you want ● ● want to receive script notifications. the password data or data you enter on different Open while downloading —...
-
Page 67: Music
Music You can make a call or answer an incoming call Warning: Continuous exposure to high while listening to the radio. The radio is muted volume may damage your hearing. Listen to music when there is an active call. at a moderate level, and do not hold the device near To start a station search, select your ear when the loudspeaker is in use. -
Page 68: Fm Radio Settings
To open the list of your saved stations, select To access the Nokia Music Store, you must have a Options > Stations. valid internet access point defined in the device. Nokia Music Store is not available for all countries To listen to a saved station, select Options >... -
Page 69: Favourite Stations
Internet radio. > > To view station information, select Options To search for radio stations in the Nokia Internet > Station information (not available if you have Radio service by name, do the following: saved the station manually). Select Search. -
Page 70: Station Directory
Station directory. connections 3G connection bitrate — 3G packet data ● The station directory is maintained by Nokia. If you connections want to listen to internet radio stations outside the Wi-Fi connection bitrate — WLAN connections ● directory, add station information manually or... -
Page 71: Search Podcasts
Tip: The search service looks for podcast titles Automatic updates only occur if a specific default and keywords in descriptions, not specific access point is selected and Nokia Podcasting is episodes. General topics, such as football or running. If Nokia Podcasting is not running, the hip-hop, usually give better results than a automatic updates are not activated. -
Page 72: Directories
To subscribe to marked channels and add them to To subscribe to a podcast, select the title and your list of subscribed podcasts, select Subscribe. Subscribe. After you have subscribed to episodes of You can also add a podcast by selecting its title. a podcast, you can download, manage, and play them in the podcasts menu. -
Page 73: Play And Manage Podcasts
To see the podcasts you have subscribed to, select To stop the updating, select Options Stop > Podcasting > Podcasts. update. To see individual episode titles (an episode is a To add a new podcast by entering the URL of the particular media file of a podcast), select the podcast, select Options... -
Page 74: Music Player
Music player Select categories to navigate to the song or podcast episode you want Music player supports files formats such as AAC, AAC to hear. +, eAAC+, MP3, and WMA. Music player does not necessarily support all features of a file format or all To play the selected files, the variations of file formats. -
Page 75: Playlists
To adjust the volume, press the volume key. If you select Yes, select artists to find the songs you want to include in the playlist. Press the To modify the tone of the music playback, select scroll key to add items. Options >... -
Page 76: Home Network With Music Player
USB data remotely on compatible devices in a home network. cable or Bluetooth connectivity. If you are using You can also copy files from your Nokia device to a USB cable, select Mass storage... -
Page 77: Play A Song Using Fm Transmitter
> For the latest information, and the list of non- To play a song stored in your device through a European countries, see www.nokia.com/ compatible FM receiver, do the following: fmtransmitter. Select a song or a playlist to be played. - Page 78 To activate the FM transmitter, select transmitter > On. To set a frequency manually, select Frequency enter the desired value. To list the previously used frequencies, select Options Last frequencies. >...
-
Page 79: Positioning (Gps)
Positioning (GPS) You can use applications such as GPS data to and may be impaired by materials such as concrete determine your location, or measure distances and and metal. coordinates. These applications require a GPS GPS should not be used for precise location connection. -
Page 80: Hold Your Device Correctly
GPS Establishing a position faster. GPS connection Your device is preconfigured to use the Nokia A-GPS may take from a service, if no service provider-specific A-GPS settings couple of are available. The assistance data is retrieved from seconds to the Nokia A-GPS service server only when needed. -
Page 81: Position Requests
Position requests Some vehicles have tinted (athermic) windows, ● which may block the satellite signals. You may receive a request from a network service Check satellite signal status to receive your position information. Service To check how many satellites your device has found, providers may offer information about local topics, and whether your device is receiving satellite such as weather or traffic conditions, based on the... -
Page 82: Gps Data
location, select Current position. To select the To use GPS data, the GPS receiver of your device location from map, select Select from map. To must initially receive position information from at least four satellites to calculate the coordinates of enter the position information manually, select your location. -
Page 83: Retrieve Position Information
To set your trip destination, select Options remain on the display. Use this feature outdoors to > destination and a landmark as the destination, or receive a better GPS signal. enter the latitude and longitude coordinates. To set the trip distance and time and average and To clear the destination set for your trip, select Stop maximum speeds to zero, and to start a new... -
Page 84: Nokia Maps
Nokia Map Loader PC software to download maps. To use the mobile network for positioning, select To install Nokia Map Loader to a compatible PC, see the network-based positioning method from the www.nokia.com/maps. -
Page 85: Compass
Compass The map is zoomed to your GPS position. ● Otherwise the compass icon is not shown. Select Menu > Maps. To calibrate the compass: Your device has an internal compass. When the Rotate the compass is enabled, the circle around the compass device is green, and the map view rotates automatically around all... -
Page 86: Display Indicators
Find locations When you have an active data connection and browse the map on the display, a new map is automatically downloaded if you scroll to an area To search for locations, press the scroll key and not covered by the maps that have already been select Explore. -
Page 87: Plan A Route
Plan a route To view your saved locations, in the main view, select Options > Favourites. To plan a route, scroll to your start point on the map, To send a location to a compatible device, press the press the scroll key, and select Add to route. -
Page 88: Walk To Your Destination
specific and can be used only in the selected area. There is no voice guidance available for pedestrian You can pay for the licence through a credit card or navigation, but the device guides you with a tone in your phone bill, if supported by your service or vibration approximately 20 metres (22 yards) provider. -
Page 89: Drive To Your Destination
Content such as satellite images, guides, weather To switch between different views during the and traffic information and related services are navigation, press the scroll key, and select generated by third parties independent of Nokia. view, view, Arrow view, or Route overview. -
Page 90: Maps Settings
Some jurisdictions prohibit or Internet settings regulate the use of speed camera location data. Nokia is not responsible for the accuracy, or the consequences of use of speed camera location data. To define the internet settings, select Options >... -
Page 91: Route Settings
may involve the transmission of large amounts To use the fastest route, select Route selection > of data through your service provider’s network. Faster route. This option is available only if you Contact your service provider for information have selected Drive as the mode of transportation. -
Page 92: Update Maps
You must use the Maps application and browse maps at least once before using Nokia Map Loader, as Nokia Map Loader uses the Maps information to check which version of the maps to download. -
Page 93: Home Network
Home network About home network Options Show via home network, and the > device. Your device is compatible with Universal Plug and To use the WLAN function of your device in a home Play (UPnP) and certified by the Digital Living network, you must have a working WLAN home Network Alliance (DLNA). -
Page 94: Important Security Information
Your device notifies you if another device attempts device support pages on the Nokia website. to connect to it and the home network. Do not Configure settings accept connection requests from an unknown device. -
Page 95: Activate Sharing And Define Content
define a new access point that is used not want other devices to access your files, automatically when you use the home network, deactivate content sharing. select Create new. If your home network does Images & video — Select media files to share ●... -
Page 96: Copy Media Files
other home network device and your device, and Tip: You can print images saved in Photos video and sound are played only on the other through a home network with a UPnP device. compatible printer. Content sharing does not have to be activated. To stop sharing a media file, select Options >... -
Page 97: Synchronisation Settings
To run the wizard later, in Home synchronisation To edit the transfer settings, select Options > main view, select Options wizard. Edit and from the following: > List name — Enter a new name for the list. To manually synchronise content in your mobile ●... -
Page 98: Define Outgoing Files
Define outgoing files To specify which types of files in your device to synchronise with your home media devices and how to synchronise them, select Menu > Applications Home media, and Media sync > > To home Options > Open. Select the media >... -
Page 99: Nokia Video Centre
Nokia Video Centre With Nokia Video Centre (network service), you can To connect to a service to install video services, download and stream video clips over the air from select Add new services and the desired video compatible internet video services using a packet service from the service catalogue. -
Page 100: Video Feeds
Video feeds Warning: Continuous exposure to high volume may damage your hearing. Listen to music Select Menu Applications Video centre. > > at a moderate level, and do not hold the device near The content of the installed video services is your ear when the loudspeaker is in use. -
Page 101: Transfer Videos From Your Pc
To open a folder and view video clips, use the To view your device on a PC as a mass memory scroll key. To control the video player when the device where you can transfer any data files, video clip is playing, use the media keys. make the connection with a USB data cable. - Page 102 opens a network connection, select Always ask. To set GPRS connection on or off, select Confirm GPRS usage. To set roaming on or off, select Confirm roaming. Parental control — Set an age limit to videos. ● The required password is the same as the device lock code.
-
Page 103: N-Gage
N-Gage is a mobile gaming platform available for a Your service provider will charge for data transfer. range of compatible Nokia mobile devices. You can For more information about data transfer plans, access N-Gage games, players, and content through contact your mobile service provider. -
Page 104: Get Started
If you already have an N-Gage player name, select I In My friends, you can invite other N-Gage have an account, and enter your user name and players to your friends list, and see if they are online password to log in. and available to play. -
Page 105: Track Your Progress
Track your progress Trial games — These are full game files to which ● you have access only for a limited time or which To view your current N-Gage points, go to Home, have limited content. When the trial expires, you and select Track My Progress. -
Page 106: Edit Profile Details
Edit profile details search for a particular N-Gage player, invite them to your Friends list, and then see which of your friends are online and available to play. You can also send To edit your public profile details, select Options >... -
Page 107: Sort The Friends List
Sort the friends list Send Message. The maximum size of a private message is 115 characters. To send the message, To sort your friends by availability, player name, or select Submit. N-Gage points, select Options Sort Friends > You need a GPRS, 3G, or wireless LAN connection to be able to use the messaging feature. - Page 108 Account Details — Select your purchase ● preferences. When you purchase a game, you are asked if you want to save your billing details, including your credit card number, for faster purchasing in the future.
-
Page 109: Messaging
Messaging Only devices that have compatible features can Drafts — Draft messages that have not been ● receive and display multimedia messages. The sent are stored here. appearance of a message may vary depending on Sent — The last messages that have been ●... -
Page 110: Traditional Text Input
Press each key only once for one letter. For one character, press and hold C. example, to write "Nokia" when the English The most common punctuation marks are available under 1. To scroll them through one by one, if you... -
Page 111: Change The Writing Language
use traditional text input, press 1 repeatedly. If you Copy. To insert the text into a document, press and use predictive text input, press 1, and then * hold #, and select Paste. repeatedly. To mark an item in a list, scroll to it, and press #. To open a list of special characters, press and hold To mark multiple items in a list, press and hold # while you scroll up or down. - Page 112 To send an audio or e-mail message, select The wireless network may Options Create message, and the relevant > limit the size of MMS option. messages. If the inserted picture exceeds this limit, To select recipients or groups from the contacts the device may make it list, select To.
-
Page 113: Messaging Inbox
Messaging inbox sound is included, or if video is included. To play the sound or the video, select the indicator. Receive messages To see the media objects that have been included in the multimedia message, select Options Select Menu Messaging and Inbox. -
Page 114: E-Mail
Set up your e-mail found in Contacts, start entering the recipient's name, and select the recipient from the With the Nokia e-mail wizard, you can set up your proposed matches. If you add several recipients, corporate e-mail account, such as Microsoft insert ;... -
Page 115: Add Attachments
Bcc field is not visible, select Options More To remove the selected attachment, select > > Show Bcc field. Options Remove attachment. > In the Subject field, enter the subject of the e- Read e-mail mail. Enter your message in the text area. Select Menu >... -
Page 116: Reply To A Meeting Request
Options Download Download all. The To start a new search, select Options > > attachments are not saved in your device, and are search. deleted when you delete the message. Delete e-mails To save the selected attachment or all the downloaded attachments in your device, select Select Menu... -
Page 117: Set On An Out-Of-Office Reply
To start the synchronisation again, select Download notifications — Select whether to ● Options > Connect. have the device to display a notification when an e-mail attachment has been downloaded. Set on an out-of-office reply Home screen — Define how many lines of e- ●... -
Page 118: Text Message Settings
and you may not be able to change, create, edit, or same text message centre number (network remove them. service). Text message settings Multimedia message settings Select Menu Messaging Options Select Menu Messaging Options > > > > Settings Text message. -
Page 119: E-Mail Settings
Allow anonymous msgs. — Select whether you To create a new mailbox, select Mailboxes ● > want to reject messages from an anonymous Options mailbox. The name you give to > the new mailbox replaces Mailbox in the Messaging sender. main view. -
Page 120: User Settings
recommends. The options are POP3 and IMAP4. My name — Enter your own name. Your name ● This setting cannot be changed. replaces your e-mail address in the recipient’s Security — Select the security option used to device if the recipient’s device supports this ●... -
Page 121: Automatic Retrieval Settings
E-mail retrieval — Define which parts of the e- data through your service provider's network. ● mail are retrieved: Headers only, Size limit Contact your service provider for information about data transmission charges. (POP3), or Msgs. & attachs. (POP3). Retrieval amount —... -
Page 122: Other Settings
and saves the new numbers without a name to the topic list. Other settings Select Menu Messaging Options > > Settings > Other. Select from the following: Save sent messages — Select whether you ● want to save a copy of the text messages, multimedia messages, or e-mail that you send to Sent folder. -
Page 123: Make Calls
Make calls Voice calls Options during a call In the standby mode, enter the phone number, To adjust the volume during a call, use the volume including the area code. To remove a number, key on the side of your device. You can also use the press C. -
Page 124: Voice Mail
Tip: When you have only one active voice call, To call your video mailbox, scroll to Video to put the call on hold, press the call key. To mailbox, and select Options Call video > activate the call, press the call key again. mailbox. -
Page 125: Make A Conference Call
message. To set up this option and write a standard To drop a participant, select Options > text message, select Menu Tools Settings Conference Drop participant, scroll to the > > > Phone Call Reject call with message. participant, and select Drop. >... -
Page 126: Voice Dialling
To switch between the two calls, select Swap. To A short tone sounds, and Speak now connect an incoming call or a call on hold with an displayed. Say clearly the name that is saved for active call and to disconnect yourself from the calls, the contact. -
Page 127: During A Video Call
To end the video call, press the end key. You are not receiving video (the recipient is not sending video or the network is not transmitting it). During a video call You have denied video sending from your device. To send a still image instead, select Menu >... -
Page 128: Answer Or Decline A Video Call
To change the video quality, select Options for the voice call while you share video, you can also > Video preference Normal quality, Clearer use a compatible headset. > detail Smoother motion. Warning: Continuous exposure to high volume may damage your hearing. Listen to music Answer or decline a video at a moderate level, and do not hold the device near call... -
Page 129: Video Sharing Settings
connections set up, the recipient does not receive Enter the SIP address in the format invitations. You receive an error message that username@domainname (you can use an IP indicates that the recipient cannot accept the address instead of a domain name). invitation. -
Page 130: Accept An Invitation
converted, select OK. Your device must have a To save the live video you shared, select when video editor for the conversion to work. prompted. The device notifies you of the location of the saved video. If the recipient has several SIP addresses or phone numbers including the country code If you access other applications while you are saved in the contacts list, select the desired... -
Page 131: Log
To play the video at the original volume, select Delete — Clear a highlighted event in the ● Options Original volume. This does not affect selected list. > the audio playback of the other party of the phone Log duration —... -
Page 132: Monitor All Communication Events
Monitor all communication events Select Menu Applications > Log. > To open the general log where you can monitor all voice calls, text messages, or data and wireless LAN connections registered by the device, select the general log tab . Subevents, such as a text message sent in more than one part and packet data connections, are logged as one communication event. -
Page 133: Internet Calls
Internet calls About internet calls To search for available wireless LAN (WLAN) connections, select Options Search for WLAN. > With the internet call service (network service), you can make and receive calls over the internet. Make internet calls Internet calls can be established between computers, between mobile phones, and between When you have activated the internet call feature, a VoIP device and a traditional telephone. -
Page 134: Blocked Contacts
Blocked contacts To view or edit internet call settings, select Options Settings and from the following: > Select Menu > Contacts. Scroll left, and select the Service connectivity — Select the destination ● internet calls service from the list. settings for internet call connectivity, and edit destination details. -
Page 135: Contacts (Phonebook)
Contacts (phonebook) In Contacts, you can save and update contact To send contact information, select a card, information, such as phone numbers, home Options Send business card, and the desired > addresses, or e-mail addresses of your contacts. You option. can add a personal ringing tone or a thumbnail To listen to the voice tag assigned to the contact, image to a contact card. -
Page 136: Ringing Tones, Images, And Call Text For Contacts
Ringing tones, images, and Copy contacts call text for contacts When you open the contacts list for the first time, the device asks if you want to copy names and You can define a ringing tone for a contact or group, numbers from the SIM card to your device. -
Page 137: Fixed Dialling
numbers to the SIM card, in Contacts, select a To send text messages to the SIM contacts while the contact and Options Copy memory. fixed dialling service is active, you need to add the > > text message centre number to the fixed dialling Fixed dialling list. -
Page 138: Personalise Your Device
Personalise your device You can personalise your device by changing the themes saved in the memory card without the standby mode, main menu, tones, themes, or font memory card, save the themes in the device size. Most of the personalisation options, such as memory or mass memory first. -
Page 139: Set Tones
To modify a profile, scroll to the profile, and select previous sound settings. To return to using the Options > Personalise. default sounds, select the 'Nokia' audio theme. To set ringing tones, select Ringing tone and a To change the sounds for device events, select a ringing tone. -
Page 140: Modify The Standby Mode
Modify the standby mode To change the 3-D effect that is applied to the ringing tone, select Sound trajectory and the desired effect. To change the look of the standby mode, select Menu Tools Settings General To modify the effect, select from the following >... -
Page 141: Modify The Main Menu
press C. Leaving applications running in the background increases the demand on battery power. Modify the main menu To change the main menu view, in the main menu, select Menu Tools Settings General > > > Personalisation Themes Menu view. You >... -
Page 142: Time Management
Time management Clock World clock Select Menu Applications > Clock. Alarm clock > To view the time in different locations, open the Select Menu Applications > Clock. > world clock tab. To add locations to the list, select Options location. You can add a maximum To view your active and inactive alarms, open the >... -
Page 143: Calendar
To change the alarm tone, select Clock alarm Anniversary — Add a reminder of birthdays ● tone. or special dates (entries are repeated annually). To-do — Add a reminder of a task that must Calendar ● be done by a specific date. To open the calendar, select Menu >... - Page 144 To mark a task as completed in the to-do view, select the task and Options Mark as done. > To send a calendar note to a compatible device, select Options > Send. If the other device is not compatible with Coordinated Universal Time (UTC), the time information of received calendar entries may not be displayed correctly.
-
Page 145: Office
Office File manager Shortcut: To apply actions to multiple items at once, mark the items. To mark or unmark items, press #. Select Menu Applications Office File > > > mgr.. Manage a memory card About File manager Select Menu Applications Office File... -
Page 146: Format Mass Memory
Microsoft Excel worksheets, Quickpoint for to keep before formatting the mass memory. You Microsoft PowerPoint presentations, and can use Nokia Ovi Suite or Nokia Nseries PC Suite to Quickmanager for purchasing software. You can back up data to a compatible PC. Digital rights... -
Page 147: Calculator
Save calculations Add the exchange rates for the currencies, and select Done. To save the results of a calculation, select Options > In the other Unit field, select the currency to Memory > Save. The saved result replaces the which you want to convert. previously stored result in the memory. -
Page 148: Notes
Notes Select Menu Applications Office > Notes. > > You can create and send notes to other compatible devices, and save received plain text files (TXT file format) to Notes. To write a note, start entering the text. The note editor opens automatically. -
Page 149: Applications
Applications RealPlayer Settings — Edit settings for video playback and ● streaming. With RealPlayer, you can play video clips or stream Stream content over the air media files over the air without saving them to the device first. In RealPlayer, you can only open an RTSP link. RealPlayer does not necessarily support all file However, RealPlayer plays a RAM file if you open an formats or all the variations of file formats. -
Page 150: Application Manager
User connectivity methods, such as Bluetooth defined. connectivity. You can use Nokia Application Installer in Nokia Ovi Application manager Suite to install an application to your device. With Application manager, you can see the software Icons in Application manager indicate the packages installed in your device. - Page 151 applications that are Symbian Signed or have select Messaging > Inbox, and open a passed the Java Verified testing. message that contains an installation file. Before installation, note the following: In Application manager, select Options > Install. In other applications, select the To view the application type, version number, ●...
-
Page 152: Remove Applications And Software
Software installation — Select whether ● To maintain sufficient memory, use Nokia Ovi Suite Symbian software that has no verified digital to back up installation files to a compatible PC, then signature can be installed. -
Page 153: Speech
Recorded sound clips are saved in the Sound clips To delete languages or voices, select the item and folder in Gallery. Options > Delete. Message reader settings To record a telephone conversation, open recorder during a voice call, and select . - Page 154 If your device has OMA DRM-protected content, to back up both the activation keys and the content, use the backup feature of Nokia Ovi Suite. If your device has WMDRM-protected content, both the activation keys and the content will be lost if the device memory is formatted.
-
Page 155: Settings
Settings Display Some settings may be preset for the device by your service provider, and you may not be able to change Light sensor — Scroll left or right to adjust the ● them. light sensor that observes the lighting conditions and adjusts the brightness of the display. -
Page 156: Accessories Settings
If the active standby is set off, you can assign when writing text and the predictive text keypad shortcuts for the different presses of the dictionary used. scroll key. Predictive text — Set predictive text input on ● Change Menu view —... -
Page 157: Slide Handling Settings
Select Menu Tools > Settingsand General ● > > activated each time you connect a Nokia Video Sensor settings. Connectivity Cable to your device. Select from the following: TV screen size — Select the aspect ratio of the ● Sensors —... -
Page 158: Certificate Management
Certificate management Avoid using access codes similar to the emergency numbers to prevent accidental Select Menu Tools Settings General > > > dialling of the emergency number. Security Certificate management. > Keypad autolock period — Select whether the ● Digital certificates do not guarantee safety; they are keypad is locked when your device has been idle used to verify the origin of software. -
Page 159: Security Module
certificate should be valid, check that the current Scroll to an authority certificate, and select date and time in your device are correct. Options Trust settings. Depending on the > certificate, a list of the applications that can use the View certificate details—check authenticity selected certificate is shown. -
Page 160: Positioning Settings
After resetting, the device may take a longer time To define in which format the coordinate to power on. Documents and files are unaffected. information is shown in your device, select Coordinate format, and the desired format. Positioning settings Phone settings Select Menu Applications... -
Page 161: Call Divert
Internet call alert — To be alerted for incoming Line in use — This setting (network service) is ● ● internet calls, select On. If you select Off, you are shown only if the SIM card supports two not alerted, but you receive a notification if you subscriber numbers, that is, two phone lines. -
Page 162: Call Barring
Call barring Network mode — Select which network to use. ● If you select Dual mode, the device uses the GSM Select Menu Tools Settings Phone > > > or UMTS network automatically, according to the Call barring. network parameters and the roaming Call barring (network service) allows you to restrict agreements between the wireless service the calls that you make or receive with the device. -
Page 163: Connection Settings
Connection settings For availability and subscription to packet data connection services, contact your service provider. In connection settings, you can edit access points Access points and other connectivity settings. Create a new access point Data connections and access Select Menu Tools Settings points... -
Page 164: Create Access Point Groups
asked to select a connection method and to define For example, you can add wireless LAN (WLAN) and the settings needed. packet data access points to an internet access point group and use the group for browsing the web. If To edit the settings of an access point, select one of you give the WLAN access point the higher priority, the access point groups, scroll to an access point,... -
Page 165: Wlan Internet Access Points
Access point name — The access point name is other settings depend on the selected network ● provided by your service provider. type. Phone IP address (for IPv4 only) — Enter the IP User name — The user name may be needed to ●... -
Page 166: Packet Data Settings
WLAN network mode — Select Ad-hoc Ad-hoc channel (only for ad hoc networks) — To ● ● create an ad hoc network, and to allow devices enter a channel number (1-11) manually, select to send and receive data directly; a WLAN access User defined. -
Page 167: Wireless Lan Settings
Configurations High speed packet access — Enable or disable ● the use of HSDPA (network service) in UMTS Select Menu Tools Settings > > networks. Connection > Configurations. Wireless LAN settings You may receive trusted server settings from your service provider in a configuration message. You Select Menu Tools... -
Page 168: Remote Configuration
To edit the settings, you can also select Options Server ID — Enter the unique ID to identify the ● > Settings in each application. configuration server. Server password — Enter a password to ● identify your device to the server. Remote configuration Access point —... - Page 169 To connect to the server and receive configuration settings for your device, select Options Start > configuration. To view the configuration log of the selected profile, select Options View log. > To update the device software over the air, select Options Check for updates.
-
Page 170: Troubleshooting
Troubleshooting Q: Why do missing, discoloured, or bright To view frequently asked questions about your device, visit the product support pages at dots appear on the screen every time I turn www.nseries.com/support . on my device? Q: What is my password for the lock, PIN, or A: This is a characteristic of this type of display. - Page 171 If this does not help, restart your compatible PC and your device. If the connection A: The WLAN on your Nokia device switches off still does not work, reconfigure the WLAN settings when you are not connected or trying to connect to in both your compatible PC and device.
- Page 172 Settings Multimedia message Multimedia > > A: To save data, use Nokia Ovi Suite or Nokia Nseries retrieval Manual to have the multimedia PC Suite to synchronise with or to make a back-up messaging centre save messages to be retrieved copy of all data to a compatible computer.You can...
- Page 173 PC. For further information on how to use Nokia Ovi Suite or Nokia Nseries PC Suite, see the application help or visit the Nokia support pages. Q: Can I use my device as a fax modem with a compatible PC? A: You cannot use your device as a fax modem.
-
Page 174: Green Tips
Green tips Recycle Here are tips on how you can contribute to protecting the environment. Most of the materials in a Nokia phone are recyclable. Check how to recycle your Nokia products at www.nokia.com/werecycle, or with a Save energy mobile device, www.nokia.mobi/werecycle. -
Page 175: Accessories
Accessories Warning: Use only batteries, chargers, and accessories approved by Nokia for use with this particular model. The use of any other types may invalidate any approval or warranty, and may be dangerous. In particular, use of unapproved chargers or batteries may present a risk of fire, explosion, leakage, or other hazard. -
Page 176: Battery
The battery intended for use with this device is battery. BL-5K. Nokia may make additional battery models Proper charging. Unplug the charger from the available for this device. This device is intended for electrical plug and the device when not in use. Do... -
Page 177: Nokia Battery Authentication Guidelines
Dispose of batteries according to local Always use original Nokia batteries for your safety. regulations. Please recycle when possible. Do not To check that you are getting an original Nokia dispose as household waste. battery, purchase it from a Nokia authorised service Leak. - Page 178 Nokia battery, you should refrain from using it, and take it to the nearest Nokia authorised service centre or dealer for assistance. To find out more about original Nokia batteries, see www.nokia.com/battery.
-
Page 179: Taking Care Of Your Device
Taking care of your device Your device is a product of superior design and Do not drop, knock, or shake the device. Rough ● craftsmanship and should be treated with care. The handling can break internal circuit boards and following suggestions will help you protect your fine mechanics. -
Page 180: Recycle
This way you help prevent uncontrolled waste disposal and promote the recycling of materials. Check product environmental information and how to recycle your Nokia products at www.nokia.com/werecycle, or nokia.mobi/werecycle. The crossed-out wheeled-bin symbol on your product, battery, literature, or packaging... -
Page 181: Additional Safety Information
Additional safety information Small children Medical devices Your device and its accessories are not toys. They Operation of radio transmitting equipment, may contain small parts. Keep them out of the reach including wireless phones, may interfere with the of small children. function of inadequately protected medical devices. -
Page 182: Hearing Aids
Hold the wireless device to the ear opposite the liquids, gases, or explosive materials in the same ● medical device. compartment as the device, its parts, or accessories. Remember that air bags inflate with great force. Do Turn the wireless device off if there is any reason ●... -
Page 183: Emergency Calls
petroleum gas (such as propane or butane) to Change your profile from Offline or Flight ● determine if this device can be safely used in their profile to an active profile. vicinity. Press the end key as many times as needed to clear the display and ready the device for calls. - Page 184 0.76 W/kg. Use of device accessories may result in different SAR values. SAR values may vary depending on national reporting and testing requirements and the network band. Additional SAR information may be provided under product information at www.nokia.com.
-
Page 185: Index
Index audio messages 111 browser 61 audio themes 138 bookmarks 64 access codes 23 auto-update for time/ browsing pages 61, 62 access points 163 date 142 cache memory 64 groups 164 downloads 63 accessories searching content 63 enhancements backing up device security 65 accessories settings 156 memory 145... - Page 186 missed 131 compass 85 currency computer connections 59 options during 123 converter 146 data connections received 131 See also rejecting 124 conference calls 125 data connections configuration restricting fixed dialling settings PC connectivity 59 connection manager 55 synchronisation 60 settings 160 date and time 142 voice mail 124 connection methods...
- Page 187 out-of-office reply 117 internet radio reading 115 favourites 69 headset 19 searching 116 listening 68 help application 21 sending 114 searching for stations 69 home network 76, 93 set-up 114 settings 70 copying files 96 end all calls option 126 station directory 70 sharing content 95 home synchronisation...
- Page 188 79 to-do notes network settings 162 network positioning 84 memory maps news feeds 62 clearing 25 Nokia Map Loader 92 browsing 85 web cache 64 Nokia Maps Updater 92 collections 87 message reader 113 driving 89 Nokia support...
- Page 189 pairing settings 70 positioning information 79 devices 57 scenes, image and video 38 passcode 57 positioning settings 160 screen settings 155 PDF reader 148 power saver 155 security personal certificates 158 predictive text entry Bluetooth 59 personalisation 138, 155 mode 110 certificates 158 phone setup 26 presentations 52...
- Page 190 FM transmitter 77 SMS (short message themes 138 service) 111 time and date 142 home network 94 internet calls 134 software time zone settings 142 internet radio 70 updating 22 time-out for backlight 155 software applications 150 to-do notes 143 language 156 network 162 software updates 22...
- Page 191 Video Centre 99 week settings video centre calendar alarm 143 downloading 99 welcome note 155 my videos 100 widgets 63 wireless LAN settings 167 transferring videos 101 video feeds 100 WLAN viewing 99 access points 54 video clips availability 54 shared 128 MAC address 53 video settings 44...
Need help?
Do you have a question about the N86 and is the answer not in the manual?
Questions and answers