Table of Contents
Advertisement
Advertisement
Table of Contents

Subscribe to Our Youtube Channel
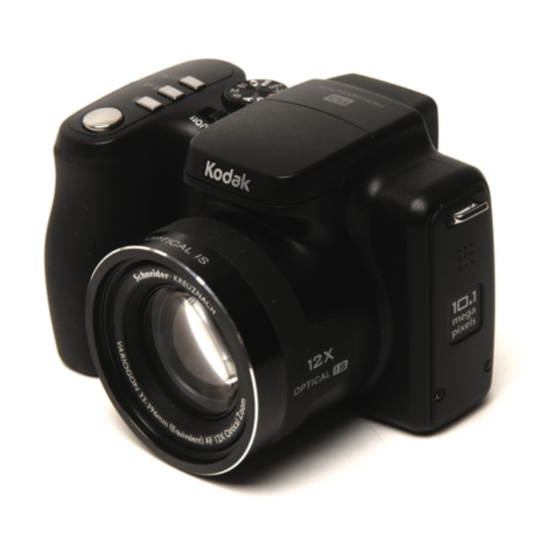
Related Manuals for Kodak EasyShare Z1012


Summary of Contents for Kodak EasyShare Z1012
-
Page 1: Installing The Software
Installing the software Before connecting any cables, install the software that was included with your camera. Follow the on-screen instructions. After installing the software, return to this user guide. Attaching the strap www.kodak.com/go/z1012support... -
Page 2: Loading The Batteries
CRV3 (non-rechargeable) KLIC-8000 (rechargeable) Charging the KLIC-8000 battery If your camera includes a Kodak Li-Ion rechargeable digital camera battery KLIC-8000 and charger, charge the battery before first use. You can also charge the battery with a Kodak EasyShare dock. Visit www.kodak.com/go/z1012accessories. -
Page 3: Turning On The Camera
Turning on the camera Setting the language, date/time www.kodak.com/go/z1012support Language: to change OK to accept Date/Time: to change for previous/next field OK to accept... -
Page 4: Taking A Picture/Video
Press the Shutter button halfway to lock the focus. When the framing marks turn green, press the Shutter button completely down. Videos Video mode Press the Shutter button completely down and release. To stop recording, press and release the Shutter button again. www.kodak.com/go/easysharecenter... -
Page 5: Transferring Pictures/Videos
Reviewing pictures/videos Review previous/next picture/video Transferring pictures/videos USB cable 1 Turn off camera. cable www.kodak.com/go/z1012support Kodak EasyShare printer dock or camera dock (May be sold separately.) For dock compatibility, visit Connect USB cable. www.kodak.com/go/dockcompatibility. Turn on camera. To purchase accessories, visit www.kodak.com/go/z1012accessories. - Page 6 • taken pictures • transferred pictures to your computer Keep learning! Finish reading this book, so you can take and share your best pictures! Visit www.kodak.com/go/z1012support and www.kodak.com/go/easysharecenter for: • the extended user guide • interactive troubleshooting and repairs • interactive tutorials •...
-
Page 7: Front View
Front view 1 Lens 2 Microphones 3 Low-light assist, Self-timer light, Video light 4 On/Off switch www.kodak.com/go/z1012support 5 Shutter button ■ Drive button (Self-timer, Burst) ■ Focus button (Close-up/Macro, Landscape, Manual) ■ Flash button 7 Mode dial 8 Flash... -
Page 8: Back View
9 Jog dial (for PASM modes) 4 Dock connector 10 Info button 5 LCD 11 Review button 6 EVF/LCD button 12 DC-In (3V) for optional AC adapter www.kodak.com/go/easysharecenter 13 USB, A/V Out 14 OK button 16 Share button 17 Menu button 18 Delete button... -
Page 9: Doing More With Your Camera
Faces are detected. ■ The scene is analyzed for other content and for lighting. ■ Kodak Perfect Touch technology is applied, for better pictures. Smart You can choose the best picture size and aspect ratio for your needs—just Capture press the Menu button and choose Picture Size. -
Page 10: Using The 12X Optical Zoom
1 Use the LCD to frame your subject. 2 Press Telephoto (T) or Wide (W) to zoom in/out. NOTE: To get a focused picture every time, remember: ■ Use the auto focus framing marks, ■ As you zoom in, move away from your subject. www.kodak.com/go/easysharecenter page... -
Page 11: Taking Flash Pictures
Flash-to-subject distance in Smart Capture mode Wide angle Telephoto www.kodak.com/go/z1012support Doing more with your camera button repeatedly to scroll If Red-eye Pre-flash is turned on (in the Setup menu): the flash fires once so the eyes become accustomed to the flash, then fires again when the picture is taken. -
Page 12: Using Focus Modes
Again for Manual Focus ■ ■ Again to return to normal Auto Focus 2 Compose the scene. Press the Shutter button halfway, then completely down. to view 2X magnification of the central area of focus. During to adjust focal length. www.kodak.com/go/easysharecenter button:... -
Page 13: Taking Self-Timer Pictures
Turn the Mode dial to Video ■ Press the Shutter button completely down. NOTE: The video stops when no storage space remains. Only the 2- and 10-second options are available in video mode. www.kodak.com/go/z1012support Doing more with your camera , or... -
Page 14: Taking Burst Pictures
The camera stops taking pictures when you release the Shutter button or when the pictures are taken. Purpose Capture an expected event. Example: A person swinging a golf club. Capture an event when the precise timing is uncertain. Example: A child blowing out birthday candles. www.kodak.com/go/easysharecenter... -
Page 15: Understanding The Picture-Taking Icons
Status icons indicate mode, feature, and camera status. Picture size Flash Focus mode Camera mode Tag name Framing marks Histogram Aperture Shutter speed www.kodak.com/go/z1012support Doing more with your camera Compression Self-timer/Burst Exposure bracketing Pictures/time remaining Storage location Zoom indicator Auto focus control White balance... -
Page 16: Working With Pictures/Videos
3 Press the Delete button, then follow the screen prompts. Magnifying a picture during review NOTE: If you press the W button while at 1X, the view changes from single-picture to multi-up thumbnails. magnify 2X - 8X view other parts of the picture return to 1X www.kodak.com/go/easysharecenter... -
Page 17: Using The Menu Button In Review
■ Review to view pictures/videos Edit to edit pictures/videos ■ Setup for other camera settings ■ 3 Press to highlight a setting, then press the OK button. 4 Choose an option, then press the OK button. www.kodak.com/go/z1012support Working with pictures/videos... -
Page 18: Understanding The Review Icons
Review mode Selected picture Scroll arrows Email tag Protected Favorite tag Review mode Selected picture Scroll arrows Print tag/number of prints Picture number Image storage location Perfect Touch tech. Low battery Video length Video number Image storage location Low battery www.kodak.com/go/easysharecenter... -
Page 19: Using The Advanced Features
Setup for other camera settings. 3 Press to highlight a setting, then press the OK button. 4 Choose an option, then press the OK button. NOTE: Press the Info button offer limited settings. www.kodak.com/go/z1012support for information about camera settings and options. Some capture modes... -
Page 20: Using Pasm Modes
Jog dial: Turn to access a setting. Press to unlock the setting. Turn to edit the setting. Press to lock the setting. www.kodak.com/go/easysharecenter Press Jog dial to control Exposure compensation (how much light enters the camera), flash compensation, and ISO... - Page 21 ISO—adjust the camera’s sensitivity to light. Higher ISO indicates greater sensitivity. NOTE: A higher ISO may produce unwanted “noise” in a picture. ISO 6400 available only in 3.1 MP and lower picture sizes. www.kodak.com/go/z1012support Using the advanced features ISO speed...
-
Page 22: Solving Camera Problems
SD/SDHC card. ■ Format the card. (Press the Menu button, then highlight the Setup tab. Highlight Format, then follow the prompts.) Caution: Formatting a card deletes all pictures and videos, including protected files. www.kodak.com/go/z1012support (page www.kodak.com/go/z1012support (page www.kodak.com/go/easysharecenter and select... - Page 23 If the LCD breaks, do not touch the glass or liquid. Contact Kodak customer support. ■ The use of an accessory that is not recommended by Kodak may cause fire, electric shock, or injury. For approved accessories, visit www.kodak.com/go/accessories. ■...
- Page 24 If Kodak is unable to repair or replace a Product, Kodak will, at its option, refund the purchase price paid for the Product provided the Product has been returned to Kodak along with proof of the purchase price paid. Repair, replacement, or refund of the purchase price are the sole remedies under the warranty.
-
Page 25: Regulatory Compliance
In countries other than the United States and Canada, the terms and conditions of this warranty may be different. Unless a specific Kodak warranty is communicated to the purchaser in writing by a Kodak company, no warranty or liability exists beyond any minimum requirements imposed by law, even though defect, damage, or loss may be by negligence or other act. -
Page 26: Waste Electrical And Electronic Equipment Labeling
For more information, see your retailer, local authority, or www.kodak.com/go/recycle. (Product weight: 325 g.) Canadian DOC statement DOC Class B Compliance—This Class B digital apparatus complies with Canadian ICES-003. -
Page 27: Russian Gost-R
MPEG-4 Use of this product in any manner that complies with the MPEG-4 visual standard is prohibited, except for use by a consumer engaging in personal and non-commercial activities. Russian GOST-R Eastman Kodak Company Rochester, NY 14650 AIO-40 www.kodak.com/go/z1012support Appendix... -
Page 28: China Rohs
Appendix China RoHS Eastman Kodak Company Rochester, New York 14650 © Eastman Kodak Company, 2008 Kodak, EasyShare, and Perfect Touch are trademarks of Eastman Kodak Company. 4F8126_en www.kodak.com/go/easysharecenter...
Need help?
Do you have a question about the EasyShare Z1012 and is the answer not in the manual?
Questions and answers