Table of Contents
Advertisement
Advertisement
Table of Contents

Related Manuals for Janome Jubilee 60507


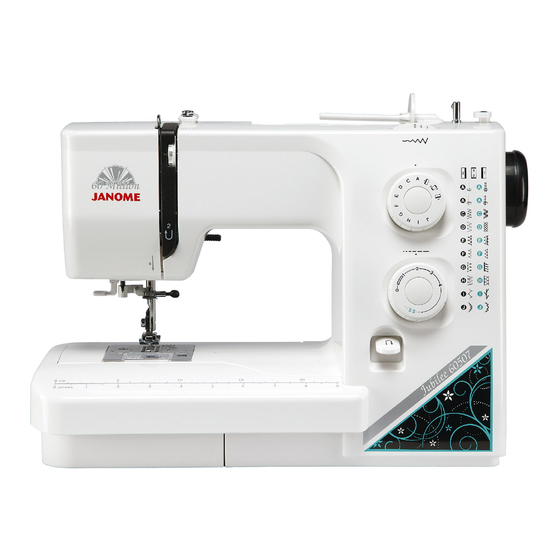
Summary of Contents for Janome Jubilee 60507
- Page 1 SERVICE MANUAL & PARTS LIST MODEL: Jubilee 60507...
-
Page 2: Table Of Contents
CONTENTS What to do when .........................1 - 3 Service Access (1) Face plate ....................4 Service Access (2) Base cover ....................5 Service Access (3) Front cover ....................6 Service Access (4) Rear cover ....................7 Adjusting Thread Tension ......................8 Adjusting Presser Foot Height and Alignment ................. -
Page 3: What To Do When
What to do when CONDITION CAUSE HOW TO FIX REFERENCE 1. Skipping 1. Needle is not inserted Insert the needle properly. stitches properly. 2. Needle is bent or worn. Change the needle. 3. Incorrectly threaded. Rethread. 4. Needle or thread are Use the recommended inappropriate for sewing needle and thread. - Page 4 CONDITION CAUSE HOW TO FIX REFERENCE 3. Breaking 1. Initial sewing speed is Start with medium speed. upper too fast. thread 2. Thread path is incorrect. Use the proper thread path. 3. Needle is bent or worn. Replace with a new needle. 4.
- Page 5 CONDITION CAUSE HOW TO FIX REFERENCE 6. Noisy 1. Backlash between See mechanical P.15 operation Shuttle hook gear and adjustment “Backlash lower shaft gear is too (lower shaft gear).” great. 2. Lower shaft gear is Eliminate the looseness. loose. 3. Inappropriate belt See mechanical P.20 tension.
-
Page 6: Service Access (1) Face Plate
Service Access (1) • Face plate <To remove> Remove the cap and setscrew. Remove the face plate. <To attach> Attach the face plate with the setscrew. Attach the cap. Face plate Setscrew... -
Page 7: Service Access (2) Base Cover
Service Access (2) • Base cover <To remove> Remove the setscrews (6 pcs.) and remove the base cover. <To attach> Shift the drop feed lever in the direction of the arrow. Attach the base cover with setscrews. Base cover Setscrew Setscrew Setscrew Drop feed lever... - Page 8 Service Access (3) • Front cover <To remove> Remove the face plate and base cover (see pages 4 and 5). Pull out the pattern selector dial and stitch length dial. Remove the setscrews (A), (B) and (C) (two off). Remove the front cover, unlocking all the hooks. <To attach>...
-
Page 9: Service Access (4) Rear Cover
Service Access (4) • Rear cover <To remove> Remove the face plate, base cover and front cover (see pages 4 and 6). Remove the setscrews (A), (B), (C) and (D). Lower the presser foot lifter and pull away the rear cover from the machine, clearing the parts(1), (2) and (3), in this order. -
Page 10: Adjusting Thread Tension
Adjusting Thread Tension • The standard tension should be 75 - 90 grams measured with a white polyester thread #50 being pulled in the direction of the arrow, when the tension dial is set at "4". <To adjust> Remove the front cover (see page 6). Set the tension dial at "4". -
Page 11: Adjusting Presser Foot Height And Alignment
Adjusting Presser Foot Height and Alignment • The distance between the bottom of the presser foot in up position and the needle plate should be 6.0 mm. <To adjust> Remove the face plate and needle. Lower the feed dog below the needle plate. Place a block 6 mm thick under the presser foot and lower the presser foot lifter. -
Page 12: Adjusting Needle Swing
Adjusting Needle Swing • If the needle swing when it is still in the fabric, correct it as follows. <To adjust> Remove the front cover (see page 6). Select the zigzag stitch ( ) and set the stitch width dial at 5.0. Loosen the setscrews on the worm. -
Page 13: Adjusting Needle Drop Position
Adjusting Needle Drop Position • The clearance between the needle and side edges of the needle hole should be 0.2 mm or more when the maximum width zigzag stitch ( ) is select. And the needle should drop in the center of the needle hole when the straight stitch is selected. -
Page 14: Adjusting Needle To Hook Timing
Adjusting Needle to Hook Timing • The amount of ascending travel of the needle in the maximum width zigzag stitch ( ) from the right lowest position should be 1.4 to 2.0 mm where the hook point meets the right side of the needle. -
Page 15: Adjusting Needle Bar Height
Adjusting Needle Bar Height • The standard distance between the upper edge of the needle eye and the upper surface of the hook race should be in the range of 3.0 - 3.6 mm when the hook point meets the right side of the needle in its ascending travel from the right lowest position of the maximum width zigzag stitch ( <To adjust>... -
Page 16: Adjusting Clearance Between Needle And Hook Point
Adjusting Clearance between Needle and Hook Point • The standard clearance between the needle and hook point should be -0.10 to +0.05 mm. <To adjust> Select the maximum width zigzag stitch ( Remove the base cover (see page 5). Remove the needle plate and bobbin holder. Replace the needle with the test pin. -
Page 17: Adjusting Backlash Between Hook Drive Gear And Lower Shaft Gear
Adjusting Backlash between Hook Drive Gear and Lower Shaft Gear • The rotary play should be 0.8 mm or less when the hook point is within the span of the feed dog, and the gears should turn smoothly. <To adjust> Remove the base cover (see page 5). -
Page 18: Adjusting Feed Dog Height
Adjusting Feed Dog Height • The distance between the lowered presser foot and needle plate should be 0.75 to 0.85 mm when the feed dog is in its highest position. <To adjust> Select the straight stitch ( ) and set the stitch width at "4". Lower the presser foot. -
Page 19: Adjusting Feed Balance
Adjusting Feed Balance The forward feeding (A) and backward feeding (B) should be equal when sewing stretch stitch pattern. <To adjust> Select the straight stretch stitch ( Place a piece of paper under the foot. Turn the handwheel to check the needle marks. Remove the cap to access the adjusting screw. -
Page 20: Adjusting Buttonhole Feed Balance
Adjusting Buttonhole Feed Balance • When sewing a buttonhole, the stitches on each side of the buttonhole should be the same density. The range of 9 to 12 stitches in the right side row against 10 stitches in the left side row is considered acceptable. -
Page 21: Adjusting Buttonhole Zero Feed
Adjusting Buttonhole Zero Feed • If the fabric is fed when sewing a bartack of the buttonhole, correct it as follows: <To adjust> Sew a test buttonhole to check if the fabric is fed while sewing the bartacks. Remove the cap to access the adjusting screw. If the fabric is fed forward (A), turn the adjusting screw in the direction (C). -
Page 22: Replacing Motor And Adjusting Motor Belt Tension
Replacing Motor and Adjusting Motor Belt Tension <To replace the motor> Remove the face plate, base cover, front cover and rear cover (see pages 4 to 7). Remove the setscrews (A) and machine socket. Remove the setscrews (B) and machine socket lid. -
Page 23: Parts List
PARTS LIST MODEL: Jubilee 60507... - Page 24 MODEL : Jubilee 60507 PARTS LIST...
- Page 25 MODEL : Jubilee 60507 PARTS LIST PARTS DESCRIPTION 751100000 Handle 507150002 Handle supporter (Right) 751077029 Handle supporter (Left) 000081005 Setscrew 4x8 652137006 Arm thread guide (2) 000101404 Setscrew 4x6 507605100 Face cover bracket (unit) 507006105 Face cover bracket 000197706 Setscrew 4x20...
- Page 26 MODEL : Jubilee 60507 PARTS LIST...
- Page 27 MODEL : Jubilee 60507 PARTS LIST PARTS DESCRIPTION 507660608 Front cover (unit) 507177164 Front cover 753125007 Thread guard 827069004 Front cover set plate (Lower) 000120203 Setscrew 3x8 000071013 Plain washer 4 735016307 Bobbin winder stopper 000103107 Setscrew 4x14 000061205 Hexagonal nut 4-3-7...
- Page 28 MODEL : Jubilee 60507 PARTS LIST...
- Page 29 MODEL : Jubilee 60507 PARTS LIST PARTS DESCRIPTION 507661067 Face plate (unit) 507178501 Face plate 840602006 Thread cutter (unit) 724025006 Reflector sticker (2) 000101703 Setscrew 4x12 653006101 507156008 Presser bar bracket 000081005 Setscrew 4x8 735029004 Presser foot lifter 751142004 Tension release lever...
- Page 30 MODEL : Jubilee 60507 PARTS LIST...
- Page 31 MODEL : Jubilee 60507 PARTS LIST PARTS DESCRIPTION 755627103 Needle bar supporter (unit) 751014006 Needle bar supporter 000111201 Hexagonal socket screw 4x4 751630015 Needle bar (unit) 807607019 Threader positioning setting plate (unit) 807018109 Threader positioning setting plate 000111902 Hexagonal socket screw 3x4...
- Page 32 MODEL : Jubilee 60507 PARTS LIST...
- Page 33 MODEL : Jubilee 60507 PARTS LIST PARTS DESCRIPTION 756607100 Upper shaft (unit) 756504003 Upper shaft (unit) 507059000 Worm 000111201 Hexagonal socket screw 4x4 731384008 Felt 000111304 Hexagonal socket screw 5x5 673062004 Upper shaft rear bushing 756017004 Upper shaft timing gear...
- Page 34 MODEL : Jubilee 60507 PARTS LIST...
- Page 35 MODEL : Jubilee 60507 PARTS LIST PARTS DESCRIPTION 751666504 Feed rock shaft (unit) 653193003 Feed dog 000104005 Setscrew 3.5x8 650085002 Spring 738055008 Straight pin 000111304 Hexagonal socket screw 5x5 650612004 Feed regulator (unit) 820387000 Ring 000081005 Setscrew 4x8 507095008 Regulator spring...
- Page 36 MODEL : Jubilee 60507 PARTS LIST...
- Page 37 MODEL : Jubilee 60507 PARTS LIST PARTS DESCRIPTION 660655011 Hook (unit) 660536004 Hook body (unit) 508137006 Hook race bottom plate 820374004 Setscrew 2x2.3 627190010 Hook race magnet 820123006 Hook driver shaft 820124007 Hook shaft oil felt (1) 820125008 Hook shaft oil felt (2)
- Page 38 MODEL : Jubilee 60507 PARTS LIST...
- Page 39 MODEL : Jubilee 60507 PARTS LIST PARTS DESCRIPTION 507633406 Cam block (unit) 507041607 Stitch width dial 507109132 R lever 000107307 Set screw 3x8 000002105 Snap ring E-3 000081005 Setscrew 4x8 507066000 Zigzag width rod 000002507 Snap ring E-4 507635486 Pattern selector dial (unit)
- Page 40 MODEL : Jubilee 60507 PARTS LIST...
- Page 41 MODEL : Jubilee 60507 PARTS LIST PARTS DESCRIPTION Idler (unit) 753619003 Idler base 753119008 Idler 625217100 Snap ring E-6 000002806 Setscrew 4x8 000081005 Machine socket bracket 507067001 Machine socket (unit) 507668204 Machine socket (unit) 739503308 Hexagonal nut 3-1-5.5 000060802 505064002...
- Page 42 MODEL : Jubilee 60507 PARTS LIST...
- Page 43 MODEL : Jubilee 60507 PARTS LIST PARTS DESCRIPTION 507870083 Accessory set 820817015 Blind stitch foot 829801002 Zipper foot 825813016 Buttonhole foot 102261402 Bobbin 639804000 Needle set 822019509 Spool holder (Small) 625031500 Extra spool pin (2) 102403109 Felt 647808009 Seam ripper...
Need help?
Do you have a question about the Jubilee 60507 and is the answer not in the manual?
Questions and answers