
Related Manuals for CODEX DNA BioXp 9600 system


Summary of Contents for CODEX DNA BioXp 9600 system
- Page 1 BioXp™ 9600 system — User guide Part number 43056 Revision 1 Effective 19Sep2022...
-
Page 2: Table Of Contents
INSTRUMENT PORTS AND POWER SWITCH PREVENTATIVE MAINTENANCE WASTE CHUTE REPAIR SETTING UP THE BIOXP 9600 SYSTEM LOADING AND SETUP LEAVE THE BIOXP 9600 SYSTEM POWERED ON 9 LOADING ETHERNET SETUP USING THE BIOXP PLATE EXTRACTOR START THE BIOXP 9600 SYSTEM WEEE COMPLIANCE... -
Page 3: Legal Notices
Limited warranty a) Codex DNA, Inc.’s entire liability and your exclusive remedy if the Product fails to conform to the following warranty (a “Nonconforming Product”) shall be, at Codex DNA, Inc.’s sole option, either repair or replacement of such Nonconforming Product, or, if neither is practicable, a refund of the fees paid for the Product. -
Page 4: Safety Information
Safety information Manual symbols found in this guide This manual describes the use and maintenance of the Codex DNA BioXp™ 9600 system. Read this manual completely before putting the instrument into service. The following icons are used in this manual:... -
Page 5: Safety Warnings
• Use this product only as specified. If the instrument is used in a manner not specified by Codex DNA, the protection provided by the instrument may be impaired, resulting in personal injury or damage to the instrument. - Page 6 Flammable liquids: Instrument warning • Exercise caution when using flammable liquids in the BioXp™ system to minimize the risk of fire. • Do not use any flammable liquids in the instrument except for the liquids required in the included procedure. • Provide adequate ventilation for the instrument to prevent the accumulation of flammable vapors. • All sources of ignition, such as open flame or electrical spark, are not permitted near the instrument or in areas where flammable vapors may travel.
-
Page 7: Equipment Specifications
• Use of parts or materials other than those supplied with the instrument can degrade system performance and may cause safety hazards. Use only Codex DNA approved or supplied components. • Use only Codex DNA supplied power cord. Use of other power cords may compromise electrical protection and could create a hazard. -
Page 8: Site Preparation And Installation
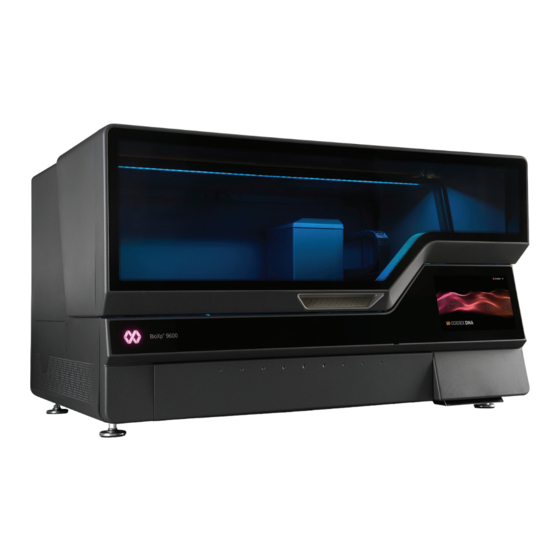
Getting to know the BioXp 9600 system Hardware overview Figure 1. Front view of the BioXp 9600 System Figure 2. Inside Deck of the BioXp 9600 system Temporary Plate and Lid Storage #1 2. Temporary Plate and Lid Storage #2 3. -
Page 9: Waste Chute
‘up and out’ of the BioXp system for cleaning. Before beginning a run on the BioXp system verify that the waste chute is installed and that the thumbscrews have been properly tightened. Setting up the BioXp 9600 system Leave the BioXp 9600 system powered On... -
Page 10: Ethernet Setup
— to an available ethernet wall jack. In order for the BioXp system to communicate with the Codex DNA server, you must open the 80/443 ports through your network. In addition, the BioXp system will be making an outbound SSL connection (HTTPS/SSL) to logmein.com, codexdna.com and drive.google.com. -
Page 11: Configure The Bioxp 9600 System
Configure the BioXp 9600 system Press the Configuration gear icon in the lower left corner 2. Press Network Test the network connection 3. Press Test connection If the system displays Network connection working normally, the BioXp system is ready for use. If you are ready to load the instrument and begin a run, refer to the loading map included with your kit components. -
Page 12: Change The Clock
Obtaining BioXp Kits To order custom BioXp application kits and reagents, visit the Codex DNA myBioXperience portal at codexdna.com. After creating an account, you will be able to upload sequences and place an order. For assistance with placing orders through myBioXperience, please reach out to orders@codexdna.com... -
Page 13: Initiating A Bioxp Run
Initiating a BioXp run Once the deck and tip drawer is loaded, confirm that all components are securely seated. 2. Close the door and tip drawer. 3. Ensure there is a suitable waste container positioned in front of the waste chute. 4. -
Page 14: Cancelling A Job During A Run
Cancelling a job during a run IMPORTANT! You will not be able to reuse reagents if you cancel a job after the run has initiated and the reagent plate seal has been broken. Do not cancel a run unless absolutely necessary. If you need to cancel a job during a run, press the ‘X’... -
Page 15: Troubleshooting
Troubleshooting BioXp™ deck inspection error After you load the deck and close the instrument door and start the run, the instrument performs a deck inspection, checking the location and orientation of the recovery plate, ethanol reservoir, reagent strip handles, reagent strips, tips, and system robotics. -
Page 16: General Troubleshooting
In the event of spillage of a hazardous material, the BioXp system user is responsible for decontamination of the hazardous material on or inside the instrument. Before using a cleaning or decontamination method other than a recommended cleaner, contact Codex DNA to verify that the proposed decontamination method will not damage the equipment. -
Page 17: Calibration
The instrument will perform a self check each day. A log of the self check is stored on the system and may be used by Codex DNA service technicians should any issue arise. Keeping the BioXp system connected to the internet ensures optimal use and analysis of the calibration log. -
Page 18: Loading And Setup
Loading and setup Loading Proper loading of the BioXp system begins with gathering the provided the materials received in your reagent kit. To start, open the hood and examine the interior of the BioXp system – make sure any materials or waste plates from a prior run have been removed before you begin loading the new consumables and reagents into the BioXp system. - Page 19 Press the framestrip into the holder and verify the location of the positioning pin and corresponding hole. The clamp assembly of the framestrip holder snaps into place to retain the framestrip. After installing all the framestrips necessary for your protocol – gently close the clamp assembles to retain the framestrips. Due to the low volume of reagent in the frame strips, this must be done carefully, without disrupting reagents pooled in the bottom of the tubes.
- Page 20 Installing Mega Strip Holder and Mega Strips (location 8) If your protocol requires Mega Strips for reagent delivery these are installed into the Mega Strip Holder which is a removable component and can be placed (along with the mega strips) into a centrifuge for preparation – then placed into the mounting system permanently installed on the deck of the BioXp system.
- Page 21 Installing Reaction Plates into the Input Plate Stacks (location 10 and 11) If your protocol requires reaction plates to be installed into the two input plate stack holders these are keyed in the top left corner and are color coded. The loading instructions for the protocol will identify the reaction plates for the job, you should install these based on the color of the carrier into one of the two plate stack holders.
- Page 22 Installing tips into the Tip drawer (location 19) If the protocol requires tips to be loaded into the drawer you may need to press the unlatch drawer button in the user interface to cause the drawer to open. Pull the drawer out completely to more easily install the tip trays into the loading bars. NOTE: the tip trays are installed in a portrait orientation with the notch at the top right corner now.
-
Page 23: Using The Bioxp Plate Extractor
Using the BioXp Plate Extractor A specialized tool has been created to help remove the 96 well semi skirted PCR plate from the carriers used by the BioXp system. To use the plate extractor tool a reaction plate assembly is inserted into the retaining fingers on the left side of the extraction tool and pressed into the guidance ring. -
Page 24: Weee Compliance
The BioXp™ system complies with the European Union’s Waste and Electrical and Electronic directive. For disposal or recycling information, contact your local authorities or the electronic industry alliance: www.eiae.org. Codex DNA, Inc. 9535 Waples Street, Suite 100 San Diego, CA 92121-2993 Technical assistance: help@codexdna.com 858.228.4115 © 2022 Codex DNA, Inc. All rights reserved.
Need help?
Do you have a question about the BioXp 9600 system and is the answer not in the manual?
Questions and answers