Table of Contents
Advertisement
Quick Links
Advertisement
Table of Contents

Subscribe to Our Youtube Channel
Related Manuals for Hysolis Split Phase SPS6K


Summary of Contents for Hysolis Split Phase SPS6K
- Page 1 User Manual Solar Power Station SPS6K Split Phase Series...
-
Page 2: Table Of Contents
We have the utmost confidence in this product’s performance and quality. Please feel free to contact us at Hysolis.com if you have any questions. Enjoy using your Hysolis Solar Power Station, and may it positively affect your... -
Page 3: Product Features
1 Product features ● Double CPU intelligent control technology, excellent performance; ● Dual isolated transformer, higher safety standard. ● 3 working modes for optional. (Utility first, Battery first, Energy saving); ● Smart cooling fan control, safe and reliable; ● Pure sine wave output, protect your loads from dirty power; ●... -
Page 4: Equipment Diagram, Operation Instructions
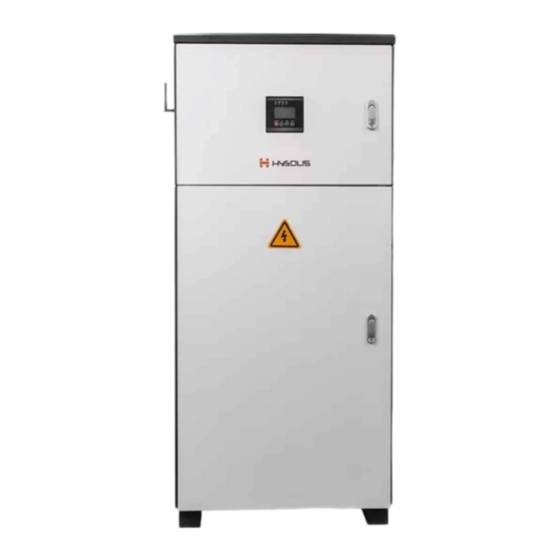
3 Diagram & operation instructions 3.1 Front panel... - Page 5 3.2 Side panel Guide - AC input breaker - AC input wiring terminals - AC output wiring terminals - AC output breaker - Solar input wiring terminals sockets - AC output - Solar input breaker - Battery breaker - WIFI Indicator - Expansion Battery Port...
- Page 6 3.3 Display Instructions 3.3.1 LCD display and function key allows user to check the SPS working status and set working modes. Such as: AC Input / AC output voltage, AC frequency, working mode, the battery level, PV input power, PV current, PV voltage, loads percentage of the unit capacity, error codes and etc;...
- Page 7 3.3.3 LED indicator instructions LED indicators Instructions PV is charging Green PV is not charging The AC input power is connected and bypassing. LINE Green The AC input is disconnected. The inverter is ON, Powered by the battery. yellow The inverter is OFF. AC output overload or Inverter fault.
- Page 8 3.3.4.2 Settings. Under the main page, long press Funct key for 5 seconds or to enter the setting menu, and then press DOWN or UP to view the sub-menu. The function of P0/P1/P2/P3/P4 in the flashing state is as follows: Main Menu Functions Buzzer mode...
- Page 9 3.3.5.2 Inverter AC charging current setting Under the main page, long press the Funct button for 5 seconds to enter the setting menu. Press the DOWN button to select the inverter charging current information P3. Press the Funct button to enter the P3 setting page. Through DOWN or UP keys, increase /decrease The charge current of the inverter (100%-80%-60%-40%-20%).
- Page 10 3.3.5.3 Error code and solution Error Fault description Solution code Contact tech support if still Overcurrent of MOSFETS board having this issue after restarting Loads shortcircuit or extreme Output short circuit overloaded. Remove some loads or reduce Overloaded the loads power. Check whether cooling fan is Over-temperature working well or vent might be...
- Page 11 3.3.5.4 Inverter charging voltage setting Under the main page, long press the Funct key for 5 seconds to enter the main menu, press the DOWN key to select the inverter work mode page P1, press the Funct key to enter P1 setting page, select the inverter work mode (01-03) through DOWN or UP key, press the Funct key to save and exit.
-
Page 12: System Wiring Instructions
4 System Wiring Instructions. 4.1 Cable size calculating Battery, AC input / output connecting wire diameter recommended that: (1 mm2 copper wire is calculated by current 4-5A) For example: 5000W/48VDC/220VAC equipment connecting wire diameter are as follows... - Page 13 4.2 Instructions for batteries wiring. This instruction is for 12V Lead-acid batteries. Make sure all the batteries are same specification, same voltage level. Note: Flip OFF the battery breaker before wiring. BE CAUTIOUS! Wrong wiring may cause damage, battery short circuit may cause fire. 4.2.1 Remove the battery fixed brackets before load the batteries.
- Page 14 4.3.2 Flip OFF the breaker in the PV combiner box. Wire the strings to the PV combiner box (“Solar Input +” & “Solar Input -” are separated).12AWG PV wire is recommended, length <40ft. 4.3.3 Flip OFF the “Solar Input” breaker in the SPS. Wire the PV combiner box output to SPS “Solar Input 1”...
-
Page 15: Power On / Off
4.5.3 For 240VAC outputs, wire to HOT1:HOT2, N, G. Total loads maximum power is 240V6KW. The 240VAC output (HOT:HOT2) is in the inverter protection circuit. The loads power ratio will be shown on the LCD display. 4.6 AC Input / AC Output wiring diagram 5 Power ON / OFF 5.1 Power ON 5.1.1 Start with battery... - Page 16 5.3 Power OFF the SPS unit. Flip OFF the “AC Output” & “AC Input” breakers, then press and hold the "ON/OF” button for 2 seconds, release after the internal relay action, the LCD screen will be off. Flip OFF the “Batter Breaker”...
-
Page 17: Maintenance
SPS AC Input terminals HOT1, HOT2 &G. Start up generator and wait for a few second to make sure it’s running stable. 5.6.3 Press and hold “ON/OFF” button for 3 seconds to start the inverter. The inverter will be ready after 4 beeps. Set the work mode on [01]. 5.6.4 Flip ON the “AC Input”... -
Page 18: Common Faults And Troubleshooting Guide
7 Common faults and troubleshooting guide WARNING: There’s high voltage inside! It may cause electric shock hazard or death! Do not open the cover unless you are the qualified electrician. Failures Possible reason Solutions The battery is not fully Make sure that the charged battery is fully charged The unit backup time... -
Page 19: Technical Specification Sheet
8 Technical Specifications Sheet Model SPS6K AC Output Rated Power 240VAC 6000W / 120VAC 3000W Rated voltage (Lead-acid 48VDC battery) Battery AC-DC Charge Current 48V30A Max (Adjustable) Battery Type Lead-Acid Voltage Range 170-275VAC(HOT1-HOT2) Input Frequency 45-65Hz Voltage/Power(HOT1-HOT2) 240VAC/6KW Voltage/Power(N-HOT1) 120VAC/3KW Voltage/Power(N-HOT2) 120VAC/3KW 50/60Hz±1%( Inverter mode) -
Page 20: System Wiring Diagram
9 System Wiring Diagram... -
Page 21: Wifi Configuration & App Setup
10 WIFI Configuration & APP setup 10.1 Power on WiFi module Power on the SPS unit, the wifi indicator light turns on red for the first 15 seconds, then turns on green and quick flash. (Above instruction for the first time connection. For resetting the network connection, press and hold the reset button. - Page 22 Step 3: Enter “WiFi configure” Screenshot 3 - WiFi configuration interface Please make sure the LED indicator light is on green and quick flash. If not, press and hold the reset button to reset. Step 4: Configure WiFi. 1) Click “Connect”, find the WiFi name starting with AF (Screenshot 5). (Android app will automatically jump to WiFi screen, IOS app needs to enter the WiFi connection page manually.) Enter the password 12345678 to connect your app to the WiFi module.
- Page 23 Screenshot 5 - select WiFi name start with AF Return to app and click “Scan” after the wifi has been connected. Select “YES” on the Tips. Screenshot 6 - scanning diagram...
- Page 24 3) The nearby Wifi hot-spot will be listed out. Select your WiFi which has access to the internet, enter the password (Note:please enter the correct password to avoid the failure of wifi connection. If the connection fails, reset to start over), click “Confirm”, the Wifi indicator light will turn on red.
- Page 25 If the equipment not shown on the App, enter “Personal Center”, select “Add Equipment”, scan the equipment ID QR code or input the Equipment ID (ST***********).Click “Add”. Screenshot 9 If failed to add equipment, please contact local dealer for support.
Need help?
Do you have a question about the Split Phase SPS6K and is the answer not in the manual?
Questions and answers