
Related Manuals for Schweizer eMag 100 HD Speech


Summary of Contents for Schweizer eMag 100 HD Speech
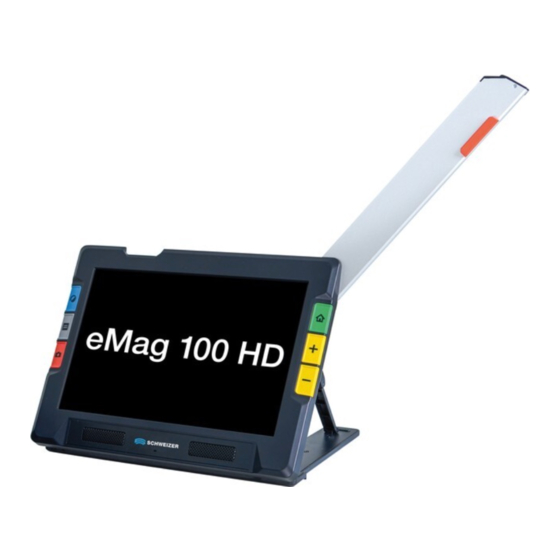
- Page 1 100 HD Speech Instruction manual for the electronic magnifier with read-aloud function eMag 100 HD Instruction manual for the electronic magnifier...
- Page 2 Service and support Contact your assistive technology provider if you require technical support for your eMag 100 HD / Speech. Note: eMag 100 HD / Speech does not contain any components that can be serviced by the user. Any unau- thorized attempt to service or replace any internal components will invalidate the warranty.
- Page 3 LCD display (16:9 format) with a screen diagonal of 25.8 cm (10"). We hope you enjoy using this high-quality device. Depending on your needs, you have obtained either an eMag 100 HD or an eMag 100 HD Speech. The eMag 100 HD Speech includes optical character recognition (OCR) and speech functions.
-
Page 4: Table Of Contents
Components of the eMag 100 HD / Speech 10 Innovative, patented technologies 5. Overview of functions Scope of delivery Difference between eMag 100 HD and eMag 100 HD Speech Touchscreen Tactile buttons (on the device) Virtual buttons (on the display) Show/hide virtual buttons... - Page 5 Overview camera Virtual buttons in Camera View Full-page camera Magnification camera Full-page camera – Writing Overview camera eMag 100 HD Speech only: Full-page camera Full-page camera – Have text read aloud Wireless Bluetooth connection to other devices Camera View Re-enabling Bluetooth...
- Page 6 Standard Mode – Image display effects Advanced Mode Display Menu Main Menu Color combinations Virtual buttons in Camera View Color contrast combinations for text Magnification camera Color contrast combinations for images Overview camera Adding color combinations Full-page camera Removing color combinations Saving and file management Visual Display Settings Taking a snapshot and...
- Page 7 100 HD Speech only: Setting the reading language and voice Text display modes Changing the text display mode Technical data Safety and maintenance Cleaning the housing of the eMag 100 HD / Speech Cleaning the LCD display of the...
-
Page 8: Emag 100 Hd / Speech At A Glance
Note: The eMag 100 HD Speech has 2 modes of operation: Camera Magnification Mode and Speech Mode. -
Page 9: Features
The built-in 13-megapixel autofocus camera provides sharp HD-quality images that can be easily viewed on the full-color 10-inch LCD monitor. In addition, you can have the eMag 100 HD Speech read texts aloud to you. The device has 3 cameras for different distances. In addition, the fold-out camera arm makes it possible to write under magnification. -
Page 10: Components Of The Emag 100 Hd / Speech
Components of the eMag 100 HD / Speech 1 On/off switch (orange) 2 LED for mains connection 3 Headphone jack 4 Charging cable connection (USB-C) 5 Power plug 6 Tactile button (blue), contrast selection 7 Tactile button (gray), Reading lines and text mask selection 8 Tactile button (red), Take snapshot 9 Tactile button (green), Home Screen/... -
Page 11: Innovative, Patented Technologies
Aptiview dynamically adjusts contrast in different parts of the image, ensuring a consistently good viewing ex- perience in a wide range of lighting conditions. Scope of delivery eMag 100 HD or eMag 100 HD Speech electronic magnifier Protective bag USB power supply with USB-C cable... -
Page 12: Difference Between Emag 100 Hd And Emag 100 Hd Speech
Difference between eMag 100 HD and eMag 100 HD Speech The speech function is only available with the eMag 100 HD Speech. The menus and controls (voice control) required for this are unavailable in the eMag 100 HD, as is the optical character recognition (OCR) function, so an image cannot be scanned and converted into text. -
Page 13: Touchscreen
Touchscreen The touchscreen gives you an easy way to perform functions of the eMag 100 HD / Speech by simply touch- ing the display. Tap the display to focus the camera and to show virtual buttons. Tap buttons/icons to navigate through menus and dialog boxes and perform functions. Select specific setting options. -
Page 14: Tactile Buttons (On The Device)
Long-press to display full colors in Camera top left View only (not in menus, snapshots, or docu- ments). Toggle between reading lines and text masks Front side, in Camera View. Text mode (gray) middle left eMag 100 HD Speech only: Toggle between 3 text viewing modes. - Page 15 Front side, image on the display. Snapshot (red) bottom left Press for 2 sec- eMag 100 HD Speech only: onds to have text recognized and read aloud. Home screen / Front side Activates the camera so that everything the “Back” (green) top right camera is facing is shown on the display.
-
Page 16: Virtual Buttons (On The Display)
Virtual buttons (on the display) Touch the display to show the virtual buttons. These icons take you to the menus and views that allow you to optimally customize the device to your needs. Which buttons are displayed depends on whether you are in Standard Mode or Advanced Mode. Advanced Mode offers you more options. -
Page 17: Menus
Menus Menus are displayed by pressing the Main Menu button To return to previous menus, tap the Back button to exit the menus Press the green tactile Home Screen/Back button completely and return to Camera View. Setting haptic feedback For immediate feedback of your actions, the eMag 100 HD / Speech may vibrate briefly when you press a tactile or virtual button. -
Page 18: Help Text
If you press a button or control on the display for 3 to 4 seconds, a help text is displayed and/or spoken (eMag 100 HD Speech only), describing what you can currently do. For example, if you press the blue Color Mode button for about 3 seconds, the information for this button appears at the top of the display. -
Page 19: Help Text Settings
> Settings > Language > Help text 2. Tap “Show help text” on the display to enable/disable the function. eMag 100 HD Speech only: Tap “Say help text” to enable/disable the function. 3. Press the green tactile Home Screen/Back button to return to Camera View. -
Page 20: Sound (Volume / Speech Speed)
1. Tap the display to show the virtual buttons, then tap the icons Main Menu > Sound 2. Swipe your finger up/down the slider eMag 100 HD Speech only: to increase/decrease the volume Swipe your finger up/down the slider or tap directly on the icons... -
Page 21: Quick Start
Quick start Charge the eMag 100 HD / Speech Before you start up the eMag 100 HD / Speech, please charge the device. It takes about 4 hours to fully charge the device. The battery needs to be charged when the charging LED on the left side of the device turns red. -
Page 22: Set Up The Emag 100 Hd / Speech
Set up the eMag 100 HD / Speech Retract the eMag 100 HD / Speech Fold out the camera arm... -
Page 23: Switch The Emag 100 Hd / Speech On/Off
Switch the eMag 100 HD on/off If you wish to put the device into sleep mode, short-press the orange On/Off button Press the button for 7 seconds until a signal sounds to switch off the device. 3 viewing options – 3 camera view positions 1 Magnification camera 2 Overview camera 3 Full-page camera... -
Page 24: Overview Of Functions
Press and release: zoom in/out incre- mentally Short-press: Take snapshot Long-press: Take snapshot, recognize and read aloud Spread apart or bring together two fingers (eMag 100 HD Speech only) on the touchscreen to zoom in/out... -
Page 25: The 3 Cameras Of The Emag 100 Hd / Speech
The 3 cameras of the eMag 100 HD / Speech The cameras allow you to view objects, take snapshots, and enhance and save images. The eMag 100 HD / Speech has 3 cameras, each dedicated to a specific task or situation. Only one camera is active at a time. - Page 26 Camera Correct Camera position Description (magnification) device operation The center of the device The stand is open and For reading on a desk or is facing down. Magnification camera the camera arm is table. Place a document Blocked when the stand (from 2x to 24x) closed.
-
Page 27: Magnification Camera
Magnification camera The magnification camera is used for reading on a desk or table. You need to place the device on the reading material. Keep the camera arm closed and open the stand. In this mode, the light is always on because of the darkness under the device. 1. -
Page 28: Overview Camera
Overview camera The overview camera is ideal for hand-held viewing. You can use it to view objects from multiple and even greater distances. 1. Use the eMag 100 HD / Speech without the reading stand and without the camera arm folded out. If neces- sary, fold in the camera arm and close the reading stand. -
Page 29: Full-Page Camera
Full-page camera Use this mode if you wish to write under magnification or view three-dimensional objects, for example. 1. Open the integrated reading stand as described in the section Magnification camera. 2. Fold out the camera arm completely. 3. Place your document flat on the table to the right of the device under the camera. -
Page 30: Full-Page Camera - Writing
Lock button to switch between Locked and Unlock eMag 100 HD Speech only: Full-page camera – Have text read aloud. Place your document / reading material to the right of the device and move it until it appears in the center of the gray frame on the eMag 100 HD / Speech display. -
Page 31: Camera View
Camera View One of the 3 cameras is always automatically enabled after you switch on the eMag 100 HD / Speech. Position the reading material or viewing object under / in front of the camera until it is visible on the display. Zooming in on an image Press and hold the upper yellow Zoom in button or the lower yellow Zoom out button... -
Page 32: Focusing
Focusing You can tap the screen in any position to focus on part of the image. Automatic focusing is performed regardless of whether the focus lock is enabled or disabled. Focus lock The virtual Focus Lock button is available when using the overview camera and the full-page camera. Tap the Locked icon to lock the focus at the current position, tap it again to unlock Reading lines and text masks... -
Page 33: Light
Light The light is automatically activated when the cameras are in use. However, you can turn the light off or on by tapping the virtual button Light Note: This virtual button only appears in overview and full-page camera mode. Taking snapshots Taking a snapshot can be useful if you wish to view images later or in a more comfortable position, magnify them, etc. -
Page 34: Emag 100 Hd Speech Only
100 HD Speech only: Have snapshots read aloud: Press the red tactile Snapshot button for 2 seconds for the text to be recognized and read aloud. Standard Mode Your device is set to Standard Mode when you first use it. Standard Mode provides a limited, easy-to-use user interface that includes the most important functions. - Page 35 Connect the eMag 100 HD / Speech wirelessly via Bluetooth to headphones or external speakers, for example. Change the visual settings to improve the image on the display. Adjust the sound settings to increase or decrease the volume. eMag 100 HD Speech only: Adjust speech volume and speed.
-
Page 36: Virtual Buttons In Camera View
Standard Mode – Virtual buttons in Camera View Virtual buttons are shown when you tap the display. Tap again to hide them. The buttons are hidden automatically after 10 seconds. Standard Mode – Magnification camera If you tap the display while using the magnification camera in Standard Mode, the Main Menu button is displayed. -
Page 37: Overview Camera
Standard Mode – Overview camera If you tap the display while using the overview camera in Standard Mode, the following buttons are displayed: Main Menu, Light On/Off, and Focus Lock On/Off. Display Main Menu. Switch the Light on or off as required. Switch the Focus Lock on or off. -
Page 38: Full-Page Camera
Standard Mode – Full-page camera If you tap the display while using the full-page camera in Standard Mode, the following buttons are displayed: Main Menu, Light On/Off, Focus Lock On/Off, and Orientation. Display Main Menu. Switch the Light on or off as required. Switch the Focus Lock on or off. - Page 39 Standard Mode – Wireless Bluetooth connection to other devices You can use Bluetooth to connect the eMag 100 HD / Speech to an audio device, such as headphones or speakers. You can only connect to one device at a time. To connect the eMag 100 HD / Speech to an audio device via Bluetooth: 1.
-
Page 40: Re-Enabling Bluetooth
Standard Mode – Re-enabling Bluetooth If you re-enable Bluetooth, eMag 100 HD / Speech will automatically connect to all previously paired devices. If you wish to unpair a device, select the device name and tap the Delete button. The eMag 100 HD / Speech disconnects from the device and deletes the connection data. -
Page 41: Standard Mode - Image Display Effects
The 3 display modes allow you to set how text being read aloud is eMag 100 HD Speech only: displayed by default. Here you can define the color combinations that can be called up using the tactile blue Color Contrasts button. -
Page 42: Color Combinations
Standard Mode – Color combinations Separate color contrast combinations can be selected for viewing camera images (images) and menus/system interfaces (text). Standard Mode – Color contrast combinations for text These are used for the following views: The system interface (menus, virtual buttons, and help text) 4 color combinations are available by default: Black on White White on Black... -
Page 43: Color Contrast Combinations For Images
Standard Mode – Color contrast combinations for images These are used for the following views: All camera-generated images on the display 6 color combinations are available by default: True colors Grayscale Black on White White on Black Blue on Yellow Yellow on Blue To select color contrast combinations for the camera-generated image on the display, proceed as follows: Press the blue tactile Color Contrasts button... -
Page 44: Adding Color Combinations
Standard Mode – Adding color combinations You can set color contrast combinations separately for camera-generated images and for menus / system interface. To add a color combination: 1. Tap the display to show the virtual buttons. 2. Tap Main Menu >... -
Page 45: Removing Color Combinations
Standard Mode – Removing color combinations 1. Tap the display to show the virtual buttons. 2. Tap Main Menu > Settings Menu > Display Menu > Color Combination 3. At the bottom of the display, choose between the two options Text (for system interface, menus, virtual buttons, and help text) or Image (for all camera-generated images on the display) 4. -
Page 46: Light Sensitivity Filter
Standard Mode – Visual Display Settings – Light sensitivity filter The light sensitivity filter is enabled by default and dims the illumination of very bright colors to accommodate requirements for which bright light makes reading difficult. For example, white is displayed as light gray. To disable the filter, slide the switch to the left or tap the left side of the button. -
Page 47: Setting The Font Size
Standard Mode – Setting the font size If you wish to increase or decrease the font size for the system interface, e. g. help text, tap the display to show the virtual buttons. Tap Main Menu > Settings Menu > Display Menu >... -
Page 48: Visual Settings (For The Display)
Standard Mode – Visual settings (for the display) To adjust the contrast, accentuate or smooth edges, or adjust the display brightness tap the display to show the virtual buttons. Tap Main Menu > Visual Settings Standard Mode – Visual settings – Brightness Use the left slider on the display to adjust the screen brightness. -
Page 49: Contrast
Standard Mode – Visual settings – Contrast Tap the Contrast button to enable this function and show a slider under the button. Note: The image quality may vary greatly depending on the lighting conditions at your location and the doc- ument you are editing. -
Page 50: Edge Effects
Standard Mode – Visual settings – Edge effects Tap the virtual button Edge Effects (if necessary multiple times) to enable this function and select one of the 3 edge effects. Swipe the slider up/down to increase/decrease the respective effect or tap directly on the effect icons. - Page 51 Edge effect Image example Note Enhance edges Available for high-contrast Accentuates edges in images colors, true color, and and text. grayscale. Edge smoothing Not available for true color or Smooths edges in images and grayscale. Only available for text. The outline is enhanced in high-contrast colors.
-
Page 52: Reset Settings
Edge effect Image example Note No edge effects Available in all color modes. Disable all edge effects. Standard Mode – Reset Settings Tap the virtual button Reset Settings to reset the brightness, contrast, and edge effects to their default settings. -
Page 53: Advanced Mode Main Menu
Advanced Mode Once you have become familiar with your eMag 100 HD / Speech, you may wish to try Advanced Mode, which includes more functions. To enter Advanced Mode, tap the display to show the virtual buttons. Then go to Main Menu >... - Page 54 (eMag 100 HD Speech only), and update the system settings. Switch from Advanced Mode to Standard Mode, which is easier to use but includes fewer func- tions.
-
Page 55: Virtual Buttons In Camera View
Advanced Mode – Virtual buttons in Camera View Virtual buttons are shown when you tap the display. Tap again to hide them. The buttons are hidden auto- matically after 10 seconds. The virtual buttons in Advanced Mode provide additional functions compared to Standard Mode. - Page 56 Show edges only. Not possible with true colors, only with high-contrast color combinations. Edge smoothing. Not possible with true colors, only with high-contrast color combinations. Dynamic contrast adjustment for variable light conditions. View of virtual buttons when using the magnification camera in Advanced Mode.
-
Page 57: Overview Camera
Advanced Mode – Overview camera If you tap the display while using the overview camera in Advanced Mode (neither the stand nor the camera arm are extended), the following but- tons are displayed: Main Menu, Light, Brightness, Edge Effects, Focus Lock, and Dynamic Contrast Adjustment. - Page 58 Show edges only. Not possible with true colors, only with high-contrast color combinations. Switch the Focus Lock on or off. Dynamic contrast adjustment for variable light conditions. View of virtual buttons when using the overview camera in Advanced Mode.
-
Page 59: Full-Page Camera
Advanced Mode – Full-page camera If you tap the display while using the full-page camera in Advanced Mode (both the stand and the camera arm are extended), the following buttons are displayed: Main Menu, Light, Brightness, Orientation, Edge Effects, Focus Lock, and Dynamic Contrast Adjustment. - Page 60 Edge smoothing. Not possible with true colors, only with high-contrast color combinations. Show edges only. Not possible with true colors, only with high-contrast color combinations. Switch the Focus Lock on or off. View of virtual buttons when using Dynamic contrast adjustment for the full-page variable light conditions.
-
Page 61: Saving And File Management
Advanced Mode – Saving and file management In Advanced Mode, you can use the file management of the eMag 100 HD / Speech to save, view, delete, import, and export documents and image files. You can also add an audio label to a file. Advanced Mode –... -
Page 62: Capturing Multiple Pages
Advanced Mode – Capturing multiple pages 1. Open the reading stand and fold out the camera arm completely to use the full-page camera. 2. Place your document flat on the table to the right of the device, under the camera. 3. -
Page 63: Audio Labels For Saved Files
Advanced Mode – Audio labels for saved files Audio labels help you identify your saved files on the eMag 100 HD Speech. You can assign an audio label to any file you save or import. However, a file loses its audio label when exported to a USB-C memory stick or copied to a computer. -
Page 64: Adding Or Changing An Audio Label Later
Advanced Mode – Adding or changing an audio label later You can also add or change an audio label when you open a previously saved file. 1. Tap the display to show the virtual buttons. Tap Main Menu > Files . -
Page 65: Opening A (Saved) File
Advanced Mode – Opening a (saved) file 1. To open a file, tap the display to show the virtual buttons. Then select Main Menu > Files All available saved files (images and documents) are displayed. 2. Tap a file to select it. 3. -
Page 66: Deleting Individual Files
Advanced Mode – Deleting individual files 1. To open a single file (image or document), tap the display to show the virtual buttons. Then tap . All available saved files (images and documents) are displayed. Main Menu > Files 2. Tap a file to select it. 3. -
Page 67: Deleting The Device Memory And All Files
Advanced Mode – Deleting the device memory and all files 1. To delete all files (images or documents) completely, tap the display to show the virtual buttons. Then select Main Menu > Settings > System Settings > Device Memory 2. Tap the Delete icon. -
Page 68: Miracast® Wireless Connection
Advanced Mode – Miracast wireless connection You can use Miracast to transfer audio and visual content from the eMag 100 HD / Speech to a computer or TV. The content is displayed simultaneously on the eMag 100 HD / Speech and the connected device. The eMag 100 HD / Speech supports Wi-Fi Direct from the eMag 100 HD / Speech to a device, but not vice versa. -
Page 69: Status Of The Miracast® Connection
5. The eMag 100 HD / Speech automatically searches for devices and lists them on the display. Select the name of the device on which you wish to show the display of the eMag 100 HD / Speech and tap the plus sign . -
Page 70: Exporting Or Importing Files
Advanced Mode – Exporting or importing files You can export or import files by tapping the virtual Transfer Files button. 1. To do this, tap on the display to show the virtual buttons. Then Select Main Menu > Files All available saved files (images and documents) are displayed. 2. -
Page 71: Emag 100 Hd Speech Only: Setting The Reading Language And Voice
100 HD Speech only: Setting the reading language and voice The eMag 100 HD Speech initially reads the text aloud in the factory-set language and voice. To change the reading language and voice, tap the display to show the virtual buttons. -
Page 72: Text Display Modes
100 HD Speech only: Text display modes With 3 text display modes, you can set how text being read aloud is displayed by default. Image Mode Teleprompter Mode Line Ticker Mode If you tap the Play button, the device starts reading the document aloud from the beginning. -
Page 73: Changing The Text Display Mode
100 HD Speech only: Changing the text display mode To set how recognized text is displayed or emphasized by default, proceed as follows: 1. Tap the display to show the virtual buttons. 2. Tap Main Menu > Settings Menu >... -
Page 74: Technical Data
Rechargeable lithium-ion battery, approx. 3.5 hours of continuous use, charging time approx. 4 hours Read-aloud function (eMag 100 HD Speech): 20 national languages with selection of different voices Note: Only use the supplied charger to charge the eMag 100 HD / Speech battery. Manufacturer:... -
Page 75: Safety And Maintenance
Safety and maintenance Please read the following instructions to keep the device in good working order and to ensure safe han- dling: Do not look into LEDs when the device is on, as it may harm your eyes. Do not attempt to repair the eMag 100 HD / Speech yourself or open the housing. This product does not contain any parts that can be serviced by the user. -
Page 76: Cleaning The Lcd Display Of The Emag 100 Hd / Speech
Cleaning the LCD display of the eMag 100 HD / Speech Before cleaning the display, turn off the eMag 100 HD / Speech and unplug the power plug. Always use a clean microfiber cloth. Gently wipe the display with the cloth. Do not apply pressure to either the cloth or the LCD display. If you use a liquid cleaning agent, it must be suitable for an LCD display. -
Page 77: Safety Instructions For Rechargeable Batteries
Safety instructions for rechargeable batteries We would like to inform you that our rechargeable batteries are marketed in compliance with the law and draw your attention to the following points: Our product contains a rechargeable battery. In order to avoid environmental and/or health hazards, used batteries/rechargeable batteries must be returned for regulated disposal at municipal recycling centers or via retailers. -
Page 78: Explanation Of Symbols
Explanation of symbols Article number Batch code Serial number Medical device Authorized representative Manufacturer Date of manufacture Barcode Fragile Protect from moisture Warning Read instructions Disposal notice Power supply Certificate of Conformity Certificate of Conformity... - Page 80 A. SCHWEIZER GmbH Hans-Böckler-Straße 7, 91301 Forchheim Phone 09191-72100, Fax 09191-721072 info@schweizer-optik.de, www.schweizer-optik.de For reasons of better readability, the masculine and/or feminine form is/are used for personal designations and personal nouns. Corre- sponding terms apply equally to all genders. The abbreviated form of language is intended for editorial reasons only and does not imply any valuation.
Need help?
Do you have a question about the eMag 100 HD Speech and is the answer not in the manual?
Questions and answers