Table of Contents
Advertisement
Quick Links
Advertisement
Table of Contents

Related Manuals for Schweizer eMag 120 HD


Summary of Contents for Schweizer eMag 120 HD
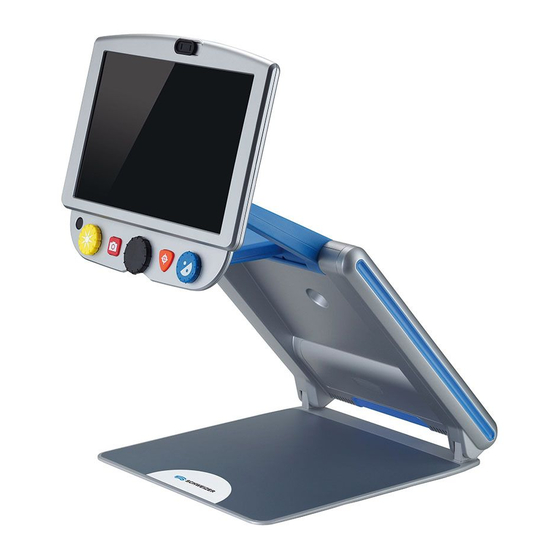
- Page 1 120 HD eMag 150 HD Instructions for use for the portable video magnifier...
- Page 2 Congratulations on purchasing your eMag 120 HD / Authorised representative eMag 150 HD. This portable video magnifier allows you Manufacturer to magnify texts and objects. The eMag 120 HD / eMag 150 HD features LCD widescreen (16:9). Manufacture date We hope you enjoy using this high-quality device.
-
Page 3: Table Of Contents
Displaying a slide show Performance characteristics, what's in the box Start the slide show Reading Lines and Reading Masks Setting up the eMag 120 HD / eMag 150 HD Turning on reading lines or reading masks Powering the unit Adjusting distance between reading... -
Page 4: Emag 120 Hd / Emag 150 Hd - Overwiew
120 HD / eMag 150 HD – overview Intended use This electrical device serves to electronically enlarge objects or for reading printed materials in everyday use. Clinical use This electrical device contributes significantly to daily tasks, facilitates independence, increases productivity and improves self-esteem. -
Page 5: Performance Characteristics, What's In The Box
SD Card slot – capture and save images to an installed SD Card Self-view camera – magnification from 1x to 2.5x What's in the box (1) eMag 120 HD – portable video magnifier with 12-inch flat-panel monitor eMag 150 HD – portable video magnifier... -
Page 6: Setting Up The Emag 120 Hd / Emag 150 Hd
Setting up the eMag 120 HD / eMag 150 HD Powering the unit To power the unit or charge the battery, do the following: 1. Plug the power adapter cord into the unit’s power jack (1). The jack is located on the left side of the unit next to the POWER button. -
Page 7: Opening The Unit
Opening the unit Note: To apply power to the unit, make sure it is plugged into an AC outlet or that an optional battery is installed and charged. You can still use the unit while it is charging. 1. Place the unit on a sturdy, stable work surface. 2. - Page 8 4. Place both hands along the left and right sides of the monitor, and pull it toward you (4 and 5). The unit automatically powers on as you move the monitor from its closed position. Note: If a battery is installed, and the unit does not power on, plug the unit into an AC outlet, or press the POWER button.
-
Page 9: Closing The Unit
Closing the unit 1. To close the unit, use both hands to lower and rotate the monitor until it is against the unit’s body. 2. Place both hands on the left and right sides of the body, and lower it until the unit is closed. The unit automatically powers off. -
Page 10: Manually Powering The Unit On And Off
Manually powering the unit on and off The unit automatically powers on when you open it and move the monitor from its closed position. The unit powers off when you collapse and close it. To manually power the unit on and off, do the following: 1. -
Page 11: Battery Status Led
Battery status LED The POWER button is a multi-color LED (green/red) that indicates battery status when an optional battery is installed in the unit. The button is located next to the power jack on the left side of the unit. Batteries are charged, power adapter connected. -
Page 12: Control Panel Functions
Control panel functions Control panel functions... - Page 13 Button / dial Description of functions (1) BRIGHTNESS Turn clockwise to increase screen brightness. Turn counterclockwise to decrease (Yellow dial) screen brightness. Press to freeze the image that is displayed on the screen. Press again to return to live view. (2) FREEZE FRAME Press and hold for approximately six seconds to enter or exit Review mode.
-
Page 14: General Operation
General operation Changing magnification Turn the center black MAGNIFICATION dial clockwise to zoom-in and enlarge, or counterclockwise to zoom away from the object that is displayed on the screen. Adjusting screen and image brightness To make the image lighter, turn the yellow BRIGHTNESS dial clockwise. -
Page 15: Changing Screen Colors
Changing screen colors To change screen colors, turn the blue COLOR MODE dial A color mode is a pre-defined color combination (for example, yellow text on a black background). You can use color modes to reduce glare and provide contrast to make it easier to read text on the screen. There are six default color modes: True Full Color –... -
Page 16: Color Modes
Color modes There are six factory default color modes and 27 additional color modes that you can activate and use. Select the color modes that best suit your visual needs, for example, yellow text against a black background. 1. Full color * 12. -
Page 17: Freezing An Image
Freezing an image To freeze the image displayed on the screen, do the following: 1. Press the red FREEZE FRAME button . The Freeze Frame icon displays on the screen. 2. Press the button again to turn off Freeze Frame and return to live view. Using the find feature The Find feature is useful when moving and repositioning a document or item under the camera. -
Page 18: Self-View Camera
2. While still holding the button, move the item until the crosshairs shown on the screen align with the new area that you want to view. 3. Release the orange FIND button los. The camera zooms in to its previous magnification level and the crosshairs turn off. - Page 19 2. While sitting in front of the unit, position the display at an angle that is comfortable for you. If necessary, hold the left and right sides of the display, and then gently tilt it forward or backward to adjust the angle, or lift it up or down to adjust the height.
-
Page 20: Advanced Operation
Advanced operation Control panel – advanced features Important: The black ADVANCED button (A) is used with other control panel buttons and dials to access and perform more features and operations. Always press and hold the ADVANCED button (A) first, and then press or turn the other buttons or dials to perform the advanced task. - Page 21 Button / dial Description of functions (A + 1) BRIGHTNESS Turn to adjust the LED reading light brightness. (Yellow dial) Press and hold to save the current image to an SD Card. Release when (A + 2) FREEZE FRAME the Save icon appears on the screen. Images can only be saved when an (Red button) SD Card is in the SD Card slot.
-
Page 22: Adjusting Led Brightness
Adjusting LED brightness To adjust the LED reading light brightness, do the following: 1. Press and hold the black ADVANCED button. 2. Do one of the following: Turn the yellow BRIGHTNESS dial clockwise to increase brightness. Turn the yellow BRIGHTNESS dial counterclockwise to decrease brightness. -
Page 23: Reviewing Or Deleting Images Saved On An Sd Card
Note: Images can only be saved when an SD Card is in the SD Card slot (1). If the image cannot be saved, displays on the screen. Reviewing or deleting images saved on an SD Card Note: To enter Review mode from live view or freeze frame, press the red FREEZE FRAME button 6 seconds. -
Page 24: Review Other Images Saved On An Sd Card
Review other images saved on an SD Card 1. Turn the blue COLOR MODE dial , to move forward or back through the saved images. 2. The Save Image check box is selected for each image. Delete the current image while in Review mode 1. -
Page 25: Displaying A Slide Show
Displaying a slide show You can create a slide show that loops continuously using the images saved on the SD Card. Each image dis- plays for approximately five seconds. The order that images display is based on their file names, for example, IMG_0001.bmp, IMG_0002.bmp, and so on. -
Page 26: Start The Slide Show
Start the slide show 1. Press and hold the black ADVANCED button and the red FREEZE FRAME button The first image stored on the unit, based on its file name, displays on the unit’s screen for approximately five seconds followed by the second image, the third, and so on. 2. -
Page 27: Turning On Reading Lines Or Reading Masks
Turning on reading lines or reading masks To select reading lines or mask, do the following: 1. Press and hold the black ADVANCED button. 2. Turn the black MAGNIFICATION dial , to cycle through and select one of the following options: horizontal lines, vertical lines, horizontal masks, vertical masks, or none. -
Page 28: Adding And Removing Color Modes
Adding and removing color modes The unit has 6 default color modes that are available as you turn the blue COLOR MODE dial You can have up to 12 color modes enabled at one time. Using the Configuration menu, there are an additional 27 different color combinations that you can choose from. For a list of color modes, see Color Modes on page 16. -
Page 29: Restoring Factory Settings
Restoring factory settings Press and hold the following buttons for approximately 10 seconds to reset the unit to its default settings: Black ADVANCED button + Red FREEZE FRAME button + Orange FIND button... -
Page 30: Changing And Saving Default Settings
Changing and saving default settings You can change the unit’s factory settings using the Configuration menu as described in this section. Note: When configuring color modes, it is best to have both a page of text and a color photo to place under the camera to select settings best suited for you. - Page 31 3. Press the black ADVANCED button to move to subsequent options. Below are descriptions for these options. Symbol Beschreibung Standardeinstellung Freeze frame Find Magnification tables* Magnification display number* “88” Time** 00:00 (HH:MM in 24h-hour format) Date** 01.01.14 (MM.DD.YY) See Adjusting magnification settings on page 32 for more information. Time and Date settings are only saved while a battery is installed and charged.
-
Page 32: Adjusting Magnification Settings
4. When an item that you want to change displays, press the red FREEZE FRAME button to cycle through the different settings available for that option. 5. When finished, press and hold the black ADVANCED button and the orange FIND button again for at least 10 seconds to save and exit the Configuration menu. -
Page 33: Selecting A Magnification Table
Note: Tables 1 and 3 have a higher top-end magnification range. This results in some loss of resolution when using Full Color mode. To read comfortably above 24x, choose a contrasting color mode, for example, white text on a black background. -
Page 34: Changing The Magnification Display Number
Changing the magnification display number After selecting a magnification table, you can choose whether or not the current magnification value displays on the screen as you turn the black MAGNIFICATION dial To set your preference, do the following: 1. Press the black ADVANCED button until the magnifying glass icon displays on the screen. 2. -
Page 35: Configuration Menu Settings
Configuration menu settings Setting Description Adds more color positions so that additional color combinations are available when you turn the blue COLOR MODE dial during normal operation. By default, positions 1 through 6 are available. Positions 7 through 12 can be added using this setting. - Page 36 Setting Description Disables or enables freeze frame functionality. It is enabled ( ) by default. Freeze frame If you disable ( ) it, Freeze frame is no longer available when you press the red FREEZE FRAME button during normal operation. During normal operation, Find displays a set of crosshairs on the screen and zooms Find out so that you can see more of the item displayed on the screen.
- Page 37 Setting Description Sets the type of magnification value that displays on the screen as you turn the black MAGNIFICATION dial . Press the red FREEZE FRAME button to select a value. Magnification display Select the icon with “88” to display the magnification in use relative to the 16 dial number positions, for example, 1, 2, 3, and so on.
-
Page 38: Changing The Battery
Changing the battery A Li-ion battery is an optional feature. Please contact the dealer who sold you the device if you later wish to purchase a battery. To remove a battery and replace it with a charged battery, do the following: Removing the battery 1. - Page 39 4. Use both thumbs to press down on the outside edges of the battery compartment door, and then slide it toward you. This releases the battery door and exposes the battery. 5. Use the plastic tab (1) located on the left side of the battery to lift and remove the battery.
-
Page 40: Replacing The Battery
Replacing the battery 1. Place the battery into the compartment. Make sure that the battery’s contacts align with the compartment’s contacts. 2. Align the battery door’s locking tabs with the compartment’s slots, and slide the door until it locks. Make sure that the battery’s plastic tab remains inside the compartment. -
Page 41: Setting Date And Time
Setting date and time After replacing the battery, you must reset the unit’s date and time so that saved images have an accurate timestamp. for approximately 10 seconds to 1. Press and hold the black ADVANCED button and the orange FIND button enter Configuration mode. - Page 42 Press the red FREEZE FRAME button to move to day, and then turn the yellow BRIGHTNESS dial set the day. Press the red FREEZE FRAME button again, and turn the yellow BRIGHTNESS dial to set the year. The year format is the last two digits of the current year. 4.
-
Page 43: Troubleshooting
Troubleshooting Problem Solution The screen is blank. Press the unit’s power button. Make sure the power cable is correctly connected to the unit and a power outlet. Reduce magnification. Try adjusting brightness. Switch to a different color mode. The unit does not Press the unit’s power button. -
Page 44: Service And Support
Service and support If you require technical support with your eMag 120 HD /eMag 150 HD, please contact the dealer who sold you the visual aid. It is recommended you first refer to “Troubleshooting”. Note: This device contains no user serviceable components. Any unauthorised attempt to service or replace... -
Page 45: Safety And Maintenance
Safety and maintenance Please read the following instructions to make sure that the device always remains in flawless condition and that safe handling is guaranteed: Please read the User Manual before using this device. Do not try to repair this device or open the housing yourself. This product does not contain any parts that may be replaced by the user. -
Page 46: Technical Data
Technical data eMag 120 HD / eMag 150 HD Magnification: 1,7 x to 24 x / 2,3 x to 31 x Diagonal of screen: 30 cm (12") / 39 cm (15") Colour modes: True Full Color, High-contrast full color (Color-Boost-Contrast),... - Page 48 A. SCHWEIZER GmbH Hans-Böckler-Straße 7, 91301 Forchheim, Germany Phone +49 9191-72100, Fax +49 9191-721072 info@schweizer-optik.de, www.schweizer-optik.de...
Need help?
Do you have a question about the eMag 120 HD and is the answer not in the manual?
Questions and answers