Table of Contents
Advertisement
Quick Links
Advertisement
Table of Contents

Related Manuals for IntelliCam System X2


Summary of Contents for IntelliCam System X2
- Page 1 System X2 DocRef # 04012022 Revised 04-01-2022 System X2 User Guide...
-
Page 2: Table Of Contents
TABLE OF CONTENTS: Introduction Page 3 Hardware, Controls, and Indicators Page 3 X2 Accessories and X2 Set-Up Page 4 Flashback 4 Setup Page 5 Deployment Settings and Flashback Activation Page 6 Settings for Optimal Battery Life Page 7 Shake Detection and Sensor Use and Programming Page 8 Viewing Pre-Recorded Files and Common APN Numbers Page 9... -
Page 3: Introduction
Video Recorder and the Flashback 4G GSM/LTE Modem for streaming of the recorded video. The System X2 is in a weatherproof enclosure. The video recorder will remain in the “sleep mode” until it receives an alarm signal from any Intellicam sensor. When the X2 receives a sensor alarm signal, it will wake up and start the video recording. -
Page 4: X2 Accessories And X2 Set-Up
SIM card. 5. Ensure that the 128G SD card is properly installed. 6. Attach power supply or battery pack to System X2. 7. Install batteries into IR-903 Sensor and program ID if necessary. The X2 is normally used with a “Static IP SIM Card”. You can order Static IP SIM cards from your “Business Account Representative”... -
Page 5: Flashback 4 Setup
Flashback DVR via the internal Wi-Fi in your computer. It may take up 90 seconds before your computer will recognize the Flashback’s SSID number and you need to make sure your System X2 is within 4 feet of your computers Wi-Fi signal. -
Page 6: Deployment Settings And Flashback Activation
HIGHLY RECOMMENDED FLASHBACK DEPLOYMENT SETTINGS: Before you deploy the System X2, we recommend the following settings to maximize battery life and performance. How to apply these settings is explained on page 6. 1.Trigger Duration: 2 minutes. 2. Wi-Fi timeout: 15 minutes 3. -
Page 7: Settings For Optimal Battery Life
Three Key Settings for Optimal Battery Life: 1. Trigger Duration : From the Homepage, click on the “Triggers” tab, scroll down to “Inputs”. We recommend that both Input 1 and Input 2 be programmed for 2 minutes. (Fig. 1) From the Homepage, click on “Networks”, scroll down 2. -
Page 8: Shake Detection And Sensor Use And Programming
“Wakeup” option causes the unit to wake-up from Sleep Mode when the unit is subjected to the set level of mechanical shake. (Fig. 5) NOTE – This is used to notify you via SMS text, if someone has tampered with the System X2 gateway. This is not a required setting. -
Page 9: Viewing Pre-Recorded Files And Common Apn Numbers
VMS supplier to check if your VMS is compatible with the Flashback DVR and 4G manufactured by Ovation, or by contacting Ovation (www.ovation.co.uk) Please contact Intellicam for information regarding the how to get Airship or how to use it. Common Static IP APN Numbers... -
Page 10: Technical Specifications
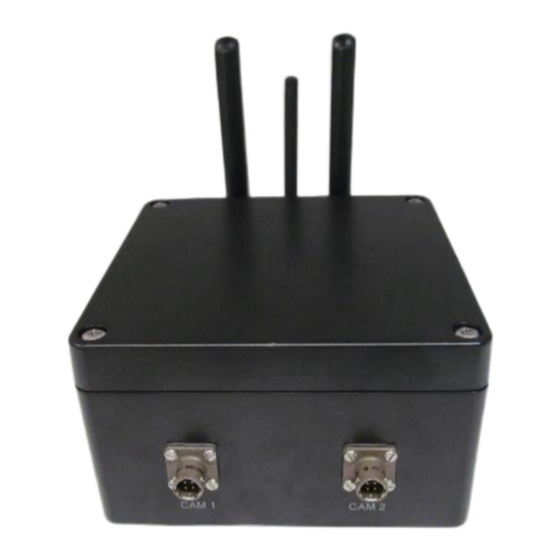
Technical Specifications: System X2 Enclosure Dimensions 6”L x 6”W x 3.5”H Enclosure Weight 3.5 Lbs. Camera Connectors Canon 4-Pin Video Monitor 5” Color LED Monitor BPK-8D Battery Pack 8 each “D” cell batteries (12 VDC) BPK-8D Battery Life 90 days standby or 30 hours streaming video... - Page 11 (Prolonged connection of the video monitor will greatly reduce battery life). 3. Power up the System X2 by connecting the supplied AC power adapter, (use of the Battery Pack during set up is not recommended as you will waste battery power).
- Page 12 Viewing Of Video After Deployment: Overview: Once the System X2 has been deployed at the surveillance site, if anyone enters that area and “triggers” a sensor, the System X2 will automatically power up, start recording video, and will send a text to all pre-programmed Users listed in the Flashback User Interface, notifying them of alarm activity.
- Page 13 Connect the video monitor only when aiming the cameras. Prolonged connection of the video monitor will greatly reduce battery life. 3. Power up the System X2 by connecting the supplied AC power adapter, use of the Battery Pack during set up is not recommended as you will waste battery power.
- Page 14 4. Each time you change a setting you must save each setting by clicking on “Submit” at the bottom right-hand section of each screen. *Wi-Fi Timeout must always be less than or equal to Sleep Mode or the System X2 will never go into sleep mode which will cause your batteries to fail prematurely.
Need help?
Do you have a question about the System X2 and is the answer not in the manual?
Questions and answers