Table of Contents
Advertisement
Quick Links
Advertisement
Table of Contents

Related Manuals for Cuckoo CAC-C1010FW


Summary of Contents for Cuckoo CAC-C1010FW
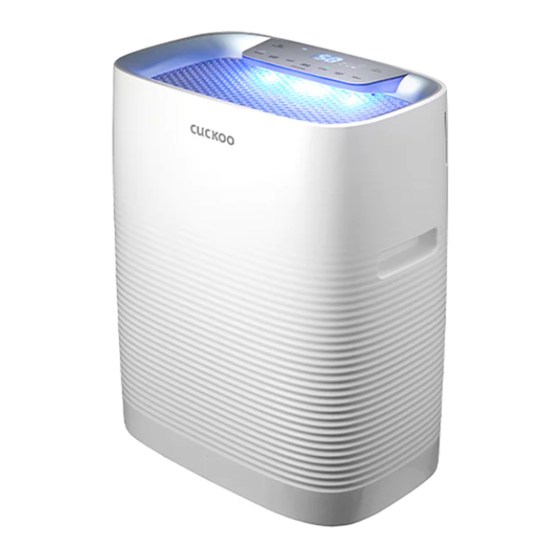
- Page 1 AIR PURIFIER USER MANUAL CAC-C1010FW...
-
Page 2: Merits Of Cuckoo Air Purifier
To our customers! Thank you for choosing Cuckoo Air Purifier. Please keep this User Manual (including the Warranty) for your reference. This manual will guide you when you have any questions or when the product does not work properly. Merits of Cuckoo Air Purifier... -
Page 3: Table Of Contents
CONTENTS Before Use Merits of Cuckoo Air Purifier Warnings for Safe Use Name of Parts / Accessories How to Use Details to Check before Use 11~13 Names/Functions of the Control/Display Panel Self Diagnostic Mode 15~16 Basic Operations 17~21 Operating Modes... -
Page 4: Warnings For Safe Use 4~7
10A and power surge •To replace the damaged power cord or plug, please visit protection. Do not plug in CUCKOO website and contact Customer Service to prevent multiple devices into the same dangerous situations. power outlet or extension cord •We strongly recommend that the damaged parts be repaired or... - Page 5 Warnings for Safe Use About Power Supply Warning Do not When moving the product, Do not put anything heavy do not pull the power cord. or the product on the power cord. •It may cause a damage to the product, electric shock, or fire.
- Page 6 Warnings for Safe Use Installation Guide Warning Caution Air Circulation Place the product at least 20inch away Please check if there is any obstacle 24inch on the sides and 24inch away on the around the product to ensure good top from the wall and surrounding air circulation.
- Page 7 Warnings for Safe Use During Use Warning Do not Never soak the product in water. Do not place a bowl with water, drugs, foods, small metallic materials, inflammables, etc. on top of the •There is a risk of electric shock. product.
-
Page 8: Name Of Parts / Accessories 8~9
Name of Parts / Accessories Name of Parts Control & Display Panel Air Outlet Handle Fine Dust Sensor Air Purifying Filter Filter Cover / Air Inlet Accessories Caster Set User Manual Service Card... - Page 9 Name of Parts Air Filters Pre-Filter True HEPA H14 Filter Harmful Gas Easy Filter S Active Carbon Deodorization Filter ※ The picture may differ from the actual product. Section Air Filter Level 1 Pre-Filter Level 2 Harmful Gas Easy Filter S Level 3 Active Carbon Deodorization Filter Level 4...
-
Page 10: Details To Check Before Use
Details to Check before Use Caution Caution: When the product is not in use, please unplug the unit.This product is exclusively for 120V, 60Hz. Put the Power Plug in the exclusive Power Outlet. Details to Check before Use Open the filter cover. ▶... -
Page 11: Names/Functions Of The Control/Display Panel 11~13
Names/Functions of the Control/Display Panel Control Panel • ON/OFF : To turn the unit on and off. • MODE : Select the desired mode. ※ Each time the button is pressed, the mode changes in the order of AUTO, ROOM CARE, YELLOW DUST, BABY, SLEEP and REPEAT. - Page 12 Names/Functions of the Control/Display Panel Display Panel • AUTO : This indicates the product is in automatic air purification mode. • ROOM CARE : This indicates the product is in room care air purification mode • YELLOW DUST : This indicates the product is in yellow dust air purification mode. •...
- Page 13 Names/Functions of the Control/Display Panel Cleanliness Indicator • Cleanliness Indicator : This displays the cleanliness of Names/Functions of the Control/Display Panel air with colors. Pollution Level 1 Level 6 Level 2 Level 3 Level 4 Level 5 Level (Clean) (Pollution) Cleanliness Blue Teal...
-
Page 14: Self Diagnostic Mode
Self Diagnostic Mode Self Diagnostic Mode When the unit is not working properly, the display panel will show an alert. If there is an alert that will not disappear, please contact our customer service center. This indicates a malfunction of the Fan Motor. Contact our Customer Service Center. -
Page 15: Basic Operations 15~16
Basic Operations Basic Operation Insert the plug into a wall outlet. ❶ ▶ The product will enter the waiting mode with a beeping sound. ※ If the plug was pulled out while still in running, the unit operates in the mode set previously. Press the ON/OFF button. - Page 16 Basic Operations Basic Operation ❸ -7 Press the AIR CLEANLINESS button for three seconds to select the cleanliness indicator. ▶ Each time the button is pressed for three seconds, the cleanliness indicator is turned on or off. ※ TURBO indicator is turned on when this mode is selected. ※...
-
Page 17: Operating Modes 17~21
Operating Modes Operating Modes AUTO mode detects the air quality and will automatically AUTO adjust the necessary fan speed. • In the standby mode, press the ON/OFF button once. Initially, the unit will run in AUTO mode. If a different mode was selected it will maintain your selected operating mode. -
Page 18: Operating Modes Options
Operating Modes Operating Modes YELLOW DUST Is a setting that automatically adjusts to eliminate yellow dust. • In AUTO mode, press the MODE button once. • It auto controls the fan speed using the preset algorithms. • It shows the current fan speed and cleanliness of air during operation. •... - Page 19 Operating Modes Operating Modes SLEEP Is a setting made for sleep, operating at a low sound level. • In AUTO mode, press the MODE button four times. • Minimizes air volume for a peaceful experience. • Initially, the display panel shows MODE indicator for five seconds, and then only SLEEP mode stays on.
- Page 20 Operating Modes Operating Modes ENERGY SAVE Detects indoor lighting and adjusts accordingly. • When the Energy Eye Night Sensor senses darkness during operation, all indicators including the cleanliness indicator are turned off, and the Power Saving option on. • The Power Saving goes off when it gets bright or a button is pressed. ※...
- Page 21 Operating Modes Operating Modes TURBO Quickly remove dust with maximum performance • Press the TURBO button to activate. • The fan will speed up to the maximum fast purify the air. • It shows the current fan speed and cleanliness of air during operation. •...
-
Page 22: Options 22~23
Options Options STERILIZATION • Press the STERILIZATION button to activate Plasma Ionizer and the STERILIZATION icon will be displayed on the panel. To turn it off, press the button again. AUTO OFF • Press the TIMER button to set the Auto Off option. •... - Page 23 Options Options BUTTON LOCK • Press the TIMER button for three seconds to set this option. • To unlock the buttons, press the TIMER button again for three seconds. LOCK UNLOCK FILTER REPLACEMENT • Alert for filter replacement or filter cleaning will appear. Once the filters are replaced, reset the alarm for filter replacement.
-
Page 24: Other Settings
Other Settings How to Set Room Care (room size) This is a setting method for setting the size of the space to be utilized. ① After plugging in the power plug, it enters the Standby mode (all function indicators are turned off). - Page 25 Other Settings How to adjust Voice Volume The following instructions explains how to cancel the voice option and adjust the volume. ① Begin in Standby Mode. ② Press the MODE button for three seconds to enter the Room Care settings and then press the MODE button twice.
- Page 26 Other Settings How To Set Sensor Sensitivity Sensor sensitivity can be set to Low, Medium or High. The default level is set to Medium. ① Begin in Standby Mode. ② Press the MODE button for three seconds to enter the Room Care settings and then press the MODE button four times.
- Page 27 Other Settings How To Set Energy Eye Function The following instructions show how to set the darkness sensing range for power saving. ① Begin in Standby Mode. ② Press the MODE button for three seconds to enter the Room Care settings and then press the MODE button six times.
-
Page 28: Cleaning And Maintenance Guide 28~30
Cleaning and Maintenance Guide How to Clean the Fine Dust Sensor (Clean once every two months) Open the filter cover. ▶ Pull the top center of the cover to open. ※ Be careful not to force open by pulling the lower part of the cover. It may cause a damage to the product. - Page 29 Cleaning and Maintenance Guide Caution When cleaning, please pull the power plug out of the wall outlet. How to Clean the Main Body (Clean once every two to four weeks.) Use a slightly damp cloth and thoroughly wipe the unit. Use a cotton swab when cleaning the dust off the exterior grooves.
- Page 30 Cleaning and Maintenance Guide This function allows you to minimize energy consumption by automatically detecting the surrounding brightness. It minimizes functions of the Display Panel when it senses darkness. The following instructions show how to set the darkness sensing range for power saving. How to Clean the Main Body (Clean once every two to four weeks.) Open the filter cover.
-
Page 31: How To Replace Filters
• If the filter is used over the cleaning or replacement cycle, it may degrade the performance or emit odor. • Please use genuine CUCKOO filters only. • A torn or wet Air Purifying Filter must be replaced with a new one. Contact our Customer Service Center for purchase of filters. -
Page 32: How To Install Wheels
How to Install Wheels Caution • When installing the wheel, unplug the power cord and remove the water tank and water bottle. • Do not lean on the product with wheels and do not let a child ride on the product with wheels. ※... -
Page 33: Please Check Before Asking For Support
Please check before asking for Support. ▼ If you do not comply with this user manual, the device may not work properly. Please read the following measures accordingly if there is a problem with the product. If there is still a problem, please contact our Customer Service Center. Recommendation Problem Checklist... - Page 34 ※ The information (exterior, design, and specifications) provided in this User Manual is subject to change with out prior notice to improve the quality of the device. ※ CA(Clean Air) - KOREA Air Cleaning Test Standard ※ Manufacturer : CUCKOO HOMESYS CO., LTD.
- Page 35 MEMO 35 35...
- Page 36 http://www.cuckoorental.com We provide satisfying consultation and services concerning your complaints, suggestions, and recommendations upon receiving your troubled product model name, status, and contact information. ♣ After reading this manual, keep it in a place easily accessible to the user for future reference. ♣...
Need help?
Do you have a question about the CAC-C1010FW and is the answer not in the manual?
Questions and answers