Advertisement
Quick Links
Advertisement

Related Manuals for Patroleyes Ultra 1296P


Summary of Contents for Patroleyes Ultra 1296P
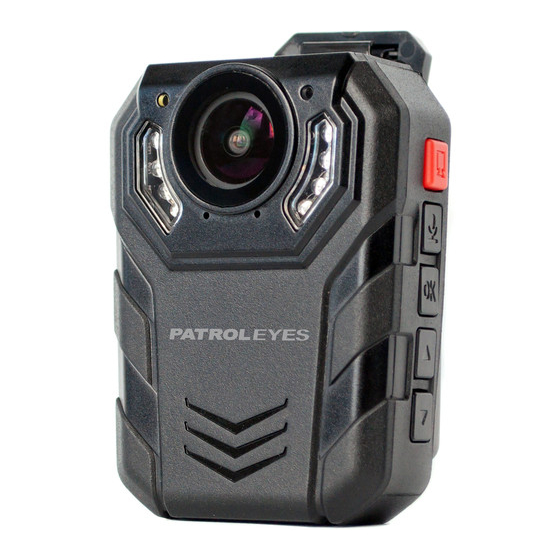
- Page 1 Body Camera User Manual...
- Page 3 Product function diagram...
- Page 5 Quick To Use >Switch machine In the off state, long press the power button of the body camera, the machine can be turned on, and in any state, press and hold the power button for 3 seconds, the machine will shut down. >Video After the body camera is turned on, in the standby preview state, short press the record button to start recording.
- Page 6 >Recording After the body camera is turned on, in the standby preview state, briefly press the recording button to record. In the recording state, the display screen will display the recording interface, and the recording time will be displayed at the same time, and the top indicator light will flash. Press the record button again to stop recording, return to the standby preview interface, and the recording file is automatically saved.
- Page 7 > Highlights During the video shooting process, long press the 'infrared key', the key symbol will appear on the screen. The marked video will not be deleted automatically when the loop recording is started, and the marking will be automatically canceled when the recording stops. >Password protection When the body camera enters the menu or connects to the computer, the camera screen will prompt to enter the password.
- Page 8 >Playback The body camera can perform local playback. In the standby state, short press the playback button to enter the playback interface, and you can playback videos, photos, and recordings separately. >Red and blue warning lights Short press the light button to turn on the body camera alarm light, and the red and blue lights can be turned on for alarm or warning.
-
Page 9: Parameter Settings
Parameter Settings The menu setting can set the video and system parameters. In the standby state, short press the menu key once to enter the setting menu. >Video resolution There are several options for the resolution of 2160P/1440P/1296P/1080P/720P/480P. The larger the value, the larger the file, and the shorter the recording time with the same amount of memory. - Page 10 >Loop recording Loop recording has an on/off option. In the open state, when the body camera memory is full, the system will automatically delete the first recorded video clip; in the closed state, when the camera is full, the system will prompt that the memory is insufficient. >Quality There are three options for image quality: fine/normal/economy.
- Page 11 >Video Prerecorded In the open state, the body camera is in the pre-recording state when it is turned on, and the recording icon in the upper left corner of the screen displays red. After pressing the record button, the red dot starts to flash and the recording starts. At this time, the video file will contain the content 30 seconds before pressing the record button.
- Page 12 >Motion detection There are two options for motion detection: Off/on. When set to on, the body camera will automatically start shooting when there is a moving object within the shooting range of the body camera. When there is no moving object entering the shooting range, the camera will automatically stand by.
- Page 13 > Date Stamp when set to on, the time watermark will be superimposed on the recording screen, the default setting is "on". >Car Mode There are two options: off/on in car mode. When set to on, the body camera will automatically turn on and start recording when it is powered on.
- Page 14 > Video coding The encoding method can be set to "H.264" and H.265" two options, the H.265 encoding method can save the video for a longer time in the same memory under the condition of ensuring the clarity, the default setting is "H.264". >Image Size The camera resolution is 42M/36M/32M/21M/16M/12M/10M/8M/5M/3M/VGA...
- Page 15 > Continuous Shooting Continuous shooting about off/3/5/10 four options. Continuous shooting means that in standby mode, the camera can take multiple photos continuously by pressing the camera button once. The default continuous shooting setting is Off. >Screen saver The screen saver setting has three options: off/ 1 min / 3 min. The screen saver means that the screen will automatically turn off after the body camera is not operated to save power.
- Page 16 >Auto Power Off There are five options for automatic shutdown settings: off/1min/3min/5min/10min. Automatic shutdown means that the body camera is in the standby state, and automatically shuts down after no operation. The default setting is Off. >Language The body camera can be set to a variety of system languages, including English, German, French, Italian, Spanish, Japanese and other languages.
- Page 17 >Volume There are four options for volume adjustment: About on/off. When set to "Off, no sound. >Flashover Sound The red and blue flashing sound has two options: on and off. In the open state, the body camera will emit an alarm sound at the same time when the alarm light is turned on.
- Page 18 > Silent Mode The silent mode has two options: on/off. When set to on, the body camera will turn off the indicator light and sound, and the default setting is off. >Infrared Switch The infrared switching setting has two options: manual/automatic. When set to automatic, the body camera automatically turns on and off the infrared light according to the brightness of the external environment.
- Page 19 > Frequency The light source frequency has two options: 50hz/60hz, the default is 50hz. >GSENSOR There are two options for gravity sensor settings: on/off. When set to on, the key video recording will be automatically turned on when the recorder is subjected to different degrees of vibration.
- Page 20 >Date time Enter the time setting, use the playback/menu key to increase and decrease the number size, and press the enter key to adjust to the next setting content. After setting the year/month/day/hour/minute/second, press the switch key to return to the upper interface to complete the setting. >...
- Page 21 > Device ID The device ID can be set to the seven-digit number of the body camera, use the playback/lei single button to adjust the number size, and press the "OK button" to confirm the selection. > Passwordprotect Password protection can be selected from two options: off/on. When set to on, you need to enter a password in the camera setup menu and when connecting to a computer.
- Page 22 > Password When modifying the device password, you need to enter the old password first. The default password is 0000000. Use the "Playback/Menu" button to adjust the size of the number, and press the OK button to confirm the selection. Be sure to remember the password.
- Page 23 >Format It is used to format the internal storage of the camera. After selecting Confirm, all internal data will be cleared. Please make sure that there is no important data in the camera before formatting. After the data is cleared, it cannot be restored. Please operate with caution.
-
Page 24: Data Transmission
Data Transmission After the password protection is turned on and the camera is turned on, use a USB data cable to connect the camera to the computer, the camera screen will pop out of the left interface, enter the initial password 0000000 to enter the recorder U disk, and find "Removable Disk"... - Page 25 CAMMHD...
- Page 26 This device complies with part 15 of the FCC Rules. Operation is subject to the following two conditions: (1) this device may not cause harmful interference, and (2) this device must accept any interference received, including interference that may cause undesired operation. Any changes or modifications not expressly approved by the party responsible for compliance could void the user's authority to operate the equipment.