Table of Contents
Advertisement
Quick Links
Advertisement
Table of Contents

Related Manuals for Patroleyes MAX


Summary of Contents for Patroleyes MAX
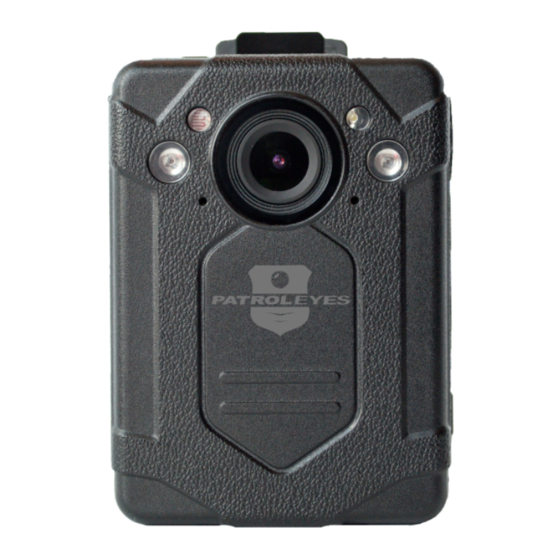
- Page 2 Overview Overview The MAX body camera is an advanced recording system with many options and features available. Please review the manual to familiarize yourself with the functions of this camera. Troubleshooting: If you are having problems with your camera, please first fully charge it and power it on, then press the reset button.
-
Page 3: Before Use
Before Use Getting Started Basic Operation: • Fully charge the camera using the included USB cable and charging dock for 3-4 hours. The charging indicator will turn 1) Press and hold the Power button (located on the bottom blue when charging. When the device is fully charged, the right side of the camera) for about 2 seconds. - Page 4 Recording Recording Video Recording: Function Button: a. To record a video, press the Record button (located on the a. Pressing the FN button on the right side of the camera will left side of the device with a recorder symbol). The unit will allow you to change recording resolutions instantly.
- Page 5 Video/Photo/Audio Playback Setup - Resolution Users are able to view previously recorded video files To go to the Menu interface, press the Confirm/Menu button using the following process. (located below the LCD monitor display). Resolution a. In the Menu, select “Resolution” and press the Confirm/Menu button.
-
Page 6: Setup - Video Quality
Setup - Video Quality Setup - Video Length Video Quality Video Length a. In the Menu, select “Video Quality” and press the a. In the Menu, select “Video Length” and press the Confirm/Menu button. Confirm/Menu button. Menu Menu Resolution 1080P/30 Resolution 1080P/30 Video Quality... - Page 7 Setup - Photo Size Setup - Photo Burst Mode Photo Size Photo Burst Mode a. In the Menu, select “Photo Size” and press the a. In the Menu, select “Photo Burst Mode” and press the Confirm/Menu button. Confirm/Menu button. Menu Menu Resolution 1080P/30...
-
Page 8: Setup - Date & Time
Setup - Photo Size Setup - Date & Time Device ID Date & Time a. In the Menu, select “Device ID” and press the a. In the Menu, select “Date & Time” and press the Confirm/Menu button. The first digit will be highlighted. Confirm/Menu button. -
Page 9: Setup - Volume
Setup - LCD Brightness Setup - Volume LCD Brightness Device Volume a. In the Menu, select “LCD Brightness” and press the a. In the Menu, select “Device Volume” and press Confirm/Menu button, use Up/Down button to change the Confirm/Menu button, use Up/Down button to options. - Page 10 Setup - Key Tone Setup - Mute Recording Key Tone Mute Recording a. In the Menu, select “Key Tone” and press the a. In the Menu, select “Mute Recording” and press the Confirm/Menu button, use Up/Down button to change Confirm/Menu button, use Up/Down button to change options.
- Page 11 Setup - IR Sensitivity Setup - IR Filter IR Sensitivity IR Filter a. In the Menu, select “IR Sensitivity” and press a. In the Menu, select “IR Filter” and press the Confirm/Menu button, use Up/Down button to the Confirm/Menu button, use Up/Down button to change options.
-
Page 12: Setup - Motion Detection
Setup - IR LED Setup - Motion Detection IR LED Motion Detection a. In the Menu, select “IR LED” and press the a. In the Menu, select “Motion Detection” and Confirm/Menu button, use Up/Down button to press the Confirm/Menu button, use Up/Down change options. - Page 13 Setup - Stealth Mode Setup - Pre-Record Stealth Mode Pre-Record a. In the Menu, select “Stealth Mode” and press a. In the Menu, select “Pre-Recording” and the Confirm/Menu button, use Up/Down button to press the Confirm/Menu button, use Up/Down change options. button to change options.
- Page 14 Setup - Post Record Setup - Post Record Audio Post-Record Audio Post-Record a. In the Menu, select “Post-Record Audio” and a. In the Menu, select “Post-Record” and press press the Confirm/Menu button, use Up/Down the Confirm/Menu button, use Up/Down button to change options.
- Page 15 Setup - Auto Power Off Setup - LCD Auto Off LCD Auto Off Auto Power Off a. In the Menu, select “LCD Auto Off” and press a. In the Menu, select “Auto Power Off” and the Confirm/Menu button, use Up/Down button to press the Confirm/Menu button, use Up/Down change options.
-
Page 16: Setup - Default Settings
. You must wait for your camera to acquire GPS signal before recording for videos to have GPS location. For GPS location to be viewed on a map, the files must be opened in the GPS video player software, which is available at: www.stuntcams.com/max... - Page 17 Setup - Change Password Setup - Connection Mode Connection Mode Change Password a. In the Menu, select “Connection Mode” and a. In the Menu, select “Change Password” and press the Confirm/Menu button, input the press the Confirm/Menu button, input the password, default password is 000000, six zeros.
- Page 18 Setup - Version PatrolEyes Max Cam Manager PatrolEyes Cam Manager is a desktop application that Version allows you to transfer files and edit certain settings on your a. In the Menu, “Version” displays the firmware verison. camera. You can download the latest version from our FAQ page at: stuntcams.com/max...
- Page 19 PatrolEyes Max Cam Manager PatrolEyes Max Cam Manager Device ID & Police ID Reset Device: a. The device ID can be up to 5 characters long while the a. Resetting the device with cam manager will reset all the Police ID can be up to 6 characters long.
-
Page 20: Optional Accessories
• Video Redaction • Advanced Cloud Storage • Suction Cup Mount • Epaulette Mount • Carrying Case • Lanyard • Screen Protectors • 8 Camera Docking Station • Camera Management Software • PatrolEyes Protection Plus Program • Alligator Magnet Mount...