
Related Manuals for Checkpoint CLASSIC Series


Summary of Contents for Checkpoint CLASSIC Series
- Page 1 Checkpoint Systems, Inc. Electronic Article Surveillance User’s Guide Electronic Article Surveillance North America User’s Guide Copyright 2014. Checkpoint Systems, Inc. ...
-
Page 2: Table Of Contents
Table of Contents Important Information for User's 1‐4 Introduction 5‐7 Equipment Care Dos & Don’ts EAS Antennas 9‐10 Troubleshooting Guide 11‐12 Hard Tag Application 13‐15 Hard Tagging Dos and Don’ts Hard Tag Removal Soft Labels Where to Apply Labels Label Dos and Don’ts Source Tagging Label Deactivation Omni Verifier Deactivation 24‐27 Testing Procedures 28‐29 Troubleshooting 30‐32 Handling Alarm Activations Alarm Activation Log 34‐35 Customer Service Procedures 36‐37... -
Page 3: Important Information For User's
The information in this document is aimed as a guide only and information in this guide is subject to change without notice. Checkpoint cannot be held responsible for individual interpretation of this document. - Page 4 Where applicable, Checkpoint Systems, Inc. Electronic Article Surveillance (EAS) products comply with the Maximum Permissible Exposure limits FCC 47 C.F.R. 1.1307(b)(1)) for US and RF Exposure limit RSS 102 , table 4.2 for Canada. Equipment Safety Compliance Statement Checkpoint’s Electronic Article Surveillance (EAS) products have been designed for safeness during normal use and, where applicable have been certified, listed, or recognized in accordance with one or more of the following safety standards; UL 60950‐1, CSA C22.2 No. 60950‐1‐07. Additional approvals may be pending. WARNING: Changes or modifications to Checkpoint’s EAS equipment not expressly approved by the party responsible for assuring compliance could void the user’s authority to operate the equipment in a safe or otherwise regulatory compliant manner. Industry Canada Regulatory Compliance Statement This device complies with Industry Canada licence‐exempt RSS standard(s). Operation is subject to the following two conditions: (1) this device may not cause interference, and (2) this device must accept any interference, including interference that may cause undesired operation of the device. Le présent appareil est conforme aux CNR d'Industrie Canada applicables aux appareils radio exempts de licence. ...
- Page 5 Models / Modèles d'antenne: Important Information to our Users in Europe CE Regulatory Compliance Statement Where applicable, Checkpoint Systems, Inc. offers certain Electronic Article Surveillance (EAS) products that have CE Declarations of Conformity according to R&TTE Directive 99/5/EC, EMC Directive 2004/108/EC, and Low Voltage Directive 2006/95/EC. System Electromagnetic Compatibility (EMC) has been tested and notified through Spectrum Management Authorities if necessary, using accredited laboratories, whereby, conformity is declared by voluntarily accepted European Telecommunications Standards Institute (ETSI) standards EN 301489‐3 and EN 302208 and/or EN 300330, as applicable. NOTE: Certain Electronic Article Surveillance (EAS) equipment have been tested and found to conform to the CE emission and immunity requirement in Europe. This equipment generates, uses, and can radiate radio frequency energy and, if not installed and used in accordance with the instruction manual, may cause harmful interference to radio communications. Under unusual circumstances, interference from external sources may degrade the system performance, which may include intermittent decreases in detection and/or intermittent increases in alarm activity. However, there is no guarantee that interference will not occur in a particular installation. If this equipment experiences frequent interference from external sources or does cause harmful interference to radio communications reception, which can be determined by turning the equipment off and on, please contact a Checkpoint Systems representative for further assistance. Where applicable, Checkpoint Systems, Inc. Electronic Article Surveillance (EAS) products comply with the limitation of human exposure to electromagnetic fields EN 50364 and with the limit values of German accident prevention regulations for electromagnetic fields BGVB11. RoHS Compliance Statement The RoHS Directive stands for "the restriction of the use of certain hazardous substances in electrical and electronic equipment." A RoHS compliant product means that electrical and electronic equipment cannot contain more than maximum permitted levels of lead, cadmium, mercury, hexavalent chromium, polybrominated biphenyl (PBB) and polybrominated diphenyl ether (PBDE). Checkpoint is in compliance with the RoHS directive.
- Page 6 WEEE Compliance Statement The Waste Electrical and Electronic Equipment Directive (WEEE) applies to companies that manufacture, sell, distribute, or treat electrical and electronic equipment in the European Union. There are a number of obligations imposed on Checkpoint as a supplier of electrical and electronic equipment. Checkpoint's compliance approach for each of these obligations is provided below. WEEE Marking All products that are subject to the WEEE Directive supplied by Checkpoint are compliant with the WEEE marking requirements. Such products are marked with the "crossed out wheelie bin" WEEE symbol shown below in accordance with European Standard EN 50419. Information for User's According to the requirements of European Union member state WEEE legislation, the following user information is provided in English for all Checkpoint supplied products subject to the WEEE directive. This symbol on the product or on its packaging indicates that the product must not be disposed of with normal waste. Instead, it is your responsibility to dispose of your waste equipment by arranging to return it to a designated collection point for the recycling of waste electrical and electronic equipment. By separating and recycling your waste equipment at the time of disposal you will help to conserve natural resources and ensure that the equipment is recycled in a manner that protects human health and the environment. For information about how to recycle your Checkpoint supplied waste equipment, please contact the distributor from whom the product was purchased or reach out to your local Checkpoint representative for details on proper disposal of electronics manufactured and sold by Checkpoint. REACH Compliance Statement The European REACH Regulation 1907/2006 on Registration, Evaluation, Authorization, and Restriction of Chemicals (REACH), Annex XVII entered into force in June 2009, and affects all companies producing, importing, using, or placing products on the European market. The aim of the REACH regulation is to ensure a high level of protection of human health and the environment from chemical substances. Checkpoint Systems’ substances management system follows and complies with the current revision of the REACH Regulation on the substances as identified by ECHA (European Chemical Agency). Checkpoint Systems’ products are considered articles as defined in REACH Article 3 (3). These products/articles under normal and reasonable conditions of use do not have intended release of substances. Therefore the requirement in REACH Article 7 (1) (b) for registration of substances contained in these products/articles does not apply. Checkpoint Systems’ products/articles do not contain Substances of Very High Concern or if there are SVHC in the product/article, the content is less than the 0.1% (wt/wt) as defined by REACH Article 57, Annex XIV, Directive 67/548/EEC. Therefore the requirement in REACH Article 7 (2) to notify ECHA if a product/article contains more than 0.1% wt/wt of an SVHC and tonnage exceeding 1 tonne per importer per year is not applicable. Checkpoint Systems’ European operations do not manufacture or import chemicals, therefore Checkpoint Systems has no obligation to register substances.
-
Page 7: Introduction
Checkpoint’s leading‐edge technology uses radio frequency (RF) waves that are emitted by the pedestals at the entrance to the establishment. This creates an invisible wall between the pedestals that searches only for live Checkpoint tags attached to merchandise. If the tag is not deactivated prior to the merchandise leaving the store, the pedestals produce an alarm –... - Page 8 Introduction • The training of management and store associates is the key to successful use. • It is important to remember that the system is only a deterrent based tool and its effectiveness depends largely upon how store associates interface with it. •...
- Page 9 • Without an alert work force, systems will not function correctly. Remember, the Checkpoint system is a tool that leverages your existing security policies. As is true of all EAS platforms, this RF‐EAS system can only be as effective as the people who operate it.
-
Page 10: Equipment Care Dos & Don'ts
The systems used in stores at present are either ‘swept’, ‘pulse’, or 360° pulse listen RF technology. If proposed renovations are likely to affect the system, please contact Checkpoint for additional advice. Please Note – No plasma screen monitors should be fitted within 11–13 feet of any antenna, in either the horizontal or vertical plane. -
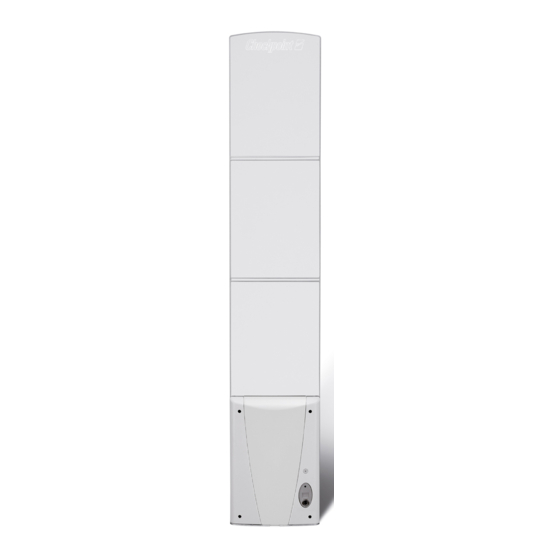
Page 11: Eas Antennas
• Installed at entrances, exits, staff exits and possibly restroom facilities in your store. • Transmit low frequency radio waves at the same frequency as the tags. • Checkpoint NGL (CLASSIC) and EVOLVE iRANGE pulse listen systems are based on transceiver technology and therefore can operate as a single stand alone antenna. - Page 12 EAS Digital Antennas CLASSIC RANGE: Offers the recognized benefits of Checkpoint design, quality and detection in four affordable design options. TREND/PX STREET STYLE PLUS/QX EVOLVE iRANGE: Checkpoint’s premier range, designed with maximum detection and features including data reporting. There are various data accessories and effective network solutions available for iRange, pushing this platform to the next level with KPI driven management tools. The platform has been proven time and time again to help retailers grow profitably. P20S SEMI-SHIELDED EVOLVE EXCLUSIVE RANGE: An exclusive collection of designer‐based solutions. For those retailers whose store designs require something more exclusive. All based on EVOLVE technology for the best of the best. RF, DUAL, RFID Under-floor...
-
Page 13: Troubleshooting Guide
If the light is on: • And confirmed systems is enabled. Re‐test the system. • If all the above checks and test have been carried out and there is still no detection, then please call Checkpoint Systems service desk. - Page 14 Are there cables running nearby? There are no faulty lights in the area. • Check for damage to the antenna. • Call for a Checkpoint engineer if required. Problem Deactivation unit malfunctioning: • Check that items are being deactivated within the deactivation range stipulated.
-
Page 15: Hard Tag Application
Hard Tag Application Hard tags come in many different styles and types. They are made of high impact proof plastic and are secured to lock with either a pin or a lanyard made of steel. Hard tags are reusable and are removed from merchandise at the point of sale using a magnetic detacher. Keepers, bottle tags, and other specialty tags are also available. General Guidelines • See inside product box for detailed application instructions. • Tagging placement on a product should be standardized so that cashiers know where to locate tags when removing at the point of sale. • Tags should be positioned in a visible place on the outside of the garment for maximum deterrent effect. • Pins should be pushed gently through the fabric along seam, then pressed easily into the tag. • After applying, tags should be checked to ensure they are fastening securely by giving the tag a gentle tug. Use caution when applying pins through fine or unique materials. • For pinless or lanyard tags, loop around the part of the product that is to be protected e.g handle and secure other end into the hard tag. ... - Page 16 Tagging Procedures – Hard Tags Push and rotate pin to open fabric fibers To start: Pins and hard tags should be and to avoid damage. Important! Always separated from each other. apply the pin through the fabric seam. Push the pin through fabric until the stem is Line up the pin with the hole in the hard tag seen on the outside of the garment.
- Page 17 Where to Apply Hard Tags For Tops: Sweaters, jackets, blouses, camisoles Place tag 3” above the hemline on the wearer’s left side seam For Bottoms: Jeans, Dress Pants, Skirts, Shorts Place tag 3” above the hemline on the wearer’s left outside seam For Shoes & Accessories: Place tag through eyelet, loop, or fabric material Consult your manager, as application preference may vary by product or company. Consult your Checkpoint Sales representative if you have questions, or would like assistance determining where to place tags.
-
Page 18: Hard Tagging Dos And Don'ts
Hard Tagging Dos and Don'ts Hard Tagging Dos and Don’ts Don'ts Tag in a consistent position on all like garments Pierce leather, suede or waterproof materials Tag in a position that will interfere with the Tag in line with your company policy customer trying a garment on Tag in a visible position for maximum Use bent pins or damaged lanyards deterrence Leave pins on the point of sale area or on the Gently ease the pin through the fabric floor Perform the tug test to ensure the pin/tag is Store tags next to deactivation equipment locked into position Store tags and pins/lanyards separately on Place customer payment cards next to the removal magnetic detacher Ensure bottle tags are positioned on the Place multiple tags on one item narrowest part of the bottle neck Correct Incorrect... -
Page 19: Hard Tag Removal
Hard Tag Removal • Using the metal detacher, tag removal is quick and simple. • Place the cone of the tag into the hollow of the detacher, press lightly on the pin and lift the pin upwards. The tag will remain in the detacher and the pin can be removed from the fabric. • If the pin does not lift away, then press slightly more firmly on the pin head and twist gently. This allows the pin to reposition itself in the lock. The pin will now lift from the tag. • Tags and pins should be stored safely and separately for reuse. • Dispose of any bent pins, these could jam in the locking mechanism. • Take care not to leave the sharp pins lying around. • Checkpoint personnel may bolt the detacher to a convenient position on the point of sale area. It is essential that these detachers are kept secure and not accessible to the public. • Most detachers are supplied with a lock and key to prevent unauthorized tag removal. -
Page 20: Soft Labels
• Each label is subjected to Checkpoint’s quality control measures. Sometimes tags are produced that do not meet a high enough standard. These tags may appear within any roll and are identified by a red spot. -
Page 21: Where To Apply Labels
Where to Apply Labels Application may vary depending on type and size of label used. Below are general guidelines based on standard, white labels and Checkpoint micro, clear labels. Clear Labels Placement White Labels Placement Clear labels are designed to be White labels may not be a Boxed Goods a visual deterrent. Boxed Goods visual deterrent. Place them on the front of Place them on the side or... -
Page 22: Label Dos And Don'ts
Paper Label Do’s and Don'ts Paper Label Dos and Don’ts Don'ts Consult your manager regarding proper Cover important or legally required placement options and procedures information about the product with the tag Apply the tag as close to the product barcode Bend or crease the tag. A slight curve is OK. as possible Ensure that the tag is applied smoothly and Apply to metallic surfaces, unless intended as evenly a visual deterrent only Store tags at room temperature in a secure Place an EAS label on food items, unless it is a area designated food label Correct Incorrect... -
Page 23: Source Tagging
Performance (EP) labels are more environmentally friendly than traditional labels; they contain less aluminum, less paper and less plastic. A pioneer in RF technology with more than 40 years of experience, Checkpoint provides unparalleled support for source tagging, including: • Product analysis for optimal tag placement •... -
Page 24: Label Deactivation
Soft Label Deactivation • Labels are not reusable and stay on a product during and after purchase. • The labels must be cancelled or turned off prior to the customers leaving the store. • This process is called “Deactivation”. • The deactivation equipment come in several forms. All forms are wired to a Chassis. •... -
Page 25: Omni Verifier
Omni Verifier The Omni Verifier is a portable device that has 3 functions. It is rechargeable and comes with its own charger cradle. Omni Verifier with card Function 1 Testing for a ‘live’ tag – place in ‘PV’ mode • Depress red button and hold over product/tag. •... -
Page 26: Deactivation
Deactivation Below you will find procedures for how to deactivate labels after purchase. A wide variety of apparel labels – including soft and clear RF labels, iS Pro Tags and graphic hang tags – do not require removal. Instead, deactivation turns the label OFF. USE OF VERIFIER UNITS Portable verifiers feature an Alarm sensor, allowing you to verify if a EAS security tag is ON or OFF. • When an active label is held within range, a beep sound indicates the label is ON. • For the OMNI® tool, select the Personal Tag Verifier (PV) mode to enable this feature. TIPS FOR INSTALLED PADS Free‐standing deactivators or “pads” can be fitted to the underside of the POS counter. Maximum distance above pad where deactivation will occur is called “Deactivation Height” and depends on the system. Ensure that supplies of Tags / Labels do NOT come near these stations. Again, active labels must never be brought near such areas. TIPS FOR WAND DEACTIVATORS Handheld wand devices allow bulky and heavy items to be deactivated without removal from the shopping cart. Some units attach to the deactivator with a flexible cable. Pass the end of the wand near the label; either side can face outward. Deactivation heights will vary. Aim for closer than 5cm [2in] to each label. - Page 27 Sounder Status LED (colored) Power LED Volume Knob Thumb Screw Access Panel Key features are listed below: • User‐friendly Front Panel with Volume control • Multi‐Color Status LED • USB Connector (feature in development) will later support data reporting • Several modes of operation (this guide explains how to change mode) CPiD‐RF Training New employees who have never used a Deactivator will benefit from improved performance, better identification of Hard Tags (alarm with Detect feature) and the ability to verify EAS labels. Managers or Store Operations will work with Checkpoint to determine which mode is suited for your mix of tags. If varied uses are permitted, Managers can quickly train employees. Using CPiD‐RF Deactivation and detection are assisted with Alarm on HT and other typical operations. Basic operation is the same as Counterpoint IX and other related products. Label Deactivation can be integrated to the POS, so the action of scanning a barcode label will produce CPiD‐RF action (with a limited time window for deactivation). During the “on time” when the Yellow Status LED is on, deactivation is enabled. With success, Red indicates deactivation (or alarm). Another supported method is using an interlock where an additional device, such as a keyswitch or foot‐pedal, produces the function. External Counters and Alarms are supported. The Operation Mode iVerify offers the same function as the Omni Verifier. Selecting mode is described on the following page. ...
- Page 28 Counterpoint Intelligent Deactivator‐RF (CPiD‐RF) Apply User‐Selected Settings SYSTEM SETTINGS Access to DIP Switches & Reset Switches provide control of unique system features and fine tuning of performance. Pull access panel open from right. By moving selected switches up or down, you can adjust system mode, power and gain. Mode Name Known Selection SW 2 SW 3 Operation Modes Operation Mode is a global iDeact Mode 5 system setting which configures iDetect HT Mode 6 CPiD‐RF to deactivate (only), deactivate and detect, or iDetect/Deact Mode 4 verify active EAS tags. iVerify Verification Set Switches (SW) 2 and 3 to configure Mode. Set SW 3, 4 and 5 to adjust the system’s Receiver Gain (or “Sensitivity”). See next page. OTHER USER CONTROLS ‐ Reset Button for start up Each time the unit is powered ON, press the reset button, wait until the Violet LED light is on, then press Reset again. The unit makes a clicking noise while it tunes; this is normal. If the Red or Violet LED ever ...
- Page 29 Troubleshooting The purpose of this table is to explains steps to troubleshoot CPiD‐RF issues. Problem Action(s) Green power LED is not on. Confirm DC plug and AC power cord are both secure. Function is lost (or reduced Check connections; confirm deactivation). antenna(s) are plugged in. Confirm SW 1 (Power) is OFF. Status light is teal. CPiD‐RF may need to be auto‐tuned: reset unit by pressing button. View Status LED when re‐testing for a good result. System is constantly Remove tagged items within 3ft alarming. (0.9m) of the pad. Try reducing the receiver gain (SW 4, 5, 6). Another Deactivator could be too close to the pad. Try turning the other device off or moving it further away. Status light is blinking red. (This Confirm there is nothing laying on top indicates a mis‐tune condition.) of the antenna. Remove nearby metal objects and then reset. The problem column describes the noticeable symptoms which indicate CPiD‐RF is not functioning at its best. Sometimes the solution is obvious, for example, remove nearby tags, but the action(s) column gives you a formal approach to solving any problem. The steps allow you to identify the issue and prevent it from occurring again. Counterpoint ECO This product version is based on the CPiD‐RF. Some features are not available on the ECO version of the product, namely Interlock and iVerify. Normal deactivation procedures will apply to Counterpoint ECO. Contact Checkpoint for additional information on applications.
-
Page 30: Testing Procedures
B. If not, refer to number 3 3. If the problems persist, contact Checkpoint’s Service Department to place a service call. When placing a service call, please give a brief description of the problem you are experiencing. See the Contact Information section for details on how to contact your service center. - Page 31 3. If the problems persist, contact Checkpoint’s Service Department (800‐253‐7580) to place a service call. When placing a service call, please give a brief...
-
Page 32: Troubleshooting
Troubleshooting Phantom Alarms A phantom alarm is when the alarm sounds or the pedestals illuminate when no one is walking through the system. Review the following suggestions to troubleshoot: Q: Is someone carrying tagged merchandise near the system? Are there tags or tagged merchandise within six feet of the system? A: Check behind the counters, inside boxes, etc. - Page 33 Troubleshooting Counterpoint Deactivation Units If you are experiencing problems when testing deactivation units, check the following before placing a service call: 1. Make sure the chassis is plugged in and/or the power switch is turned on. A green light should illuminate on the front of the electronics box to indicate power.
- Page 34 PV 2000 1. If it doesn’t beep when turned on, the battery may need to be replaced. 2. If the AMBER light is seen, this indicates a low battery and the battery should be changed at this time. Possible Alarm Causes A false alarm occurs when a pedestal alarms or illuminates when someone passes through the system after tags on the merchandise have been deactivated and/or removed.
-
Page 35: Handling Alarm Activations
A Guide to Handling Alarm Activations For every alarm activation, the nearest trained store associate should respond by following these tips and guidelines: • There is a chance that the staff has not deactivated/removed a tag. • Keep the approach non confrontational. • Walk calmly to the customer, do not run. •... -
Page 36: Alarm Activation Log
• Merchandise recovered, if applicable • Value of merchandise recovered, if applicable • Name of store employee who handled alarm situation • Description of alarm response; additional comments • Date and reason Checkpoint Service Department was called... -
Page 38: Customer Service Procedures
2. Do not place liquids in an area where they could spill and short‐circuit a deactivation unit. 3. Call Checkpoint’s Service Department before installing new carpet to avoid cutting the system cable. 4. Turn the system off if there is remodeling or electrical work being done at your store. - Page 39 User’s Guide • Make sure that employees do not give customers any information about the system or tags • Call your Checkpoint representative if you have any questions regarding the use of the system, tags or accessories Customer Service Contact Information For you Customer Service needs, please call 1800‐253‐7580 and follow the...
- Page 40 Checkpoint Systems is a global leader in merchandise availability solutions for the retail industry, encompassing loss prevention and merchandise visibility. Checkpoint provides end‐to‐end solutions enabling retailers to achieve accurate real‐time inventory, accelerate the replenishment cycle, prevent out‐of‐stocks and reduce theft, thus improving merchandise availability and the shopper’s experience. Checkpoint's solutions are built upon 45 years of radio frequency technology expertise, innovative high‐theft and loss‐prevention solutions, market‐leading RFID hardware, software, and comprehensive labeling capabilities, to brand, secure and track merchandise from source to shelf. Checkpoint's customers benefit from increased sales and profits by implementing merchandise availability solutions, to ensure the right merchandise is available at the right place and time when consumers are ready to buy. Listed on the NYSE (NYSE: CKP) Checkpoint operates in every major geographic market and employs 4,700 people worldwide. Checkpoint Systems, Inc. 101 Wolf Drive, P.O. Box 188 Thorofare, New Jersey 08086 800 257 5540 Toll Free 856 848 1800 Phone 856 251 9468 Fax www.checkpointsystems.com p/n 7274435...
Need help?
Do you have a question about the CLASSIC Series and is the answer not in the manual?
Questions and answers