Table of Contents
Advertisement
Advertisement
Table of Contents

Subscribe to Our Youtube Channel
Related Manuals for Raspberry Pi RP2040


Summary of Contents for Raspberry Pi RP2040
-
Page 2: Colophon
(“High Risk Activities”). RPTL specifically disclaims any express or implied warranty of fitness for High Risk Activities and accepts no liability for use or inclusions of Raspberry Pi products in High Risk Activities. -
Page 3: Table Of Contents
4.1. Serial input and output on Raspberry Pi Pico ............ - Page 4 Getting started with Raspberry Pi Pico 10.2.1. Setting up CLion................
-
Page 5: Quick Pico Setup
Chapter 1. Quick Pico Setup If you are developing for Raspberry Pi Pico on the Raspberry Pi 4B, or the Raspberry Pi 400, most of the installation steps in this Getting Started guide can be skipped by running the setup script. - Page 6 Once it has run, you will need to reboot your Raspberry Pi, $ sudo reboot for the UART reconfiguration to take effect. Once your Raspberry Pi has rebooted you can open Visual Studio Code in the "Programming" menu and follow the instructions from Section 7.2.
-
Page 7: The Sdk
The following instructions assume that you are using a Raspberry Pi Pico and some details may differ if you are using a different RP2040-based board. They also assume you are using Raspberry Pi OS running on a Raspberry Pi 4, or an equivalent Debian-based Linux distribution running on another platform. -
Page 8: Install The Toolchain
Getting started with Raspberry Pi Pico WARNING If you have not initialised the submodule in your checkout then USB CDC serial, and other USB tinyusb pico-sdk functions and example code, will not work as the SDK will contain no USB functionality. -
Page 9: Blinking An Led In C
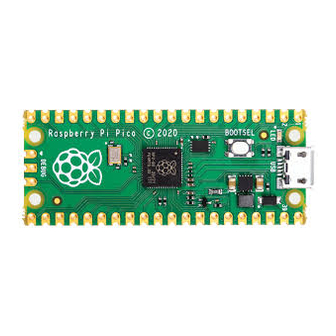
Learning how to blink an LED gets you half way to anywhere. We’re going to go ahead and blink the on-board LED on the Raspberry Pi Pico which is connected to pin 25 of the RP2040. -
Page 10: Load And Run "Blink
3.2. Load and run "Blink" The fastest method to load software onto a RP2040-based board for the first time is by mounting it as a USB Mass Storage Device. Doing this allows you to drag a file onto the board to program the flash. Go ahead and connect the... -
Page 11: Desktop
Getting started with Raspberry Pi Pico 3.2.1. From the desktop If you are running the Raspberry Pi Desktop the Raspberry Pi Pico should automatically mount as a USB Mass Storage Device. From here, you can Drag-and-drop onto the Mass Storage Device. -
Page 12: Boards
3.2.3. Aside: Other Boards If you are not following these instructions on a Raspberry Pi Pico, you may not have a BOOTSEL button (as labelled in Figure 1). Your board may have some other way of loading code, which the board supplier should have documented: •... -
Page 13: Saying "Hello World" In C
IMPORTANT The default Raspberry Pi Pico UART TX pin (out from Raspberry Pi Pico) is pin GP0, and the UART RX pin (in to Raspberry Pi Pico) is pin GP1. The default UART pins are configured on a per-board basis using board configuration files. -
Page 14: Build "Hello World
Getting started with Raspberry Pi Pico The destination for can be changed using CMake directives, with output directed to UART or USB CDC, or to both, stdout pico_enable_stdio_usb(hello_world 1) ① pico_enable_stdio_uart(hello_world 0) ② 1. Enable output via USB CDC (USB serial) printf 2. -
Page 15: Flash And Run "Hello World
4.3. Flash and Run "Hello World" Connect the Raspberry Pi Pico to your Raspberry Pi using a micro-USB cable, making sure that you hold down the button to force it into USB Mass Storage Mode. Once it is connected release the... -
Page 16: See "Hello World" Uart Output
Chapter 6) you need to use a UART based serial connection as the USB stack will be paused when the RP2040 cores are stopped during debugging, which will cause any attached USB devices to disconnect. 4.5. See "Hello World" UART output Alternatively if you dragged and dropped the binary, then the "Hello World"... -
Page 17: Powering The Board
CTRL-A 4.6. Powering the board You can unplug the Raspberry Pi Pico from USB, and power the board by additionally connecting the Raspberry Pi’s 5V pin to the Raspberry Pi Pico VSYS pin via a diode, see Figure... - Page 18 Pi Pico in USB host mode, in this case 5V must be connected to the VBUS pin. The 3.3V pin is an OUTPUT pin on the Raspberry Pi Pico, you cannot power the Raspberry Pi Pico via this pin, and it should NOT be connected to a power source.
-
Page 19: Flash Programming With Swd
Raspberry Pi Pico exposes the RP2040 SWD interface on three pins at the bottom edge of the board. The host can use the SWD port to access RP2040 internals at any time, so there is no need to manually reset the board or hold the BOOTSEL button. -
Page 20: Swd Port Wiring
3 wires, to directly access the Pico’s serial port. The default configuration is to have SWDIO on Pi GPIO 24, and SWCLK on GPIO 25 — and can be wired to a Raspberry Pi Pico with the following mapping, 5.2. SWD Port Wiring... -
Page 21: Loading A Program
Raspberry Pi Pico, or other RP2040-based board. If possible you should wire the SWD port directly to the Raspberry Pi as signal integrity is important; wiring the SWD port via a breadboard or other indirect methods may reduce the signal integrity sufficiently so that loading code over the connection is erratic or fails completely. - Page 22 Getting started with Raspberry Pi Pico Put the RP2040 into a clean initial state, as though it had just powered up, so reset that it is ready to run our code. Disconnect from the RP2040 and exit. Our freshly-programmed code will exit start running once OpenOCD disconnects.
-
Page 23: Debugging With Swd
Chapter 6. Debugging with SWD As well as resetting the board, loading and running code, the SWD port on RP2040-based boards like Raspberry Pi Pico can be used to interactively debug a program you have loaded. This includes things like: •... - Page 24 WARNING If you see an error like then your Raspberry Pi Pico is either powered off, wired incorrectly, or Info : DAP init failed has signal integrity issues. Try different GPIO jumper cables. This OpenOCD terminal needs to be left open. So go ahead and open another terminal, in this one we’ll attach a gdb instance to OpenOCD.
- Page 25 Error erasing flash with vFlashErase packet attempting to load the binary onto the Raspberry Pi Pico via OpenOCD then there is likely poor signal integrity between the Raspberry Pi and the Raspberry Pi Pico. If you are not directly connecting the SWD connection between...
-
Page 26: Using Visual Studio Code
Visual Studio Code (VSCode) is a popular open source editor developed by Microsoft. It is the recommended Integrated Development Environment (IDE) on the Raspberry Pi 4 if you want a graphical interface to edit and debug your code. 7.1. Installing Visual Studio Code ... -
Page 27: Loading A Project
Getting started with Raspberry Pi Pico 7.2. Loading a Project Go ahead and open the folder by going to the Explorer toolbar ( ), selecting "Open Folder," pico-examples Ctrl + Shift + E and nagivating to, in the file popup. Then click "OK" to load the Folder into VSCode. -
Page 28: Debugging A Project
, which is used by the debugger hello_usb.elf • , which can be dragged onto the RP2040 USB Mass Storage Device hello_usb.uf2 7.3. Debugging a Project repo contains an example debug configuration that will start OpenOCD, attach GDB, and finally launch pico-examples the application CMake is configured to build. -
Page 29: Running "Hello Usb" On The Raspberry Pi Pico
"cmake.statusbar.advanced": { 6 "debug": { 7 "visibility": "hidden" 8 9 "launch": { "visibility": "hidden" "build": { "visibility": "hidden" "buildTarget": { "visibility": "hidden" "cmake.buildBeforeRun": true, "C_Cpp.default.configurationProvider": "ms-vscode.cmake-tools" 21 } 7.3.1. Running "Hello USB" on the Raspberry Pi Pico 7.3. Debugging a Project... - Page 30 Code The code should now be loaded on to the Raspberry Pi Pico, and you should see the source code for "Hello USB" in the main right-hand (upper) pane of the window. The code will start to run and it will proceed to the first breakpoint —...
-
Page 31: Project
Getting started with Raspberry Pi Pico Chapter 8. Creating your own Project Go ahead and create a directory to house your test project sitting alongside the directory, pico-sdk $ ls -la total 16 drwxr-xr-x 7 aa staff 6 Apr 10:41 ./... - Page 32 .elf The full program output, possibly including debug information .uf2 The program code and data in a UF2 form that you can drag-and-drop on to the RP2040 board when it is mounted as a USB drive .dis A disassembly of the compiled binary .hex...
-
Page 33: Debugging Your Project
Getting started with Raspberry Pi Pico NOTE UF2 (USB Flashing Format) is a file format, developed by Microsoft, that is used for flashing the RP2040 board over USB. More details can be found on the Microsoft UF2 Specification Repo ... -
Page 34: Working In Visual Studio Code
If you want to also use Visual Studio Code to debug and load your code onto the Raspberry Pi Pico you’ll need to create file for your project. The example Chapter 7 should work. - Page 35 Getting started with Raspberry Pi Pico Figure 12. Creating a RP2040 project using the graphical project creation tool. You can add specific features to your project by selecting them from the check boxes on the GUI. This will ensure the build system adds the appropriate code to the build, and also adds simple example code to the project showing how to use the feature.
-
Page 36: Project Generation From The Command Line
--feature feature. You can add multiple features, up to the memory limitation of the RP2040. You can use the option of the --list script to list all the available features. -
Page 37: Building On Other Platforms
$ brew tap ArmMbed/homebrew-formulae $ brew install arm-none-eabi-gcc However after that you can follow the Raspberry Pi instructions to build code for the RP2040. Once the toolchain is installed there are no differences between macOS and Linux to, so see Section 2.1... - Page 38 , and targets, you can find these in the directories hello_world/serial hello_world/usb inside the newly created directory. The UF2 binaries can be dragged-and-dropped directly onto a RP2040 board build attached to your computer using USB. 9.1. Building on Apple macOS...
-
Page 39: Saying "Hello World
9.1.4.1. UART output Alternatively if you want to you want to connect to the Raspberry Pi Pico standard UART to see the output you will need to connect your Raspberry Pi Pico to your Mac using a USB to UART Serial converter, for example a... -
Page 40: Installing The Toolchain
Getting started with Raspberry Pi Pico WARNING Using Raspberry Pi Pico with Windows 7 or 8 is not officially supported but can be made to work. 9.2.1. Installing the Toolchain To build you will need to install some extra tools. - Page 41 Removing it from the list of installed items will mean that you will be unable to build Raspberry Pi Pico binaries. 9.2.1.4. Installing Python 3.9 During the installation, ensure that it’s installed 'for all users' and add Python 3.9 to the system...
-
Page 42: Getting The Sdk And Examples
Getting started with Raspberry Pi Pico Figure 17. Installing Python 3.9 tick the "Add Python 3.9 to PATH" box. 9.2.1.5. Installing Git When installing Git you should ensure that you change the default editor away from , see Figure Figure 18. Installing Ensure you tick the checkbox to allow Git to be used from third-party tools and, unless you have a strong reason otherwise, when installing Git you should also check the box "Checkout as is, commit as-is", select "Use Windows'... -
Page 43: Line
The UF2 binaries can be dragged-and-dropped directly onto a hello_world/usb build RP2040 board attached to your computer using USB. 9.2.4. Building "Hello World" from Visual Studio Code Now you’ve installed the toolchain you can install Visual Studio Code and build your projects inside the that environment rather than from the command line. - Page 44 Getting started with Raspberry Pi Pico WARNING If you start Visual Studio code by clicking on its desktop icon, or directly from the Start Menu then the build environment will not be correctly configured. Although this can be done manually later in the CMake Tools Settings, the easiest way to configure the Visual Studio Code environment is just to open it from a Developer Command Prompt Window where these environmental variables are already set.
-
Page 45: Flashing And Running "Hello World
9.2.5.1. UART output Alternatively if you want to you want to connect to the Raspberry Pi Pico standard UART to see the output you will need to connect your Raspberry Pi Pico to your computer using a USB to UART Serial converter, for example a... - Page 46 COM port disappears. chgport After entering the speed and port, hit the "Open" button and you should see the UART output from the Raspberry Pi Pico in your Terminal window. 9.2. Building on MS Windows...
-
Page 47: Using Other Integrated Development Environments
Eclipse is a multiplatform Integrated Development environment (IDE), available for x86 Linux, Windows and Mac. In addition, the latest version is now available for 64-bit ARM systems, and works well on the Raspberry Pi 4/400 range (4GB and up) running a 64bit OS. The following instructions describe how to set up Eclipse on a linux device for use with the Raspberry Pi Pico. - Page 48 This example uses the OpenOCD system to communicate with the Raspberry Pi Pico. You will need to have provided the 2-wire debug connections from the host device to the Raspberry Pi Pico prior to running the code. On a Raspberry Pi this can be done via GPIO connections, but on a laptop or desktop device, you will need to use extra hardware for this connection.
- Page 49 Getting started with Raspberry Pi Pico 10.1.1.5. Creating a Run configuration In order to run or debug code in Eclipse you need to set up a Run Configuration. This sets up all the information needed to identify the code to run, any parameters, the debugger, source paths and SVD information.
- Page 50 10.1.1.5.2. Setting up the debugger We are using OpenOCD to talk to the Raspberry Pi Pico, so we need to set this up. in the Executable box and Actual Executable box. We also need to set up OpenOCD to use the Pico specific openocd configuration, so in the Config options sections add the following.
- Page 51 Getting started with Raspberry Pi Pico 10.1.1.5.3. Setting up the SVD plugin SVD provides a mechanism to view and set peripheral registers on the Pico board. An SVD file provides register locations and descriptions, and the SVD plugin for Eclipse integrates that functionality in to the Eclipse IDE. The SVD plugin comes as part of the Embedded development plugins.
-
Page 52: Using Clion
Mac. This is a commercial IDE often the choice of professional developers (or those who love JetBrains IDEs) although there are free or reduce price licenses available. It will run on a Raspberry Pi, however the performance is not ideal, so it is expected you would be using CLion on your desktop or laptop. - Page 53 Getting started with Raspberry Pi Pico Figure 29. Configuring a CMake profile in CLion. You can have as many CMake profiles as you like with different settings. You probably want to add a build by Release hitting the button, and then filling in the PICO_SDK_PATH again, or by hitting the copy button two to the right, and...
- Page 54 Getting started with Raspberry Pi Pico Figure 31. Configuring a second CMake profile in CLion. 10.2.1.1.2. Running a build Now we can choose to build one or more targets. For example you can navigate to the drop down selector in the middle of the toolbar, and select or starting typing ;...
-
Page 55: Other Environments
There are many development environments available, and we cannot describe all of them here, but you will be able to use many of them with the SDK. There are a number of things needed by your IDE that will make Raspberry Pi Pico support possible: •... - Page 56 Getting started with Raspberry Pi Pico Ensuring your Raspberry Pi 4 and Raspberry Pi Pico are correctly wired together, we can attach OpenOCD to the chip, via configs. rp2040 $ openocd -f interface/raspberrypi-swd.cfg -f target/rp2040.cfg WARNING If your flash has DORMANT mode code in it, or any code that stops the system clock, the debugger will fail to attach because the system clock is stopped.
- Page 57 Getting started with Raspberry Pi Pico Figure 34. OpenOCD SVD running and connected to the Raspberry Pi Pico. 10.3. Other Environments...
-
Page 58: Appendix A: Using Picoprobe
Pico into a USB → SWD and UART bridge. This makes it easy to use a Raspberry Pi Pico on non Raspberry Pi platforms such as Windows, Mac, and Linux computers where you don’t have GPIOs to connect directly to UART or SWD, but you do have a USB port. - Page 59 Getting started with Raspberry Pi Pico software." Download and run the installer from https://www.msys2.org/. Start by updating the package database and core system packages with: pacman -Syu If MSYS2 closes, start it again (making sure you select the 64-bit version) and run pacman -Su to finish the update.
-
Page 60: Mac
Getting started with Raspberry Pi Pico Close MSYS2 and reopen the 64-bit version to make sure the environment picks up GCC. $ git clone https://github.com/raspberrypi/openocd.git --branch picoprobe --depth=1 $ cd openocd $ ./bootstrap $ ./configure --enable-picoprobe --disable-werror ① $ make -j4 1. -
Page 61: Build And Flash Picoprobe
Scroll down to Utilities, and download the UF2 under "Debugging using another Raspberry Pi Pico". These build instructions assume you are running on Linux, and have installed the SDK. Alternatively, you can get a UF2 of picoprobe from the getting started page. -
Page 62: Picoprobe Wiring
Getting started with Raspberry Pi Pico make -j4 Boot the Raspberry Pi Pico you would like to act as a debugger with the button pressed and drag on BOOTSEL picoprobe.uf2 Picoprobe Wiring Figure 36. Wiring between Pico A (left) and Pico B (right) configuring Pico A as a debugger. -
Page 63: Install Picoprobe Driver (Only Needed On Windows)
Getting started with Raspberry Pi Pico IMPORTANT If Pico B is a USB Host then you must connect VBUS to VBUS, not VSYS to VSYS, so that Pico B can provide 5V on its USB connector. If Pico B is using USB in device mode, or not using its USB at all, this is not necessary. -
Page 64: Windows
Getting started with Raspberry Pi Pico Windows Download and install PuTTY https://www.chiark.greenend.org.uk/~sgtatham/putty/latest.html Open Device Manager and locate Picoprobe’s COM port number. In this example it is COM7 Open PuTTY. Select under connection type. Then type the name of your COM port along with 115200 as the Serial speed. -
Page 65: Mac
Getting started with Raspberry Pi Pico brew install minicom minicom -D /dev/tty.usbmodem1234561 -b 115200 Using Picoprobe with OpenOCD Same for all platforms src/openocd -f interface/picoprobe.cfg -f target/rp2040.cfg -s tcl Connect GDB as you usually would with target remote localhost:3333 Using Picoprobe with OpenOCD... -
Page 66: Appendix B: Using Picotool
Getting started with Raspberry Pi Pico Appendix B: Using Picotool It is possible to embed information into a Raspberry Pi Pico binary, which can be retrieved using a command line utility called picotool Getting picotool utility is available in its own repository. You will need to clone and build it if you haven’t ran the pico-setup picotool script. -
Page 67: Using Picotool
$ picotool help PICOTOOL: Tool for interacting with a RP2040 device in BOOTSEL mode, or with a RP2040 binary SYNOPSYS: picotool info [-b] [-p] [-d] [-l] [-a] [--bus <bus>] [--address <addr>] ... -
Page 68: Display Information
No accessible RP2040 devices in BOOTSEL mode were found. Device at bus 1, address 7 appears to be a RP2040 device in BOOTSEL mode, but picotool was unable to connect indicating that there was a Raspberry Pi Pico connected then you should run pictool using , e.g. - Page 69 Getting started with Raspberry Pi Pico $ sudo picotool info Program Information name: hello_world features: stdout to UART $ sudo picotool info -a Program Information name: hello_world features: stdout to UART binary start: 0x10000000 binary end: 0x1000606c Fixed Pin Information 20:...
-
Page 70: Save The Program
Getting started with Raspberry Pi Pico Save the program Save allows you to save a range of memory or a program or the whole of flash from the device to a BIN file or a UF2 file. $ picotool help save SAVE: ... -
Page 71: Basic Information
(e.g. Debug Build) Pins This is certainly handy when you have an executable called but you forgot what RP2040-based board it hello_serial.elf was built for, as different boards may have different pins broken out. -
Page 72: Details
Getting started with Raspberry Pi Pico UART1 TX UART1 RX There is one line in the function: setup_default_uart bi_decl_if_func_used(bi_2pins_with_func(PICO_DEFAULT_UART_RX_PIN, PICO_DEFAULT_UART_TX_PIN, GPIO_FUNC_UART)); The two pin numbers, and the function UART are stored, then decoded to their actual function names (UART1 TX etc) by picotool. - Page 73 Getting started with Raspberry Pi Pico #define bi_program_url(url) bi_string(BINARY_INFO_TAG_RASPBERRY_PI, BINARY_INFO_ID_RP_PROGRAM_URL, url) then either unconditional inclusion binary info blah, bi_decl(bi_blah(…)) for binary information that may be stripped if the enclosing function is not included in bi_decl_if_func_used(bi_blah(…)) the binary by the linker (think...
-
Page 74: Setting Common Fields From Cmake
Getting started with Raspberry Pi Pico Setting common fields from CMake You can also set fields directly from your project’s CMake file, e.g., pico_set_program_name(foo "not foo") ① pico_set_program_description(foo "this is a foo") pico_set_program_version_string(foo "0.00001a") pico_set_program_url(foo "www.plinth.com/foo") 1. The name "foo" would be the default. -
Page 75: Appendix C: Documentation Release History
To accompany the V1.0.1 release of the C SDK • 23/Feb/2021 Minor corrections • Changed font • Additional documentation on sink/source limits for RP2040 • Major improvements to SWD documentation • Updated MicroPython build instructions • MicroPython UART example code •... - Page 76 Getting started with Raspberry Pi Pico The latest release can be found at https://datasheets.raspberrypi.org/pico/getting-started-with-pico.pdf. Appendix C: Documentation Release History...
Need help?
Do you have a question about the RP2040 and is the answer not in the manual?
Questions and answers