Advertisement
Quick Links
INSTRUCTION MANUAL
使用说明书
#1 BY DESIGN
2022
Goosky
Thank you for choosing
entering the remote control world, you must be told a lot of relevant
knowledge and precautions to ensure that you can be more comfortable in
the learning process. Before starting the operation, please read this manual
carefully. We believe it will be of great help to you. Please keep this manual
properly for future reference.
感谢您选用谷天科技 系列产品。
进入遥控世界前必须告诉您许多相关的知识与注意事项,以确保您能够在学
习的过程中较得心应手。在开始操作之前,请务必详细阅读本说明书,相信
一定能够给您带来相当大的帮助,也请您妥善保管这本说明书,以作为日后
参考。
Technology series products. Before
Advertisement

Subscribe to Our Youtube Channel
Related Manuals for Goosky S2


Summary of Contents for Goosky S2
- Page 1 INSTRUCTION MANUAL 使用说明书 Goosky Thank you for choosing Technology series products. Before entering the remote control world, you must be told a lot of relevant knowledge and precautions to ensure that you can be more comfortable in #1 BY DESIGN the learning process.
- Page 2 IMPORTANT NOTES 重要声明 S2 remote control helicopter is not a toy, it is a leisure product designed by combining many high-tech products. Improper use or unfamiliarity of the product may cause serious injury or even death. Please read this manual carefully before using. Pay attention to your own safety.
- Page 3 PREVENT OPETATION 勿不当使用本产品 禁止 Do not modify and process by yourself. For any upgrade, modification or repair, please use the parts in the product catalog of GOOSKY to ensure the safety of the structure. Please confirm to operate within the product limits, do not use overload, and do not use it for other illegal purposes other than safety and laws.
- Page 4 EQUIPMENT REQUIRED FOR ASSEMBLY 自备工具 刀子 剪刀 尖嘴钳 斜口钳 Knife Scissors Needle Nose Pliers Diagonal Cutting Pliers 六角螺丝起子 十字螺丝起子 Philips Screw Drive Hexagon Screw Driver lubricating oil CA 瞬间胶 AB Glue AB 胶 胶水使用方法 Instructions of using glue For the assembly steps marked with the following symbols, please use glue or oil to ensure the reliability of use. 标有以下符号之组装步骤,请配合上胶或上油,以确保使用之可靠度。...
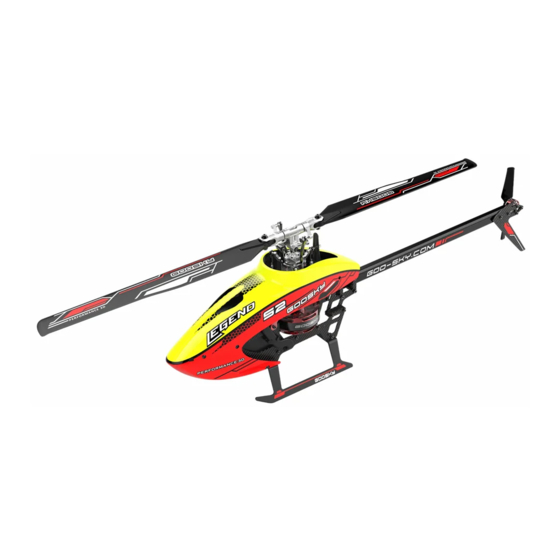
- Page 5 Specifications 参数规格 71.5 Specifications 参数配备 Lenght : 436mm 机身长: 436mm Height : 144mm 机身高: 144mm Main Blade : 193mm 主旋翼长度: 193mm Main Rotor Diameter : 440mm 主旋翼直径: 440mm Tail Rotor Diameter : 99mm 尾旋翼直径: 78mm Flying Weight : 345g 起飞重量约: 345g Features 设计特点...
- Page 6 step 1 步骤一 Thrust braring and washer for radial bearing are wear items,and thus should be CAUTION inspected for replacement after every 20 flights. For flights with high headspeed ,the inspection interval should be reduced to ensure flight safety. Concave opening of bearing face inside Flat bearing gasket Ball Bearing-MR63ZZ...
- Page 7 step 2 步骤二 Socket screw Socket screw Ball Bearing-681X (Φ1.5*Φ4*2mm) Copper sets Copper sets Copper sets (Φ1.5*Φ2.8*0.4mm) Ball Bearing-681X (Φ1.5*Φ4*2mm)x8 Inner ball head seat Copper sets Ball Bearing-681X (Φ1.5*Φ4*2mm) Copper sets FBL control arm Socket screw Copper sets (Φ1.5*Φ2.8*0.4mm)x2 Copper sets Copper sets Socket screw Socket screw...
- Page 8 step 3 步骤三 Ball Bearing-MR104ZZ ( Φ4*Φ10*4 ) Socket screw (M1.6X6) Socket screw Bearing limit (M2X6) carbon plate Socket screw (M2X6) Servo bracket Ball Bearing-MR104ZZ ( Φ4*Φ10*4 ) second floor CAUTION Motherboard Socket screw Socket screw Ball Bearing-MR104ZZ ( Φ4*Φ10*4 )x2 (M1.6x6mm)x2 (M2x6mm)x3 M1.6 Nut...
- Page 9 step 4 步骤四 Socket screw M1.6x4mm Frame Widening Mount Socket screw M1.6x4mm Socket screw Socket screw M1.6x3mm M1.6x4mm Frame Widening Mount Socket screw M2x4mm Socket screw Socket screw Tail Boom Mount (M1.6x4mm)x6 (M1.6x3mm)x4 Chassis fixing column Socket screw (M2x4mm)x2 Socket screw (M2.5x6mm) CAUTION Main Shaft...
- Page 10 step 5 步骤五 cross recessed countersunk head tapping screws (ST1.6x4mm) Body reinforcement cross recessed round head tapping screw (ST1.5X6 ) card buckle right panel cross recessed round head left panel tapping screw motor cable cover cross recessed round Socket screw head tapping screw (ST1.5X4 ) Socket screw...
- Page 11 step 6 步骤六 CAUTION 步骤 In this step, the M1.6*4 screws fixing the motor components on both sides should not be completely locked in place. Socket screw 六 (M1.6x4mm) CAUTION Socket screw 六 (M1.6x4mm) Socket screw 六 (M1.6x4mm)x4 CAUTION Socket screw 六...
- Page 12 step 7 步骤七 Socket screw Tailpipe (M1.6x4mm) Tailpipe inner mount 尾管内部固定座 Socket screw (M1.6x5mm) Socket screw Tail motor reinforced plate group 尾侧板加强片 (M1.6x4mm)x2 Tail Fin Socket screw (M1.6x5mm)x2 tail rotor Socket screw (M1.6x4mm) M1.6 screw sleeve M1.6 tail motor 尾电机 Socket screw Socket screw (M1.6x4mm)x4...
- Page 13 step 8 步骤八 Socket screw Socket screw Socket screw M2x12mm-L4 (M2x12mm-L4)x2 Socket screw M2 Nut Socket screw Socket screw M2 Nut WWW.GOO-SKY.COM...
- Page 14 step 9 步骤九 Plastic ball link Plastic ball link Plastic ball link Plastic ball link WWW.GOO-SKY.COM...
- Page 15 step 10 步骤十 Plastic ball link Plastic ball link Socket screw (ST1.7X6 ) Croduct Phase Panel Set Socket screw (ST1.7X6 ) Socket screw Plastic ball link (ST1.7X6 ) WWW.GOO-SKY.COM...
- Page 16 step 11 步骤十一 Flight control 3M shock absorber CAUTION Note: 1: First, fully fit the double-sided shock-absorbing sticker to the upper seat of the battery compartment, and then install the flight controller. 2: The edge of the outgoing end of the flight control module is aligned with the edge of the square groove, which is on the upper seat of the bottom battery compartment (as shown in the blue line).
- Page 17 step 12 步骤十二 cross recessed round head tapping screw 十 Canopy spring Canopy button Canopy lower shell cross recessed round head tapping screw 十 cross recessed mechanical Jaw round head screw 圆头十字机械牙螺丝(M1.4X4)x2 upper shell hook Canopy 头罩上壳卡钩 Canopy upper shell 头罩上壳...
- Page 18 step 13 步骤十三 Phillips screws 十 (ST1.5X4 ) Socket screw cross recessed round head tapping screw 十 (ST1.5X4 ) Socket screw cross recessed round head tapping screw 十 (ST1.5x4mm) Socket screw (M1.6x4mm)x2 WWW.GOO-SKY.COM...
- Page 19 step 14 步骤十四 M2 Nut Socket screw Socket screw (M2x6mm) (M2x6mm) M2 Nut Socket screw (M2x6mm)x2 WWW.GOO-SKY.COM...
- Page 20 step 15 步骤十五 Main propeller Socket screw Flat bearing gasket Socket screw M2 screw sleeve M2 screw sleeve Flat bearing gasket Flat bearing gasket M2 Nut Main propeller Flat bearing gasket Socket screw CAUTION M2 screw sleeve Notice: 1: Each group of main propellers has been selected, weighed and matched before leaving the factory. When there are multiple pairs of main propellers at the same time, multiple groups cannot be mixed and used.
- Page 21 step 16 步骤十六 Notice: Press the button to open the 1: Press the lower case button to open the lower case; CAUTION lower case CAUTION Notice: 1: Install the battery to the end; 2: Press and hold the lower case button, and close the case upwards to ensure that the case lock is in place;...
- Page 22 step 17 步骤十七 CAUTION How to disassemble the upper case: 1: Disassemble the fixing screws on both sides. 2: The propeller is turned to the side of the fuselage, and the two blades are retracted. 3: Move the upper casing upwards and turn it 90 degrees toward the blade position, and it can be disassembled;...
- Page 23 step 18 步骤十八 WWW.GOO-SKY.COM...
- Page 24 飞控对频介绍 CAUTION Turn on the GOOSKY T8 transmitter, press the BIND button for 3 times after the helicopter is powered on. The blue light flashes quickly. Keep the transmitter less than one meter away from the flight control. The flight control passes self-detection when the blue light is solid on.
- Page 25 包装方式: 吊卡 +PE 袋 配件编号 : 配件编号 : GT000014 配件编号 : 配件编号 : GT000013 GT000015 GT000016 Product name: S2 Semi-Metal Shell Servo Product name: Servo swing arm Product name: Main Board Product name: Second floor Board 配件名称 : S2 半金属舵机 配件名称 : 舵机摆臂...
- Page 26 配件名称 : 脚架组 -( 蓝 ) 配件名称 : 双直尾管 - 红 配件名称 : 双直尾管 - 绿 适用机型 : 适用机型 : S2 适用机型 : 适用机型 : M1.6=4PCS M1.6=4PCS Package: Hang tag +PE bag Package: Hang tag +PE bag Package: Hang tag +PE bag...
- Page 27 Main rotor holder set 主桨固定配件组 配件名称 : 垂直翼 - 绿 配件名称 : 垂直翼 - 蓝 配件名称 : 主桨组 配件名称 : 适用机型 : S2 适用机型 : 适用机型 : RS2 适用机型 : RS2 Φ2*Φ10*0.2x4 M2X12 半牙 x2 M2 尼龙防松螺母x2 M2 螺丝套 X2 M1.6*5=2PCS M1.6*5=2PCS...
- Page 28 机头罩 -- 黄绿色 机头罩 -- 绿蓝色 配件名称 : 配件名称 : 配件名称 : 配件名称 : 适用机型 : RS2 适用机型 : S2 适用机型 : 适用机型 : ST1.7*4=2PCS M1.4*4=2PCS Package: Hang tag +PE bag Package: Hang tag +PE bag Package: Hang tag +PE bag...
- Page 29 Transmitter description-1 遥控器说明-1 Remote Control Power Light(Red) 遥控器 (MODEL HOLD IDLE Pose mode Manual mode 100% Manual mode Throttle, Orientation Front Back, Left Right Flying Ring POWER-2 POWER-1 Remote Control Power Light(Red) 遥控器 (MODEL HOLD IDLE Pose mode Manual mode Manual mode 100% Front Back,Orientation...
- Page 30 遥控 Handle (Product Model) 产品型号: T8 提手 (Diameters) 外形尺寸长: L153*W93*H154 (Radio Frequency) 无线频率: 2.404GHz--2.4475 GHz (Transmit Power) 发射功率: < 20 dBm (Weight) 重量约: 335g (Modulation Mode) 调制方式: 2FSK (Spread Spectrum Mode) 扩频方式: FHSS (Working Voltage) 工作电压: 3.7V (Remote Distance) 遥控距离: 300m (Charge Interface) 充电接口:...
- Page 31 Memo 备忘录 WWW.GOO-SKY.COM...
- Page 32 Zhongshan Goosky Technology Innovation Co., Ltd. www.goo-sky.com 2022...
Need help?
Do you have a question about the S2 and is the answer not in the manual?
Questions and answers