Table of Contents
Advertisement
Quick Links
EMG2926-Q10A
Dual-Band Wireless AC/N Gigabit Ethernet Gateway
Version 1.00
Edition 1, 09/2014
Quick Start Guide
User's Guide
Default Login Details
LAN IP Address
www.zyxel.com
User Name
Password
http://192.168.1.1
(Router Mode)
http://192.168.1.2
(Access Point Mode)
supervisor, admin
supervisor, 1234
Copyright © 2014 ZyXEL Communications Corporation
Advertisement
Table of Contents

Subscribe to Our Youtube Channel
Related Manuals for ZyXEL Communications EMG2926-Q10A


Summary of Contents for ZyXEL Communications EMG2926-Q10A
- Page 1 Dual-Band Wireless AC/N Gigabit Ethernet Gateway Version 1.00 Edition 1, 09/2014 Quick Start Guide User’s Guide Default Login Details LAN IP Address http://192.168.1.1 (Router Mode) http://192.168.1.2 www.zyxel.com (Access Point Mode) User Name supervisor, admin Password supervisor, 1234 Copyright © 2014 ZyXEL Communications Corporation...
- Page 2 Related Documentation • Quick Start Guide The Quick Start Guide shows how to connect the EMG2926-Q10A and access the Web Configurator wizards. It contains information on setting up your network and configuring for Internet access.
- Page 3 Contents Overview Contents Overview User’s Guide ............................11 Introduction .............................12 Introducing the Web Configurator ......................18 EMG2926-Q10A Modes ..........................22 Router Mode ............................23 Access Point Mode ..........................30 Tutorials ..............................37 Technical Reference ..........................49 Monitor ..............................50 WAN ................................55 Wireless LAN ............................66 LAN .................................89 DHCP Server ............................93 NAT .................................98...
- Page 4 1.1 Overview ............................12 1.1.1 Dual-Band ..........................13 1.2 Applications ............................13 1.3 Ways to Manage the EMG2926-Q10A ....................13 1.4 Good Habits for Managing the EMG2926-Q10A ................14 1.5 Resetting the EMG2926-Q10A ......................14 1.5.1 How to Use the RESET Button ....................14 1.6 The WPS Button ..........................14 1.7 LEDs ..............................15...
- Page 5 6.2 Set Up a Wireless Network Using WPS ....................37 6.2.1 Push Button Configuration (PBC) ....................37 6.2.2 PIN Configuration ........................38 6.3 Connect to EMG2926-Q10A Wireless Network without WPS ............39 6.3.1 Configure Your Notebook ......................41 6.4 Using Multiple SSIDs on the EMG2926-Q10A ..................43 6.4.1 Configuring Security Settings of Multiple SSIDs ..............44...
- Page 6 10.5 IP Alias Screen ..........................91 10.6 IPv6 LAN Screen ..........................92 Chapter 11 DHCP Server ............................93 11.1 Overview ............................93 11.1.1 What You Can Do ........................93 11.1.2 What You Need To Know .......................93 11.2 DHCP Server General Screen ......................93 EMG2926-Q10A User’s Guide...
- Page 7 15.1.1 What You Can Do ........................ 113 15.1.2 What You Need To Know ..................... 113 15.2 General Screen ..........................115 15.3 Services Screen ..........................115 Chapter 16 Content Filtering ..........................118 16.1 Overview ............................118 16.2 Content Filter ..........................118 EMG2926-Q10A User’s Guide...
- Page 8 20.4 WWW Screen ..........................138 20.5 Telnet Screen ..........................139 20.6 SNMP Screen ..........................140 20.7 Wake On LAN Screen ........................142 20.8 TR069 Screen ..........................143 Chapter 21 Universal Plug-and-Play (UPnP)......................146 21.1 Overview ............................146 21.2 What You Need to Know .......................146 EMG2926-Q10A User’s Guide...
- Page 9 24.6 Firmware Upgrade Screen ......................168 24.7 Configuration Backup/Restore Screen ..................169 24.8 Restart Screen ..........................171 24.9 System Operation Mode Overview ....................171 24.10 Sys OP Mode Screen ........................172 24.11 Language Screen ........................173 24.12 Diagnostic Ping Screen .......................173 Chapter 25 Troubleshooting..........................175 EMG2926-Q10A User’s Guide...
- Page 10 25.2 Power, Hardware Connections, and LEDs ..................175 25.3 EMG2926-Q10A Access and Login ....................176 25.4 Internet Access ..........................177 25.5 Resetting the EMG2926-Q10A to Its Factory Defaults ..............179 25.6 Wireless Connections ........................179 25.7 USB Device Problems ........................181 Appendix A Pop-up Windows, JavaScript and Java Permissions ...........182 Appendix B Setting Up Your Computer’s IP Address ..............191...
- Page 11 User’s Guide...
- Page 12 Quality of Service (QoS), to redistribute traffic over the EMG2926-Q10A for the best possible performance in a home network. There are two USB 2.0 ports on the side panel of your EMG2926-Q10A. You can connect USB (version 2.0 or lower) memory sticks, USB hard drives, or USB devices for file sharing. The EMG2926-Q10A automatically detects the USB devices.
-
Page 13: Ways To Manage The Emg2926-Q10A
Chapter 1 Introduction 1.1.1 Dual-Band The EMG2926-Q10A is a dual-band AP and able to function both 2.4G and 5G networks at the same time. You could use the 2.4 GHz band for regular Internet surfing and downloading while using the 5 GHz band for time sensitive traffic like high-definition video, music, and gaming. -
Page 14: Good Habits For Managing The Emg2926-Q10A
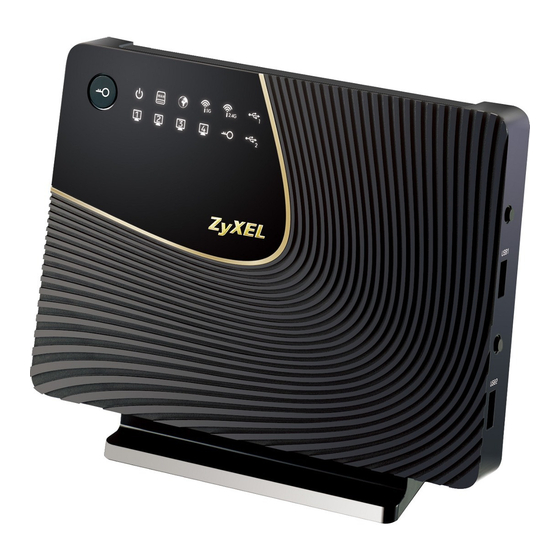
Make sure the power LED is on. Press the RESET button for one to four seconds to restart/reboot the EMG2926-Q10A. Press the RESET button for longer than five seconds to set the EMG2926-Q10A back to its factory- default configurations. 1.6 The WPS Button Your EMG2926-Q10A supports Wi-Fi Protected Setup (WPS), which is an easy way to set up a secure wireless network. - Page 15 1.7 LEDs Look at the LED lights on the front panel to determine the status of the EMG2926-Q10A. Use the LED button at the side panel of the device to turn the LED lights on or off. If you have already pushed the LED button to the ON position but none of the LEDS are on, make sure the EMG2926- Q10A is receiving power and the power is turned on.
- Page 16 The EMG2926-Q10A is sending or receiving IP traffic. The EMG2926-Q10A does not have an IP connection. WLAN 2.4/5G The EMG2926-Q10A is ready, but is not sending/receiving data through the 5G wireless LAN. Blinking The EMG2926-Q10A is sending/receiving data through the 5G wireless LAN.
-
Page 17: Wall Mounting
Make sure the screws are fastened well enough to hold the weight of the EMG2926-Q10A with the connection cables. Align the holes on the back of the EMG2926-Q10A with the screws on the wall. Hang the EMG2926- Q10A on the screws. -
Page 18: Introducing The Web Configurator
Internet Explorer. 2.2 Login Accounts There are two system accounts that you can use to log in to the EMG2926-Q10A: “admin” and “supervisor”. These two accounts have different privilege levels. The web configurator screens vary depending on which account you use to log in. - Page 19 Chapter 2 Introducing the Web Configurator The EMG2926-Q10A is in router mode by default. Type "http://192.168.1.1" as the website address. If the EMG2926-Q10A is in access point, the IP address is 192.168.1.2. See Chapter 3 on page 22 for more information about the modes of the EMG2926-Q10A.
- Page 20 Administrator Inactivity Timer field expires (default five minutes; go to Chapter 24 on page 164 to change this). Simply log back into the EMG2926-Q10A if this happens. 2.3.2.1 Weather Edit You can change the temperature unit and select the location for which you want to know the weather.
Need help?
Do you have a question about the EMG2926-Q10A and is the answer not in the manual?
Questions and answers