Advertisement
Table of Contents
Contents
VIXEN HORNS VXH1002C Sound Air Horn Manual
BEFORE BEGINNING YOUR INSTALLATION
Read through the instruction guide before getting started with the installation. Professional installation is recommended for this product.
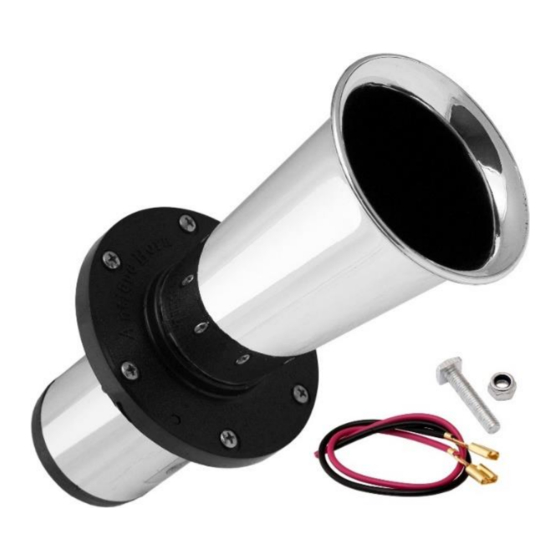
CONTENTS
- "Ooga" Air Horn (Chrome Color)
- 12V Heavy Duty Air Compressor
- Wire with Connectors
- Mounting Hardware
The specific voltage requirement for this horn kit is 12 volt DC, therefore installation must be done to a DC power source of 12 volts.
SAFETY INSTRUCTIONS
- Make sure you never attempt to disassemble this horn kit's electrical components.
- Never use your bare hands to any part of the compressor immediately after or during use.
- Avoid operating this product in an area with risk of falling or submergence into a liquid (water).
- Do not reach out for or touch any component that has fallen or been submerged into water.
- Make sure you set up in areas with good ventilation.
- Never sound the air horn anywhere near your ear(s) or that of another person.
- Make sure your battery ground is detached before getting your installation started.
- Employ equipment for eye protection during drilling operations.
MOUNTING
- Identify a suitable area for mounting, preferably an unobstructed sheet-metal surface like the frame or body of the vehicle so as to provide a firm platform which will help protect the horn from damage due to excessive shaking. Do not attach the horn to any plastic or other flexible material.
- Indicate the positions before drilling the hole of 1/4-inches in diameter. With the provided hardware for mounting, firmly tighten them to the vehicle.
- Install the bolt's head into the compressor housing's slot. Tighten the compressor firmly to the vehicle with the provided mounting hardware.

Installation in a high location underneath the hood and the downward orientation of the trumpet will prevent the horn from collecting any water.
ELECTRICAL CONNECTIONS (FACTORY HORN SWITCH)
- For vehicles with a two-terminal factory horn, transfer the wires to the compressor's terminals. If the horn doesn't sound even if the compressor motor turns on, simply reverse the wires.
- For vehicles with one-terminal factory horns, make sure you transfer the wire to the compressor's positive (+) terminal. The negative (-) terminal uses a 16-gauge wire or heavier to connect to ground.
 VIEW 1")
 VIEW 2")
ELECTRICAL CONNECTIONS (NEW HORN BUTTON)
- Using a 15A fuse (not provided) for circuit protection, connect the positive terminal of the compressor to the power source.
- The negative terminal of the compressor is attached to the horn button (not provided). The other horn button terminal is attached to any rust and paint free metal to ground.
![]()
Both connection must be done with 18-gauge wire or heavier.
")

Documents / ResourcesDownload manual
Here you can download full pdf version of manual, it may contain additional safety instructions, warranty information, FCC rules, etc.
Advertisement


Need help?
Do you have a question about the VXH1002C and is the answer not in the manual?
Questions and answers