Sricam SP009 MiNi IP Camera Qucik User Manual
Also See for SP009:
- Quick user manual (42 pages) ,
- Qucik user manual (9 pages) ,
- Manual (3 pages)
Advertisement
Table of Contents
Contents
Sricam SP009 MiNi IP Camera Qucik User Manual
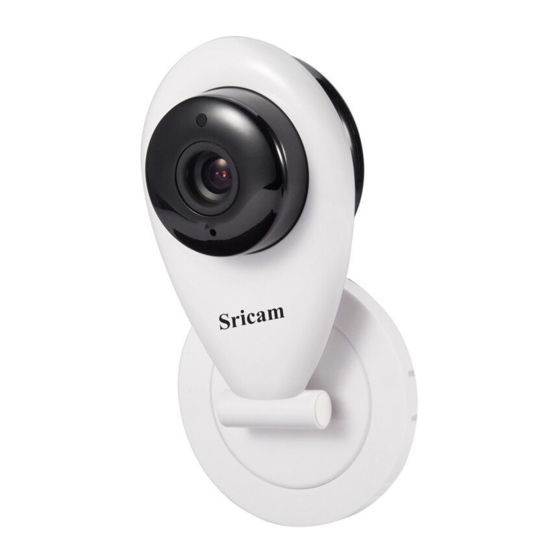
Products Introduction


Before starting setup
Make sure of the following:
- Your router supports the 2.4GHz frequency band (802.11b/g/n).
- Your router DHCP is enabled.
- Your smartphone is connected to the Internet with a WLAN/Wi-Fi that the camera will connect with.
- You know the WLAN/Wi-Fi password. (No special characters in the password and Wi-Fi SSID such as @#$%^&*).
- Your smartphone, camera, and router should be within about 8 feet during setup. After your camera is set up, you can move the camera to your preferred location (the configurations are saved to camera system)
Start setup
Sricam App Installation
Go directly to Step 3 if the ifcam app is already download and registered in your smartphone.
Method 1: Scan the QR code to download the "ifcam" App.
Android


iOS


Method 2: Search "ifcam" on Google Play or iOS App Store
Register an App user account
After download the App "ifcam", please Install and register an user account for it.


Product connection

- Power on the IP Camera.
- Waiting until you hearing continuous beeping sound from the camera, then go to step 4 for add the camera on App "ifcam".
- If you can't hear the beeping sound from the device within 1 minute, you need reset the device first. Press RESET button by a reset pin
![]() for 10 seconds until you hear a clash sound from the device. Then waiting until you hear continuous beeping sound from the device, and go to Step4 for add the device on App "ifcam"
for 10 seconds until you hear a clash sound from the device. Then waiting until you hear continuous beeping sound from the device, and go to Step4 for add the device on App "ifcam"
 for 10 seconds until you hear a clash sound from the device. Then waiting until you hear continuous beeping sound from the device, and go to Step4 for add the device on App "ifcam"
Add the camera on App


Live video stream on your smartphone

- Local record
- Screenshots
- Resolution
- Speaker
- Upside down
- Alarm switch
- Setting button
- Microphone
FAQ
MicroSD card record and playback setting
- Insert the microSD card to the camera


- MicroSD card format and record setting
Log in "ifcam" App and follow the steps: Settings -> Record Setting -> SD card Formatting-> Record Switch (Note: If you use 64G or 128G SD card can't recording, you need to format the SD card to FAT32 format on your PC. If the SD card recording is full, it will automatically loop coverage, you do not need to manually delete the video file.)


- Record Playback (on App)
Log in "ifcam" App and follow the steps: Settings >> Playback
Tap " Playback" for playback the record on MicroSD card, as picture below (Note: each record is 30 minutes)


How to Setup Motion Detection Alarm
- Enable motion detection alarm
- Tap "Settings" button >> "Settings" >> "Alarm setting" be the alarm setting window as pictures.


- Enable "Motion Detection Alarm" and "Alarm Switch" as pictures.


- Tap "Settings" button >> "Settings" >> "Alarm setting" be the alarm setting window as pictures.


- Choose motion detection alarm notification type
There are 3 modes you can choose to get the alarm notification.- Phone push alarm
Enable "Receive Notifications" then the camera will push notification to your smart phone when an alarm is activated. Push notification account is default as the ifcam app login account. If don't need this function, you can delete the push account. - Buzzer alarm
Enable "Buzzer Alarm" then the camera's buzzer works when an alarm is activated. - Email Alerts
The alarm notification will send to your designated email address.
Tap " Email Alerts", and fill in the email information as below guide- Sender: Please input your email address (e.g., Lucy@gmail.com).
- SMTP server: The server address for the Sender's email account.
- Port: Please select 587 or 465 if the SMTP address is mtp.gmail.com, Smtp.mail.yahoo.com or smtp.live.com (Hotmail.com). If not, please select 25.
- Password: input password
- Email: Enter up to three receiving email accounts (e.g., you may have both Lucy@gmail.com and Marcy@yahoo.com) as picture FAQ3-4
If failed to setup Email Alert, please activate your Gmail or Yahoo Email account.
- Phone push alarm
VideosSricam mini ip camera SP009 Video Guide on APP
Documents / Resources
References
Download manual
Here you can download full pdf version of manual, it may contain additional safety instructions, warranty information, FCC rules, etc.
Advertisement


Need help?
Do you have a question about the SP009 and is the answer not in the manual?
Questions and answers