Advertisement
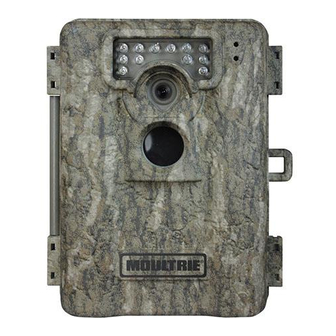
CAMERA OVERVIEW

OFF/ IR AIM / SETUP / AUTO
IR AIM - When IR Aim is ON and the PIR Sensor detects motion, the Status LED on the front of the camera will intermittently flash and then shut off.
Setup position selects the camera setup main screen. While in this screen, pressing the select button will take you to the different categories of setup (time, date, clear, and camera ID number).
Select/Wakeup, Enter, Up/Down Buttons
The SELECT button scrolls through options. The ENTER button selects the item to be changed and lock in the set value. The UP and DOWN buttons are used to change the values of the options.
Battery Compartment
The camera is powered by 4 C-cell alkaline batteries. Be sure to align batteries in the way depicted on the engraved battery diagrams inside the battery compartment. This will ensure proper polarity. Note: only use alkaline batteries, the use of any other type battery may damage the camera.
SD Card Slot
Accepts up to a 32GB SD card for photo and video storage.
NOTE: An SD Card must be installed for the camera to operate (sold separately).
USB PORT
Download still pictures and video onto your computer by connecting a mini USB cable (not included) to the mini USB port.
EXTERNAL POWER PORT
Accepts the Moultrie Power Panel® or Moultrie Battery Box accessories (sold separately) only. Refer to www.moultriefeeders.com for more information.
NOTE: The use of any other power source will void your warranty and possibly harm your camera.
BATTERY STATUS LED
This LED will light up and remain lit when 25% of battery life remains.
QUICK START INSTRUCTIONS
Use the steps below as a guide to quickly set up your camera so it will function using the factory default settings.
STEP 1
Open camera cover. Install 4 C-cell alkaline batteries. Make sure that the polarities on the batteries match the polarities indicated in the battery chamber. Recommended for use: Duracell® or Energizer® batteries.
STEP 2
Insert SD Memory Card until you hear an audible click. Camera will not operate without SD card. Slide the Mode switch to setup. To set the time and date, press the enter button and use the Up/Down buttons to change settings. Press Select to lock in the setting.
STEP 3
Mount camera in desired location using a mounting strap. Switch camera to IR AIM. Aim camera using motion detection to determine target area. Walk in front of at the desired distance and the camera LED will flash indicating the area which is detected.
STEP 4
Set the Delay and Resolution. Slide the Mode switch to Auto. The camera will start count down. Close cover and secure. The camera will operate using default settings. You may also customize the settings if required.

DEFAULT SETTINGS
| Factory Settings | |||
| TIME/DATE: | AM12:00 2011/1/01 | CAMERA ID: | 1 |
CAMERA SETUP
Battery Installation
Open the camera cover and install 4C-Cell Alkaline batteries. Make sue thatthe (+ and -) polarities match the polarities indicated inside the battery chamber.
Note: Anytime you load or unload batteries, make sure that the camera is OFF. If using 12V DC Power Pane; Plug, do not remove internal batteries.

Insert SD Card
You will need to open the front cover to insert an SD memory card. You can inset a SD Card up to 32 GB. Insert the SD card in the direction indicated on the card, until you hear an audible click.
Note: Camera will not operate without an SD memory card installed.

Power ON
Slide the Mode Switch to the Setup position. The time will appear on the LCD Display. The camera has powered up.

Mounting with a Strap
Close cover and place camera on a tree or pole approximately 3ft high. Thread the mounting strap through the mounting strap slots onthe back of the
camera and secure.
Hint: If you are mounting camera to cover a trail, face the camera down the trail tilted at a slight downward angle. Face the camera North or South to avoid over exposure from the sun. Clear brush away from camera ffont to avoid false triggers from the wind.

Aiming Camera
After the camera has been mounted, open the cover and slide the Mode Switch to IR Aim. Close cover. Stand in front of the camera. The Status LED will flash red when it detects movement. Use this process to guide your camera to cover the desired target area.

MOULTRIE ACCESSORIES (Sold Separately)
Using a Deluxe Tree Mount
The camera can also be mounted directly to a tree using a mounting bracket that attaches directly to a tree or pole. Strap the tree mount to the tree and secure, then attach the camera to the tree mount using the tree mount socket located on the back of the camera.

Using the Moultrie Camera Power Panel
Place near the tree where the camera is mounted. Place for best exposure to sun. To attach to a tripod secure the power panel to the tripod angled upward for best exposure. Plug the power panel to the Power Panel Plug. This will extend the life of your camera in the field.
Note: Leave internal batteries in the camera during use. The Camera Power Panel needs 4 hours of sunlight to fully power the camera.

Using the Moultrie Battery Box
Extend the field life of your Moultrie camera with a long-lasting, rechargeable external power source. Place near the tree where the camera is mounted. Plug the Battery Box to the Power Panel Plug. This will extend the life of your camera in the field.

SETUP AND PROGRAMMING
Navigating Different Settings
During the Setup mode, you can program the camera for different settings. The Enter button will start the programming process when the selection flashes. The Up/Down buttons will move from one value to the next. The Enter button will then lock in any selections. Then press the Select button again to move to the next setting.

Turning Power ON/OFF
Open the camera cover. Turn the Mode switch to the Setup position. The time will appear on the LCD display. If you want to turn the unit off, slide the selector switch to OFF. The LCD will show "OFF" and then power down.
Note: If there is no activity for 2 minutes the camera will shut off automatically to save battery life.

Setting Time and Date
While the camera is in the Setup mode, the LCD display will show the time. Press the Enter button and the selection will flash. Use the UP/Down buttons to change the selection. Press the Enter button to lock in the selection. Press the Select button to move to the next selection. Repeat the process to set the year, month and day.

Reset Picture Count/Erase Images/Format Card
After the camera's time and date have been set, you can reset the picture count on the camera. Press the Select button until "Clr" shows in the LCD display. Press Enter button and use the Up/Down buttons to choose between Yes or No. Press the Enter button to confirm the selection. "Yes" will reset file number to start from 0001 anderase all images stored on the SD card.
NOTE: This will also format your SD card for use in your camera.

Setting Camera ID
Press the Enter button to select an identity for your camera. Use the Up/Down buttons to choose between nine different numbers (1-9) to help identify your cameras (i.e. CAMERA 3 will be marked on the info strip given 3 was selected). Press Enter to lock in your selection. Press the Select button and the LCD will display the time again.

Setting Time Delay
To set the time delay, slide the Delay switch to the desired time. There are 4 time delay settings, 1 min, 5 mins, 10 mins and 30 mins.

Setting Image Quality or Type
Slide the Resolution switch to the desired setting. Choose one of 3 settings:
High Photo, Low Photo or Video.

Sleep Mode
After all your settings have been made, slide the Mode switch to Auto and close the cover.
Note: If there is no activity within 2 minutes, the camera will enter sleep mode to conserve battery life. The camera will then power up and become active when motion is detected.

CAPTURE MODES
Photo Mode
To operate the camera in Photo mode, slide the Resolution button to the HI or LO position. Slide the Mode switch to AUTO position. The LCD display will count down for 10 seconds. After the LCD goes off, the camera is ready for capturing photos.

Video Mode
To operate the camera in Video mode, slide the Resolution button to the VID position. Slide the Mode switch to AUTO position. The LCD display will count down for 10 seconds. After the LCD goes off, the camera is ready for capturing video. (10 second video clips at 30 frames per second).

FCC Statements

Note: Changes and modifications not expressly approved by the party responsible could void the user's authority to operate this device.
This device complies with Part 15 of the FCC Rules. Operation is subject to the following two conditions: (1) This device may not cause harmful interference, and (2) this device must accept any interference received, including interference that may cause undesired operation.
NOTE: THE MANUFACTURER IS NOT RESPONSIBLE FOR ANY RADIO OR TV INTERFERENCE CAUSED BY UNAUTHORIZED MODIFICATIONS TO THIS EQUIPMENT. SUCH MODIFICATIONS COULD VOID THE USER'S AUTHORITY TO OPERATE THE EQUIPMENT.
NOTE: This device complies with the limits for a Class B digital device, pursuant to Part 15 of the FCC Rules. These limits are designed to provide reasonable protection against harmful interference in a residential installation. This device generates, uses, and can radiate radio frequency energy and, if not installed and used in accordance with the instructions, may cause harmful interference to radio communications. However, there is no guarantee that interference will not occur in a particular installation. If this device does cause harmful interference to radio or television reception, which can be determined by turning the equipment off and on, the user is encouraged to try to correct the interference by one or more of the following measures:
- Reorient or relocate the receiving antenna.
- lncrease the separation between the equipment and receiver.
- Connect the equipment into an outlet on a circuit different from that to which the receiver is connected.
- Consult the dealer or an experienced radio/TV technician for help.
CAMERA SPECIFICATIONS
Memory & Storage
Your camera supports external SD memory cards ONLY and will accept up to a 32GB card. Using large memory cards can slow the camera response. The camera cannot capture any photo or video without external memory. Please insert an SD memory card to operate camera. Estimates are based on the most common types of memory cards that can be purchased at electronic stores, office supply stores, or online. Estimates may vary based on camera settings or environmental conditions.

Always turn the unit off when inserting or removing an SD memory card to avoid damage and ensure that the camera properly updates the memory information.
| Auto Mode | ||
| SD Card Size: | 2 GB | 16 GB |
| HIGH 2560 x 1920 | 1500 | 12000 |
| LOW 640 x 480 | 8000 | 64000 |
| Video Mode | ||
| SD Card Size: | 2 GB | 16 GB |
| VGA 640 x 480 (based on 10 sec video) | 204 | 1632 |
Actual capacity will vary based on image properties.
System Requirements
OS: Microsoft® Windows® XP with Service Pack 2 (Service Pack 3 recommended); Windows Vista® Home Premium, Business, Ultimate, or Enterprise with Service Pack 1; Windows 7 or Mac OS 10.1 or higher
Hard disk space: 100MB or above
CPU: Intel® Pentium® 4 or AMD Athlon® 64 processor or above
Memory: 1GB of RAM
Specifications
| A-5 | A-8 | |
| Operational Mode | Game Detect/Video | Game Detect/Video |
| Resolution | 5.0 MP | 8.0 MP |
| Still Resolutions | JPEG Low 640 x 480, High 2560 x 1920 | JPEG Low 640 x 480, High 3200 x 2400 |
| Video Resolutions | AVI - 640 x 480 | AVI - 640 x 480 |
| SD Memory Card | Up to 32 GB SD card (not included) | Up to 32 GB SD card (not included) |
| Power Supply | 4 C-cell Alkaline batteries (not included) | 4 C-cell Alkaline batteries (not included) |
VIEWING YOUR IMAGES
There are a number of ways for you download and view the pictures, videos in the field or at another location.
Removing the SD Card
To remove the SD Memory Card, open the camera cover and push gently on the SD card and it will pop out slightly allowing you to remove it. Load the SD card into the player or card reader to view or move stored images to another location.

Make sure that the camera is in the OFF position before removing SD card.
ln the Field
You can download the pictures or videos with the aid of external devices. To download, use an external player or card reader that is supported by 12V DC or Mini USB Jack.

At Home
Remove the entire camera and transport to another location to download images. To connect the camera to a PC computer, turn the camera ON, press the MENU button once to change to SETUP Mode. Connect the mini USB cord (not included) between the USB out port and the PC computer. The computer will recognize the camera as a removable drive. The unit works with Windows XP/Vista/7 and Mac OS X. Copy the images and videos from the camera onto your PC for further editing or printing. When the USB cable is disconnected, the camera will go back to SETUP mode.

See the full line of Moultrie camera accessories at www.moultriefeeders.com
IMPORTANT INFORMATION
Important Battery lnformation
- Only use alkaline batteries. We recommend the use of Duracell or Energizer batteries.
- Do not mix old and new batteries. Always replace ALL the batteries at the same time.
- When the camera is not in use, please remove the batteries.
Moultrie Limited Warranty
This product has been thoroughly tested and inspected before shipment. It is guaranteed from defects in material and workmanship from the date of purchase for 1 year. Under this limited guarantee we agree to replace or repair free of charge any part or parts which have been found to be defective in original material or workmanship. Should you require in-warranty service, call our Customer Service Department. If your problem cannot be addressed over the telephone, we may need you to send us your defective product plus proof of purchase.
You must register your camera at www.moultriefeeders.com/warranty to activate your 1-year warranty.
Our Service Department will gladly answer any questions you have. Call 800-653-3334, Monday - Friday, 8:00 AM to 5:00 PM CST.

VideosMoultrie A-5 Game Camera - Setup Video
Documents / Resources
References
Download manual
Here you can download full pdf version of manual, it may contain additional safety instructions, warranty information, FCC rules, etc.
Advertisement


Need help?
Do you have a question about the A-5 and is the answer not in the manual?
Questions and answers