NuWave Pro Plus Infrared Oven Manual
- Manual manual (128 pages) ,
- Manual and cookbok (102 pages) ,
- Owner's manual (12 pages)
Advertisement
- 1 IMPORTANT SAFEGUARDS
- 2 Parts for the NuWave Oven Pro Plus
- 3 NuWave Oven Pro Plus Assembly Guide
- 4 Digital Control Panel on Power Head
- 5 General Use Instructions
- 6 Directions for the NuWave Oven Pro Plus
- 7 CLEANING AND CARE INSTRUCTIONS
- 8 IMPORTANT TIPS
- 9 THE NUWAVE OVEN PRO PLUS COOKING SYSTEM
- 10 THE MANUFACTURER WARRANTS
- 11 THE WARRANTY DOES NOT COVER
- 12 TO OBTAIN SERVICE
- 13 MANUFACTURER'S OBLIGATION
- 14 Videos
- 15 Documents / Resources
IMPORTANT SAFEGUARDS
When using electrical products, especially when children are present, basic safety precautions should always be followed, including the following:
READ ALL INSTRUCTIONS BEFORE USING

To reduce the risk of electrocution:
- Read all instructions, safeguards, and warnings before using the appliance.
- Do not place appliance where it can fall or be pulled into water or other liquids.
- Do not reach for an appliance that has fallen into water. Unplug immediately!
- Do not immerse cord, plug, or power head in water or other liquids.

To reduce the risk of burns, electrocution, fire or injury:
- This appliance should not be used by children. Close supervision is necessary when this product is used near children.
- Use this appliance for its intended purpose as described in this brochure.
- Do not use any other accessories or attachments not recommended by the manufacturer. They may result in fire, electrical shock, or personal injury.
- Never operate this appliance if it has a damaged cord or plug; not working properly; has been dropped or damaged; or dropped into water. Return the appliance to an authorized customer service center for inspection, repair, or adjustment. Any other servicing should be performed by an authorized service representative.
- Keep the cord away from heated surfaces.
- Unplug from outlet when not in use and before cleaning. Allow to cool before putting on or taking off parts.
- Always unplug power cord by pulling on the plug. DO NOT unplug by pulling on cord.
- Never force the plug into an outlet.
- Do not use outdoors.
- Do not use or operate where aerosol (spray) products are being used or where oxygen is being administered.
- Do not let cord hang over edge of table or counter, or touch hot surfaces.
- Do not place on or near a hot gas or electric burner or in a heated oven.
- Extreme caution must be used when moving an appliance containing hot oil or other hot liquids.
- Use extreme caution when removing hot liner pan or cooking rack.
- To disconnect, press the Pause/Clear button twice before unplugging.
- Do not use this appliance for anything other than it is intended.
- Check all electrical wiring. Beware of damaged cord or plug. This appliance is for household use only; it is designed to process normal household quantities. It is not suitable for continuous or commercial operation.
- Do not disassemble the product. There are no user serviceable parts.
- Do not leave the appliance unattended while in use.
- Use the handles when lifting the dome from the base.
- Do not touch hot surfaces. Use the handles provided or use oven mitts.
- Stop or pause cooking before removing the dome to check or turn food. The dome and power head should be placed on the dome holder.
- Always remove the dome away from you so the escaping steam is channeled away from your face.
- If the power cord is damaged, it should be replaced by a special cord or assembly from the manufacturer or its service agent.
- Use caution when disposing of hot grease.
- Keep this manual handy for easy future reference.
SAVE THESE INSTRUCTIONS
Electrical Information:
The cord length of this appliance was selected to reduce Safety Hazards that may occur with a long cord. Extension cords are available and may be used if care is exercised in their use. If an extension cord is used: (1) the marked electrical rating of the extension cord should be at least as great as the electrical rating of the appliance, and (2) the longer cord should be arranged so that it does not drape over the counter or table top where it could be accidentally pulled off the counter or table or tripped over.
Certain models of the appliance may have a polarized plug (one blade is wider than the other). This plug is intended to fit into a polarized outlet only one way. if the plug does not fit fully into the outlet, reverse the plug. If it still does not fit properly, contact a qualified electrician. Do not attempt to modify the plug in any way.

Electric shock hazard. Use with adequate electrical system. Do not use if cord or plug is damaged.
All metal items in the oven, such as the liner pan and cooking rack, can get very hot during cooking. Please be careful when removing these items from a hot oven. Always wear oven mitts or use pot holders. Allow liner pan and cooking rack to cool completely before cleaning. The dome opening may expand slightly when hot. In rare instances, the power head could detach itself from the dome completely, thereby causing hot air to escape from between the dome and the power head.
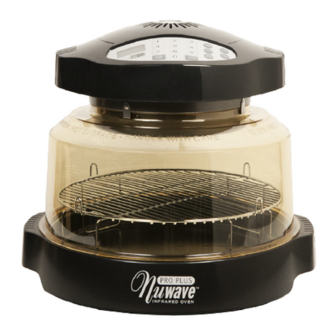
Parts for the NuWave Oven Pro Plus

- Power Head - easy-to-use, programmable digital controls.
- Dome - BPA-free, transparent, and lightweight.
- Cooking Rack - reversible to heights of 1-inch or 3-inch.
- Non-Stick Liner Pan - easy clean, eco-friendly, non-stick, no PTFE, and no PFOA.
- Base - cool to the touch so it can also be used as a serving tray.
- Dome Holder - uniquely designed to securely hold your NuWave Pro Plus dome and power head assembly.
NuWave Oven Pro Plus Parts
Digital Power Head (IRC6) 26001 Black with Silver Accents
 26001 Black with Silver Accents")
Cool to Touch Base (IRC6) 26004 Black with Silver Accents
 26004 Black with Silver Accents")
BPA-Free Dome 26007

12-inch Non-Stick Liner Pan 26010

1-inch/3-inch Reversible Cooking Rack 22070

Dome Holder 22020

Registration Card 26018

Complete Cookbook & Manual 26013

Instructional DVD 26015

English Quick & Easy Cooking Guide 26014

Spanish Quick & Easy Cooking Guide 26014

NuWave Pro Plus Oven Accessories
Extender Ring Kit 26012

Kit includes:
10-inch Non-Stick Baking Pan 22071
2-inch Cooking Rack 26008
3-inch Stainless Steel Extender Ring 26011
NuWave Supreme Pizza Kit 22104

Kit includes:
Stainless Steel Pizza Flipper 22042
Silicone Pizza Liner 22105
Stainless Steel Pizza Server 22106
100% Bamboo Cutting Board 22107
NuWave Pro Plus Baking Kit 26019

Kit includes:
8x8-inch Silicone Baking Pan 22111
Silicone Baking Divider 22112
Silicone Cupcake Liner (set of 12) 22113
Silicone Baking Ring 22114
Whip-It Whisk 22115
NuWave Pro Plus Baking Book 26020
NuWave Twister 22091

NuWave Party Mixer 22191

NuWave Pro Plus Carrying Case 26016

To order call our Customer Service Line at: 1.877.689.2838 (M-F 8:00AM-4:30PM CST), or order online at www.NuWaveNow.com. Please provide the item name and number to ensure that your purchase is processed accurately.
NuWave Oven Pro Plus Assembly Guide
Connecting Power Head to Dome
Place Power Head on the rim of the Dome and lock it into place by rotating the Power Head clockwise until the locking lugs are engaged.
Assembling the Full NuWave Oven
Place Base Tray on a firm, stable surface.
Place Liner Pan inside Base Tray. When doing so, make sure the handles are in the dropped down position. If the handles are not fully dropped, the Dome may not fit over the base properly.
Place dual level Cooking Rack on the Liner Pan according to cooking requirements.
Place food on the rack.
Place Dome with Power Head over food, connecting to the Base Tray. The Dome should fit evenly onto the base.
Set cook time and temperature according to recipe requirements.

BEFORE USING:
Prior to the first use of your NuWave Oven, wash Dome, Liner Pan, Base, and Cooking Rack in warm soapy water or run through a dishwasher cycle.

Do not wash or immerse Power Head in water or cycle through dishwasher. The outer surface may be cleaned by wiping carefully with a damp dishcloth or sponge.

How to Install and Use Dome Holder
Make sure the Power Head is tightly locked onto the Dome. The whole assembly can be easily lifted and put aside as shown in steps 1, 2 and 3.
- Place Dome Holder under either side of base handle.

- Make sure both feet of the Dome Holder are situated inside the handle, and the Dome Holder is resting horizontally on a flat surface.

- Place the assembled Power Head and Dome at a 45° angle on the holder as shown.
Note: Do not leave Dome in Dome Holder for an extended period of time.


Cooking Instructions
Only lift Dome by the handles on the Power Head. Once the Power Head and the Dome are assembled, the handles will allow you to lift both together when removing or checking food. When removing Liner Pan after cooking, be extremely careful and always use oven mitts.
For best results, follow the time, temperature, and Cooking Rack height instructions provided in the cooking chart and recipe book. No preheating required.

Models Containing 3-inch Extender Ring
If your NuWave Oven included a 3-inch Extender Ring, the Ring can be used for multi-level cooking or for oversized food items that may not fit under the standard dome. Generally, foods (such as a ham or turkey) that exceed 10 pounds would require the use of the Extender Ring for optimal cooking.
Directions
The Extender Ring should be positioned between the original dome and the base. The addition of the Extender Ring will expand the NuWave Oven's available cooking space by approximately 440 cubic inches when using the 3-inch Ring. When adding the Extender Ring to the NuWave Oven, make sure it fits snugly onto the dome. When the Ring is placed under the dome incorrectly, the overlapping edges will not fit together properly. Please use caution when using the Ring. If improperly used, heat or steam could escape from the oven which could cause burns or alter the necessary cooking times of your foods. The Extender Ring should only be used as an accessory item with the NuWave Oven. It is not intended to serve as a replacement for the dome, base, or any other components of the NuWave Oven.

General Rules
- Place foods that require the longest cooking time on the rack closest to the heating element (ex. potatoes, carrots), and place soft vegetables on the lower racks (ex. mushrooms, tomatoes).
- When choosing the multi-level cooking option, use food combinations that take roughly the same amount of time to prepare. Examples: pork or chicken and potato wedges; fish and stewed tomatoes; or frozen beef with baked potatoes.
- If top layer foods finish cooking earlier, remove rack(s) from above and continue cooking bottom foods until done.
- Use shallow or oven-safe dishes for cooking.
- To warm bread, place it on the bottom rack or liner pan and cover. To bake bread, place bread on the top rack.
Models Containing Extender Ring Kit
2-inch Rack
The 2-inch Rack for the NuWave Oven Pro Plus can be used in a variety of ways.
- It can be the primary rack with or without the Extender Ring.
- With the Extender Ring, it can be positioned on top of or under the 3-inch rack for more multi-level cooking space.
- Without the Extender Ring, the 2-inch rack can also facilitate multi-level cooking by creating a third cooking surface between the liner pan and the bottom of the 3-inch rack.
- You may use two extra 2-inch racks above and below the 3-inch rack, which is especially useful for dehydrating.

Note: The 2-inch rack is only to be used in the positions and purposes shown below. Any other uses may affect cooking time and quality.
Care and Use
The Extender Ring is constructed from high-impact stainless steel. It should not be cleaned with any harsh abrasive, but it is dishwasher safe.
3-inch Cooking Rack

1-inch Cooking Rack

2-inch & 1-inch Cooking Rack

2-inch & 3-inch Cooking Rack

3-inch & 2-inch Cooking Rack


Do not touch the dome or any surface on the cooking area during operation. The air inside the dome can reach 350°F (177°C) which makes the surface very hot and may cause burns. Do not open the dome or remove the power head while the NuWave Oven is operating. Turn off the power before removal.
Digital Control Panel on Power Head

General Use Instructions
- Make sure the unit is plugged into a properly grounded outlet and that the cord is not touching any heated objects.
- Be certain that the liner pan has been properly placed within the base.
- Do not place the Pro Plus or any associated parts directly on your stove top, inside a conventional oven or in contact with any other direct heat source. Damage may result.
- Metal, glass or silicone dishes and pans, and all other oven-safe materials used in a conventional oven, may be utilized in the NuWave Pro Plus.
Directions for the NuWave Oven Pro Plus
Control Panel on Power Head
"0" should appear on LCD display when program is clear.
Easy Start
To start cooking, press the Cook Time button, enter time as desired, then press Start. Default is programed at 350ºF. If cooking at any other temperature, Cook Temp button will be needed. See Setting Temperature for details.
Setting Cook Time
Press the Cook Time Button. The Time indicator will flash in the right corner of the display panel. Enter the time in hours and minutes by pressing the corresponding numerals. For example, 1 hour and 30 minutes would be entered by pressing 1,3,0. The display panel will show 1:30. If the required time is in minutes, you only need to enter 1 or 2 numbers. For example, 5 minutes just push 5; for 46 minutes, push 46. If the number needs to be corrected, clear the entry by pressing Pause/Clear button twice. Then re-enter the correct numbers.
Note: Maximum allowed cook time for temperatures 325ºF and above is 2 hours. If cooking time is set more than that it will automatically revert back to 2 hours. Longer times can be added by simply adding more time after the initial 2 hours has expired. For temperatures below 325ºF, maximum allowed time is 9 hours and 59 minutes.
Setting Temperature
- Press the Cook Temp button.
- Press desired temperature.
- Temperature can be changed by 1ºF increments.
- Temperature ranges from 100ºF to 350ºF.
Start Cooking
Set appropriate temperature and time, then press Start to begin cooking. The remaining cooking time will appear in the display panel, and the colon symbol between the hours and minutes will blink. The oven will automatically stop cooking when the time has expired, and a "beep" will alert you to that fact.
Pause/Clear Cooking
To Pause the oven, press the Pause/Clear button once. The remaining cooking time will stay listed on the display panel but the colon will not blink.
To STOP or Clear cooking time, press the Pause/Clear button twice. Cooking functions will cease immediately, remaining time will be fully cleared, and a '0" will appear.
Delay Function
After setting your temperature and time, you can delay the program before cooking starts. When entering delay, it will always be the first function. The delay function is only for cook time and delaying start time. Press the Delay button. The Delay and Time functions on the LCD will blink. Input delay time and press Start. Delay stops blinking and remains on until time expires. It is possible to delay a program for up to 9 hours and 59 minutes. If the delay countdown reaches 0, the oven will "beep" to signal the end.
Reheat Function
The default setting is programmed at 350ºF for 4 minutes. This function is perfect for reheating single portion-sized foods. To activate the reheat function, make sure programming is clear. The LCD display will read 0. Press the Reheat button. This will activate the default setting. Press Start. Alarm will "beep" 3 times once time has expired. For example, if you are warming leftover pizza, simply place the slice on the 3-inch rack, press Reheat, then Start. If you are warming a rice or noodle dish, place a single-serving amount in an oven-safe container (glass, metal, silicone). For softer rice or noodles, add a sprinkle of water and cover with foil.
Warm Function
After the initial cooking time is complete, you may keep foods warm. When entering warm, it will always be the last function. The default setting is programmed at 155ºF for 2 hours. Press the Warm button. The Warm and Time functions on the LCD will blink. 2:00 will be displayed, then press Start. To change the time, press cook time, enter the desired time and proceed. You may program the oven to keep foods warm for up to 9 hours and 59 minutes. Once the initial cooking cycle is finished, the oven will "beep" twice before switching to the WARM function.
CLEANING AND CARE INSTRUCTIONS
Unplug the unit before cleaning. The dome and all other parts, except the Power Head, are dishwasher safe. Protect the metal and plastic surfaces; do not use abrasive cleaners or scouring pads. Clean after each use. The outer surface of the Power Head can be cleaned by wiping with a damp cloth.
Do not wash or immerse Power Head in water or cycle through dishwasher. The outer surface may be cleaned by wiping carefully with a damp dishcloth or sponge.

IMPORTANT TIPS
- Check the power outlet to ensure proper operation. Do not operate the unit simultaneously with other major appliances plugged into the same outlet.
- Check the cooking temperature if the oven is cooking too slowly.
- The electrical plug must be properly inserted into the outlet.
- Always turn off and unplug the oven before washing.
- Moisture may accumulate inside Dome if food is not promptly removed once cooking time has expired. Steam/moisture buildup can be avoided through prompt removal of cooked foods.
- Do not rest dome in dome holder for extended period of time, as it could warp. Always replace dome on base tray promptly after removing food.
THE NUWAVE OVEN PRO PLUS COOKING SYSTEM
To obtain warranty service, contact the service department at this toll free number: 1-877-689-2838 M-F 8:00AM - 4:30PM CST or NuWave, LLC.
1755 N. Butterfield Road, Libertyville, IL 60048, U.S.A.
www.NuWaveNow.com
THE MANUFACTURER WARRANTS
The infrared cooking system including power head, dome, cooking rack, liner pan, base, and all electrical components are to be free from defects and workmanship under normal household use, when operated in accordance with the Manufacture's written instructions provided with each unit for one (1) year from date of purchase. The Manufacturer will provide the necessary parts and labor to repair any part of the infrared cooking system at NuWave, LLC. Service Department. After the expiration of the warranty, the cost of the labor and parts will be the responsibility of the owner.
THE WARRANTY DOES NOT COVER
The non-stick coating (if applicable) on any part of the cooking system. The Limited Warranty is voided if repairs are made by an unauthorized dealer or the serial number data plate is removed or defaced. Normal deterioration of finish due to use or exposure is not covered by this Warranty. This Limited Warranty does not cover failure, damages or inadequate performance due to accident, acts of God (such as lightning), fluctuations in electric power, alterations, abuse, misuse, misapplications, corrosive type atmospheres, improper installation, failure to operate in accordance with the Manufacturer's written instructions, abnormal use or commercial use.
TO OBTAIN SERVICE
The owner shall have the obligation and responsibility to: Pay for all services and parts not covered by the warranty; Prepay the freight to and from Service Department for any part or system returned under this warranty; Carefully package the product using adequate padding material to prevent damage in transit. The original container is ideal for this purpose. Include in the package the owner's name, address, daytime telephone number, a detailed description of the problem, and your "RGA number." (Call 1-877-689-2838) or e-mail help@nuwavenow.com to obtain the RGA (Return Goods Authorization number). Provide the cooking system model & serial number and proof of date of purchase (a copy of the receipt) when making claims under this warranty.
MANUFACTURER'S OBLIGATION
The Manufacturer's obligation under this Limited Warranty is limited to repairing or replacing any part of the infrared cooking system expressly covered by this Limited Warranty which upon examination is found to be defective under normal use. The Limited Warranty is applicable only within the continental United States and only to the original purchaser of the manufacturer's authorized channels of distribution. THE LIMITED WARRANTY MAY NOT BE ALTERED, VARIED OR EXTENDED EXCEPT BY A WRITTEN INSTRUMENT EXECUTED BY THE MANUFACTURER. THE REMEDY OF REPAIR OR REPLACEMENT AS PROVIDED UNDER THIS LIMITED WARRANTY IS EXCLUSIVE. IN NO EVENT SHALL THE MANUFACTURER BE LIABLE FOR ANY CONSEQUENTIAL OR INCIDENTAL DAMAGES TO ANY PERSON, WHETHER OR NOT OCCASIONED BY NEGLIGENCE OF THE MANUFACTURER, INCLUDING WITHOUT LIMITATION, DAMAGES FOR LOSS OF USE, COSTS OF SUBSTITUTION, PROPERTY DAMAGE, OR OTHER MONEY LOSS.
Some states do not allow the exclusion or limitation of incidental or consequential damages, so the above limitation exclusions may not apply. This Limited Warranty gives specific legal rights, and there may also be other rights which vary from state to state. EXCEPT AS OTHERWISE EXPRESSLY PROVIDED ABOVE, THE MANUFACTURER MAKES NO WARRANTIES EXPRESSED OR IMPLIED ARISING BY LAW OR OTHERWISE, INCLUDING WITHOUT LIMITATION, THE IMPLIED WARRANTIES OF MERCHANTABILITY AND FITNESS FOR A PARTICULAR PURPOSE TO ANY OTHER PERSON. READ YOUR OWNER'S MANUAL. IF YOU STILL HAVE ANY QUESTIONS ABOUT OPERATION OR WARRANTY OF THE PRODUCT, PLEASE CONTACT NUWAVE, LLC.
1-877-689-2838
email: help@nuwavenow.com
Protected under U.S. Patents: 6,201,217; 6,617,554;
6,917,017; 6,936,795; D487,670; D490,648; 7,964,842B2.
International Patents: EP 1 446 981
Other U.S.A. and other International Patents Pending
Model 20541-20549: 120V, 60Hz, 1500Watts
Model 20551-20559: 120V, 60Hz, 1500Watts


Designed & Developed in U.S.A. by:
NuWave, LLC.
1755 N. Butterfield Road, Libertyville, IL 60048
1.877.689.2838
M-F 8:00AM-4:30PM CST
© 2014 NuWave, LLC. All Rights Reserved.
VideosNuWave Pro Plus Digital Oven - Baking Set with David Venable Video
Documents / Resources
References
Download manual
Here you can download full pdf version of manual, it may contain additional safety instructions, warranty information, FCC rules, etc.
Advertisement


Need help?
Do you have a question about the Pro Plus and is the answer not in the manual?
Questions and answers