
Related Manuals for Effekta KS5 Series


Summary of Contents for Effekta KS5 Series
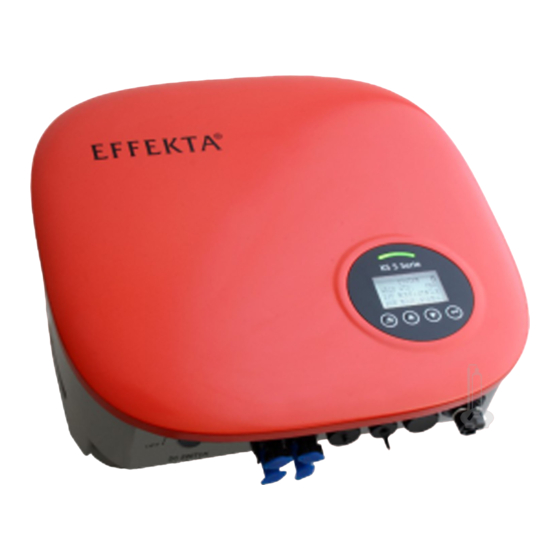
- Page 1 Grid-Connected Inverter Installation and Operation Manual KS5-Series 3000ST / 5000DT 202111 Ver:1.0...
-
Page 2: Table Of Contents
User Manual Contents 1.Introduction ........................3 Product Description ..................3 Packaging ....................4 Optional Packaging ..................4 Inverter Storage ................... 5 2. Safety Instructions ......................5 2.1 Safety Symbols ....................... 5 2.2 General Safety Instructions ..................6 2.3 Notice for Use ......................7 3. -
Page 3: 1.Introduction
User Manual 1.Introduction 1.1 Product Description KS5 series single phase inverters integrate DRM and backflow power control function, that could suitable for smart grid requirement. LCD display is Optional Figure 1.2a Bottom side view Figure 1.2b Bottom side view (others) -
Page 4: Packaging
User Manual 1.2 Packaging When you receive the inverter, ensure that all the parts listed below are included: Object Description Model Number PV grid tie inverter Wall/pole bracket Locking screws 1 pair for KS5 3000ST, DC connector 2 pairs for others AC connector Manual OT terminal... -
Page 5: Inverter Storage
User Manual Object Description Number DRM connector CT connector WiFi/GPRS Stick 1xCT and com cable 1.4 Inverter Storage Proper storage is required if the inverter is not installed immediately. • Store the inverter in the original packing case. • The storage temperature must be always between -40° C and +70° C, and the storage relative humidity must be always between 0 and 95%, non-condensing. -
Page 6: General Safety Instructions
User Manual NOTE: NOTE symbol indicates important safety instructions, which if not correctly followed, could result in some damage or the destruction of the inverter. CAUTION: CAUTION, RISK OF ELECTRIC SHOCK symbol indicates important safety instructions, which if not correctly followed, could result in electric shock. -
Page 7: Notice For Use
User Manual CAUTION: Risk of electric shock. Do not remove cover. There is no user serviceable parts inside. Refer servicing to qualified and accredited service technicians. CAUTION: The PV array (Solar panels) supplies a DC voltage when they are exposed to sunlight. PV module used with inverter must have an IEC 61730 Class A rating. -
Page 8: Overview
User Manual 3. Overview 3.1 Front Panel Display LCD display is Optional. Figure 3.1 Front Panel Display 3.2 LED Status Indicator Light The LED status indicator can display red and green. When the indicator light is on, it indicates that there is power. When the indicator light is red, it indicates the alarm state; when the indicator light is green, it indicates the operation state. -
Page 9: Lcd (Optional)
User Manual • Access to modify the adjustable settings (the ESC and ENTER keys). 3.4 LCD (Optional) The four-line Liquid Crystal Display (LCD) is located on the front panel of the Inverter, which shows the following information: • Inverter operation status and data; •... -
Page 10: Installation
, always make sure the flow of air around the inverter is not blocked. • Exposure to direct sunlight will increase the operational temperature of the inverter and may cause output power limiting. EFFEKTA recommends inverter installed to avoid direct sunlight or raining. - Page 11 User Manual also be kept). The bottom of the inverter should be 500mm clearance to the ground. Figure 4.2 Inverter Mounting clearance • Visibility of the LED status indicator lights and the LCD located at the front panel of the inverter should be considered.
-
Page 12: Mounting The Inverter
User Manual 4.2 Mounting the Inverter Dimensions of wall bracket: Figure 4.3 Inverter wall mounting Please see Figure 4.4 and Figure 4.5 for instruction on mounting the inverter. The inverter shall be mounted vertically. The steps to mount the inverter are listed below: 1. - Page 13 User Manual Figure 4.5 Wall Mount Bracket 5. Use M5*16 screws in accessory to lock the inverter to the mount bracket.
-
Page 14: Electrical Connections
User Manual 4.3 Electrical Connections 4.3.1 Connect PV side of inverter The electrical connection of the inverter must follow the steps listed below: 1. Switch the Grid Supply Main Switch (AC) OFF. 2. Switch the DC Isolator OFF. 3. Assemble PV input connector to the Inverter. Check whether the polarity of the connecting cable of the photovoltaic string is correct, and ensure that the open circuit voltage under any condition does not exceed the upper limit of the inverter input value of... - Page 15 User Manual Check the positive and negative polarity of the PV strings, and connect the PV connectors to the right terminals. Serious damages to the inverter and connector over temperature may occur. Please use approved DC cable for PV system. Cross section(mm²)...
- Page 16 User Manual Figure 4.8 Disassemble the Connector Cap nut 2. Insert the wire into the connector cap nutand contact pin. Figure 4.9 Insert the Wire into the Connector Cap nut and contact pin 3. Crimp the contact pin to the wire using a proper wire crimper. С...
-
Page 17: Connection Of Ac Output
User Manual Figure 4.12 Connect the DC Connectors to the Inverter 4.3.2 Connection of AC output For all AC connections, 4-10mm² 105 XJ cable is required to be used. Please make sure the resistance of cable is lower than 1 ohm. If the wire is longer than 20m, it's recommended to use 10mm²... - Page 18 User Manual d. Insert the crimped conductors L, N and PE into the corresponding terminals and tighten the screw with a hex key wrench screwdriver(size:2.5, 1.2-2.0N·m). Ensure that all conductors are securely in place in the screw terminals on the bush insert. e.
-
Page 19: External Ground Connection
User Manual heard or felt. Figure 4.13 Connect the AC Connector to the Inverter Note: Connection for Split phase grid. When connect to 208/220/240V split phase, please connect L1 to "L" terminal, L2 to "N" terminal. Also connect earth to ground terminal. 4.3.3 External ground connection An external ground connection is provided at the right side of inverter. -
Page 20: Max, Over Current Protection Device (Ocpd)
User Manual 4.3.4 Max, over current protection device (OCPD) To protect the inverter's PV and AC grid connection conductors, EFFEKTA recommends installing breakers that will protect against overcurrent. The following table defines OCPD ratings for the KS5 single phase inverters. -
Page 21: Inverter Monitoring Connection
User Manual 4.3.5 Inverter monitoring connection The inverter can be monitored via Wi-Fi or GPRS. All KS5 communication devices are optional (Figure 4.20). For connection instructions, please refer to the KS5 Monitoring Device installation manuals. Figure 4.20 Communication function The inverter is equipped with standard RS485 and WLAN/GPRS communication ports, and the RS485 communication port is mainly used for the software upgrade, WLAN/GPRS communication port is for inverter wireless monitoring. -
Page 22: Ct Connections (Optional)
User Manual 4.3.6 CT connections (optional) This inverter has integrated export limitation functionality. To use this function, a CT must be installed, if use the CT, please reference below picture. The CT should be fitted around the live conductor on the grid side of the main incoming consumer unit. Use the directional flow indication arrow on the CT to ensure it is fitted in the correct orientation. -
Page 23: Dred Port Connections (Optional)
User Manual 4.3.7 DRED port connections (optional) DRED means demand response enable device. The AS/NZS 4777.2:2015 required inverter need to support demand response mode (DRM). This function is for inverter that comply with AS/NZS 4777.2:2015 standard. KS5 inverter is fully comply with all DRM. A 6P terminal is used for DRM connection. -
Page 24: Start & Stop
User Manual 5. Start & Stop 5.1 Start the Inverter To start up the Inverter, it is important that the following steps are strictly followed: Switch the grid supply main Switch (AC) ON first. Switch the DC switch ON. If the voltage of PV arrays are higher than start up voltage, the inverter will turn on. -
Page 25: Operation
User Manual 6.Operation During normal operation, the display alternately shows various status information (see Figure 6.1). Screens can also be scrolled manually by pressing the UP and DOWN keys. Figure 6.1 Operation Overview Lock screen Pressing the ENTER key locks (Figure 6.2(a)) or unlocks (Figure 6.2 (b)) the screen. Figure 6.2 Locks and Unlocks the Screen of LCD Main Menu Press the ESC key to access to the Main Menu,there are three submenus in the Main Menu... -
Page 26: Setup-Technicians Only
User Manual 6.1 Setup-Technicians Only NOTE: To access to this area is for fully qualified and accredited technicians only. Enter menu "SETUP" need password. Select "SETUP" from the Main Menu. The screen will require the password as below. Figure 6.4 Enter password The default password is "0000". -
Page 27: Set Date/Time
User Manual 6.1.1 Set Date/Time Please set the time and date after starting the inverter for the first time. Figure 6.5 Set Date/Time 6.2 Inquire The following submenus are displayed when the Inquiry menu is selected,You can also continue to access the next menu level. 6.3 Statistics Select Statistics from the Main Menu to access the following options,You can also continue to access the next menu level. -
Page 28: Maintenance
User Manual 7. Maintenance Inverter does not require any regular maintenance. However, cleaning the dust on heat-sink will help the inverter to dissipate the heat and increase its life time. The dust can be removed with a soft brush. CAUTION: Do not touch the inverter's surface when it is operating. -
Page 29: Trouble Shooting
User Manual 8.Trouble shooting It is very easy for the inverter’s maintenance. When you meet any problems, please refer to the following trouble shooting first, please contact your local distributor if the problem can’t be solved by yourself. The following sheet lists some basic questions may encounter in the operation. Alarm Failure description Solution... - Page 30 User Manual 1.Disconnect PV input and restart the inverter AC Relay Fault and check whether fault still exists. 1.Please check the configuration of PV input, one of PV input is idle when inverter is set on PV Input Voltage Low parallel mode.
- Page 31 User Manual the failure persists, please contact your local distributor or the service center. Please keep ready with you the following information before contacting us. 1. Serial number of Inverter; 2. The distributor/dealer of Inverter (if available); 3. Installation date. 4.
-
Page 32: Specifications
User Manual 9. Specifications Inverter Technical Parameter Table -1 Model Specifications KS5 3000ST Max. DC power 4050W Max. DC voltage 600Vd.c. Normal DC voltage 380Vd.c. MPPT voltage range 80-560Vd.c. Number of MPPT trackers Strings per MPPT tracker Max. input current per MPPT tracker 15Ad.c. -
Page 33: Inverter Technical Parameter Table -2
User Manual Inverter Technical Parameter Table -2 Model Specifications KS5 5000DT Max. DC power 6750W Max. DC voltage 600Vd.c. Normal DC voltage 380Vd.c. MPPT voltage range 80-560Vd.c. Number of MPPT trackers Strings per MPPT tracker Max. input current per MPPT tracker 15Ad.c./ 15Ad.c. -
Page 34: Quality Assurance
EFFEKTA has the right to refuse to honor the quality guarantee. Conditions • After replacement, unqualified products shall be processed by EFFEKTA. • The customer shall give EFFEKTA or his partner a reasonable period to repair the faulty device. Exclusion of Liability... - Page 35 User Manual...
- Page 36 User Manual Rheinwaldstraße 34, 78628 Rottweil Tel: + 49 (0) 74 1 / 1 74 51 - 0 Mail: info@effekta.com...
Need help?
Do you have a question about the KS5 Series and is the answer not in the manual?
Questions and answers