Table of Contents
Advertisement
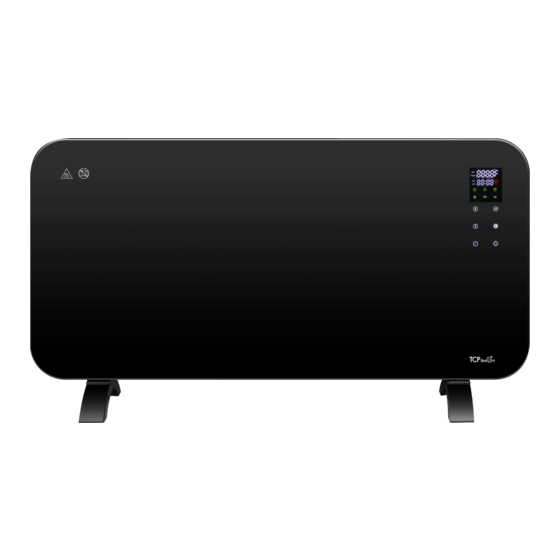
GLASS PANEL HEATERS
The TCP Smart Wi-Fi glass panel heaters offer an efficient and quick heating solution combined with
a sleek, modern look. Control your heating exactly as you desire either using control panel situated
on the heater or remotely using the TCP Smart App.
USER INSTRUCTIONS
IP24 ELECTRONIC SERIES
MODEL
SMARADGBL1500UK/
SMARADGWH1500UK
SMARADGBL2000UK/
SMARADGWH2000UK
IMPORTANT: Read these instructions fully before using the heater. Retain these instructions for
future reference.
SAFETY INSTRUCTIONS
1.
Ensure the feet are correctly attached before using the heater.
2.
CAUTION: Some parts of this product can become very hot and cause burns. Particular attention has to
be given where children and vulnerable people are present. Children 3 years and younger should be
continually supervised when in close proximity to the heater. Children aged from 3 years to less than
8 years shall only switch on/off the appliance provided that it has been placed or installed in its
intended normal operating position and they have been given supervision or instruction concerning
use of the appliance in a safe way and understand the hazards involved. Children aged from 3 years
and less than 8 years shall not plug in, regulate and clean the appliance or perform user
maintenance.
3.
Use this heater on a flat, horizontal and stable surface, or fix it to the wall, as applicable.
4.
Ensure the power supply to the socket into which the heater is plugged is in accordance with
the rating label on the heater and that the socket is earthed.
5.
Keep the power cord away from the hot body of the heater.
6.
Indoor use only.
7.
Do not place the heater on carpets with a very deep pile.
8.
Always ensure that the heater is placed on a firm level surface.
9.
Do not place the heater close to curtains or furniture in order to avoid a fire hazard.
10. Do not insert any object through the heat outlet or air grilles of the heater.
11. Do not use the heater in areas where flammable liquids are stored or where flammable
POWER
AC220-240V 50-60Hz 1300-1500W Class I
AC220-240V 50-60Hz 1800-2000W Class I
(to be read before operating the heater).
Advertisement
Table of Contents

Related Manuals for TCP Smart SMARADGBL1500UK


Summary of Contents for TCP Smart SMARADGBL1500UK
- Page 1 GLASS PANEL HEATERS The TCP Smart Wi-Fi glass panel heaters offer an efficient and quick heating solution combined with a sleek, modern look. Control your heating exactly as you desire either using control panel situated on the heater or remotely using the TCP Smart App.
-
Page 2: Certification Conformity
Hereby, Technical Consumer Products Ltd declares that the radio equipment type TCP Smart Wifi Fan 1500W – White, TCP Smart Wifi Fan 1500W – Black, is in accordance with Directive 2014/53/EU. The full text of the EU declaration of conformity is available at the following internet address –... -
Page 3: Wall Mounting
ASSEMBLY OF THE HEATER FREE STANDING Before using the heater, the feet (supplied separately in the carton), must be fitted to the unit. These are to be attached to the base of the heater using the 4 self-tapping screws provided, taking care to ensure that they are located correctly in the bottom ends of the heater side mouldings. -
Page 4: Operating The Heater
OPERATING THE HEATER Note, it is normal when the heaters are turned on for the first time, or when they are turned on after a long period of time not being used, the heaters may emit some smell and fumes. This will disappear when the heater has been on for a short while. -
Page 5: How To Operate
Hold the MODE button to confirm the minute value. Or leave the unit for 5 seconds and the day and time will be saved. The above operation can be performed using the TCP Smart App. HOW TO OPERATE TURNING ON AND OFF The STANDBY button can be pressed to enter and exit standby mode. -
Page 6: Child Lock
27°C is reached. Temperature Display Set Week This feature can be performed using the TCP Smart App CHILD LOCK To activate: Press the SET button until the Child Lock symbol (shown above) is highlighted green. Press MODE button or leave for 10 seconds and the operation will be saved. -
Page 7: Open Window Detection
To deactivate: Press the SET button until the Open Window Detection symbol is highlighted. Press DOWN button. Press the MODE button or leave for 10 seconds and the operation will be saved. This feature can be performed using the TCP Smart App. STANDBY TIMER With the unit running with the desired settings, press the TIMER button. -
Page 8: Cleaning The Heater
DISPLAY NIGHT MODE To activate: Press the SET button until the Night Mode symbol (shown above) is highlighted. Press UP button. Press the MODE button or leave for 10 seconds and the operation will be saved. To deactivate: Press the SET button until the Night Mode symbol is highlighted. Press DOWN button. Press the MODE button or leave for 10 seconds and the operation will be saved. - Page 9 CONNECTING THE APPLIANCE TO WI-FI Use the QR code below to download the TCP Smart App for control of the heater remotely. QR code for both android and iOS To control the heater using the TCP Smart App the unit must be turned on.
- Page 10 USING THE APPLIANCE WITH WIFI DEVICE CONTROL SCREENS 1. Switch - (power On or Off) 2. Mode - to select Anti-Frost, High Heat or Low Heat 3. Timer - to select time countdown function 4. Settings - to select Child Lock, Open Window Detection or Schedule 2.
-
Page 11: Open Window
HIGH HEAT Press Mode. Press High Heat Mode once to activate. Set Target Temperature by using + or - buttons. TIMER Using the Timer function, the heater can be set to turn off after a specified amount of time. Choose Timer at the bottom of the screen, select the duration of time that you want the heating to stay on for. - Page 12 SCHEDULE In settings operate the schedule by pressing the Shedule > button. Press Add button to show timings and days of the week. To add just one occurrence select the time you want to start the heater, press Switch and select on.
-
Page 13: Weekly Schedule
WEEKLY SCHEDULE To turn the heater on for specific time(s) and date(s), select the time you want the heater to start using the above screen. Press switch. Press ON followed by Done. Press the repeat button to show the list of days. Tick the day(s) of the week you want the start time to be used. - Page 14 Press the repeat button to show the list of days. Select the day(s) of the week you want the end time to be used. Press the < on top left hand of the screen. Press Save to save your time and date(s) for the heater to turn off.
Need help?
Do you have a question about the SMARADGBL1500UK and is the answer not in the manual?
Questions and answers